How to Draw a Turtle
Want to sketch a the most popular slow-moving animal? This tutorial on how to draw a turtle will show you how to sketch it in several ways.

How to Draw a Turtle: Introduction
Turtles have a very recognizable body structure. These cute reptiles are common in animated stories and children’s books because of their very interesting and unique appearance. Their large shell, small head, and short legs are easy to reduce into basic shapes and reproduce if you are a very inexperienced artist.
In my experience, the turtle is one of the most favorite animals to draw among children and even taking a pencil in hand for the first time, a child will be able to depict on paper something that we recognize as a turtle.
But in this lesson, I still want to show you how to draw a turtle, albeit in the simplest way possible, but so that the finished drawing is as beautiful and professional as possible.
To cover the topic of drawing a turtle as thoroughly as possible, I’ve added several additional methods to the main lesson. Together, we’ll try a very simple version suitable for preschoolers, a more detailed and advanced one, and explore many new and useful drawing tips along the way.
Turtle Drawing Tutorial
Materials
- Pencil
- Paper
- Eraser
- Coloring supplies
Time needed: 35 minutes
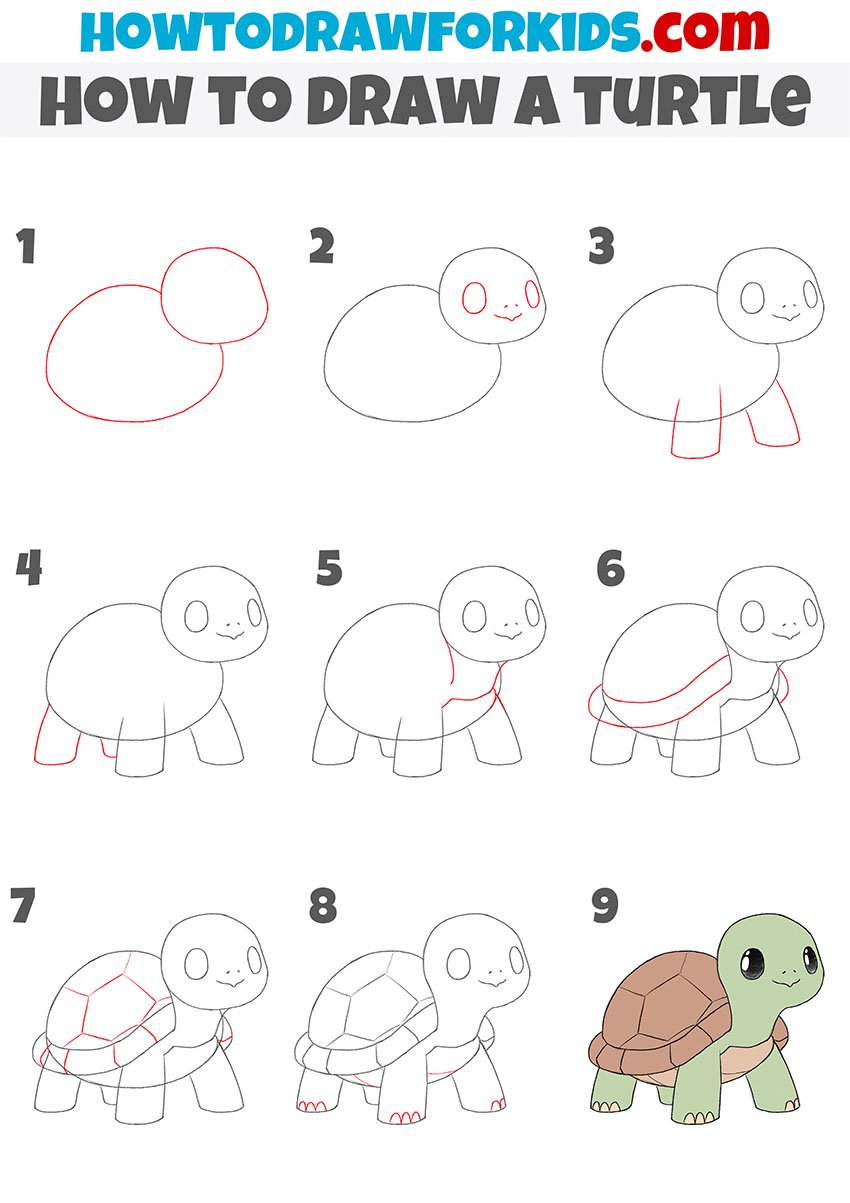
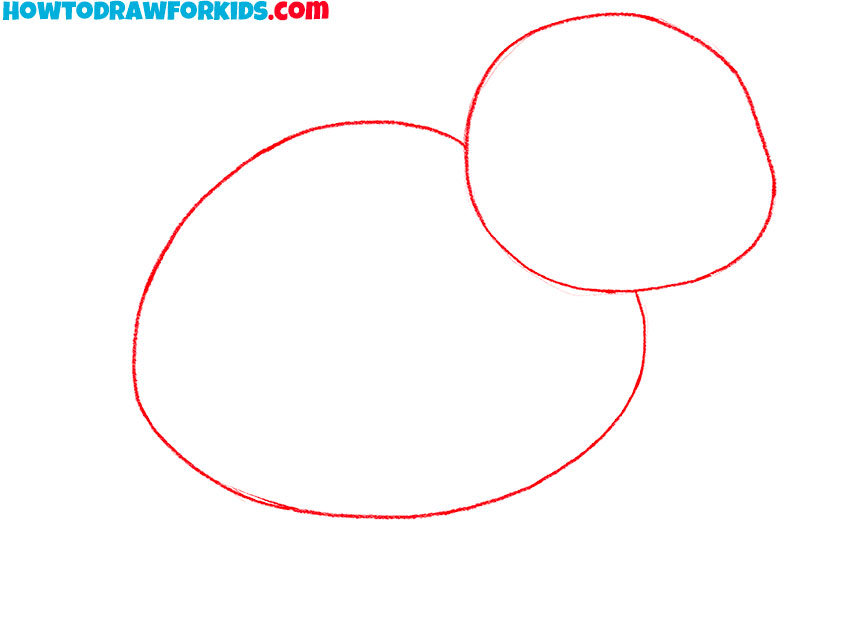
How to Draw a Turtle
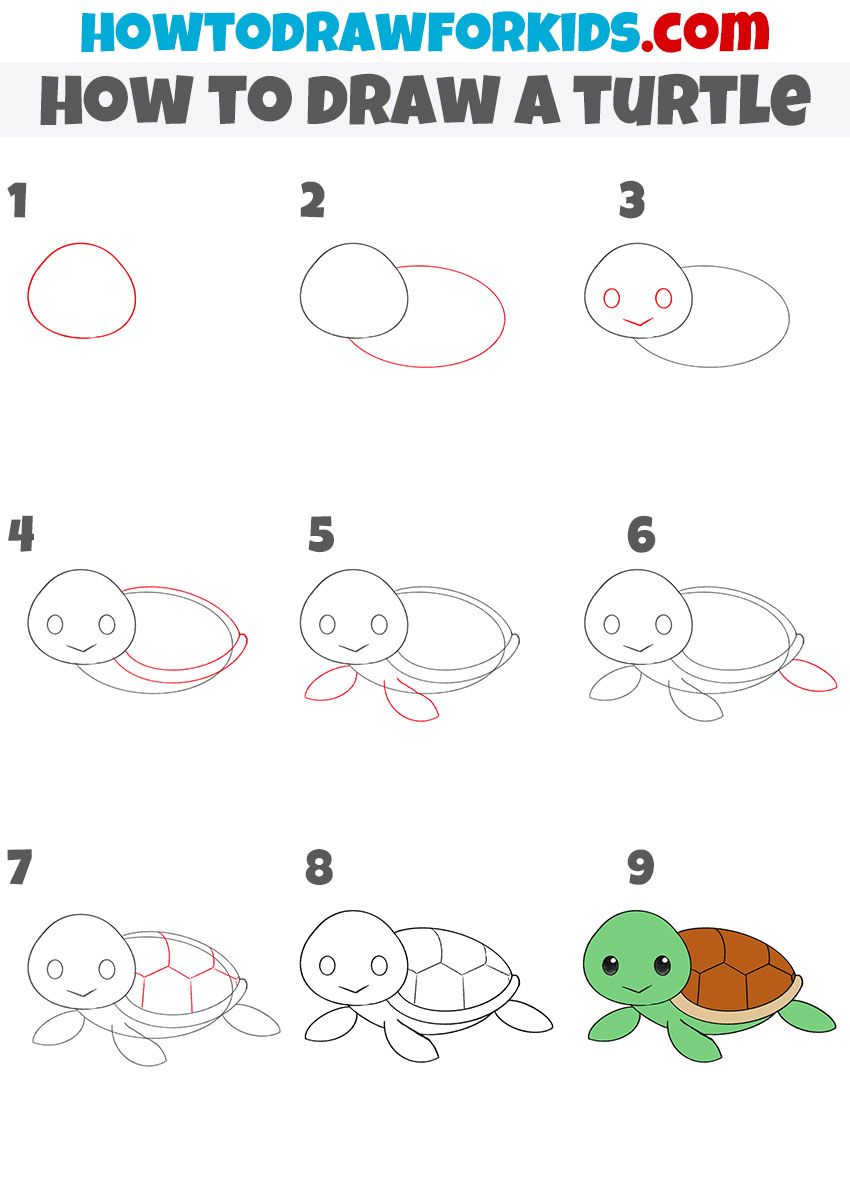
- Drawing the turtle’s basic shape.
Sketch two very light and smooth ovals. The larger oval forms the body of the turtle. Slightly above and to the right, draw a smaller oval for the head. At this stage, the overall silhouette should look like a snowman lying on its side.
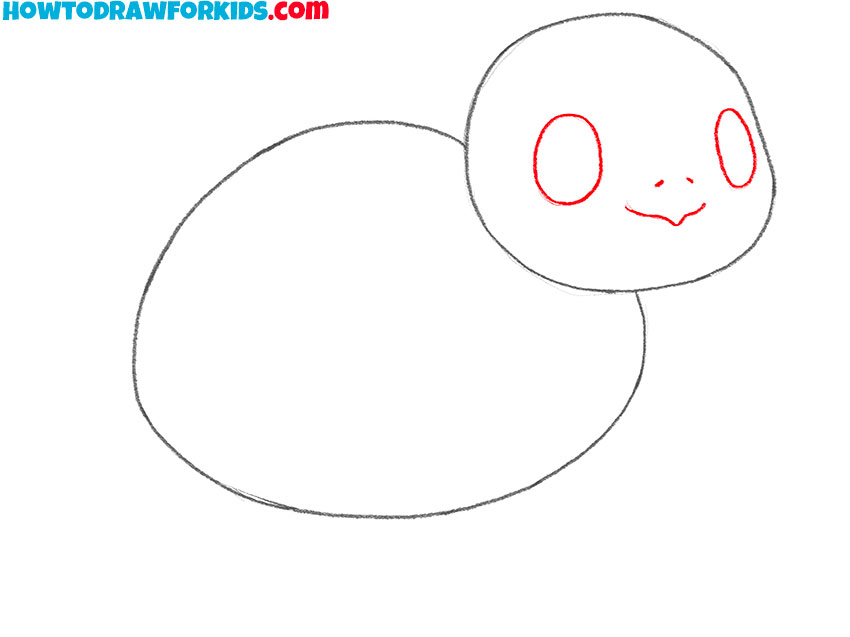
- Add features to the turtle’s head.
Draw two large oval eyes inside the head shape. Between and slightly below the eyes of the turtle, add a couple of small dots for the nose and a simple smiling mouth. The month of the turtle should have a recognizable curve with a small pointed central part.
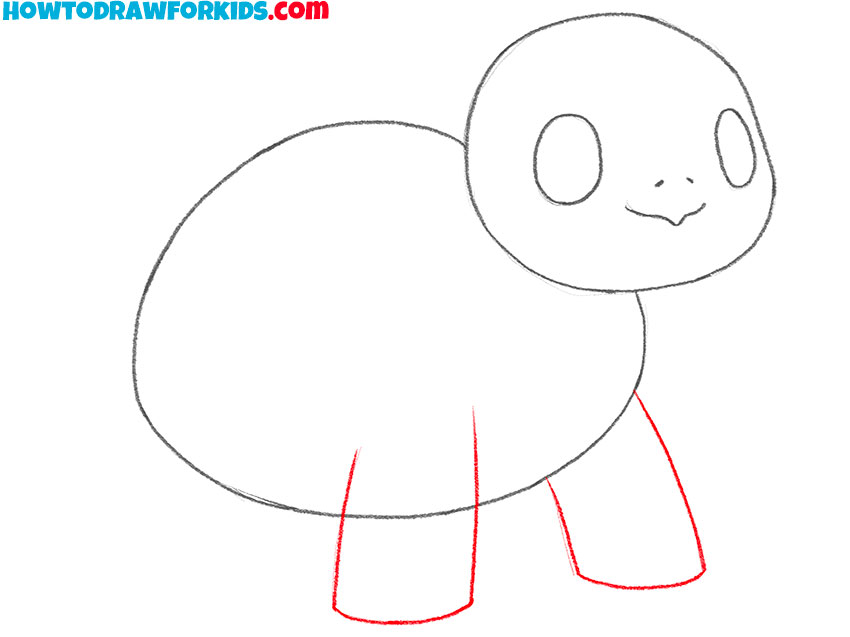
- Sketch the reptile’s front legs.
Beneath the body, draw two front legs of the turtle using simple rectangular shapes that slightly flare at the bottom. The front leg closer to the viewer should be more visible, while the top of the other can be tucked behind the shell slightly. For a sea turtle variation, angle the legs backward and make them flatter like fins.
- Add the back limbs of the animal.
The back legs of the turtle should be drawn similarly to the front legs, but might be slightly shorter. Due to the peculiarities of the structure of the turtle’s legs, the bottom of the feet must be flat. The further back leg should be overlapped by the closer front leg for a more three-dimensional look.

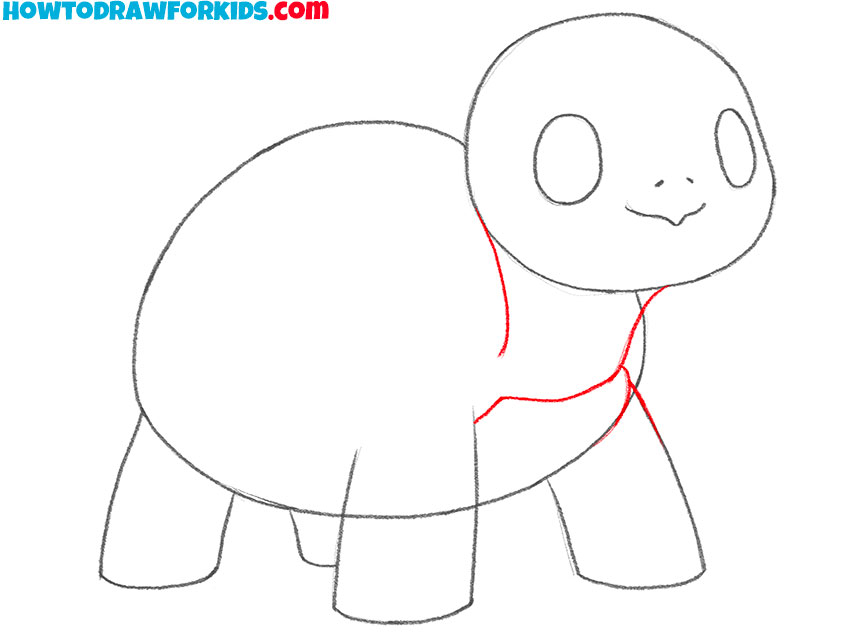
- Sketch the neck and bottom shell.
Connect the head and body with two short curved lines for the neck of the turtle. Then draw the front outline of the shell just below the head of the reptile. If you’re drawing an older turtle, consider making the neck longer and more wrinkled, or keep it simple and short for a younger version.
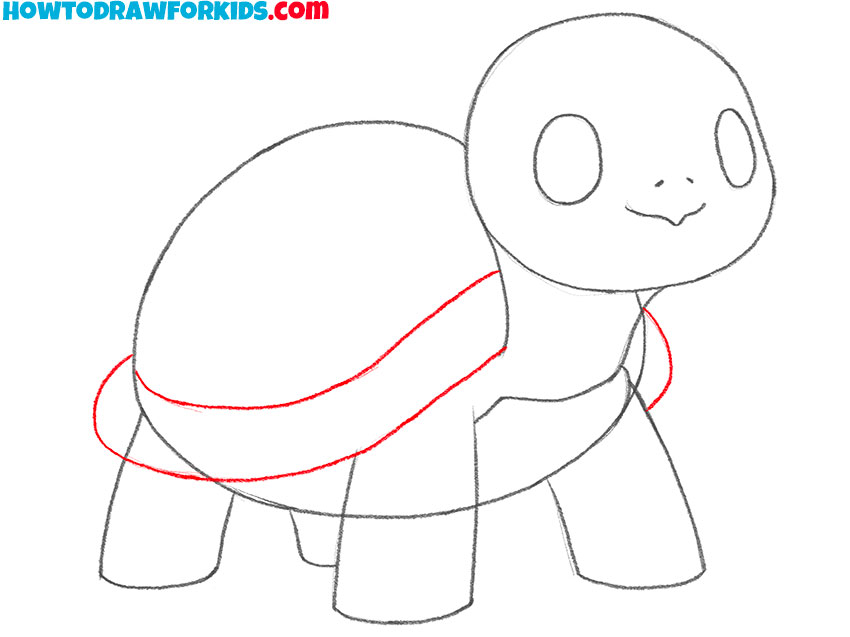
- Complete the turtle shell shape.
Draw a couple of large curved line on the back of the turtle to define the bottom rim of the shell. This line should slope down smoothly from the neck and then rise slightly towards the tail area. You could stylize the edge with a bumpier line or keep it clean and smooth.
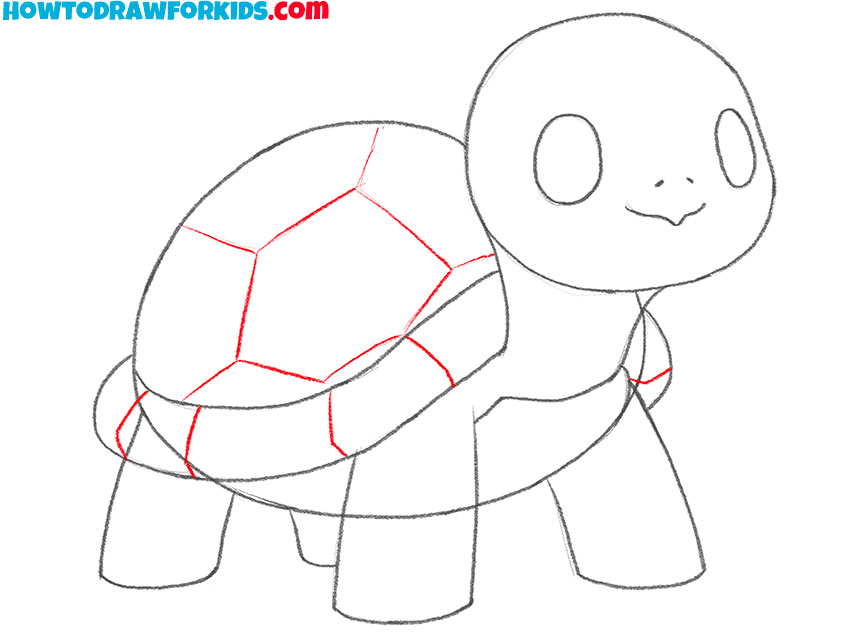
- Add pattern lines to the shell.
Inside the shell, divide the space with a few curved and angled lines to represent plates or segments. You can follow a hexagon-like pattern or make them more freeform. If you want a detailed look, add more tiles across the shell. Also, don’t forget the side plates of the shell – draw some semi-circles around the rim.
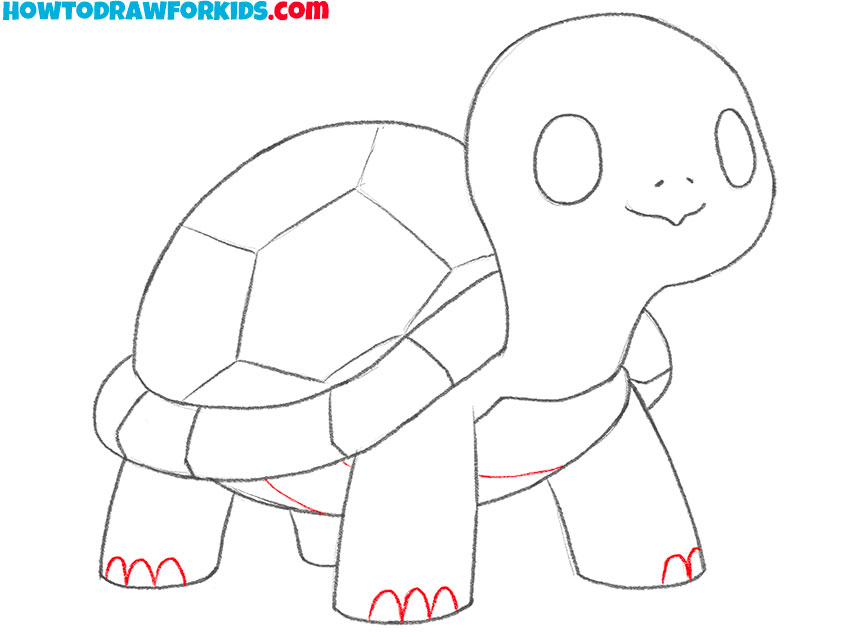
- Draw the toes and finalize the sketch.
At the bottom of each leg, draw three simple toes. These can be shaped like small rounded bumps or simple lines, depending on the style. Erase any overlapping or unnecessary guidelines. Now’s a good time to smoothen the linework. You could add a tiny tail peeking from the back.
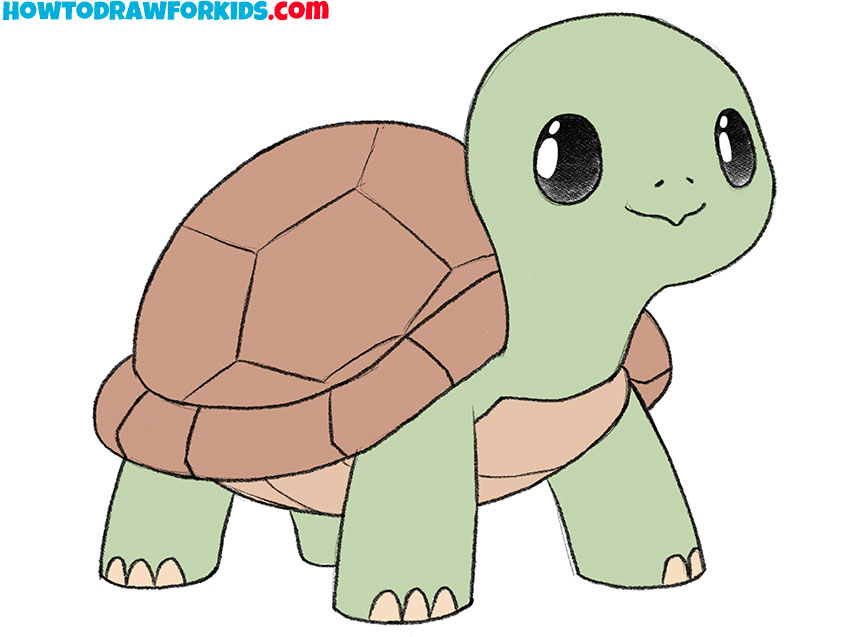
- Add color to your turtle.
Fill in the shell of the turtle with a brown tone and the body with green. You can also add a lighter beige to the underside of the shell and the claws. Try out different shades of green or brown for variations – a desert tortoise might have more yellowish tones, while a sea turtle can be olive green or dark gray.
Additional Content
You can download a free PDF file with this lesson to make practice easier. It contains the same steps shown above, arranged in a simple and printable format. You can use it without internet access and print it out as many times as needed. This is useful for both individual practice and group work, especially for beginners and younger kids.
Alternative Drawing Methods
To continue developing the topic and give you more options, I’ve also prepared several additional ways to draw a turtle. These versions include both very simplified styles and more detailed ones, so you can choose what suits your level or interest. The steps are similar, but you’ll see how small changes can affect the final result.
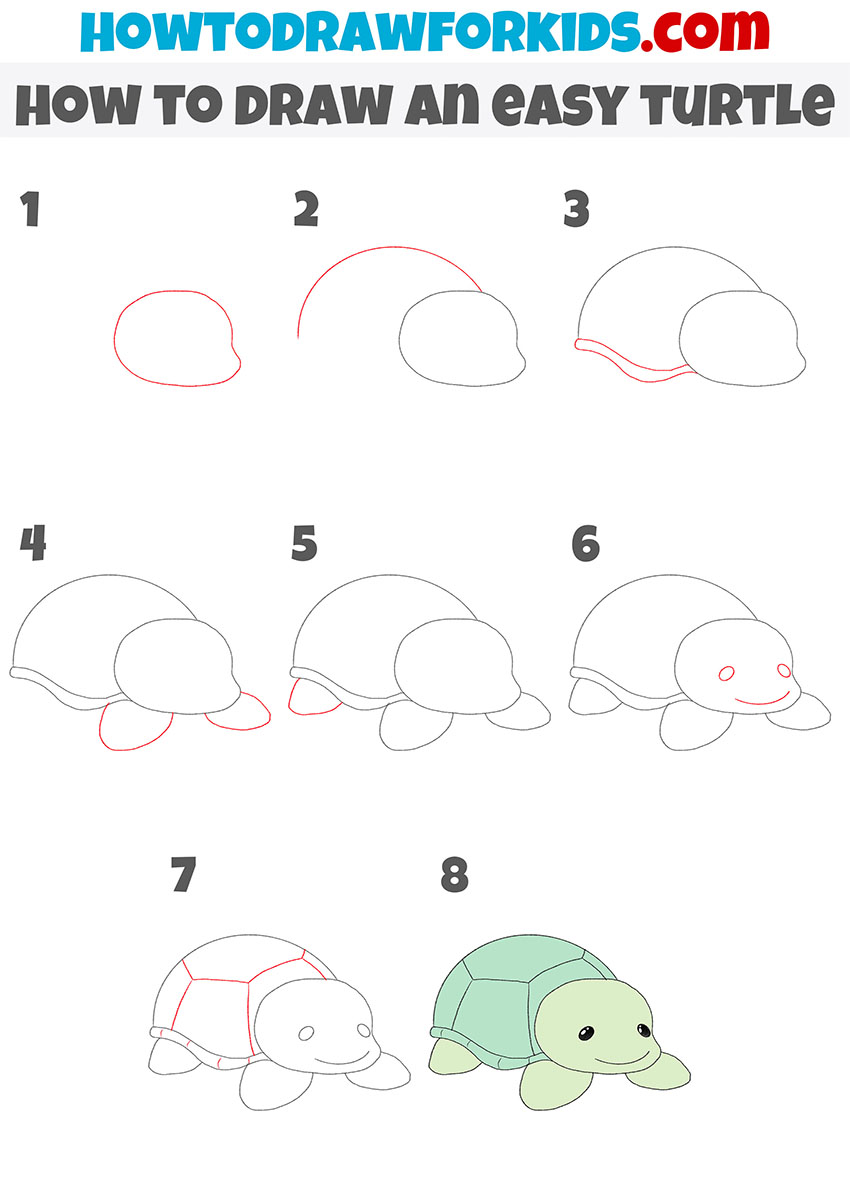
Simple Turtle Drawing Tutorial
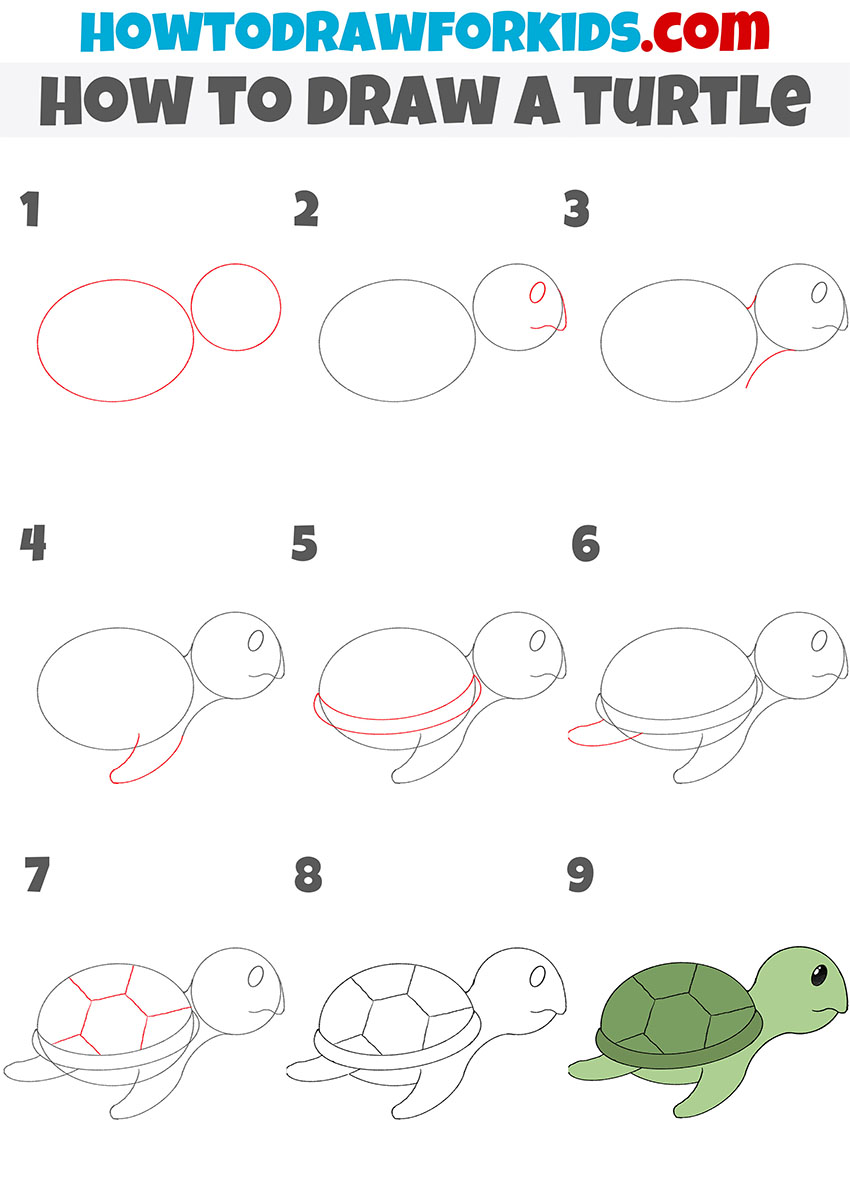
This is the first additional tutorial on how to draw a turtle that uses a different turtle as a reference and offers a simpler construction method. The shapes are more simplified, the face looks as two dots and a curve. and the sequence of steps is easier much for beginners.
Create a round shape for the turtle’s head. Then draw a large horizontal oval behind it for the shell. Inside the head, place two small circles for the eyes and a short angled line for the mouth. Around the bottom edge of the shell, add another curved line to show its thickness.
Next, draw the front flippers as two leaf-shaped forms under the head. Then add the rear flippers in a similar way near the back of the shell. For the shell pattern, draw a vertical line down the center and two curved lines on each side. Complete the pattern with a few connecting lines to form simple segments. Once the outline is done, color the turtle with a green head and limbs, and use brown for the top of the shell.
Turtle Drawing Guide for Kindergarten
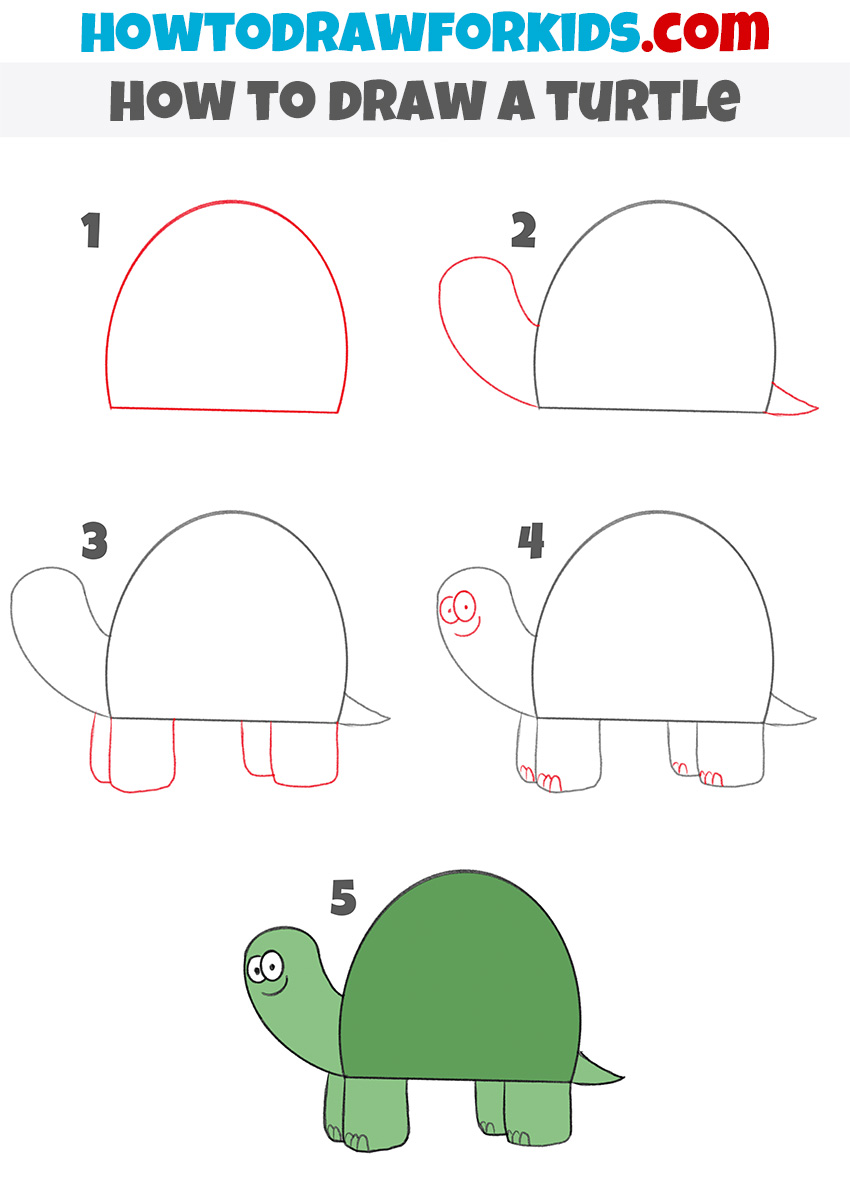
This is another additional drawing turtle tutorial that uses a very simple, upright side view with large and very basic shapes. The style is more like a cartoon tortoise, with thick legs, a simple head shape, and a short tail. There are no shell patterns or extra details, which makes it quick to draw and good for very young artists.
To draw this version of a turtle, sketch a large half-circle shape for the shell, with the flat side at the bottom. Add a small curved head and neck shape on the left, connecting it smoothly to the shell, and a short pointed tail on the right. Sketch simple rectangular shapes under the shell for the front and back legs on one side.
On the head, place two round eyes close together and draw a small smiling mouth just below them. Indicate short curved claws at the ends of the legs. Trace over the lines to make them clear, remove any extra marks, and then color the shell green and the body a lighter shade to complete the turtle drawing.
How to Draw a Turtle from the Side
In the previous additional tutorial, the turtle was drawn in the most basic way possible for preschoolers, using very simple shapes without any extra elements. This next version keeps the overall simplicity but here, the turtle is shown from the side. This approach is still easy to follow but helps children practice drawing slightly more complex shapes.
Sketch an oval for the shell and a smaller circle for the head. Inside the head shape, add an oval eye and a short curved line for the mouth. Connect the head to the shell with two smooth lines for the neck. Draw a front flipper-shaped limb extending down and curving slightly backward.
Add the lower edge of the shell as a narrow curved band. Draw the rear flipper extending from the back, then add the tail as a small pointed shape. On the shell, sketch the central hexagonal shape and connect it with angled lines to create a simple pattern. Make the lines clean and even, remove extra guidelines, and color the shell in shades of green, with a slightly lighter tone for the lower edge.
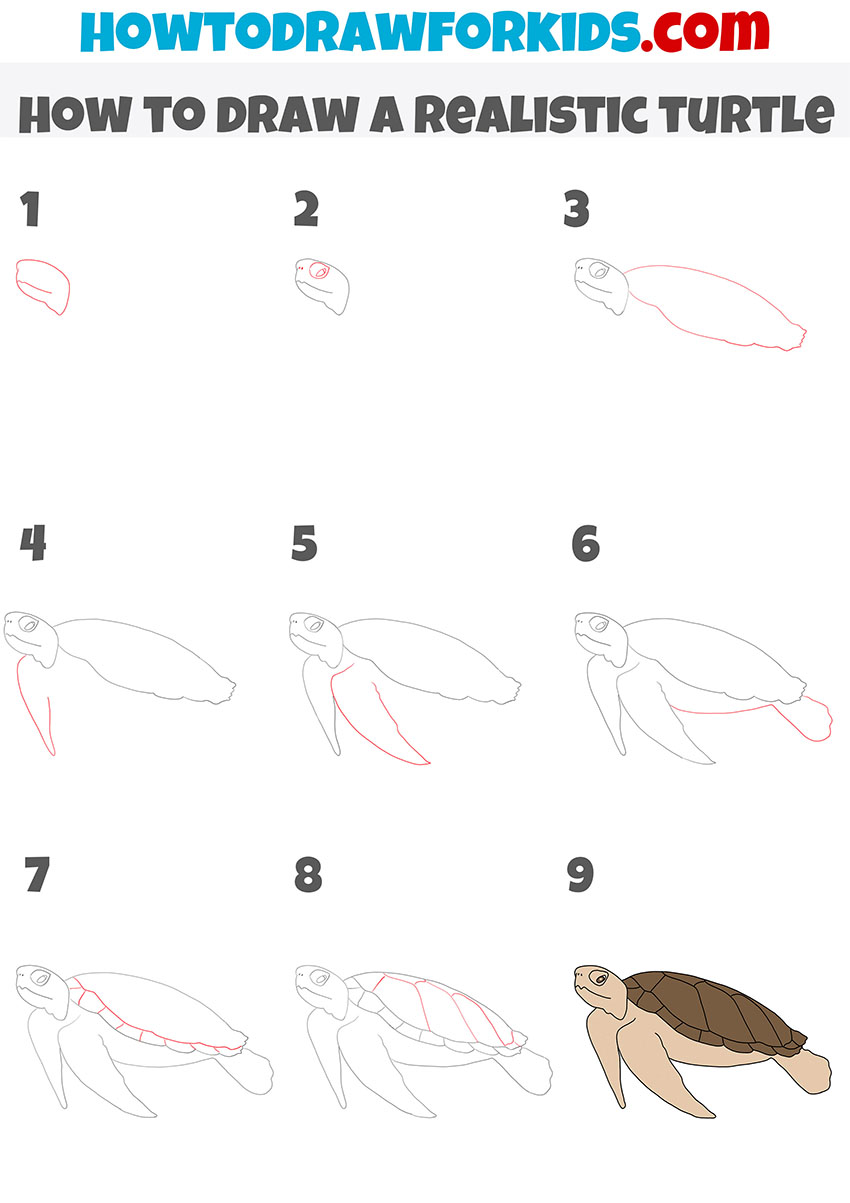
Advanced Turtle Drawing Tutorial
This turtle drawing tutorial is a more advanced option with a realistic sea turtle shape. The body is streamlined, the head and flippers are drawn with natural proportions, and the shell has an irregular outline with clear segmentation. It is suited for those ready to move beyond basic shapes and practice more lifelike animal drawing.
Create a long, slightly curved head shape, adding an oval eye and a short line for the mouth. Sketch the main body as an elongated oval, narrowing toward the tail for. Draw the front flipper long and pointed and hape the small tail at the end of the body.
Outline the upper shell with a slightly uneven curve, then add the lower edge with gentle dips. Create large segments on the shell by drawing long curved lines radiating from the top center. Go over the lines to make them clean, erase extra marks, and color the shell dark brown with a lighter beige or sand tone for the body and flippers.
How to Draw a Baby Turtle
After the earlier versions that ranged from the most basic preschool style to more realistic forms, let’s move to this additional tutorial that shows how to draw a baby turtle. The head is proportionally larger compared to the body, the legs are short and simple, and the shell has a minimal pattern.
Sketch a large rounded head shape with a slight bump on one side for the cheek. Add a smooth arched line for the top of the shell, connecting it to the head. Draw the lower edge of the shell as a thin curved strip, then sketch the short front flippers extending from beneath it. Add the rear flippers, keeping them small to convey the baby proportions.
Place two circular eyes on the head and a curved smile between them. On the shell, draw a central panel and connect it with a few straight and curved lines to form simple segments. Trace the lines clearly, erase any extra marks, and color the shell a soft green with a lighter tone for the head and limbs to complete the baby turtle drawing.
Conclusion
In this turtle drawing lesson, you first learned the main method, which shows how to draw a turtle in a very simple and recognizable form. After that, the additional tutorials offered different variations – from the simplest preschool version, to a slightly more detailed side view, a more advanced realistic sea turtle, and a cute baby turtle. These methods used the same basic idea of building the drawing from simple shapes but changes the level of detail, perspective, and style.
By practicing several versions, you can choose the one that suits your current skill level or purpose, and then gradually try the others to improve your technique. You can also combine ideas from different tutorials – for example, using the baby turtle’s proportions with the side-view shell pattern.
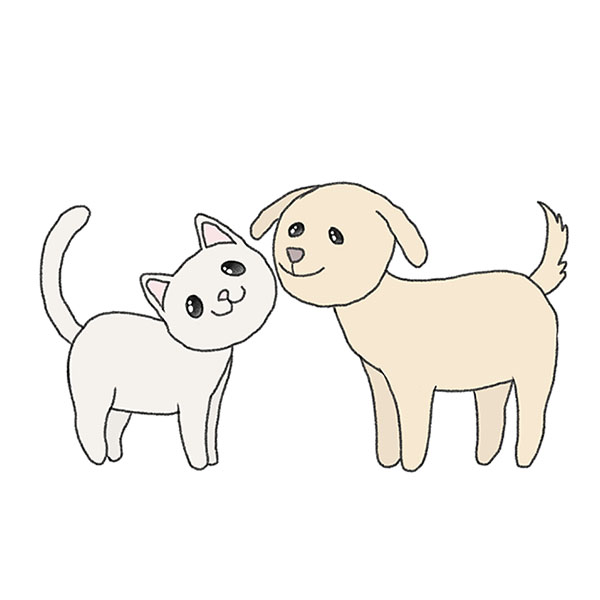
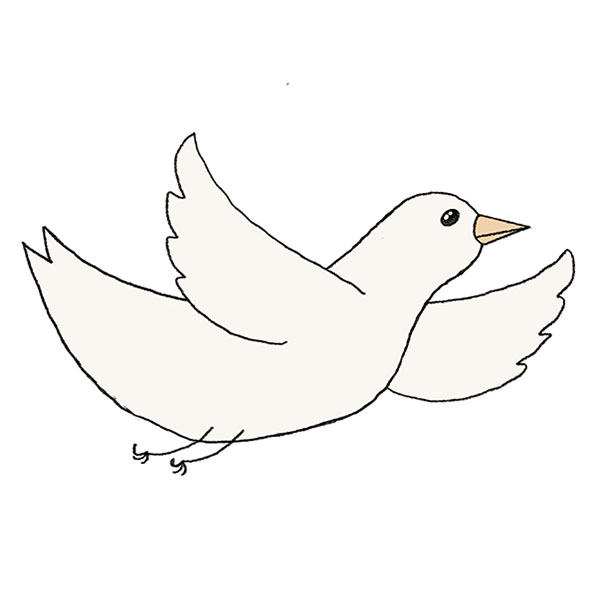
Also, you can combine your turtle drawing with other animals. For example, you can draw a shark other animal in a very detailed underwater scene. Or you can draw a cat playing with a cute baby turtle.
Share your drawings, try coloring them in different ways, and look through other animal drawing lessons to continue building your skills.

wow
Appreciate it, Eran. Glad the guide caught your attention.
great qute turtle
Thanks, Eli. That turtle turned out nicely, right? It’s a fun one to sketch.