How to Draw Wheat
Gather round, aspiring artists, as we embark on a creative sojourn to learn how to draw wheat, the staple of the heartland. My technique, designed to ease you into the craft, ensures that with each mark, you capture the serene elegance of wheat. With your pencil as your plow, you’ll cultivate lines that soon blossom into golden treasures.


How to Draw Wheat: Basic Information
Welcome, artists and dreamers, to the simple yet profound task of capturing the essence of the countryside with my easy-to-follow guide on how to draw wheat. In the dance of pencil on paper, each stroke you craft will whisper the secrets of the golden fields, transforming the blank canvas into a rustic tapestry.
As the creator of this lesson, I delight in revealing the subtle artistry of wheat sheaves. With each curve and line, as we draw wheat together, you’ll discover the elegant symmetry hidden within each golden ear. This process is akin to weaving sunlight into your sketchbook, each shade a thread of warmth.
And as we reach the culmination of our artistic harvest, the golden hues of your creation will resonate with the beauty of simplicity. Through learning to draw wheat, we’re not only sketching; we’re embracing the organic poetry that nature offers, turning the everyday into the extraordinary.
Wheat Drawing Tutorial
Materials
- Pencil
- Paper
- Eraser
- Coloring supplies
Time needed: 20 minutes
How to Draw Wheat
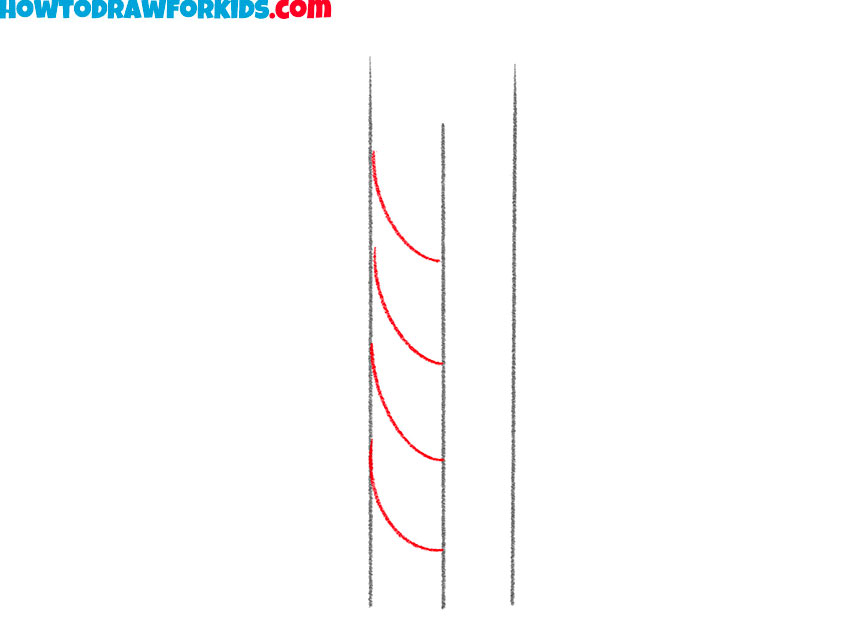
- Draw the first auxiliary line.
Start by drawing one straight vertical line. It will be the middle of the wheat you draw.

- Add more auxiliary lines.
Draw two identical straight vertical lines to the right and left of the previously drawn line.

- Start drawing the grains on the left side.
To do this, draw four similar curved lines between the first and second auxiliary lines.
- Draw some of the grains from the right.
Depict curved lines similar to the lines drawn in the previous step between the auxiliary lines.
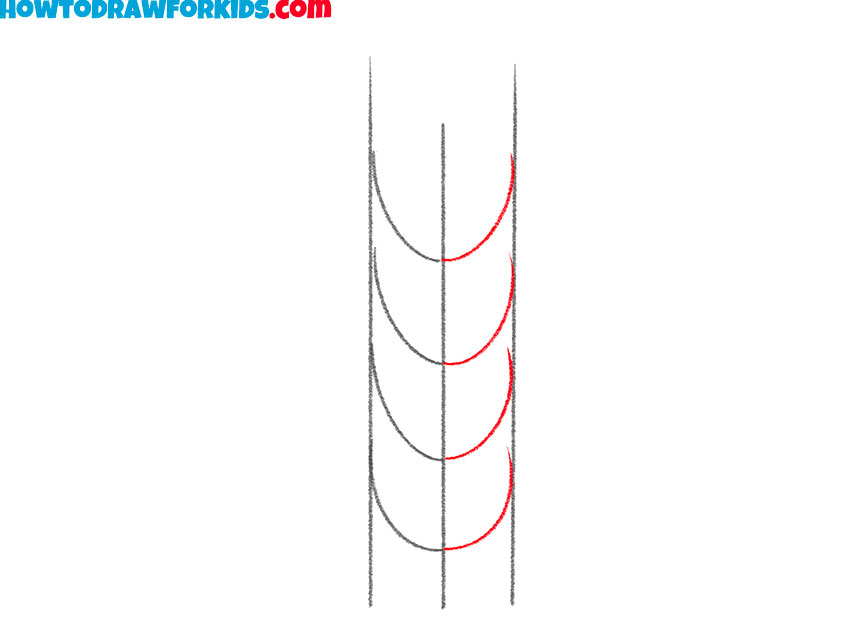
- Complete the drawing of the grains on the left.
Add the tops of the wheat grains using the four curved lines.
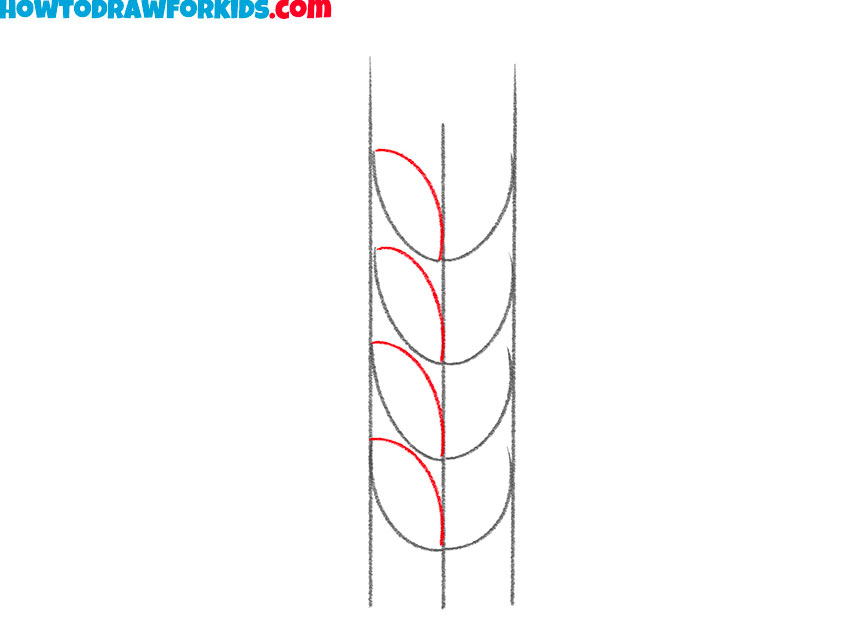
- Complete the drawing of the wheat grains on the right.
Depict four identical curved lines over the previously drawn curved lines on the right side.
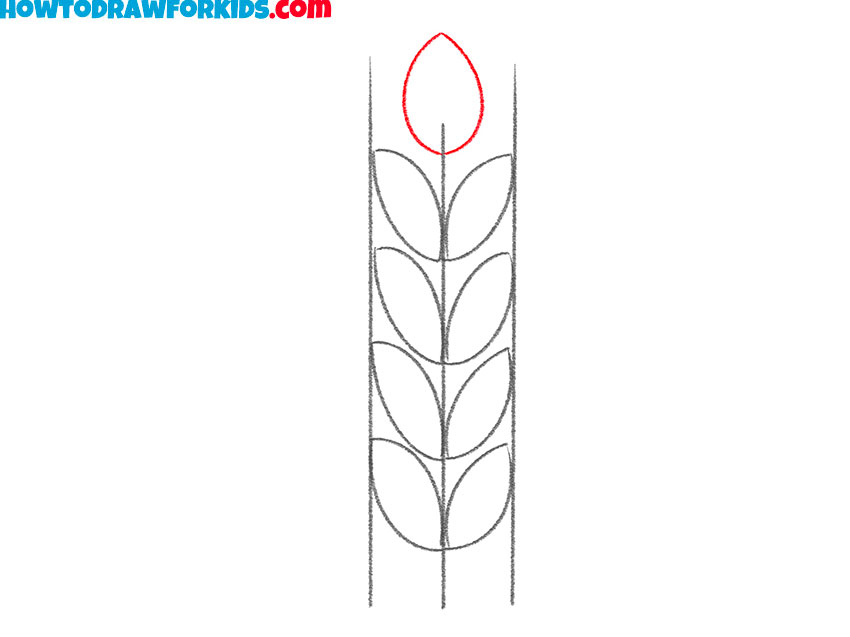
- Add the grain on top.
Outline it with a curved line. This figure is similar in shape to a drop.
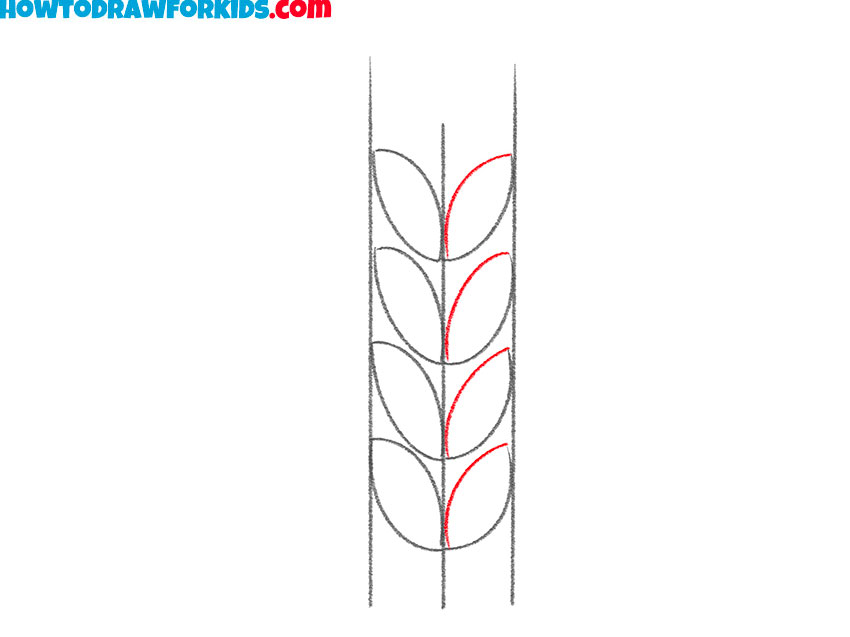
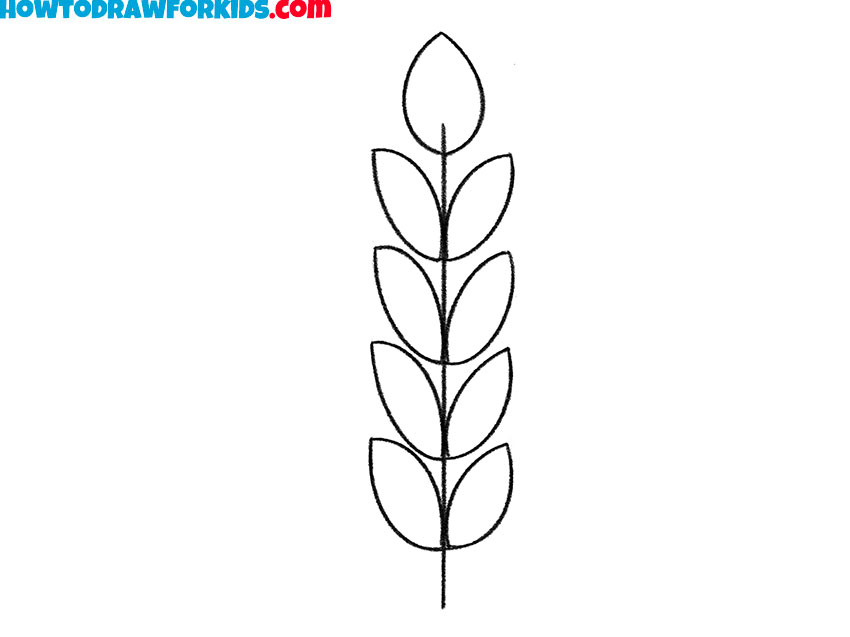
- Erase the auxiliary lines.
Use an eraser to remove unnecessary lines from the drawing.
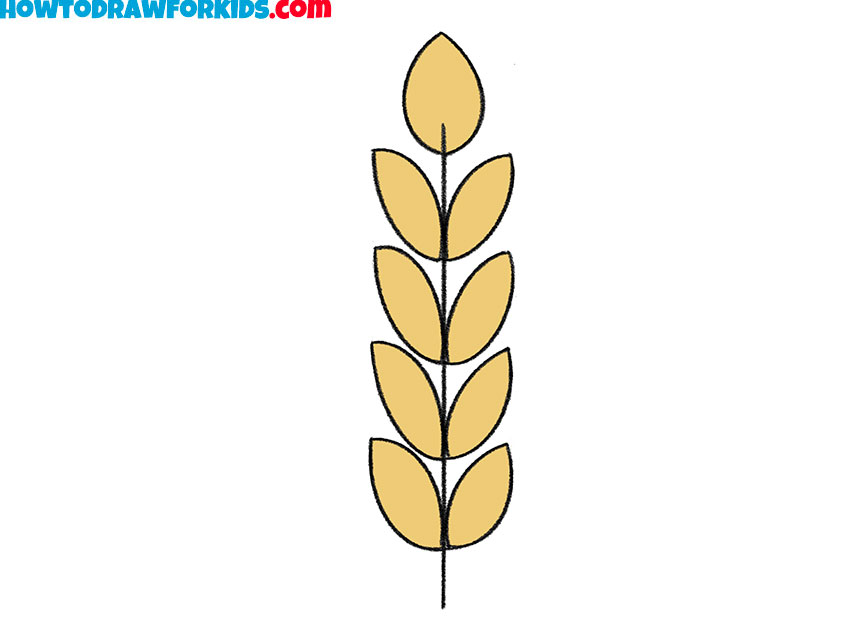
- Color in the drawing.
You should just use yellow to color this drawing.


Additional Content
For those eager to delve deeper, I’ve compiled a complementary PDF file that serves as a concise version of our drawing lesson. It’s your pocket companion to the world of art, accessible anywhere, any time, even when the digital waves of the internet can’t reach you.
Inside, you’ll find additional materials crafted to refine your skills, perfect for after you’ve mastered the fundamental stages of drawing wheat. This treasure trove is not about steps or tips; it’s about enriching your journey, expanding your artistic horizons beyond the canvas.
So, once you’ve danced through the wheat fields with your pencil, turn to this PDF. It’s more than just a guide; it’s a gateway to enhancing your craft, ensuring that the art of drawing continues to flourish within your hands, like wheat under a golden sun.
Alternative Drawing Techniques
In the spirit of artistic exploration, I’ve also devised an alternative drawing technique for wheat, tailored to broaden your practice and sharpen your artistic acumen. This new method strips down the complexity, focusing on form and flow to refine your creative touch.
This alternate approach is designed as a simpler path, inviting even the most tentative hands to dance across the page with confidence. It’s a way to practice the grace of wheat, reinforcing the fundamentals while gently pushing your boundaries.
By integrating this simpler technique into your repertoire, you’re not just learning to draw; you’re learning to see. It’s about discovering the subtle play of lines and curves that make wheat an enduring subject for artists, nurturing a deeper appreciation for every stroke you make.
How to Draw Wheat for Kindergarten
For the youngest of artists, our alternative wheat drawing method is as delightful and straightforward as a storybook tale. In the first step, a single red line stands bold and tall, a beacon for the journey ahead. It’s the backbone of our wheat stalk, inviting tiny hands to take their first mark with courage and simplicity.
Next, with the guidance of two wide V-shaped arms, we sketch the outline of our wheat’s head. It’s like opening the doors to a barn, the edges are a warm welcome to what will become the wheat’s full and ripe form. This step is about framing the potential, setting the stage for the bounty to come.
With the structure in place, step three has us drawing crisscrossing lines within the bounds of our V. These are the seeds of our imagination, sown in simple red strokes that promise to grow into the rich grain we know. It’s here that kindergarteners find the joy of pattern and repetition, an essential rhythm in the melody of drawing.

Correcting Common Mistakes in Wheat Illustration
In our artistic endeavors, the path to mastery is often lined with lessons learned from the gentle embrace of trial and error. As we reflect on the wheat drawing tutorial designed for the eager minds of kindergarteners, let us illuminate the common missteps that can occur, offering guidance to refine and perfect their craft.
- Rushing the Foundation: The first stroke is the stalk of your wheat; it sets the precedent. A hasty line may lead to a shaky foundation, reminiscent of a wind-battered stalk rather than one standing tall and proud.
- Overlooking Symmetry: Wheat’s beauty lies in its symmetry. When sketching the V shapes, unequal sides can lead to a lopsided harvest, not quite capturing the wheat’s natural elegance.
- Neglecting Spacing: The grains need room to breathe. Crowded lines may merge into a muddled mass, losing the distinct clarity that each seed deserves.
- Heavy-Handed Strokes: Gentle pressure is key. Heavy pencil marks can overshadow the delicate nature of wheat, turning a tender grain into a tough bristle.
- Skipping Steps: Each step is a building block. Missing one is like forgetting to water your seeds, where full growth is compromised by impatience.
- Coloring Outside the Lines: While creativity knows no bounds, the golden hue should stay within the wheat’s outline, preserving the purity of its form.
As we gather the sheaves of our experience, we recognize that each mistake is a whisper of wisdom, guiding our young artists to improve and grow. This journey of learning to draw is much like tending to a field; it requires patience, care, and sometimes, starting again, knowing that with each new page, a more bountiful harvest awaits.
Conclusion
As we cap off our lesson on how to draw wheat, your canvas has blossomed into a field of golden strokes. If this experience has sparked a desire to explore further, I invite you to browse my website for an array of diverse drawing lessons – perhaps the expanse of the sky or the whimsical form of a troll will be your next masterpiece.
I extend a warm invitation to join our creative community across social media, ensuring you’re always in the loop with the latest tutorials and artistic insights. Your thoughts and preferences are the seeds of future lessons, so please, share your comments and suggestions beneath this lesson.


