How to Draw a Clone Trooper
Learn how to draw a Clone Trooper from Star Wars, the most iconic sci-fi space franchise, by following this step-by-step drawing tutorial.

How to Draw a Clone Trooper: Introduction
Today I want to add to the already large Star Wars section on my website and show you how to draw a Clone Trooper using a simplified, traditional style. This lesson will follow the same approach used in many of my other character tutorials – easy to follow, with clean shapes and basic proportions.
The Clone Trooper has a very recognizable appearance with his distinct armor and iconic helmet. If you’ve already completed the tutorial on how to draw Darth Vader, you’ll notice a similar method here. That lesson also focused on a simplified version of a well-known Star Wars character, built up from basic shapes.
In this tutorial, we’ll draw a Clone Trooper standing in a battle pose and holding a weapon. Once you understand the basic shapes and construction, you can use the same principles to draw the Clone Trooper in other poses as well. Feel free to adjust the stance, weapon, or even add background elements to make your version more unique.
Clone Trooper Drawing Tutorial
Materials
- Pencil
- Paper
- Eraser
- Coloring supplies
Time needed: 45 minutes
How to Draw a Clone Trooper
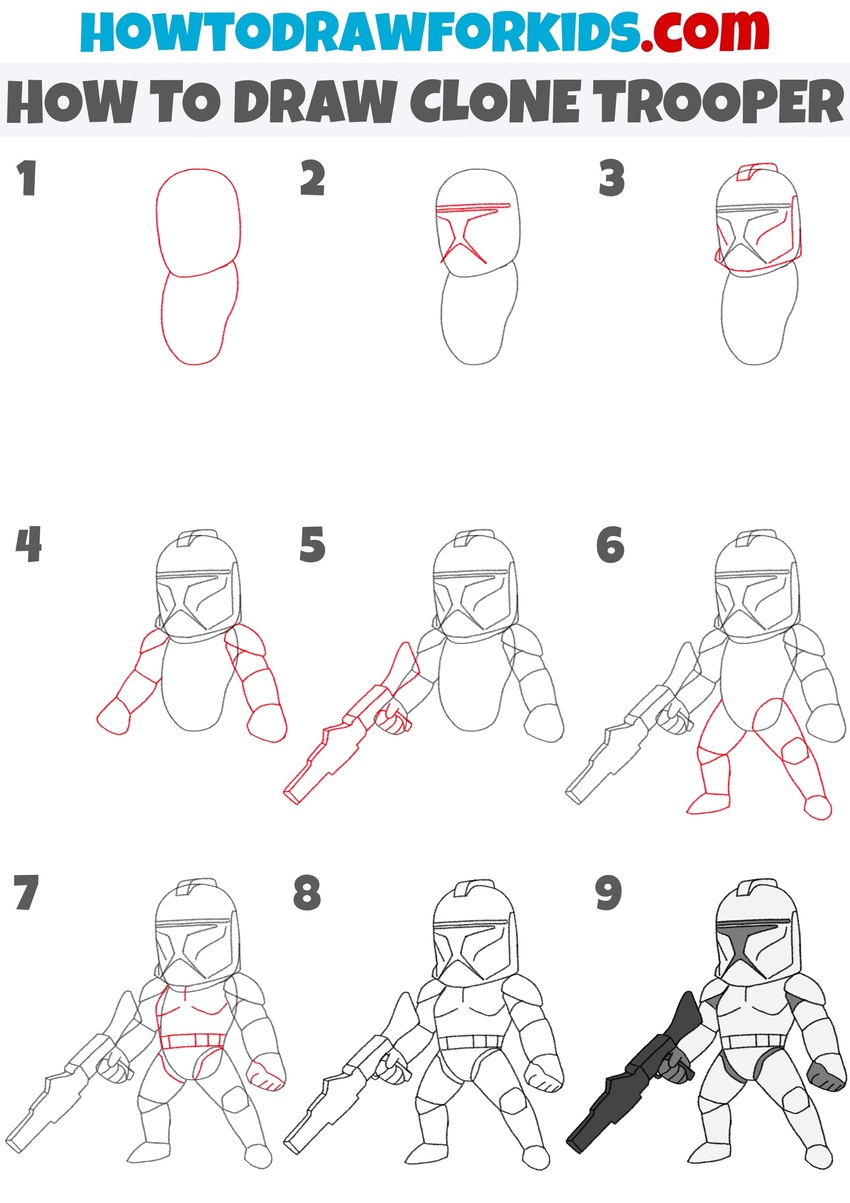
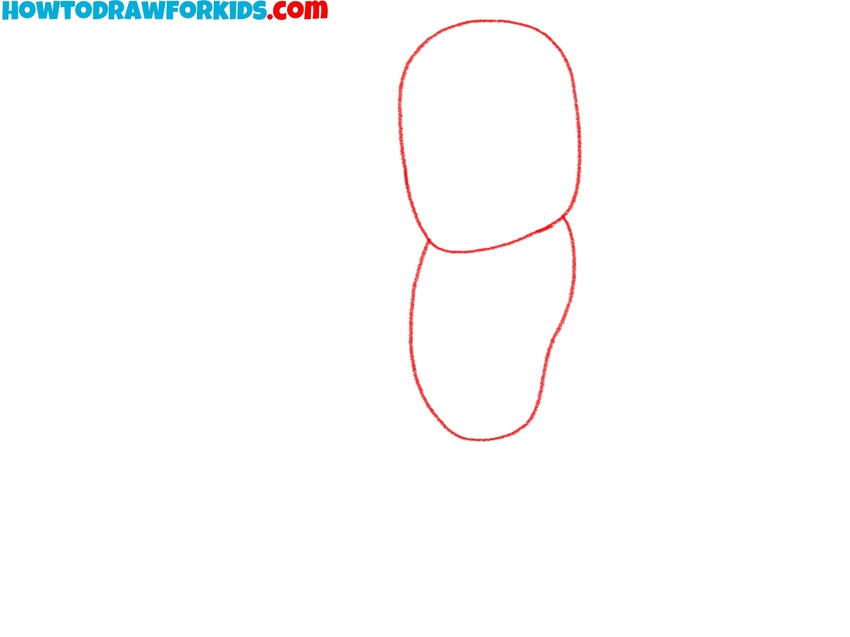
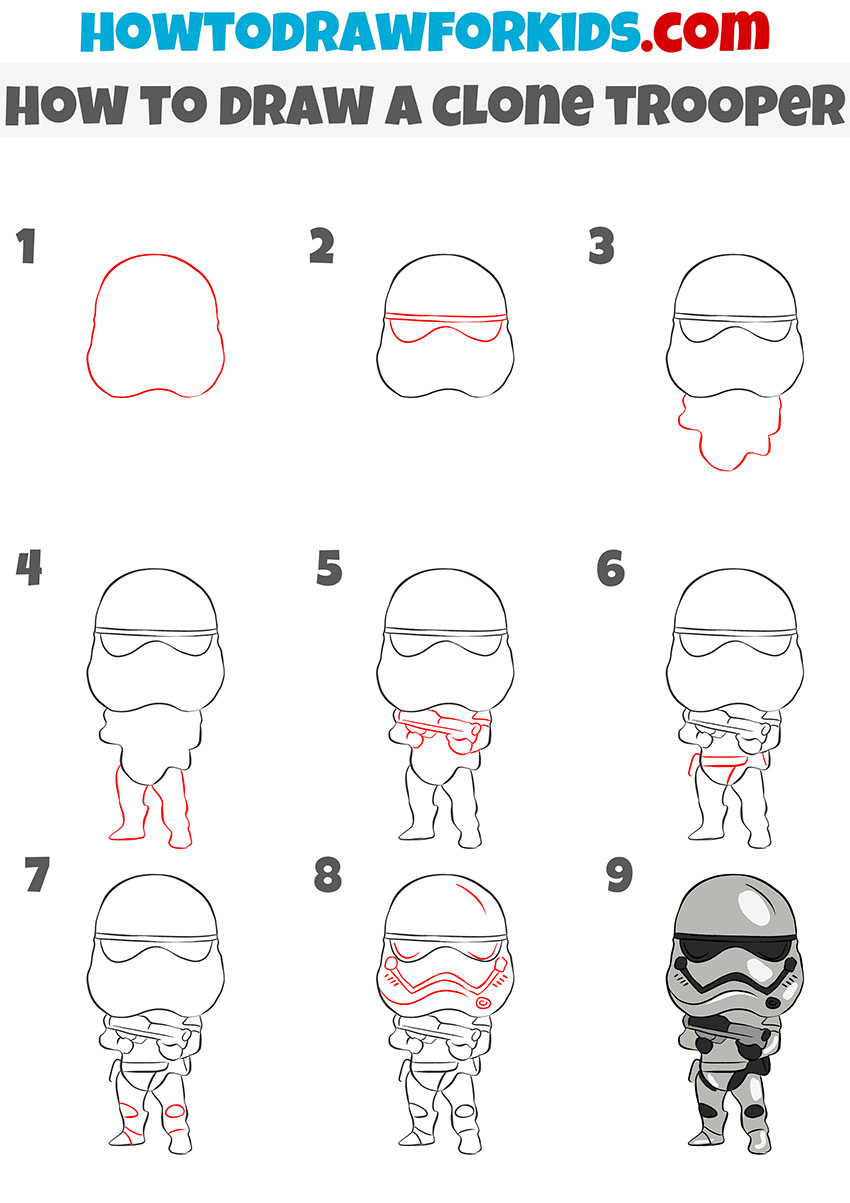
- Sketch the basic head and body shapes.
Start by drawing two simple shapes to build the base structure of the Clone Trooper. First, sketch a rounded rectangle for the helmet. Right below that, add a larger oval or bean-like shape for the torso. You can tilt the head slightly to the left or right if you want to change the stance of your Clone Trooper.
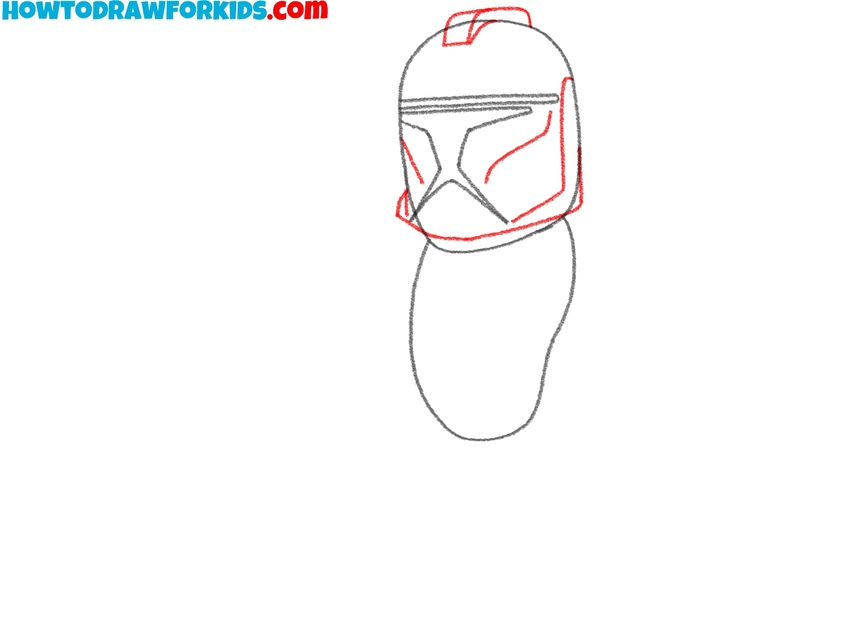
- Sketch the helmet’s visor.
First, sketch the horizontal line across the upper front of the helmet to mark the top edge of the visor. Then draw the angled, “T”-shaped visor that extends down and to the sides of the helmet. This is one of the most recognizable features of a Clone Trooper and gives them their iconic look.

- Finish the helmet details.
Now outline the sides and lower edges around the faceplate. Then, add the small central crest or vent at the top. If you’re drawing a helmet turned slightly left or right, you can adjust the size of the side details – one side will appear more prominent than the other.
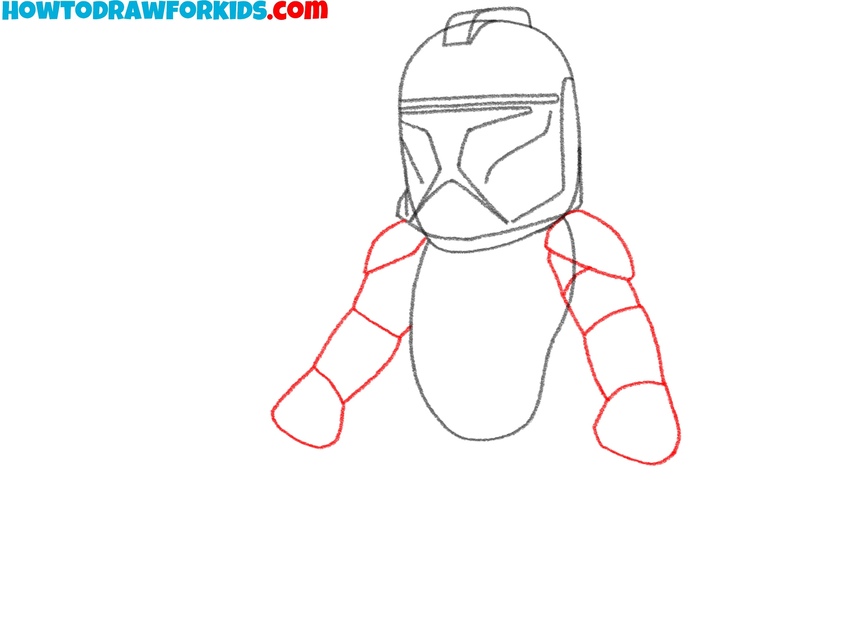
- Draw the Clone Trooper’s arms.
Add the arms by sketching two segmented shapes extending from the torso. Each arm should be made of main parts like shoulder, forearm, and hand. If you want to make the pose more action-oriented, try lifting one arm higher – as if the Clone Trooper is aiming upward or blocking.
- Sketch the weapon and fingers.
First, sketch the overall shape of the weapon – use blocky lines and angles to create a stylized sci-fi look. Then add the grip and and fingers. If you want to vary the weapon, try replacing the blaster with a smaller pistol-style blaster or a longer rifle.

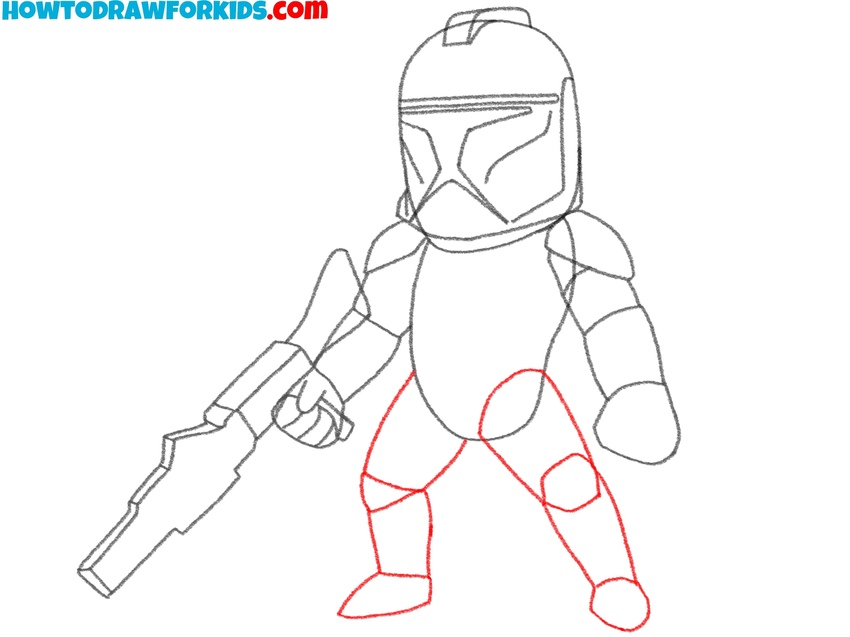
- Draw the bottom half of the Clone Trooper.
Sketch the legs starting from below the torso. Each leg should have four main parts – upper thigh, knee armor, and lower leg, and a small foot at the base. Keep the legs slightly apart and bent to show a battle-ready stance. You can widen the stance for a more aggressive posture.
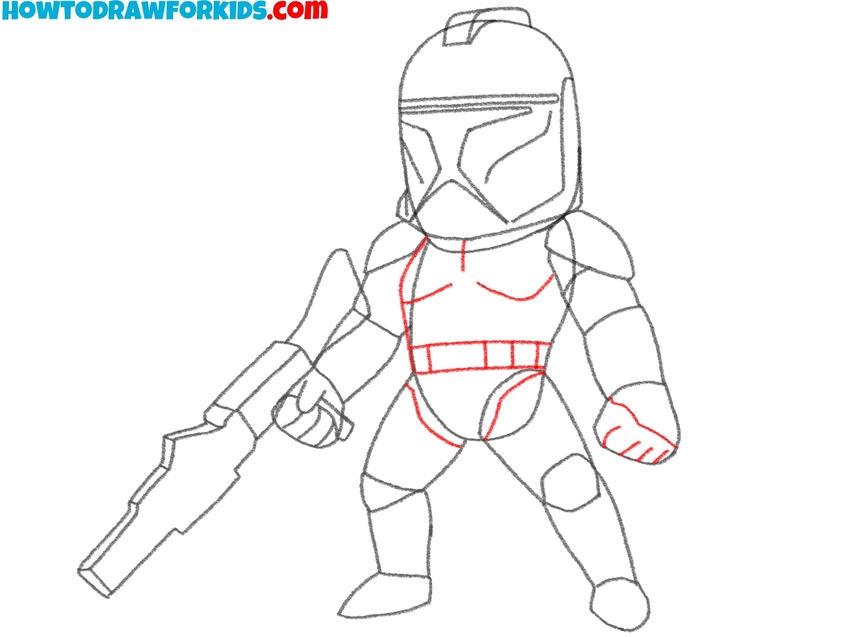
- Draw the Clone Trooper’s chest armor.
Now draw the armor lines across the torso and waist. Add curves for the chest plates and small sections around the abdomen. Then sketch the belt area with small rectangular segments. If you’d like to draw a specific type of Clone Trooper (like a commander or ARC trooper), you can add extra pouches to the belt.
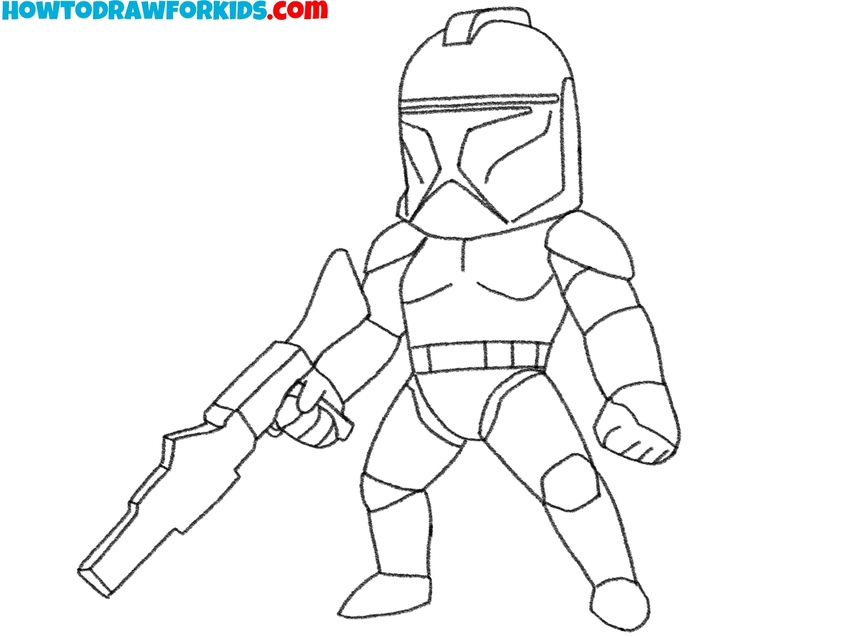
- Clean up and outline the figure.
Trace over the entire Clone Trooper drawing with a darker pencil. Erase any extra sketch lines from earlier steps and make any small adjustments or clean up wobbly edges. You can also use this stage to add small scratches, panel lines, or weathering marks to make your trooper look battle-worn or heavily armored.
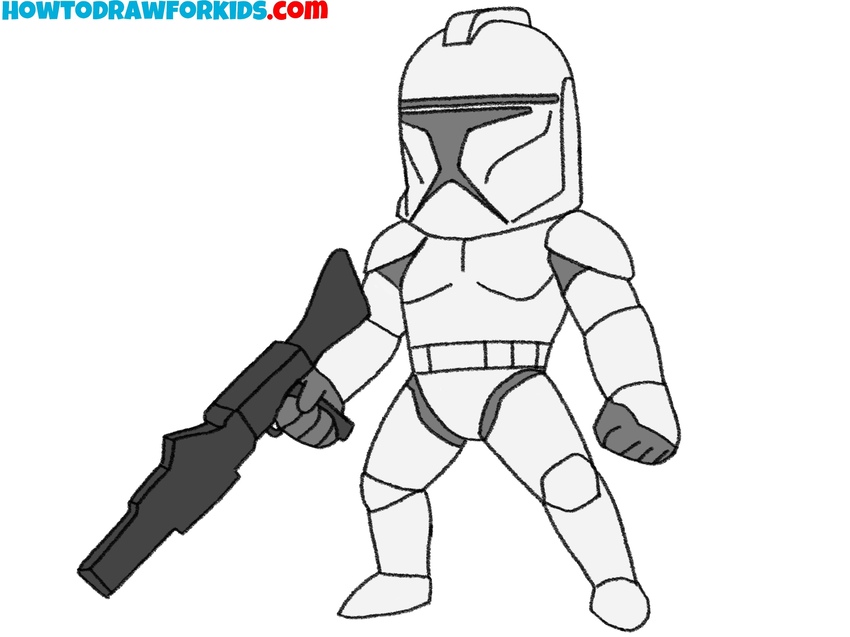
- Add color to the Clone Trooper drawing.
Color the Clone Trooper using shades of white and gray for the armor, with black for the visor and gloves, and dark gray or black for the blaster. You can add light blue or red markings if you want to show a specific rank or clone unit. Or try coloring your trooper in the style of the 501st, 212th Battalion.
Alternative Clone Trooper Drawing Tutorial
This additional step-by-step tutorial on how to draw a Clone Trooper uses a different approach than the first version. The step sequence here begins with the full helmet shape and builds downward through a body. The overall design is more cartoon-like and simplified. Unlike the first tutorial’s more detailed and detailed armor, this version offers a more simplified look.
To begin learning how to draw a Clone Trooper using this method, first draw the helmet outline as one large shape with a rounded top and curved lower edge. Add the visor and front panel of the helmet, keeping the lines smooth and symmetrical. Draw the simplified torso directly beneath the helmet, followed by the arms and upper legs. Position the legs slightly apart.
Add the Clone Trooper’s blaster resting across both hands. Sketch the basic armor shapes around the waist, knees, and shoulders. Refine the helmet with additional markings and curves. Keep the body proportions exaggerated with a large head and small limbs. Finish the drawing by coloring the Clone Trooper in gray tones with black and white details for contrast.
Conclusion
This drawing of a Clone Trooper is finished, and now you’ve learned how to create a simplified version of this character in a stylized format. You can try changing the pose, adjusting the weapon, or even adding a background to make your version more unique.
If you liked this lesson, don’t forget to check out other movie character drawing tutorials on the site, including the Harry Potter drawing tutorial for a completely different approach. Share your finished work, follow along for updates, and keep practicing to build your drawing skills one step at a time.