How to Draw a Duduk
Continuing my series of drawing lessons on Armenian culture, I want to teach you how to draw a duduk, the most legendary Armenian musical instrument.

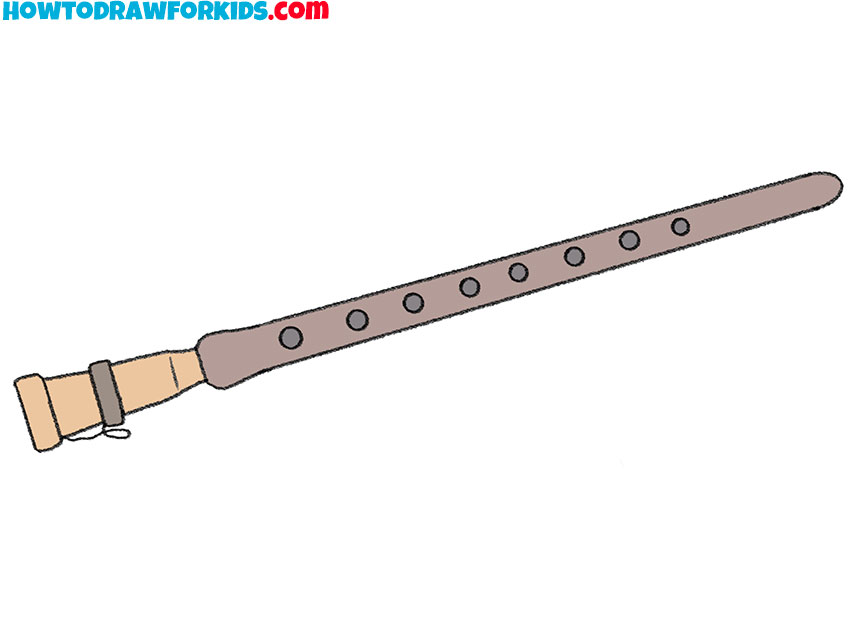
How to Draw a Duduk: Basic Information
In a previous lesson, we drew Charles Aznavour, the legendary French musician of Armenian descent. This marked the beginning of a series of lessons on my website focusing on Armenia and Armenian culture. Continuing this series, today we will learn how to draw a duduk, an instrument you may recognize from numerous Hollywood movies.
Drawing a duduk will not only help you learn to create this ancient musical instrument on paper, but also introduce you to the rich and ancient culture of Armenia. Additionally, this lesson will help you develop a range of supplementary skills that will be useful in your other works.
For example, drawing the duduk requires an accurate understanding of proportions and symmetry. The instrument’s elongated body and evenly spaced finger holes demand careful measurement and alignment. By focusing on these elements, kids can learn to maintain balance in their drawings, which is really important skill in art.
Including functional elements like the reed and finger holes requires understanding their placement and purpose. This practice helps artists think about how different parts of an object work together, improving their ability to draw complex, functional objects accurately.
Duduk Drawing Tutorial
Materials
- Pencil
- Paper
- Eraser
- Coloring supplies
Time needed: 30 minutes
How to Draw a Duduk Step-by-Step
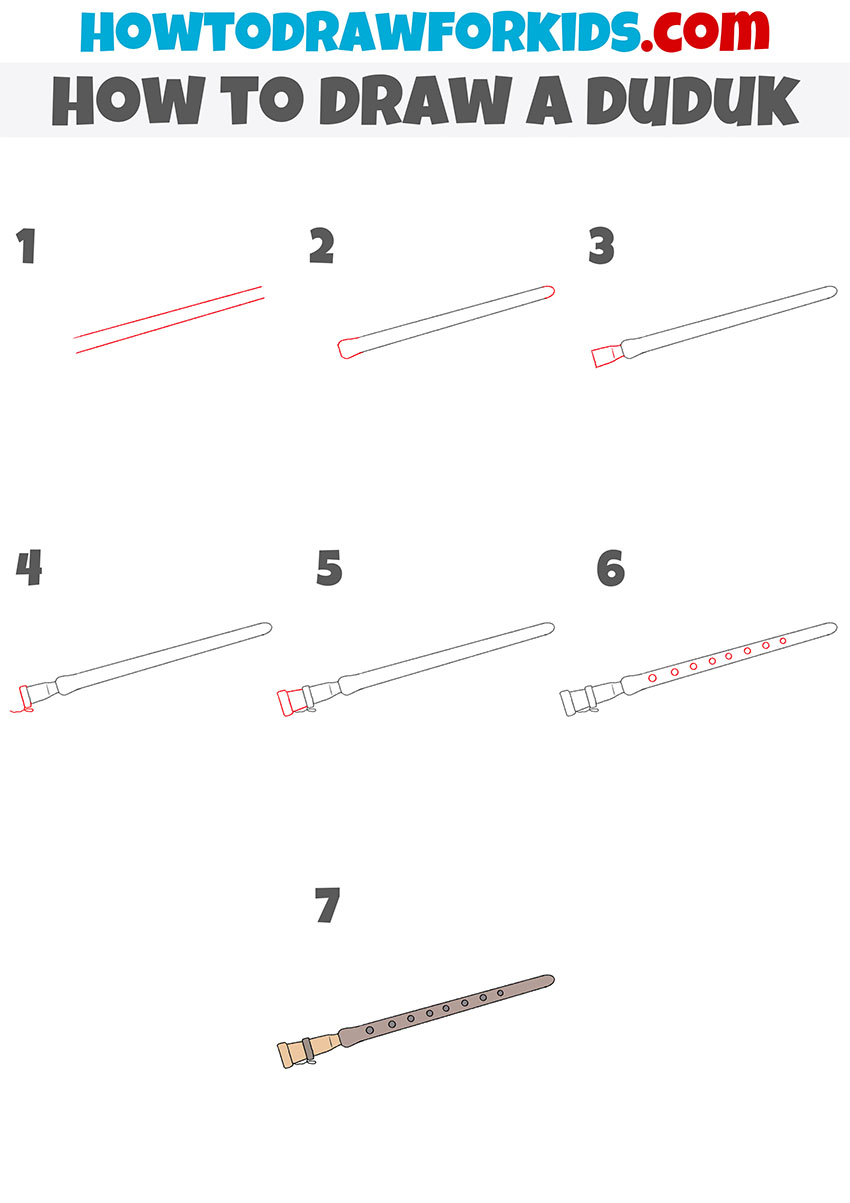
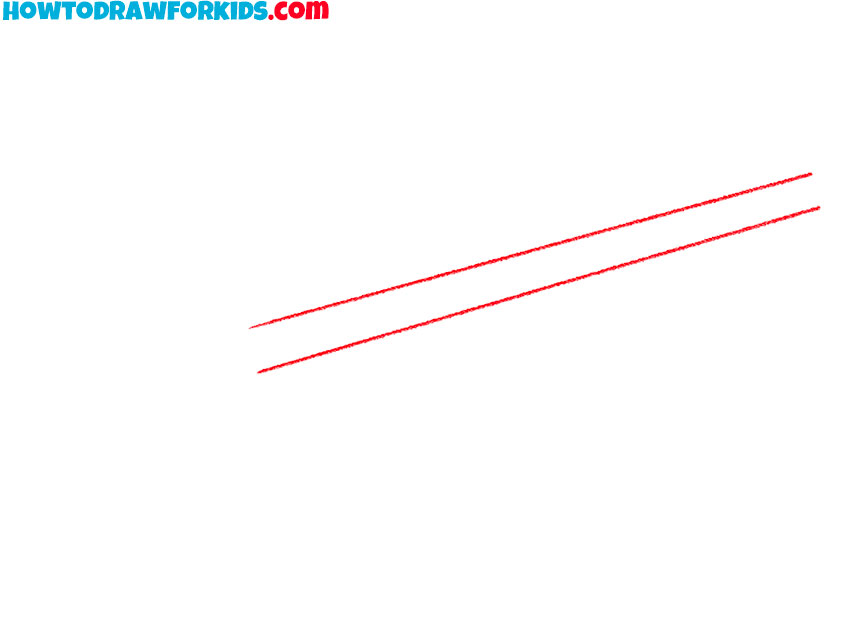
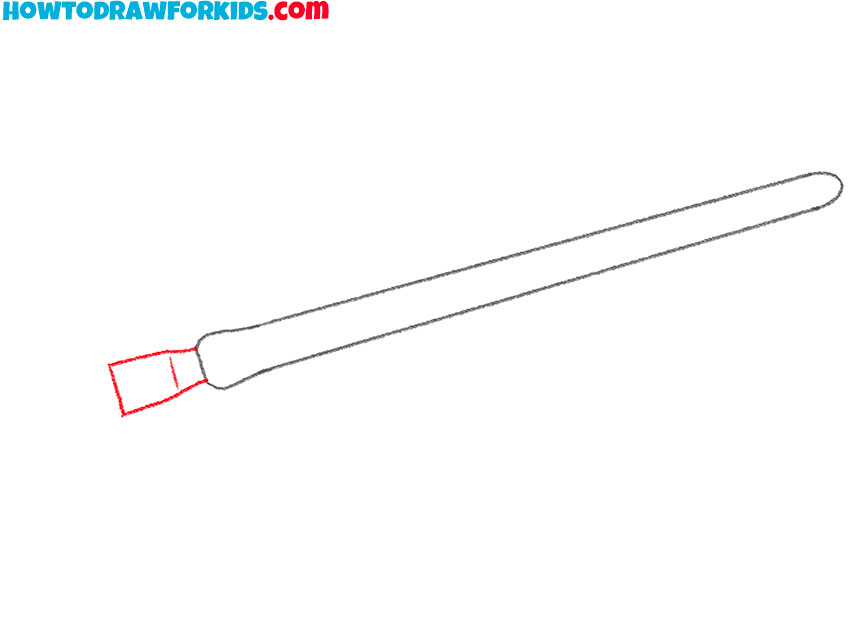
- Draw the outlines of the duduk’s body.
Start with two parallel lines slightly angled to represent the cylindrical shape of the duduk. Ensure the lines are straight and even, as this will form the basic structure of the duduk. Leave space at both ends for the reed and the end piece.
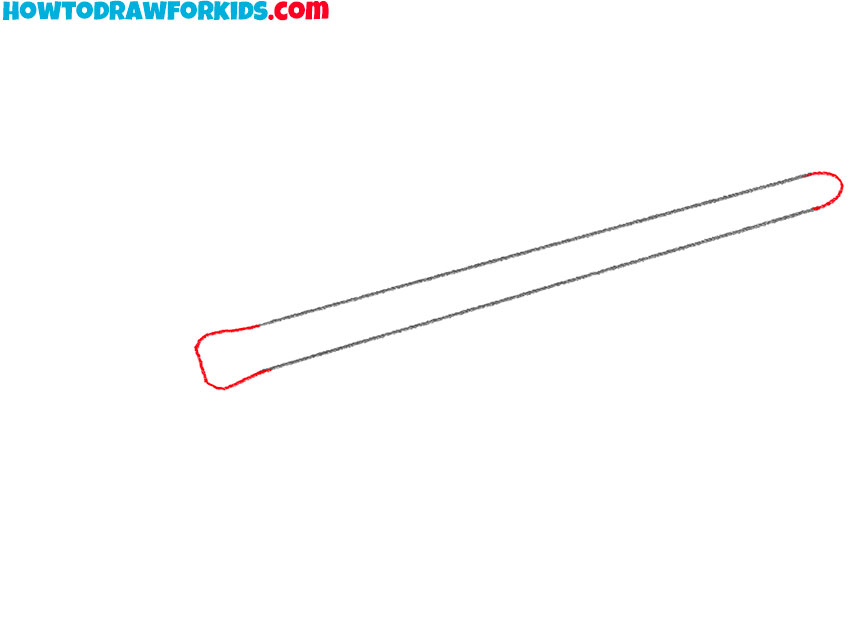
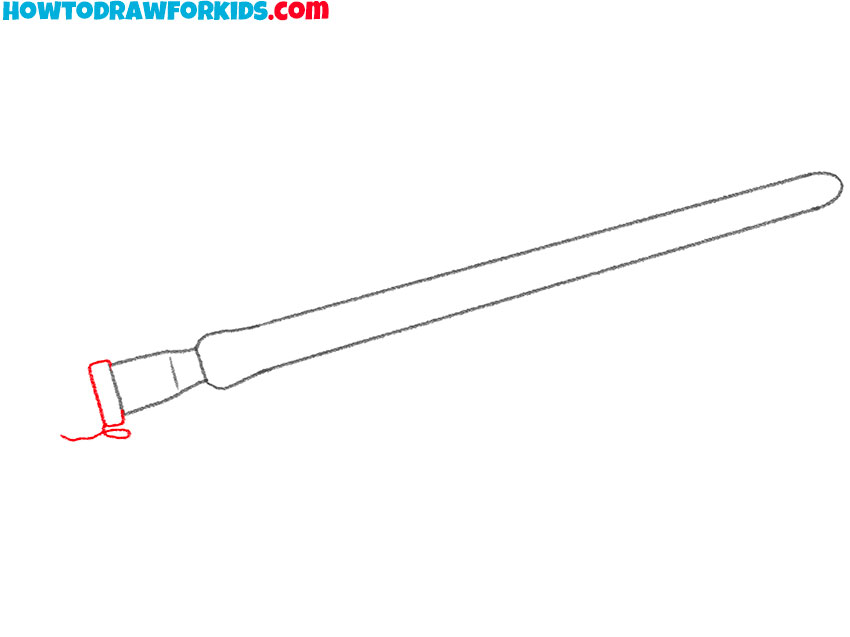
- Add the rounded edges.
Next, round off the edges of the parallel lines to give the duduk a more realistic appearance. Connect the ends of the lines with smooth, curved lines to form the cylindrical shape of the duduk. This will make it look more like a real instrument.
- Draw the reed section.
Draw a small rectangular shape at the end of the body. This rectangle should be slightly narrower than the body, representing the reed that players blow into. This part is very important for giving your duduk a realistic appearance, as the reed is an essential component of the instrument.
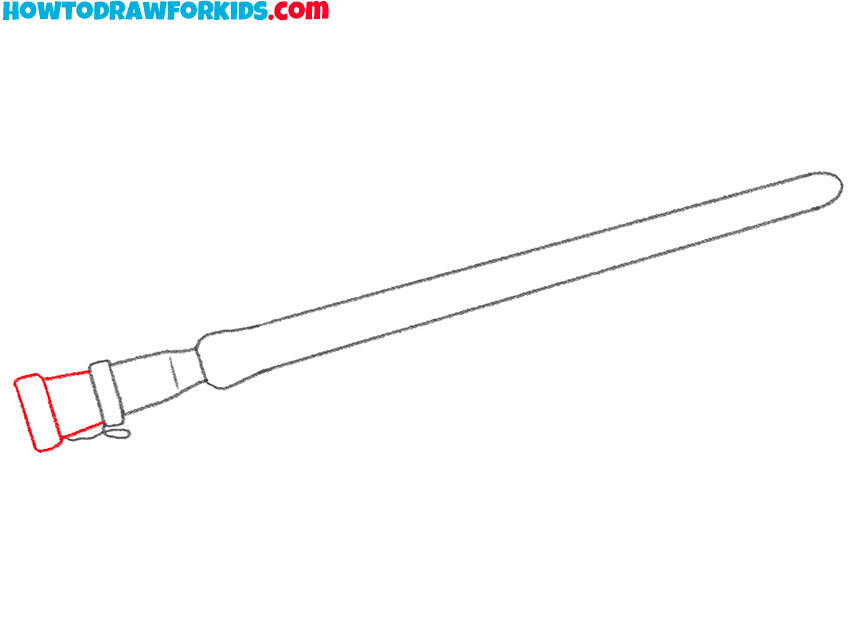
- Detail the reed and neck of the duduk.
Refine the reed and the neck of the duduk by adding more details. Draw a small curved line at the end of the reed to represent the binding that holds the reed in place. When drawing a duduk, try to maintain proportions so that the parts of the drawing are symmetrical.
- Finish drawing end reed.
Continue detailing the reed by adding more lines and curves. Draw small lines along the tip to indicate the divisions and texture of the reed. These details are very important for realism, giving the reed a textured, segmented appearance that matches the actual instrument.
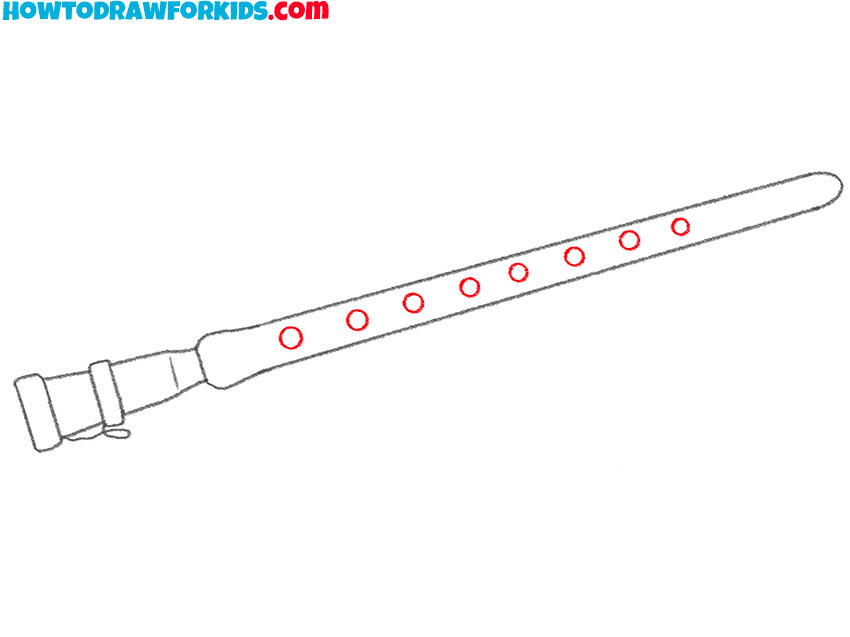
- Draw the finger holes.
Draw small, evenly spaced circles along the front of the duduk’s body. These circles represent the holes that players cover to produce different notes. Make sure the holes are evenly spaced and aligned to keep the drawing symmetrical.
- Color the duduk.
Use a light brown or beige for the body to represent the wooden material of the duduk. Color the reed section a slightly different shade to distinguish it from the body. You can add shading and highlights to give the duduk a three-dimensional appearance.
Additional Content
And here is my PDF file that includes illustrations of each step of the duduk drawing tutorial, a coloring page, a tracing worksheet, and a grid drawing worksheet. This resource is created to train your learning experience and provide additional practice.
The coloring page allows you to experiment with different color schemes, while the tracing worksheet helps reinforce the shapes and lines of the duduk. The grid drawing worksheet is an excellent tool for improving your proportion and scale accuracy. Download and use this PDF at your convenience to practice and refine your drawing skills further.
Duduk Drawing: Art Project Ideas
Create a poster celebrating Armenian cultural heritage. Feature your duduk drawing prominently, surrounded by illustrations of other cultural symbols like traditional Armenian architecture, clothing, and cuisine. Add informative text about the duduk’s history and its significance in Armenian music.
Use your duduk drawing to illustrate an Armenian folktale. Choose a story where the duduk plays a significant role and create a series of illustrations depicting key scenes. Incorporate traditional Armenian patterns and motifs in the borders and backgrounds.
Design an album cover for a fictional collection of Armenian duduk music. Feature your duduk drawing prominently, and use traditional Armenian designs and colors to create an authentic look. Experiment with typography and layout to make the cover culturally significant.
Create a series of artworks exploring Armenian cultural identity, with your duduk drawing as the starting point. Create pieces that reflect different aspects of Armenian life, such as family traditions, folklore, and religious practices. Use your duduk drawing to tie the series together, emphasizing the instrument’s cultural significance.
Design a set of traditional Armenian greeting cards featuring your duduk drawing. Use Armenian motifs and symbols to decorate the cards, and include traditional Armenian phrases or greetings.
Transform your duduk drawing into a design for a T-shirt celebrating Armenian culture. Add traditional patterns, colors, and text to create a unique and wearable piece of art.
Conclusion
This tutorial on drawing a duduk offers an opportunity to learn about the rich cultural heritage of Armenia while training your skills. Through detailed steps, you’ve learned how to accurately depict the duduk, an iconic Armenian musical instrument known for its soulful sound and historical significance.
For those interested in expanding their repertoire, don’t forget to visit my other drawing tutorials on musical instruments, such as the flute and the trumpet. These tutorials will help you learn how to illustrate different musical instruments and further train your drawing skills.