How to Draw a Broccoli
Some people enjoy this vegetable, others don’t, but I think both will want to learn how to draw broccoli in such a simple style.

How to Draw a Broccoli: Introduction
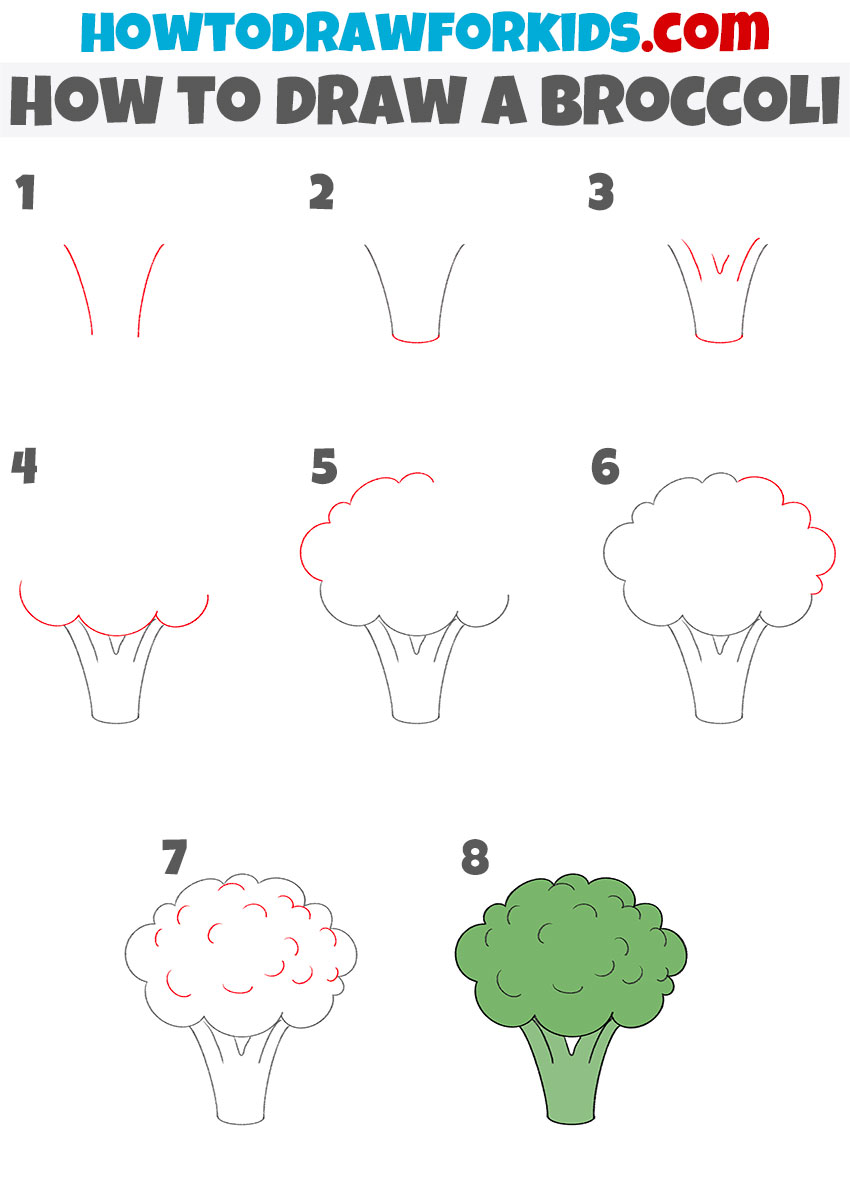
This tutorial will show the simplest way to draw broccoli in eight steps. Each step is based on basic lines and shapes, making it suitable for children or anyone just starting to learn drawing.
Broccoli is a green vegetable that resembles a small tree. It is well known for its nutritional value, containing vitamins, minerals, fiber, and antioxidants.
To draw broccoli using these instructions, prepare the necessary materials in advance so you can complete the lesson without interruptions.
Broccoli Drawing Tutorial
Materials
- Pencil
- Paper
- Eraser
- Coloring supplies
Time needed: 20 minutes
How to Draw a Broccoli
- Outline the broccoli stem sides.
To begin this broccoli drawing, sketch two slightly curved vertical lines that angle to the sides near the top. These lines will act as the central stalk that holds the crown of the vegetable. Don’t make this shape too straight, because real broccoli has a natural curve.

- Add the bottom edge of the stem.
Now close off the bottom of the stalk with a short curved line. This gives the broccoli stem a proper base so it looks finished. Think of this part as a modified cylinder. If you want, you can make this part uneven, as if the broccoli had been pulled out by the roots.

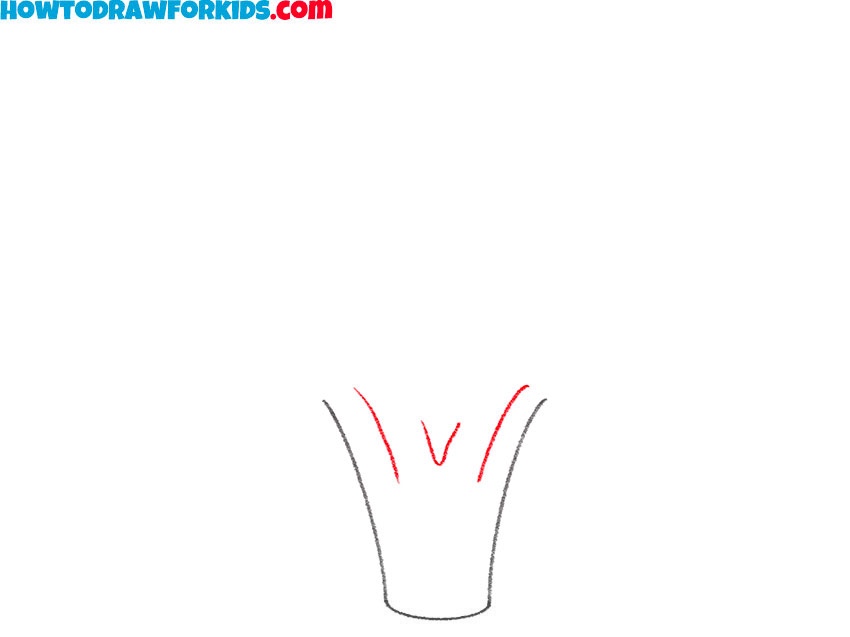
- Draw the broccoli branches.
Add a few thinner lines extending upward from the middle of the stalk to create the smaller stems that split and connect to the crown. These strokes don’t need to be perfectly symmetrical. Think of how you would draw a bouquet of flowers; the stems fan out and support the blossoms.
- Draw the bottom edge of the broccoli crown.
Next, begin to sketch the rounded outlines of the broccoli crown by adding a few curved, cloud-like shapes above the stalk. Keep the forms loose and irregular, since broccoli florets have uneven edges. I often compare this to drawing a fluffy cloud or cotton.

- Sketch the left side of the crown.
Extend your rounded shapes upward, adding more curves to illustrate the side section of the broccoli crown. Each bump should flow into the next, creating a continuous rounded top. Just like when drawing trees in a simple cartoon style, the crown should feel like one big mass rather than separate circles.

- Complete the vegetable crown.
Now finish the outline by closing the right side with more rounded forms until the broccoli crown looks whole. At this point, your broccoli drawing should resemble a fluffy oval sitting on a stalk. Step back and check proportions here.

- Draw surface details on the broccoli crown.
Inside the crown, sketch small curved lines scattered around to convey the tiny florets. These don’t need to be perfect circles; instead, keep them loose and varied. The idea is to create texture so the broccoli doesn’t look like just a big cloud.

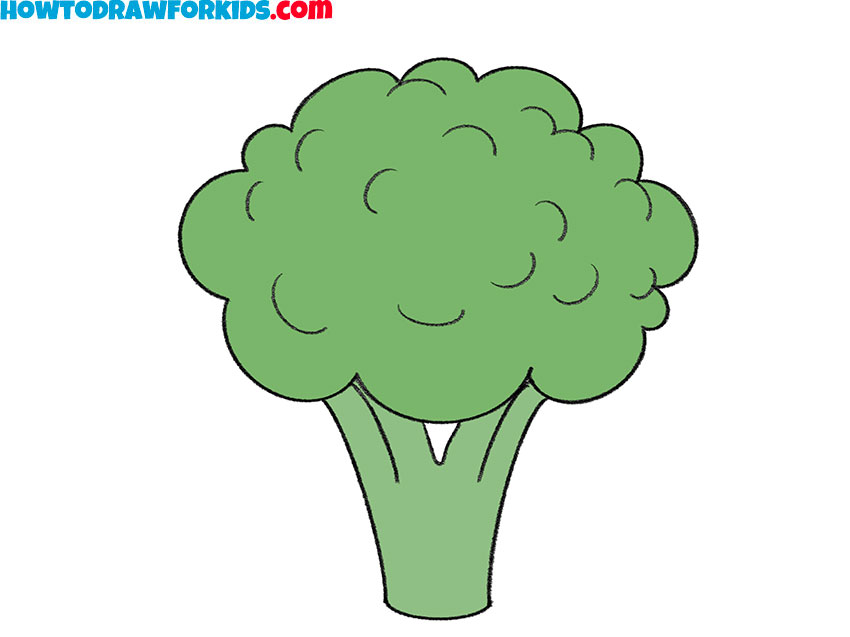
- Add green tones to the crown and stalk.
I used simple and uniform coloring for my broccoli drawing, but you can make your version more detailed. For example, paint the crown in a strong green tone and use a slightly lighter or more yellowish green for the stalk. Also, you can add shadows to make the sketch look even more realistic.
Additional Content
So you have drawn a complete step-by-step drawing of broccoli. If you liked this tutorial, you can share it with your friends and practice drawing together. We would be glad if you leave your comment on this drawing guide. Don’t forget to follow us on social media. To draw this vegetable without the internet, download the free PDF worksheet, which includes all the steps of this tutorial along with some useful additions.