How to Draw a Money Bag
Anyone who wants to sketch objects for comics, games, or stories will enjoy this tutorial on how to draw a money bag with a dollar sign.

How to Draw a Money Bag: Introduction
In this lesson, I want to show you in a very simple but clear way how to draw a money bag using basic lines and shapes. You’ve probably seen cartoon money bags like this in animated shows, games, comics, and other types of art, and now you’ll be able to create one just like it yourself.
When building the outline, it’s best to keep the lower part of the bag slightly wider than the top. This demonstrates weight and prevents the bag from looking too light. Avoid making the sides perfectly even – slight irregularity helps the drawing look more natural.
The tied section should remain simple and clear. Many drawings lose impact when too many small folds or string details are added. Use only the necessary lines to show that the fabric is gathered and held by the string. This part of the drawing should be centered and smaller than the bottom part.
The dollar sign should also look centered and easy to read. This part of the bag should consist of simple lines and shapes. Basically, it’s a big S with a straight line through it vertically.
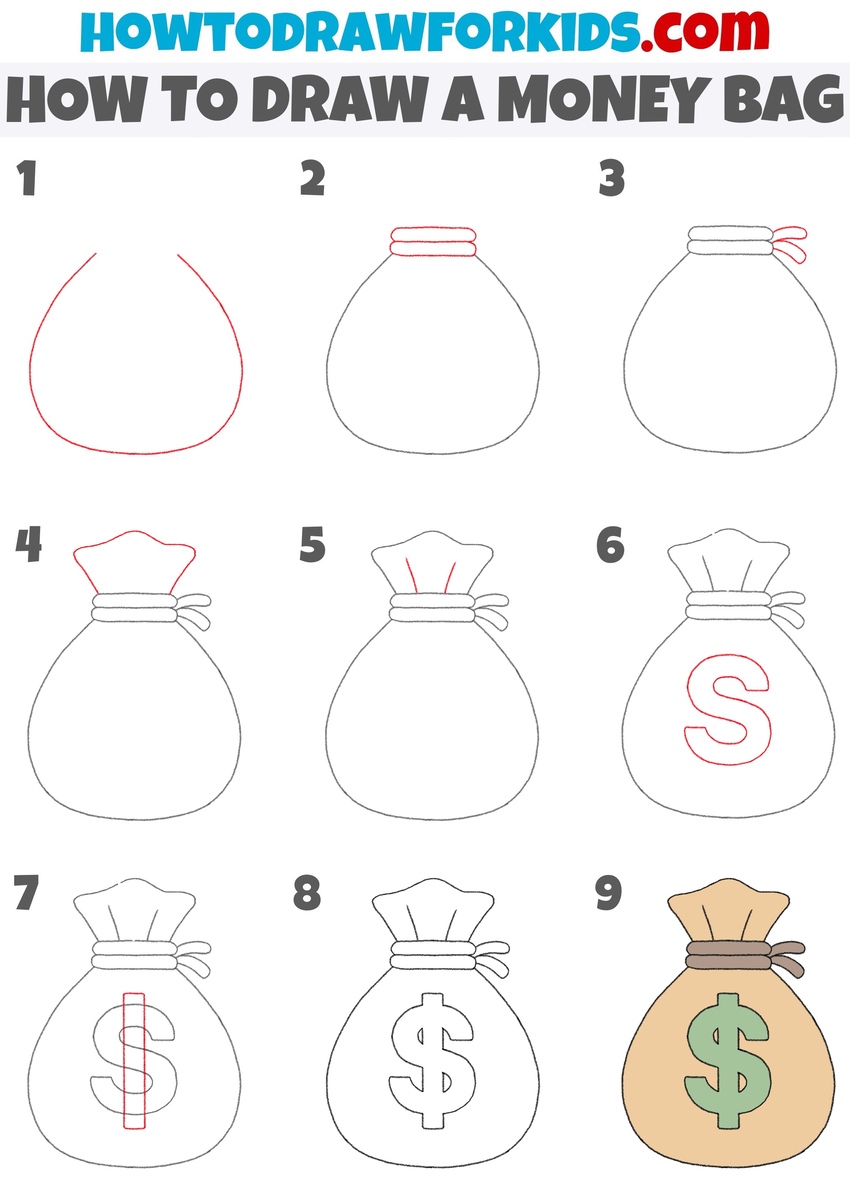
Money Bag Drawing Tutorial
Materials
- Pencil
- Paper
- Eraser
- Coloring supplies
Time needed: 30 minutes
How to Draw a Money Bag
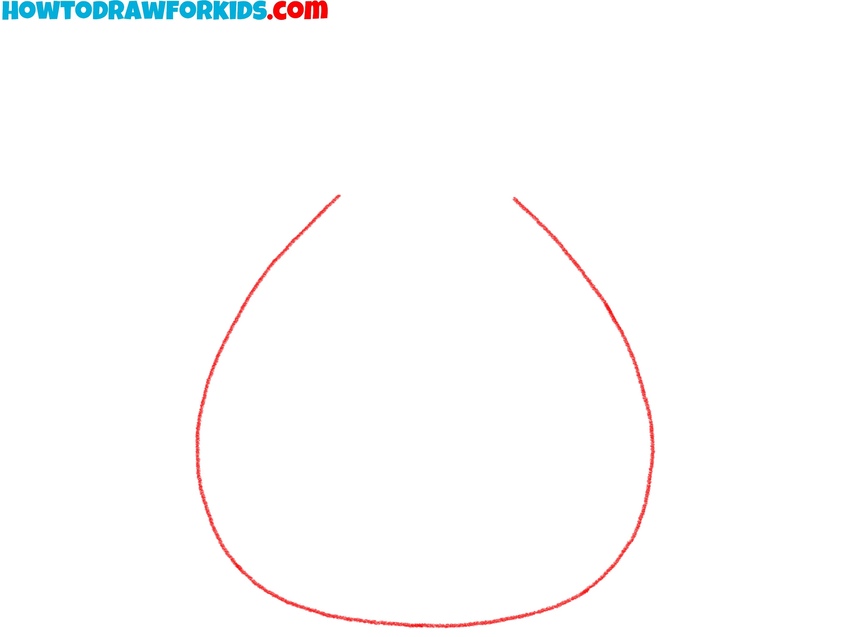
- Draw the bottom of the money bag.
First, sketch a wide, rounded shape that looks like a teardrop, pear, or a large oval with a slightly flattened bottom. The top should narrow to where the fabric will be tied. You can make your bag shape more rounded for a very full bag or more narrow and tall for an empty look.
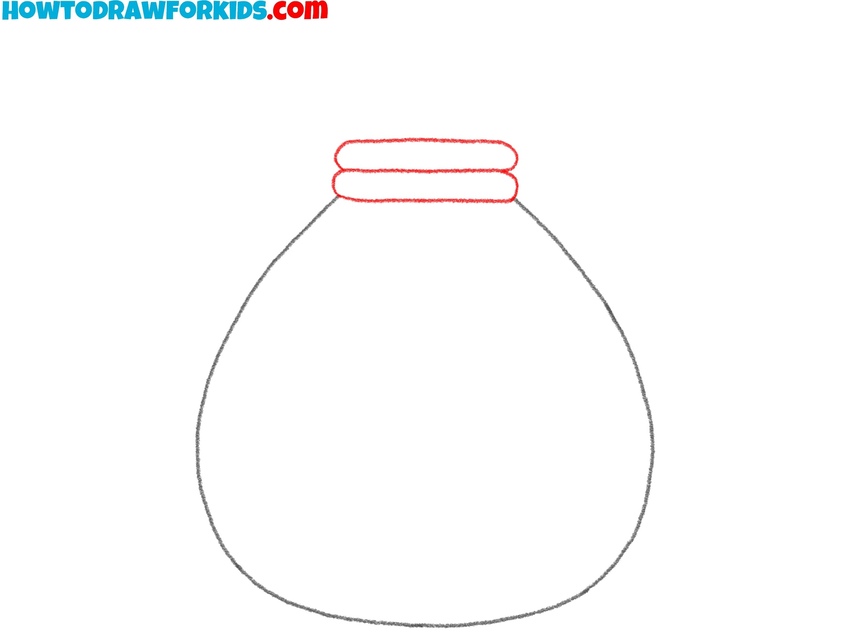
- Sketch the string wrap.
Now draw the tied section near the neck of the bag. Add two or three horizontal shapes stacked above the main bag shape. These lines represent the string securing the bag. You can also vary how tight this section looks by adjusting the width of the section.
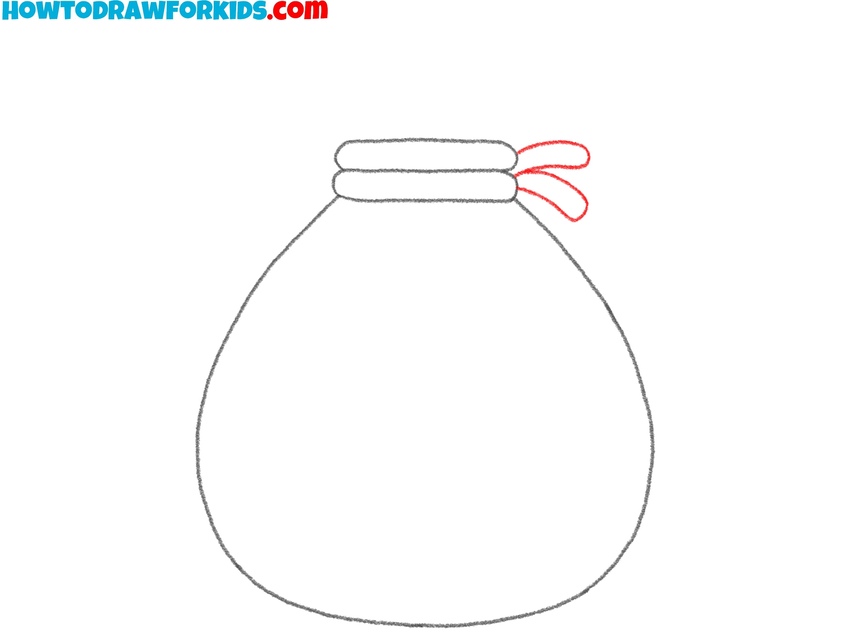
- Draw the money bag string tails.
Next, draw the string ends tied around the neck of the bag, creating two simple shapes coming from the back of the neck part. Another option is to draw a knot with the string ends sticking out. Also, you can draw a small now, if you want to make your money bag drawing link more unique.
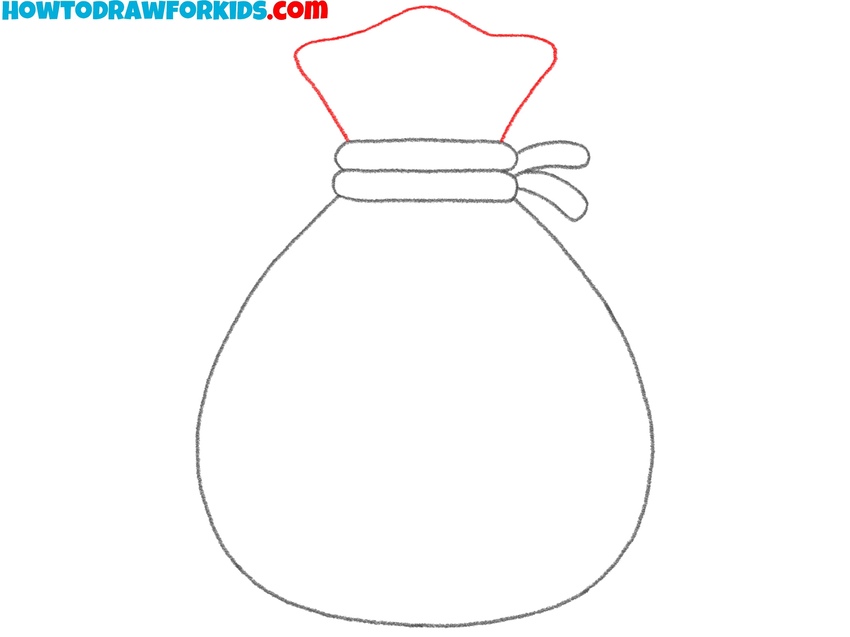
- Draw the money bag top part.
Now complete the top of the bag by drawing the gathered cloth above the tied section, sketching a wide, wavy shape to illustrate fabric folds. You can vary the number of waves. You also can make the waves symmetrical or uneven.
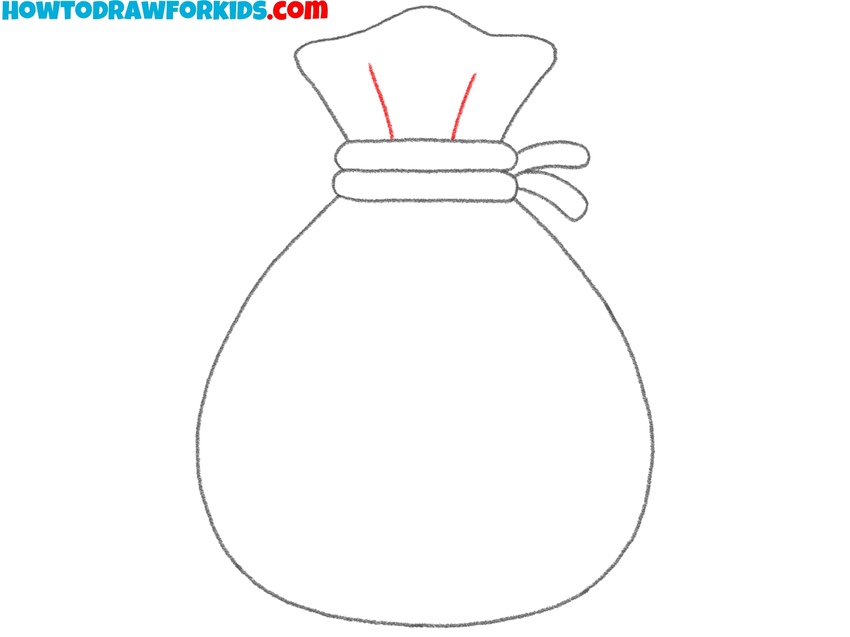
- Add wrinkles to the top section.
To give the gathered fabric more dimension, add a few short lines extending upward from the tied section. You can vary the length and angle of these lines. Or you can add more lines to give your money bag drawing more realistic look. Also, you can add some texture to the string.
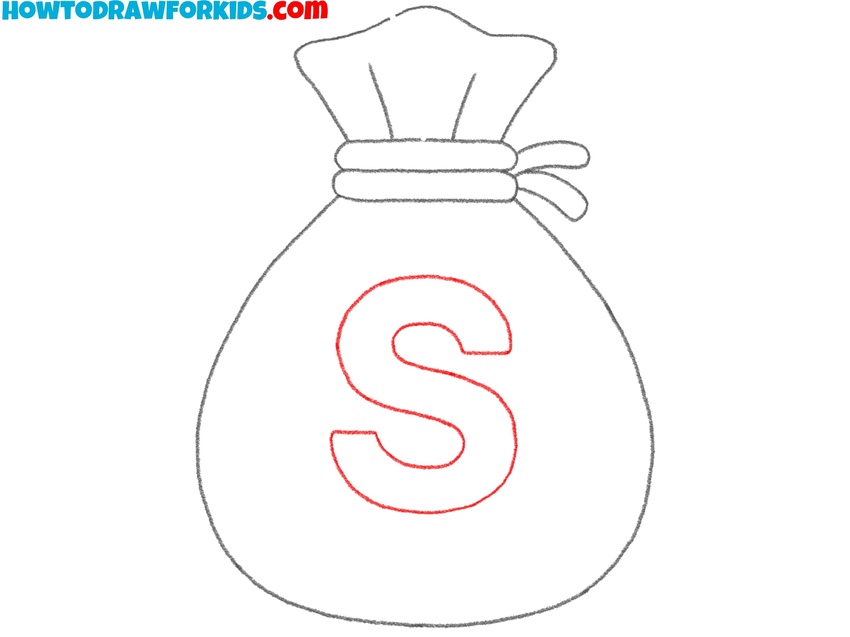
- Sketch the large letter S.
Now draw the outline of the dollar symbol on the front of the money bag, sketching a large “S” shape in the center of the bag’s body. If you want to customize your money bag drawing, you could also replace the dollar sign with another symbol, such as a euro (€), or even a simple coin icon or treasure chest emblem.
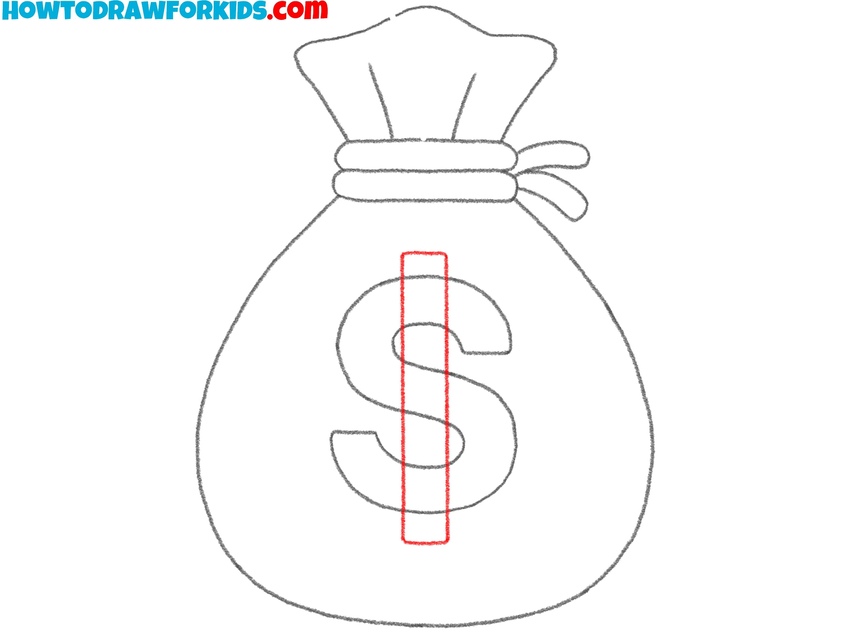
- Add the vertical line to the symbol.
Now complete the dollar sign by adding a straight vertical line through the “S.” This line should be drawn perfectly centered.. Another option is to double the vertical line – some stylized dollar signs use two lines instead of one. You could see such dollar signs in Disney cartoons.
- Clean up the linework.
Now finalize your money bag drawing by tracing the outline of the bag, the tied section, the string, and the dollar symbol. If you’d like, you can thicken the outer contour of the bag. Also, don’t forget to erase all unnecessary guidelines to give your sketch a polished look.

- Color the money bag drawing.
Finally, color your drawing of the money bag, using a soft tan or light brown for a classic canvas sack, or try a darker shade for a leather pouch style. You can also experiment with more unique options. Color the tied section a darker shade or a complementary color.

Conclusion
This tutorial on how to draw a money bag is a very simple and effective way to practice building a recognizable object using simple forms and small details. A money bag is a fun subject because it works in many drawing themes – you can add it to scenes about treasure, banking, cartoons, comics, or fantasy art.
The tutorial also allows for lots of small variations, such as different types of bows, alternate currency symbols, or textured fabric effects. It’s a great example of how small changes can quickly change the tone of an entire drawing.
If you’d like to continue drawing objects that match this theme, try my treasure chest drawing tutorial. Also, you can draw a purse using a similar simplified method.
To find more tutorials like this, follow the Pinterest page, or subscribe to the YouTube channel for video lessons. Also, check out my Instagram and Facebook pages for more art content.