How to Draw Bluey
With just a few curved lines and basic shapes, this tutorial on how to draw Bluey helps you create a cute puppy from the show.

How to Draw Bluey: Introduction
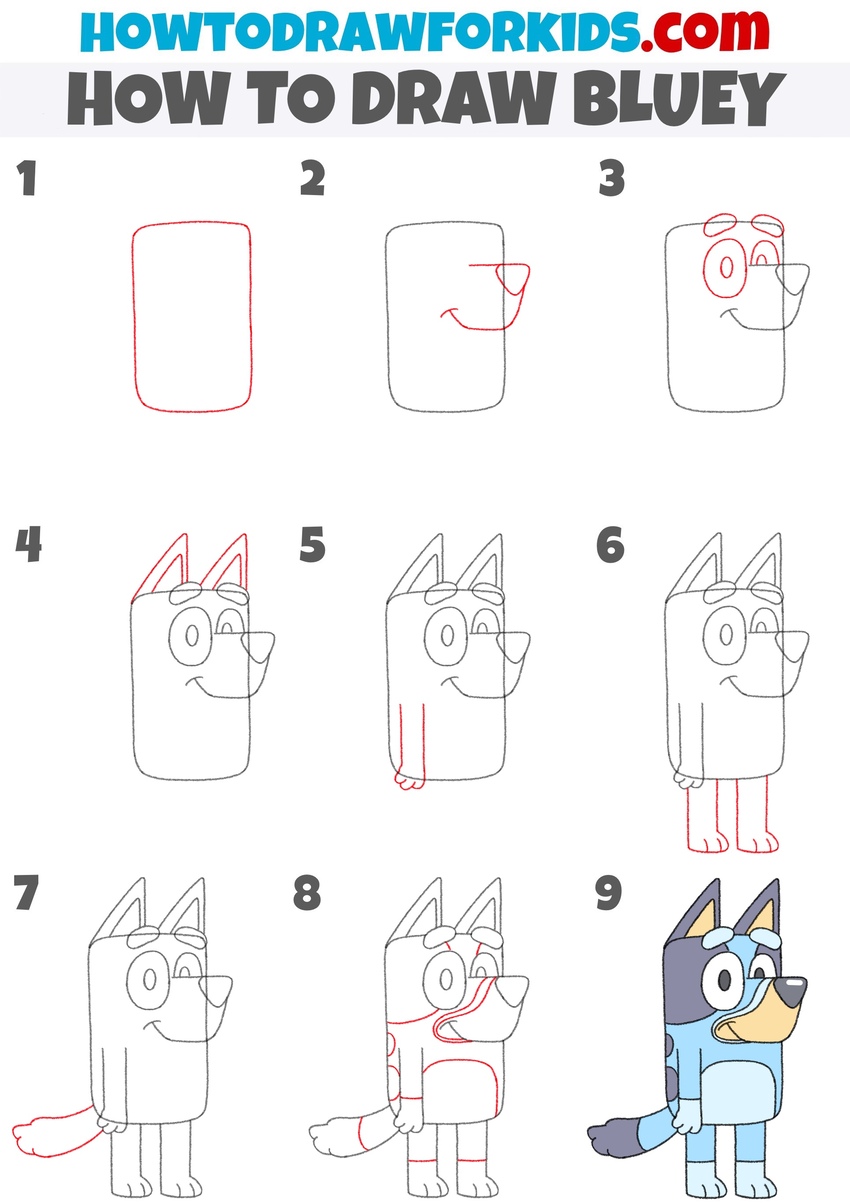
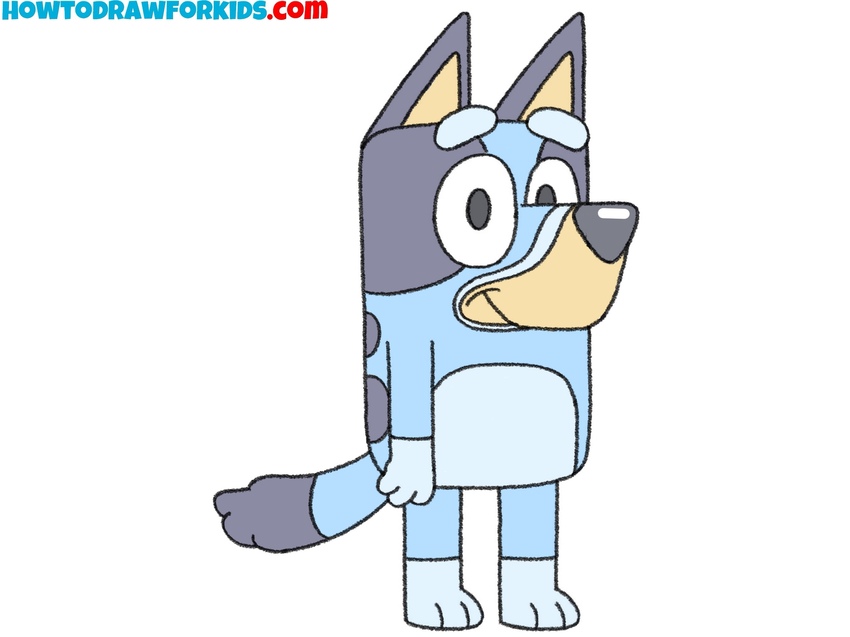
In this fun drawing lesson, you will learn how to draw Bluey step by step. The character you draw will look very cute and funny. There are nine steps in this simple tutorial.
When working with characters like Bluey, it’s important to reduce the design to its key visual traits. The upright posture, the large eyes, and the tall ears are easy to recognize, even without color. By focusing on those base elements first, the rest of the sketch becomes easier to manage.
Bluey’s design uses very basic geometric forms, which makes the character ideal for beginner-friendly drawings. The body is shaped like a soft rectangle, and all features are very simplified. By learning how to draw Bluey, you will understand the basics of creating cartoon characters in the simplest way possible.
Also remember that once you’ve learned how to draw Bluey, you’ll be able to draw most of the other characters from the cartoon as well, since they share similar proportions and follow a similar drawing process.
Bluey Drawing Tutorial
Materials
- Pencil
- Paper
- Eraser
- Coloring supplies
Time needed: 35 minutes
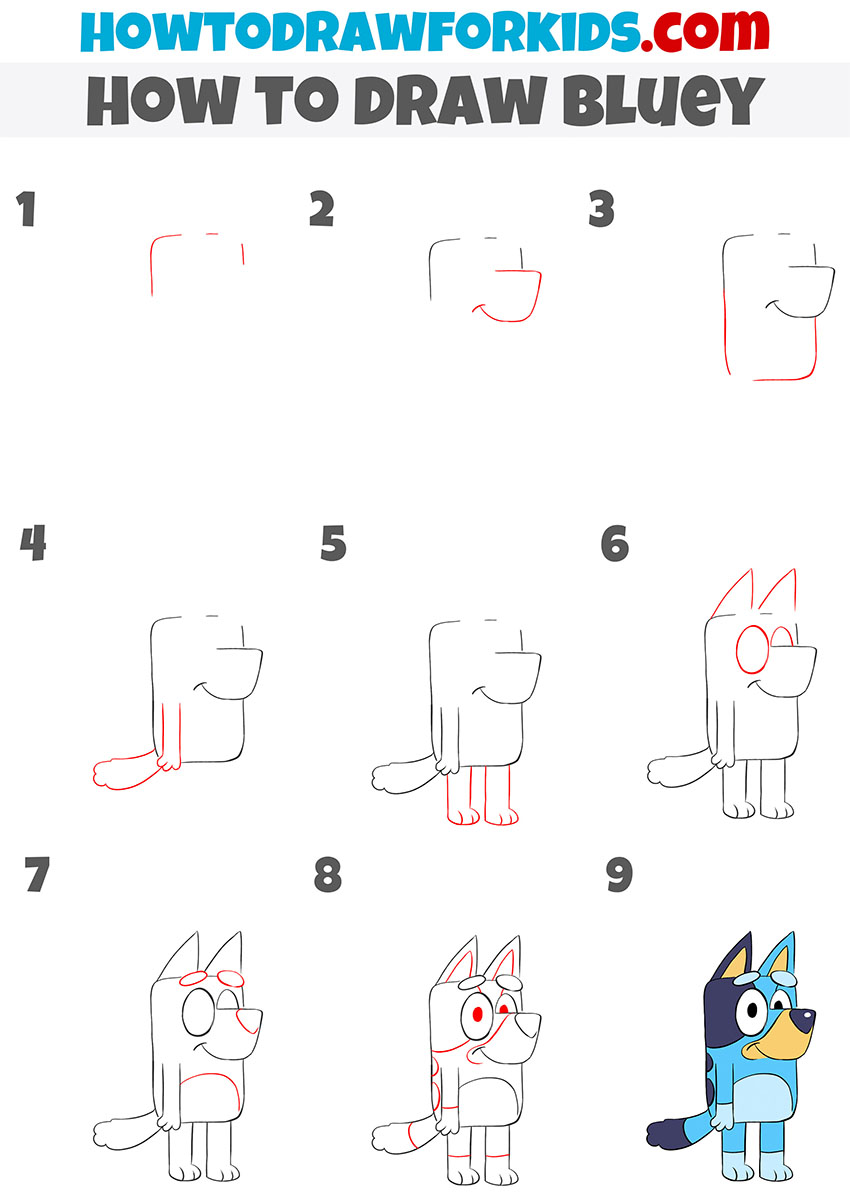
How to Draw Bluey
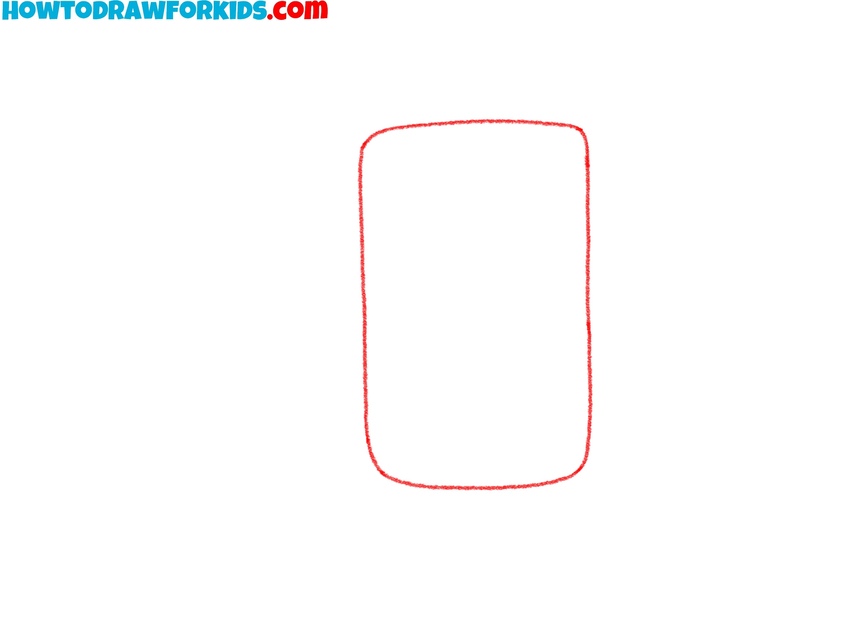
- Draw Bluey’s body base.
Sketch a tall rounded rectangle to form the overall body of Bluey. Try to keep both sides symmetrical. As always, it’s better to draw this shape lightly at first, allowing room for correction. Make sure there’s enough space above and below the rectangle for features like ears and feet that will be added later.
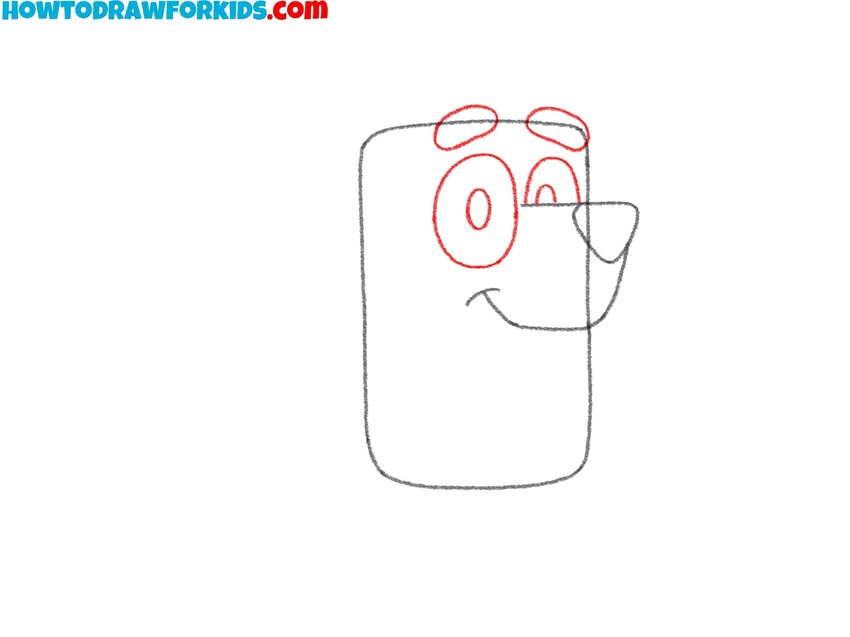
- Sketch the snout, nose, and mouth.
Now, using a long, smooth line, draw Bluey’s muzzle, ending with a nose at the front. The bottom part of the muzzle line will form the puppy’s mouth, curved into a cute smile. Keep the curve of the smile smooth and simple. Leave enough room above for the eyes and eyebrows in the next step.

- Draw Bluey’s eyes and eyebrows.
Now add two large ovals for the eyes, placed next to each other above the snout. Keep both eyes symmetrical and rounded. Inside the ovals, draw small pupils near the center. Then sketch two small curved shapes above the eyes to represent the eyebrows.
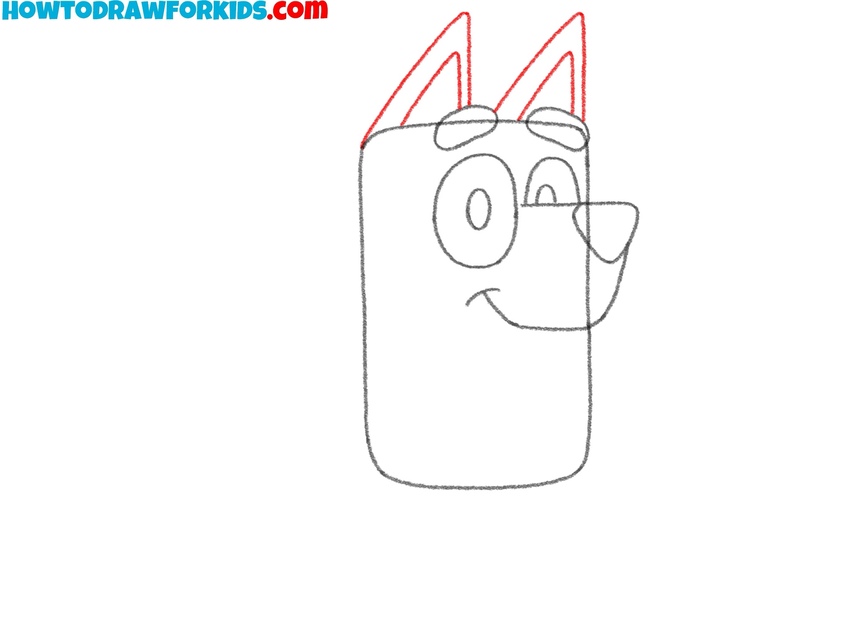
- Sketch the character’s ears.
At the top of the head, draw two triangle-like shapes for the ears. These should be tall and pointing upward. Keep both ears the same size and position them symmetrically on either side of the head. Inside each ear, sketch a smaller triangle to indicate the inner ear details.
- Draw Bluey’s arm and paw.
Next, add the arm on the left side of the body. It should begin just below the head, and extend downward in a simple curved shape. End the line with a rounded paw shape, using three small bumps for the fingers. Keep the arm close to the body.
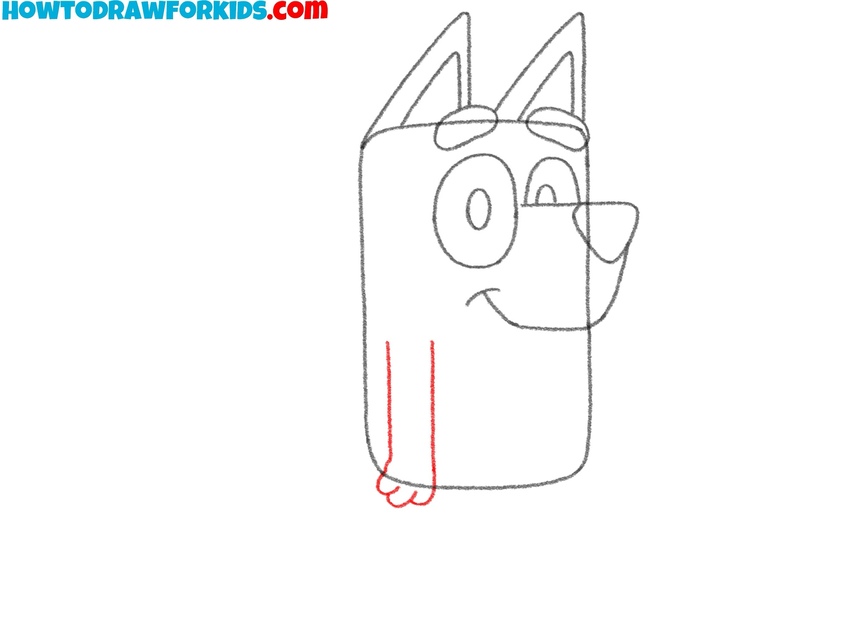
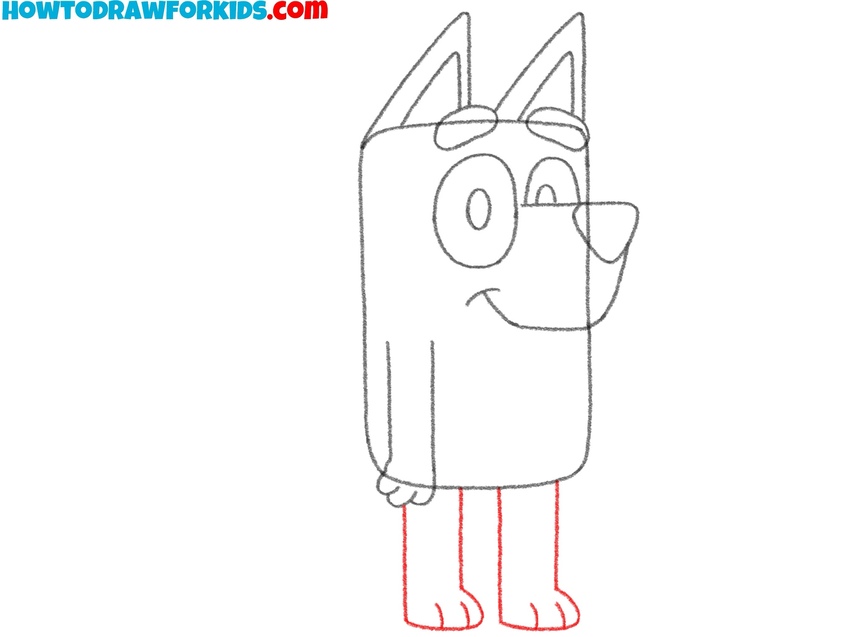
- Sketch the legs of the characters.
Now draw the legs at the bottom of the rectangle. Each leg is a straight, vertical shape with a rounded paw at the end. Leave a small space between the legs to show separation. The height and width of both legs should match. Avoid making the paws too detailed – stick to simple forms.
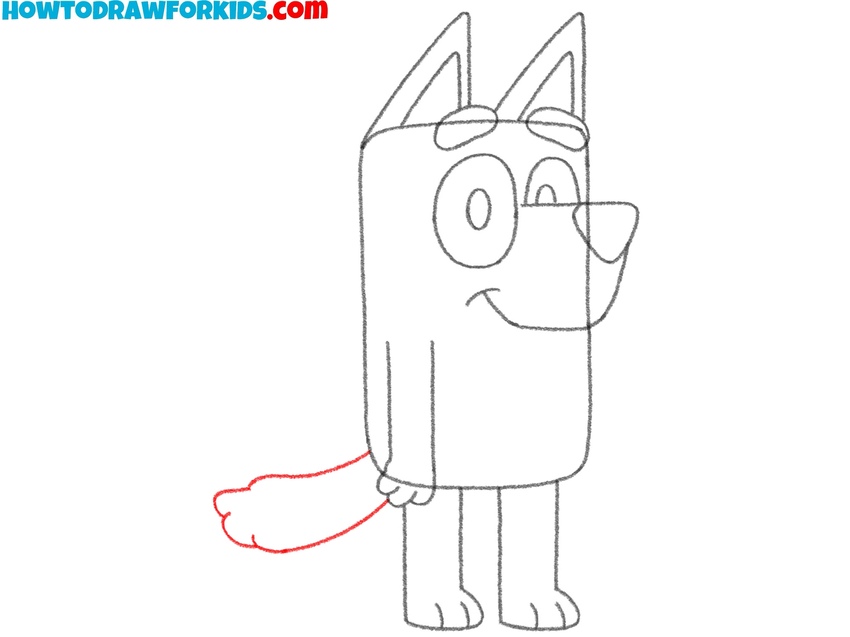
- Draw Bluey’s tail shape.
Draw a fluffy tail coming from the lower left side of the body. It should be wide at the end and taper slightly at the base. Use a wavy line to give the tail a soft, furry look. Avoid sharp points or too many jagged lines. Keep the base of the tail at the hand level.
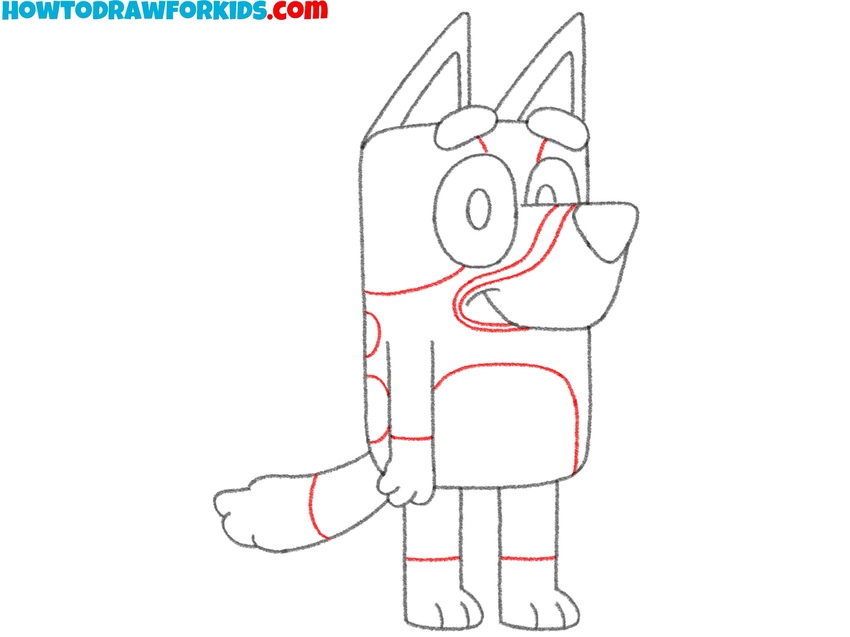
- Add the markings on the body.
Now, erase the guidelines from your Bluey drawing. Then, start sketching markings with the curved patch that covers part of the snout and around the eyes. Draw a rounded shape near the chest and place small patches on the arms, legs, back, and tail. Don’t overdo the lines – keep them very simple and clean.
- Add colors to Bluey.
Color Bluey in a combination of light and dark blue colors. Use reference if needed to place each color section correctly. Color the pupils and nose black or light gray, leaving a small highlight at the tip of the nose. Use a sand color for the inside of the ears and the bottom of the muzzle.
Simple Bluey Drawing Tutorial
This version of the tutorial on how to draw Bluey uses more simple shapes compared to the previous version. The sequence of steps are also very different from the main one. Here you will not use any guidelines or additional construction lines.
Sketch simple smooth lines for the top of the head. Draw a rounded rectangular shape on the front side for the muzzle, finishing it with a short upward curve to form the mouth. Complete the body by extending the sides down and rounding the bottom corners. Draw a simple tail extending from the left with three small humps.
Sketch the front leg as a vertical shape with three toes at the bottom. Add the hind legs below the torso using similar shapes. For the face, draw two large ovals for the eyes, close together. Add the ears using two tall triangles. Finish with eyebrows, pupils, a nose, and a few simple curved lines to separate color zones. Color the drawing according to the reference.
Conclusion
Now that you’ve followed this step-by-step guide, you should have a finished drawing of Bluey built from very basic shapes. This tutorial helps reinforce the importance of keeping forms simple and sketching recognizable features. With just a few clear lines and curves, you’ve created a complete cartoon character that’s easy to adjust and redraw.
Practicing with characters like Bluey is a good way to get more confident with shapes, proportion, and symmetry in cartoon drawing. As I’ve said above, you can draw any other character from the series using the knowledge from this tutorial.
If you’d like to sketch animals like a real professional artist, visit my puppy drawing tutorial, which also relies on simple simplified structure. And to work more on coloring, check out the Bluey coloring pages collection. Let me know in the comments if you have questions or suggestions, and don’t forget to share your finished work.

Thank you for this useful tutorial. I’ve been learning to draw my kid’s favorite characters for when we doodle in his sketch book together, he’s 1.5. And just FYI the character Bluey is a girl.
That’s wonderful, Bridgette. Drawing with your child is a great way to spend time together, and thank you for the note about Bluey!
This app is wonderful.
I’m glad you’re enjoying the tutorial.