How to Draw a Knight’s Helmet
In this art lesson, I will show you how to draw a knight’s helmet for kids. It will be a very simple step-by-step drawing tutorial.
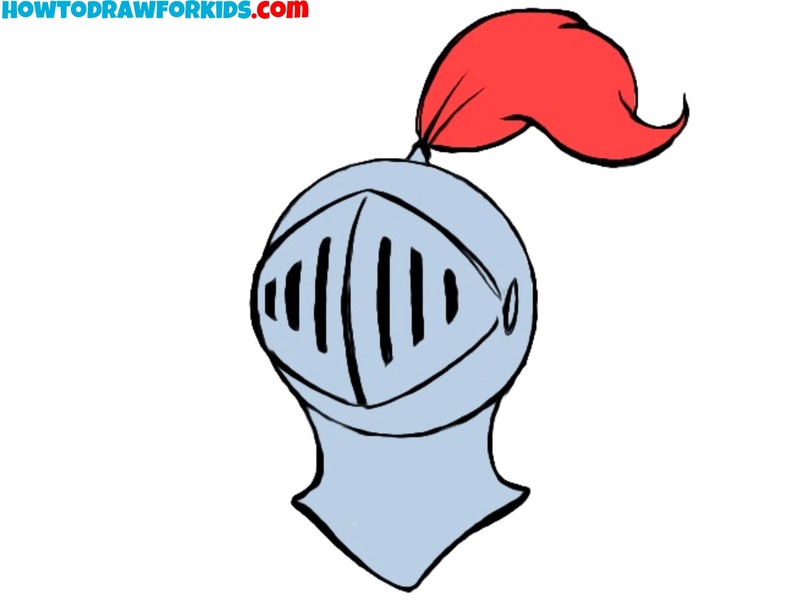
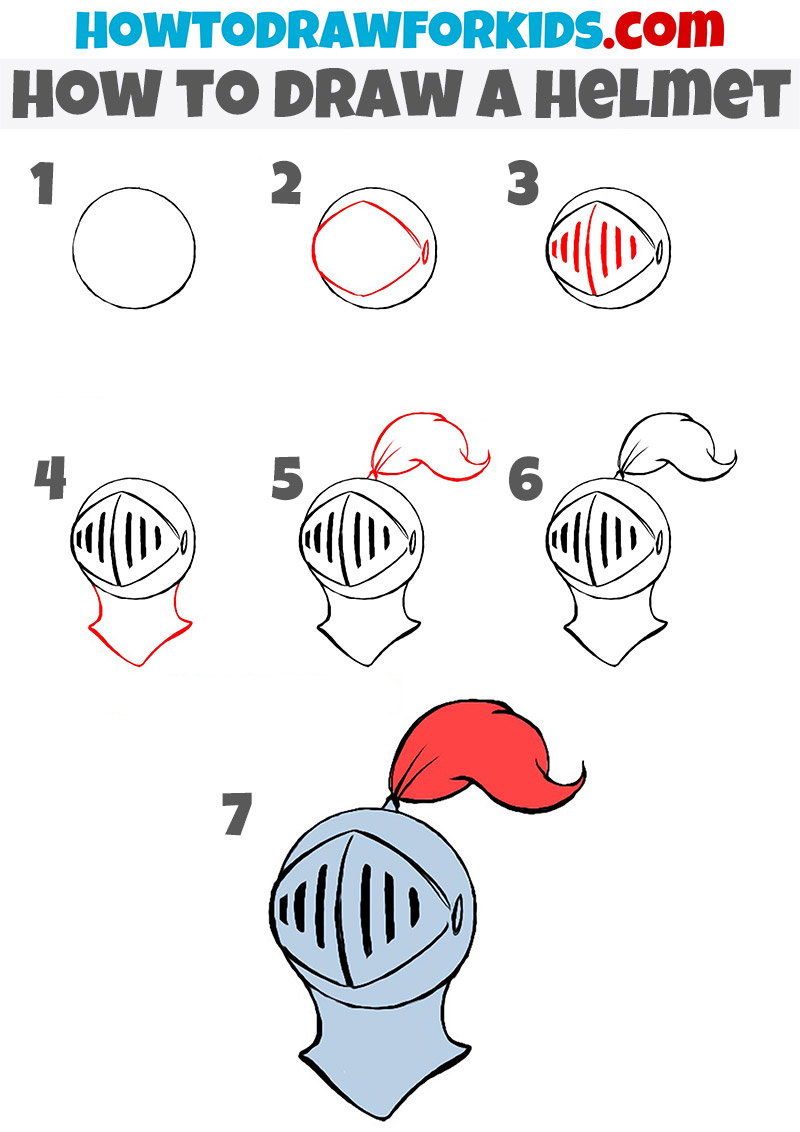
I tried to make this tutorial on as simple as possible. The entire sketching process consists of seven extremely simple steps.
How to Draw a Knight’s Helmet: Introduction
So, in this lesson on how to draw a knight’s helmet for kids, I will show you the simplest and easiest way to learn how to draw the armor of warriors.
This drawing lesson will consist of seven super simple steps, and will move the entire drawing process from simple to complex. That is, at the beginning you will draw a circle, and at the end of the drawing lesson you will receive a full-fledged knight’s helmet drawing.
In the process of drawing a helmet, a young artist will be able not only to get acquainted with how to depict a given object but also to learn how to create smooth lines.
In addition, this lesson teaches you how to correctly depict a turn of a person’s head, without being distracted by the details of the face.
So, if all the art supplies are ready, then it’s time to start the lesson.
Knight’s Helmet Drawing Tutorial
Materials
- Pencil
- Paper
- Eraser
- Coloring supplies
Time needed: 35 minutes
How to Draw a knight’s Helmet
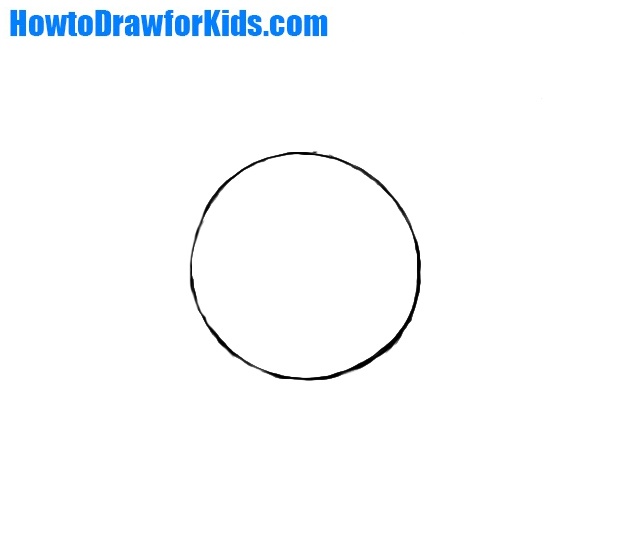
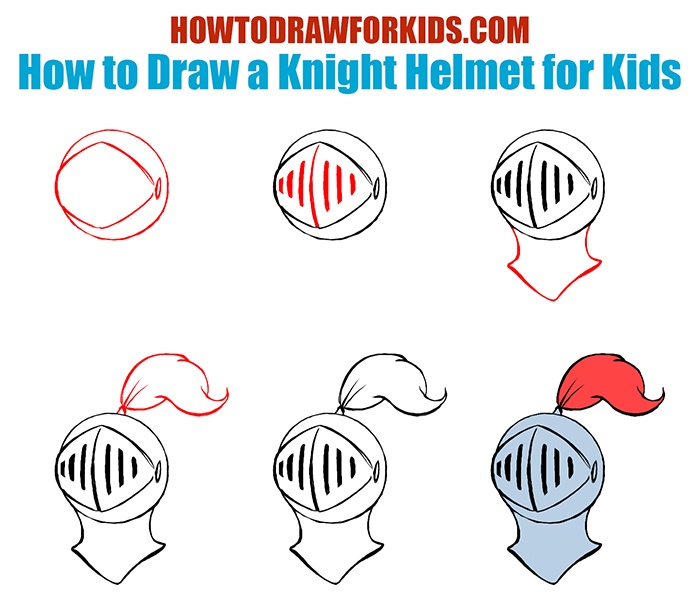
- Draw the outline of the knight’s helmet.
First, draw a circle as we do when we draw heads. This shape should be drawn lightly so that any necessary adjustments can be made easily. You can make the oval slightly wider at the sides to give it a rounded appearance, resembling the basic form of a helmet.
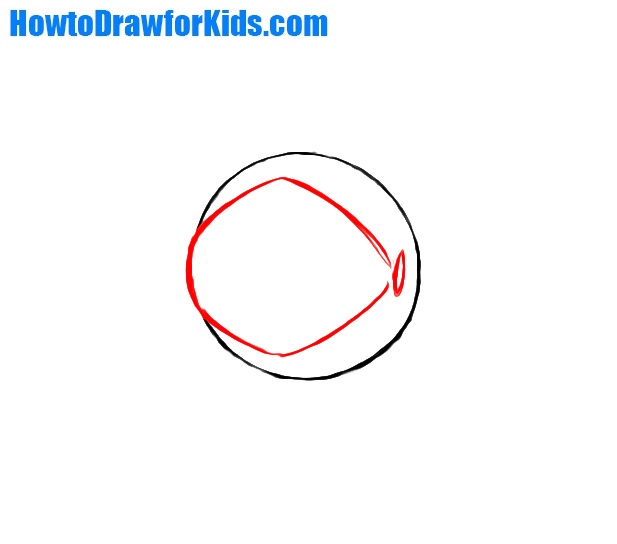
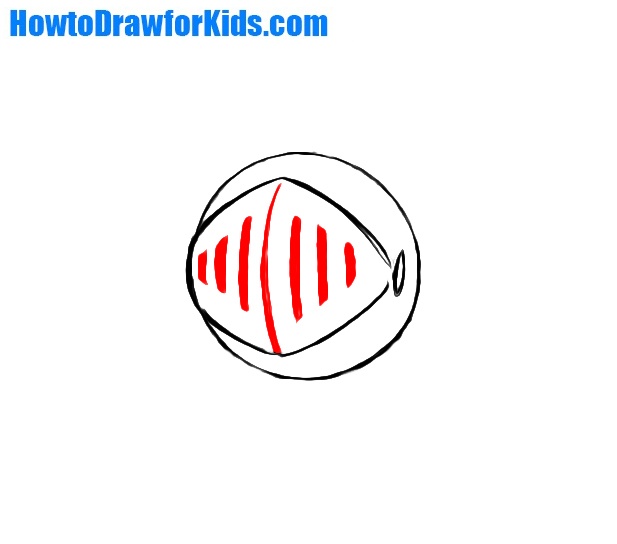
- Sketch the visor and circular hinge.
Inside the oval, sketch two curved lines to represent the faceguard’s contour. These lines should follow the curvature of the oval, creating a sense of volume. On the side of the knight’s helmet, draw a rivet that holds the faceguard.
- Draw the openings in the visor.
Within the faceguard area, draw a series of vertical slits. These slits allow ventilation and visibility for the knight. Make sure the slits taper slightly towards the top to match the rounded shape of the helmet. Instead of vertical lines like in my example, you can draw round holes.
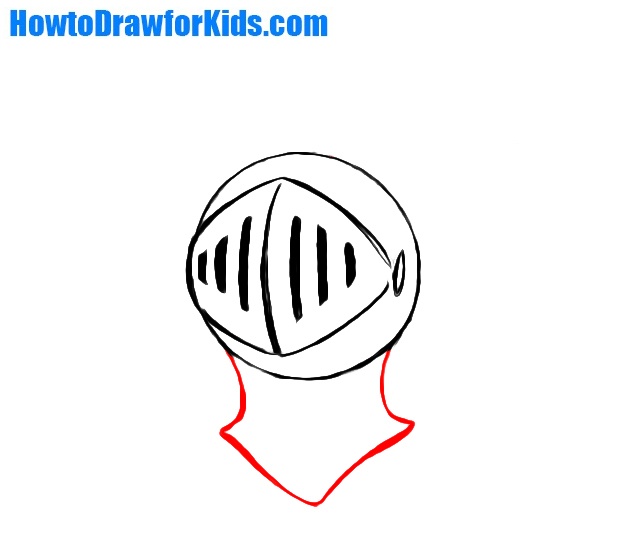
- Create the gorget.
The gorget is the part that covers the knight’s neck and upper chest. Below the oval, extend two curved lines downward to form the neckguard. These lines should flare out slightly at the bottom, creating a protective shape that wraps around the knight’s neck.
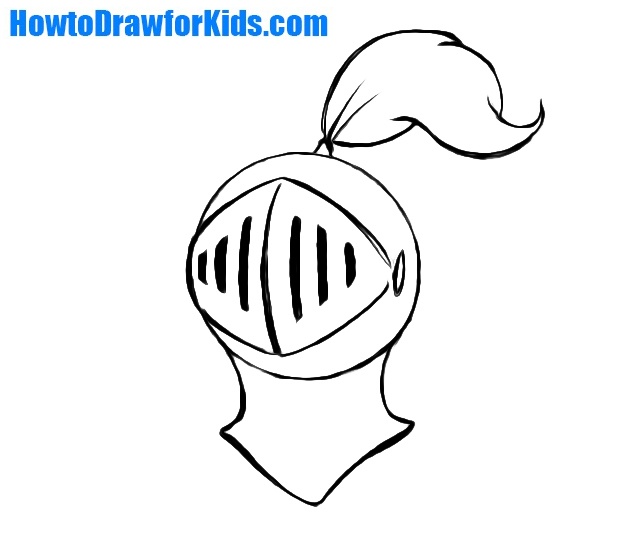
- Draw the plume.
On top of the helmet, draw a wavy, flowing shape to represent the helmet’s crest. This decorative element often signifies the knight’s rank or allegiance. Start by sketching the base of the crest, attaching it to the top center of the helmet. Then, let the lines curve and flow upwards, mimicking the appearance of a plume.

- Add some finishing touches to the knight’s helmet.
Review your drawing and darken the main lines to finalize the helmet’s shape. Erase any unnecessary or overlapping lines to clean up the drawing. Ensure all elements – the faceguard, ventilation slots, neckguard, and crest – are well-defined and proportionate.
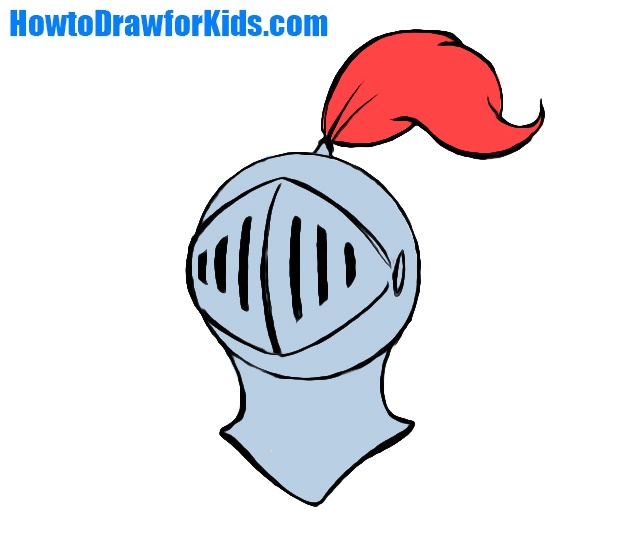
- Color your knight’s helmet drawing.
Use shades of grey or metallic tones for the helmet to give it a realistic metal appearance. Color the crest with a bright, contrasting color like red to make it stand out. You can also add shading to the helmet, focusing on areas like the faceguard, neckguard, and under the crest.
Improving Your Artwork
Knights’ helmets come in a variety of shapes and types. It depends both on the era in which a particular knight’s helmet was made, and on the country and even the master who made it. And of course, this depends on the customer, who could order either the simplest helmet or a helmet with drawings, engravings, etc.
In this step by step drawing lesson I showed you how to draw a very simple knights’ helmet. But you can of course go deeper into the topic by drawing additional details.
For example, you can add patterns that were often drawn on the helmets of noble knights.
Additionally, you can change the design of the visor to make it more complex. For example, some knights made a visor with their own face, and even an elaborately engraved mustache.
Additional Materials
Helmet – a means of protecting the head of a warrior (in our case a knight). Helmets have been known since ancient times. They were first made from leather, and then from copper and steel. Such an element of armor was widespread in antiquity, in the Middle Ages (it was this helmet that we drew today) and received a new life in the 20th and 21st centuries.
So, as always, at the end of the article, I provide a shortened version of the lesson. It will come in handy if you want to draw without the Internet or print it out for your children or students.
And also a PDF version of the lesson with all possible additions, including this knight drawing instruction, coloring page, tracing worksheet, and grid drawing worksheet.
How to Draw a a Knight’s Helmet: Video Tutorial
Conclusion
So, the next drawing lesson on the Howtodrawforkids.com website is completed, and I really hope that it was really interesting for you. I really hope that after this simple guide you learned how to create beautiful knight helmet drawings.
Do not forget to share this lesson, and subscribe to Howtodrawforkids.com on social networks, so as not to miss new lessons.
Could you please create a tutorial on “ How to Draw a Uruk Hai “ for Kids on May 7, 2022?
I’ll keep this drawing idea for my future tutorials.