How to Draw a Bat
In this tutorial I’m going to show you how to draw a bat in nine really simple steps. I’ll also introduce you to three different alternative techniques for drawing a bat.
How to Draw a Bat: Basic Information
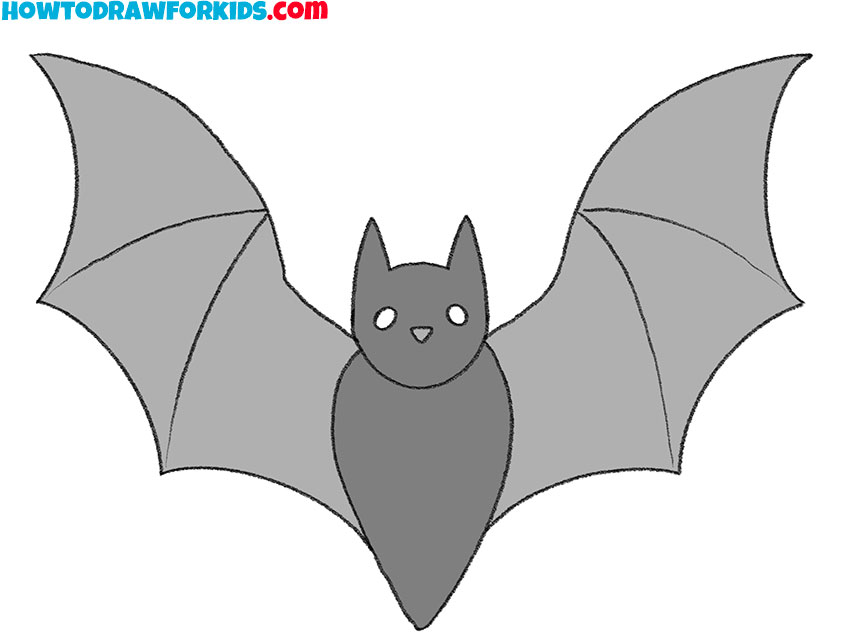
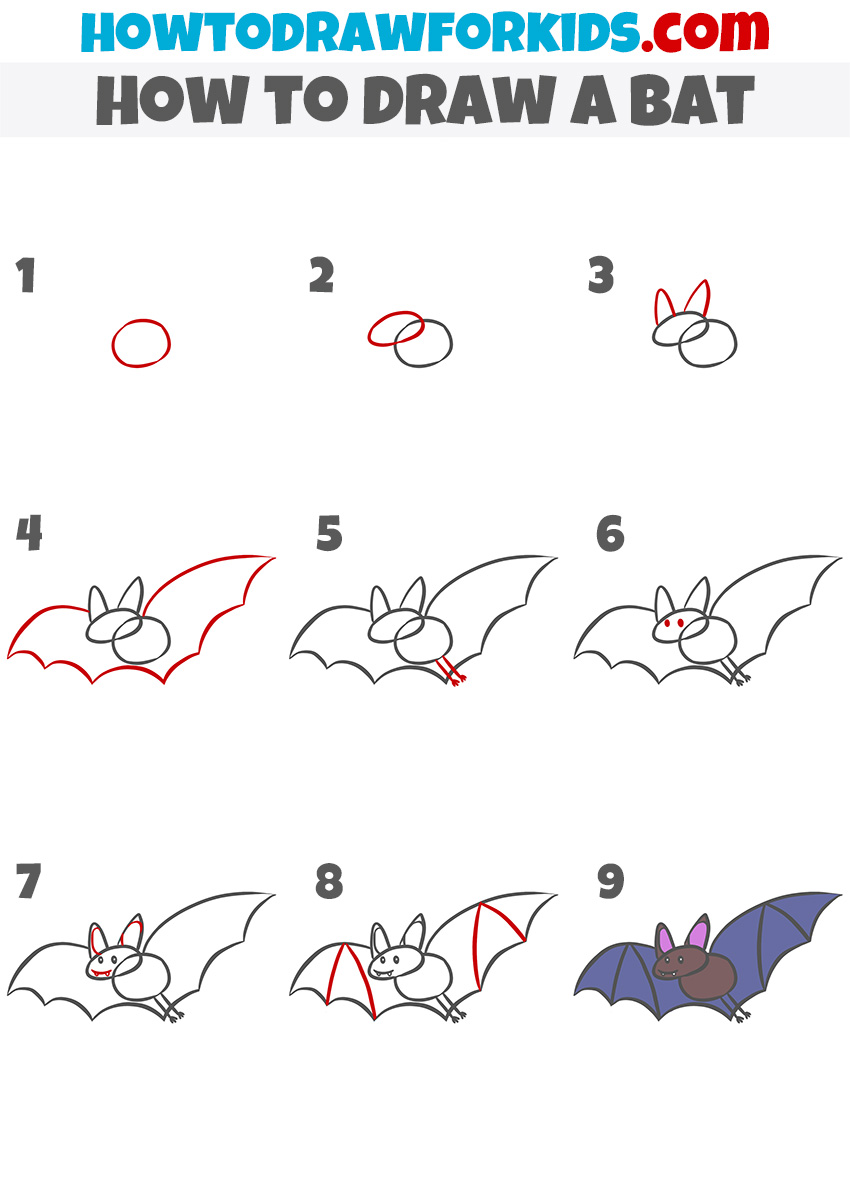
So, in this lesson, I will demonstrate you how to draw a bat. This will be a fairly simple tutorial because I used a very simplified drawing style. The basic steps look like drawing the simplest geometric shapes.
We’ve envisioned the bat’s body as two small geometric shapes, resembling the form of a large beetle or another insect. Despite this simplification, we’ve ensured that the proportions between the body and wings are accurately maintained.
Colors play a crucial role in this process. Given the simplistic style, we won’t be incorporating shadows. You can use just a few highlights for the eyes. However, the color scheme is vital, and we’ll be putting significant effort into getting it just right.
You can use this tutorial as part of a larger Halloween-themed painting or other art project, or even incorporate it into a Batman comic or another fantasy story.
Bat Drawing Tutorial
Materials:
- Pencil
- Paper
- Eraser
- Coloring supplies
Time needed: 30 minutes
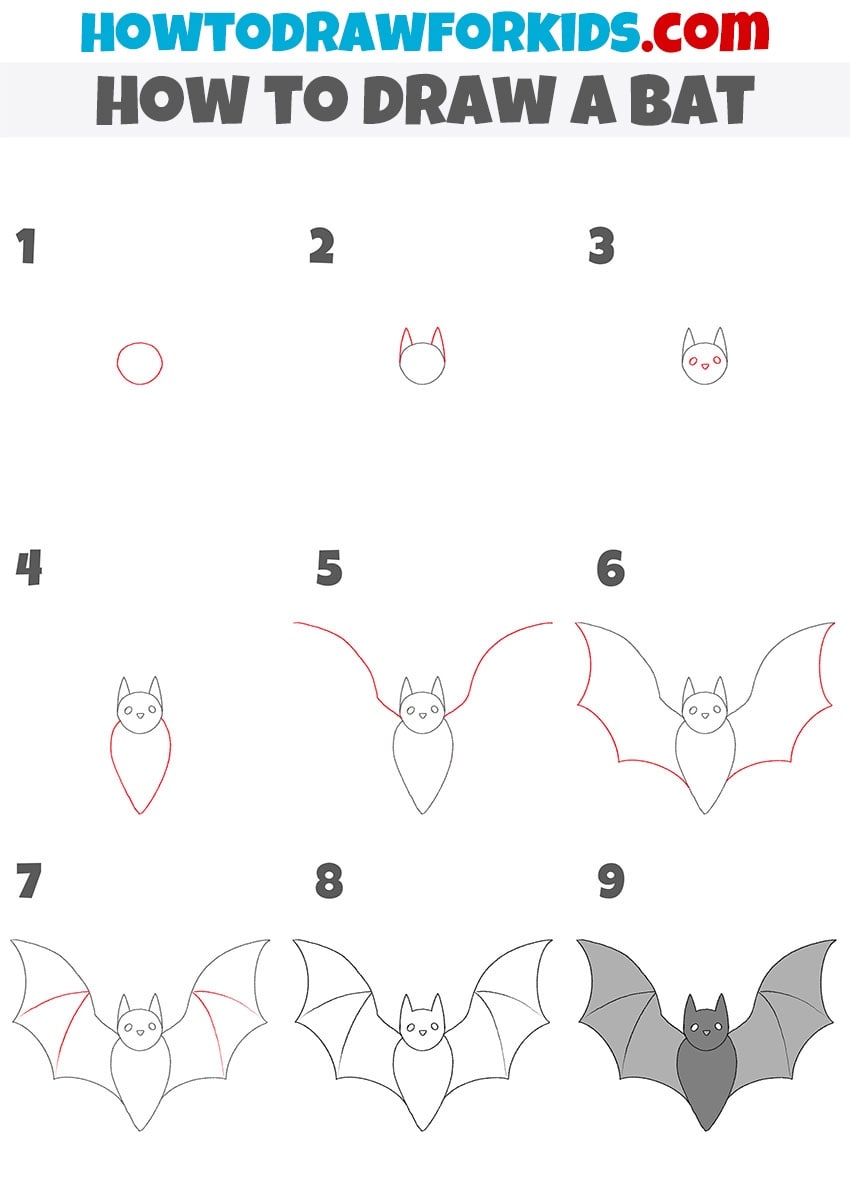
How to Draw a Bat
- Draw the head of the bat.
Start by drawing a simple circle for the bat’s head. This will serve as the base of the head and provide a foundation for the rest of the bat drawing. Keep the circle light and not too dark, as you will add more details around it in the upcoming steps.

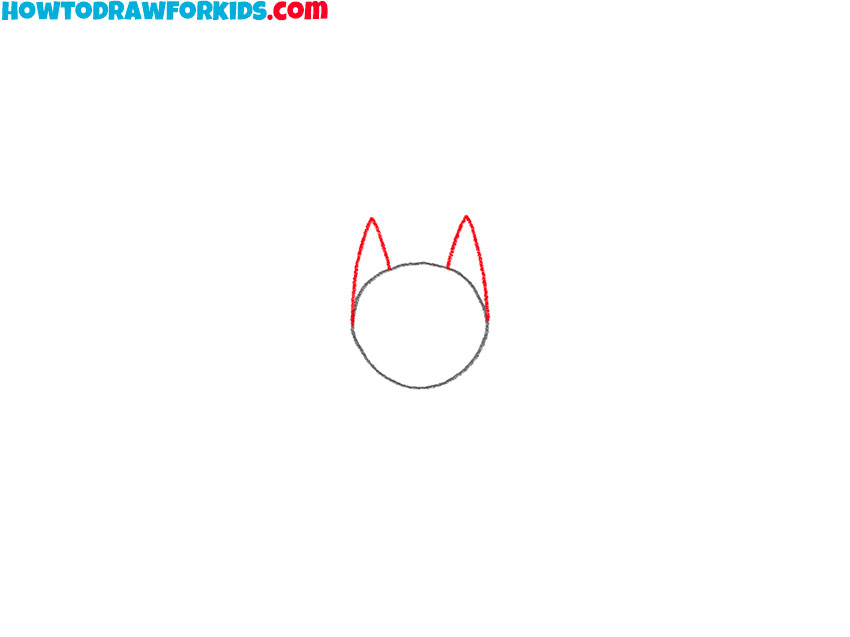
- Add the bat’s ears.
Next, add the bat’s ears by drawing two pointed, triangular shapes on top of the circle you drew in the first step. These triangles should be slightly angled outward. The ears should be about half the height of the circle, with the base of each triangle touching the top edge of the circle.
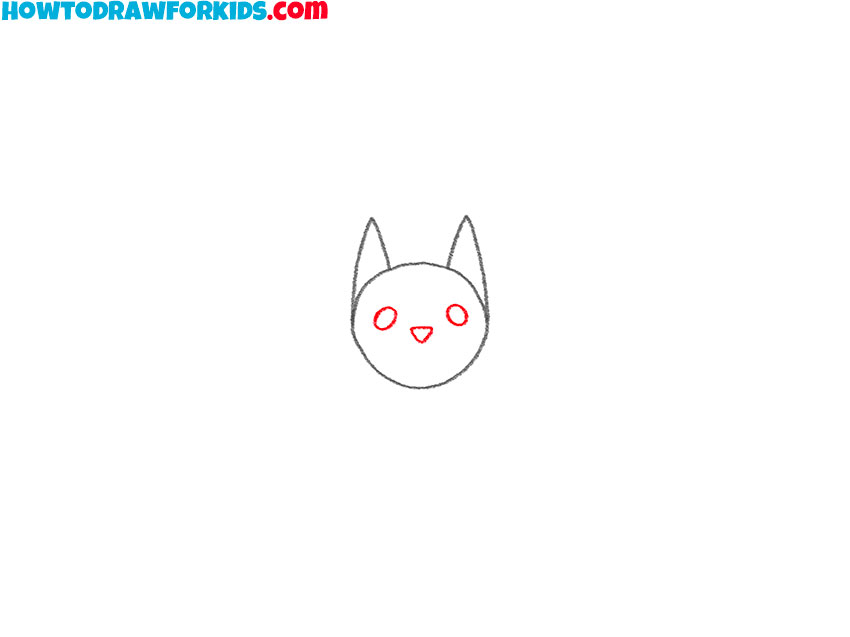
- Draw the eyes and nose.
Inside the circle, draw two small, oval eyes near the center, evenly spaced apart. You can add tiny dots in the center of each oval for pupils. Below the eyes, draw a small triangle for the bat’s nose. You can also draw a mouth, giving it a friendly or neutral expression.
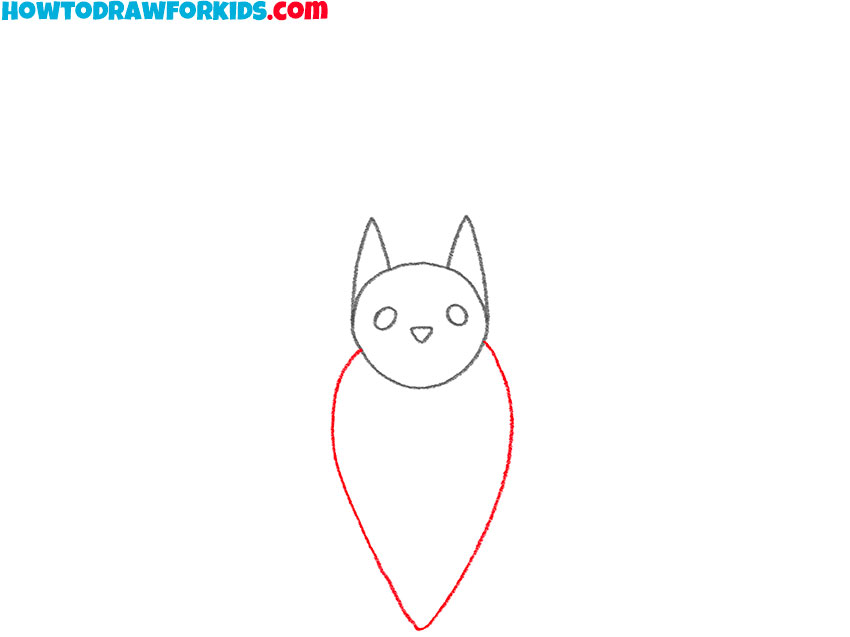
- Outline the body.
Extend the bat’s form by drawing the body directly below the head. Start by sketching a tapered oval shape that connects to the bottom of the head. This shape should be wider at the top, near the head, and gradually narrow as it goes down, coming to a rounded point at the bottom.
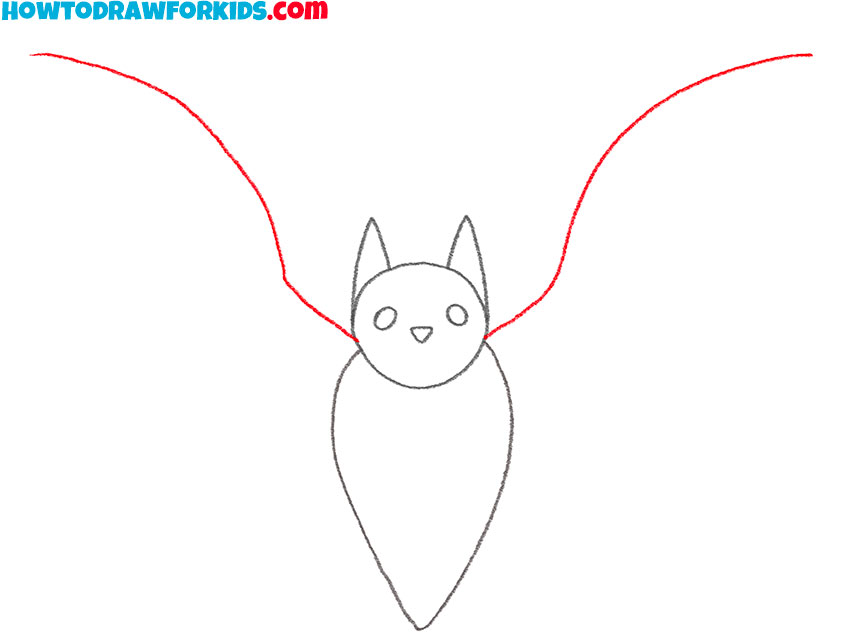
- Sketch the top edge of the wings.
With the body in place, it’s time to begin outlining the bat’s wings. Start by drawing two long, curved lines extending outward from the top sides of the bat’s head, curving slightly upward. These lines will serve as the primary guide for the wings’ shape and span.
- Add the bottom edge of the wings.
Starting from the outer tip of each curved line you drew in the previous step, draw a series of small, connected, U-shaped curves that extend back toward the body. These curves should be evenly spaced and should follow the natural curve of the wing, creating the distinctive scalloped pattern of a bat’s wings.

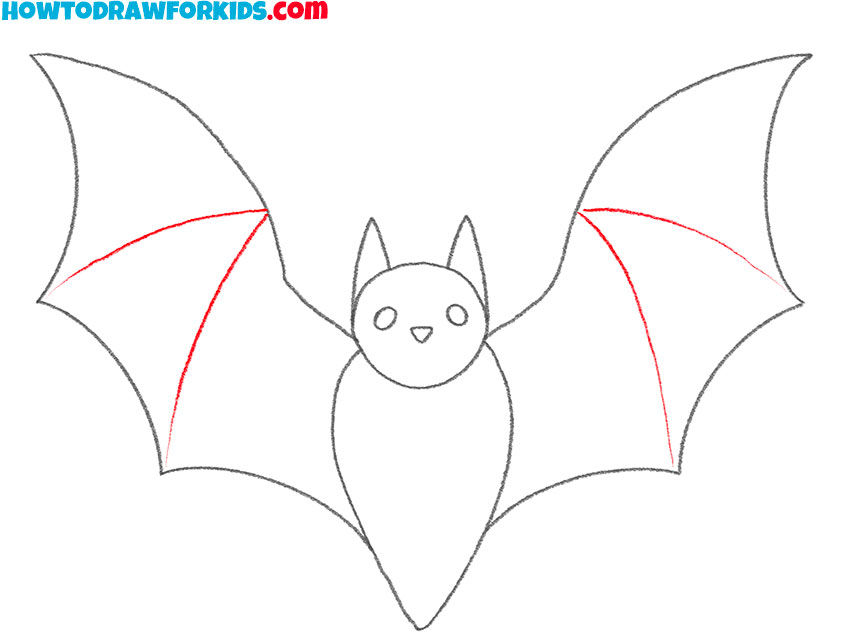
- Detail the wings.
In this step, you’ll add the bat’s wing fingers, which are the elongated bones that support the wing membrane. Starting from the point at the upper middle parts of the wings, draw three or four long, slightly curved lines extending downward.
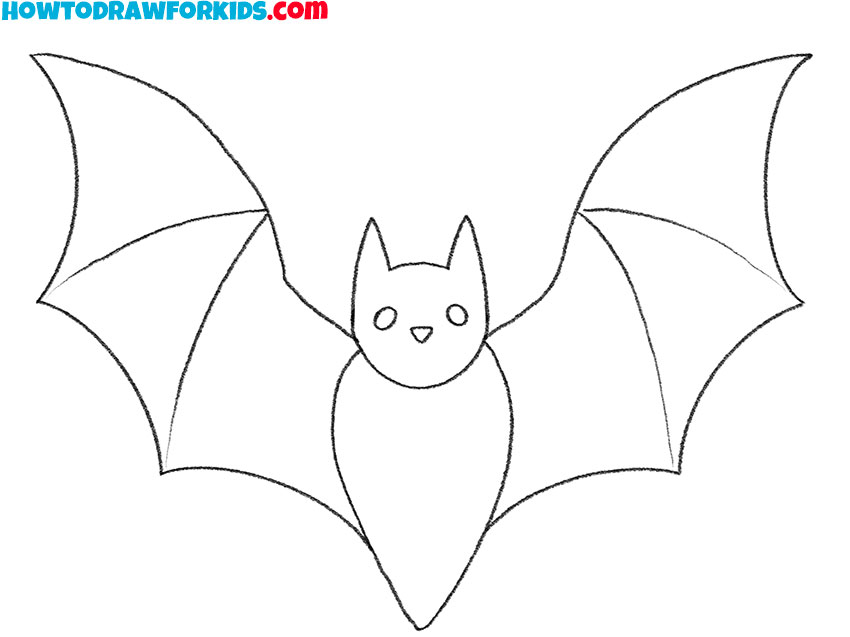
- Refine the bat shape.
Go over the lines you’ve drawn, making any necessary adjustments to the shape of the wings, head, and body of the bat. Check the symmetry of the wings and the positioning of the facial features. If needed, darken the main lines to make the bat drawing more defined and prepare it for the final touches.
- Give the bat a finished look.
Begin by filling in the body and head with a dark, solid color, typically black or a deep gray, to represent the bat’s fur. Next, color the wings using a slightly lighter shade of gray or a muted black to create contrast between the body and the wings. You can also add a touch of color to the eyes, typically with a light yellow.

Additional Content
So, the lesson of drawing a bat is completed. Remember to download the PDF version of this guide. In addition to the instruction, you will find a coloring page, tracing worksheet, and grid drawing worksheet. You can use this pdf even when the internet is off if you download it in advance.
Alternative Ways to Learn How to Draw a Bat
As I mentioned, there are several ways to draw a bat. I’ve already demonstrated the most basic method. While there are countless techniques for drawing, I’ve gathered a few of the simplest and most accessible ones for beginners. Feel free to experiment with different methods and choose the one that works best for you.
Alternative Bat Drawing Technique
This style differs from the previous one by being less schematic but more cartoonish, with a focus on bold lines. The bat’s body and head are depicted as simple overlapping ovals. The wings are drawn with smooth, flowing lines and a scalloped bottom edge that is less sharp and more exaggerated than in the previous tutorial. The facial features, like the eyes and mouth, are large and expressive.
To draw this bat, start by sketching two overlapping ovals, one for the head and one for the body. Add two large, pointed ears at the top of the head, and then draw wide, curved lines extending from the body to form the wings. Next, create the scalloped edges at the bottom of the wings for a classic bat shape. Draw two small lines below the body to represent the legs. Add large, expressive eyes and a smiling mouth to the face. Finally, complete the drawing by coloring the bat with dark and vibrant tones.
Alternative Bat Drawing Technique 2
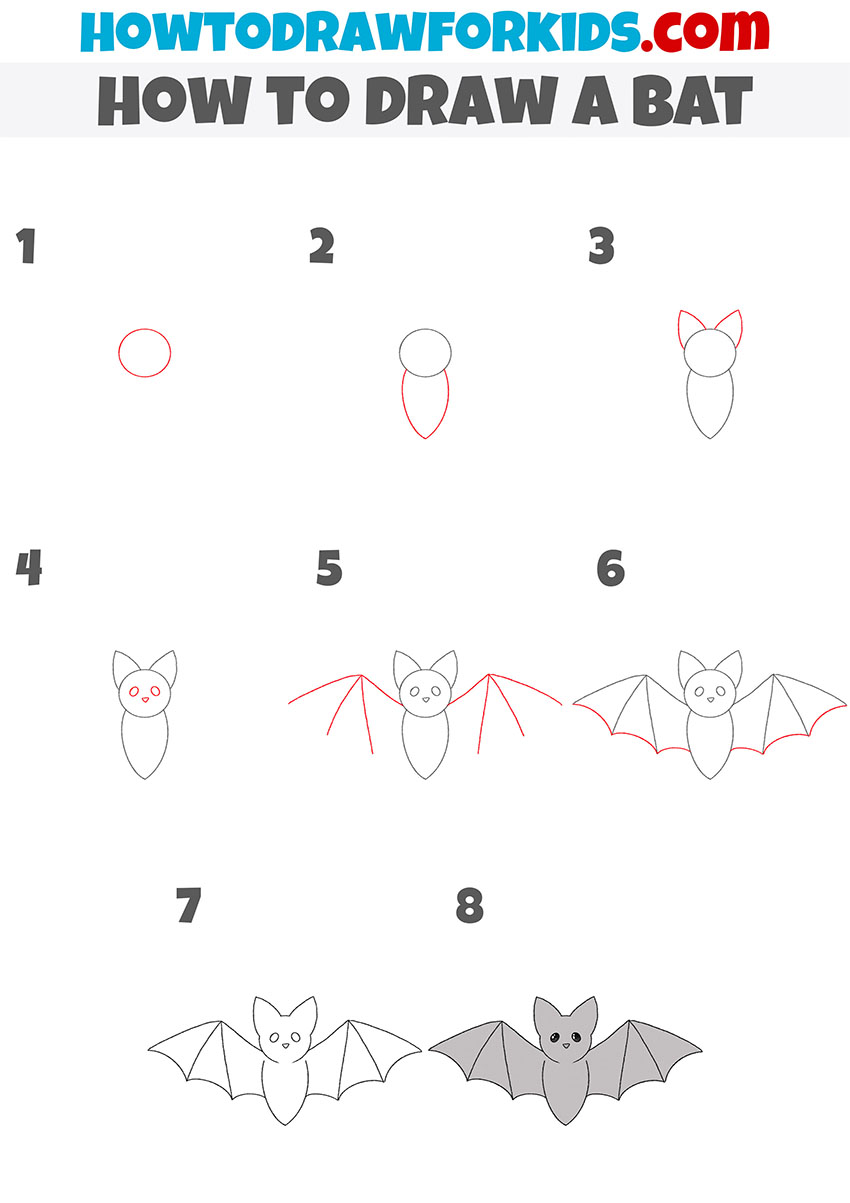
To draw a bat using this technique, begin by sketching a small oval near the center of the page for its head. Below this, draw a larger oval or teardrop shape for the body, ensuring they overlap slightly. Next, add two triangular shapes on the head’s top to form ears. Then, place two small circles within the head for eyes.
Extend two curved lines outward from each side of the body to outline the wings, connecting them to the torso with straight lines for the membrane. Complete the wing shapes with scalloped lines, add a mouth beneath the eyes, and finish with coloring.
Alternative Bat Drawing Technique 3
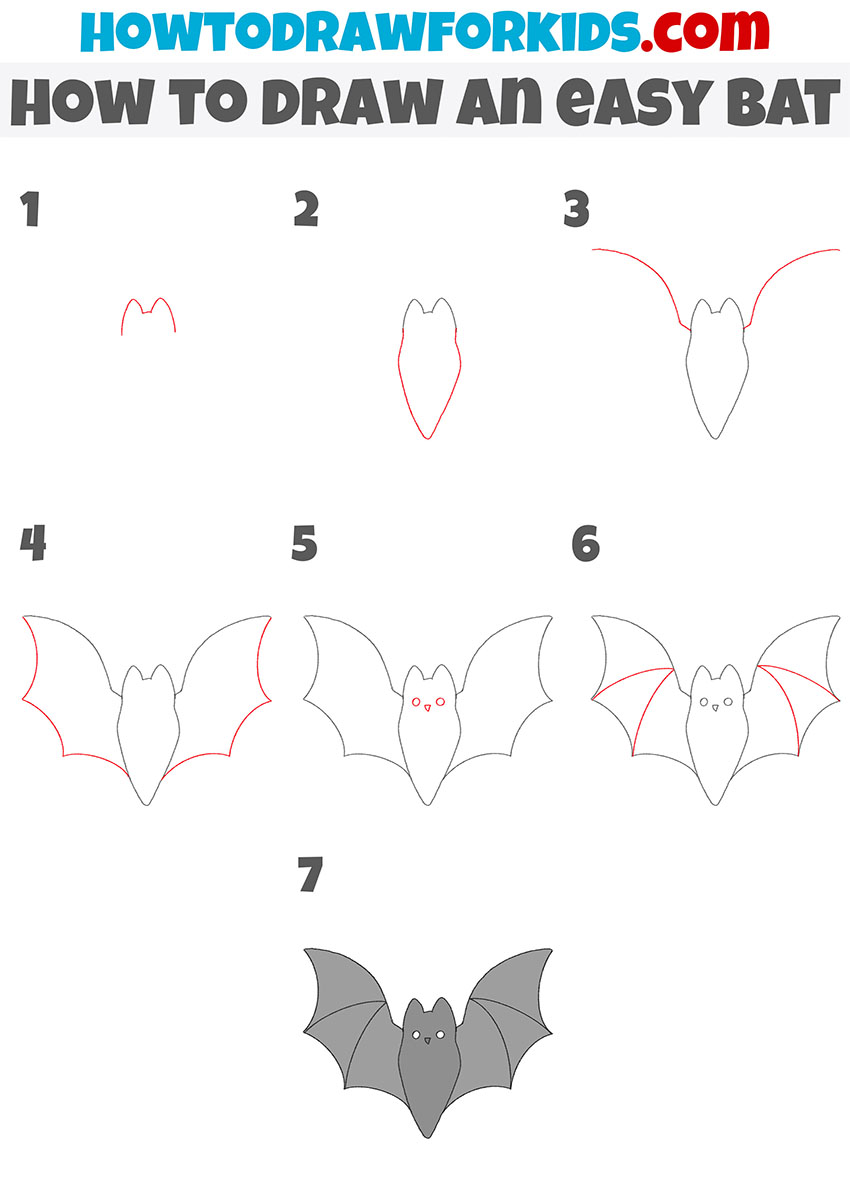
There are slight differences here from the previous picture. I decided to remove the highlights from the bat’s eyes and also used a slightly different sequence of steps. You can also see a different wing shape here – the outlines look more rounded. It’s even easier to draw such a bat. If you want to complicate this drawing a little, you can add teeth, legs, fur or other details of the appearance of this nocturnal animal.
To draw this easy bat, start by sketching the head with two pointed ears at the top. Then, draw the body as a teardrop shape extending downward from the head. Next, add the wings by drawing two long, curved lines extending outward from each side of the head. Follow this by connecting the ends of these lines with scalloped edges to form the wing shape. Add small circles for the eyes and a tiny triangular nose. Finally, improve the wings by adding inner lines to represent the wing structure and color the entire bat a dark shade.
How to Draw a Bat: Conclusion
I hope these simple step-by-step tutorials helped you learn how to draw a bat. Don’t hesitate to try drawing other animals in different poses, using the same approach to create recognizable shapes. Keep in mind that practice and experimentation are really important for improving your skills.
If you enjoyed this lesson, fell free to follow me on my social networks and leave a comment. Your feedback not only motivates us but also helps guide future content. I appreciate your support and look forward to bringing you more drawing tutorials.