How to Draw a Cat Paw
In this tutorial we will deepen our knowledge of drawing cats and learn how to draw a cat paw with two different step-by-step techniques.
How to Draw a Cat Paw: Introduction
In this tutorial, I will show you how to draw a cat paw step by step. The tutorial is simple, ensuring that even beginner artists with no prior drawing experience can follow it.
Although it may appear straightforward, drawing a cat paw involves smooth outlines, soft curves, and precise proportions. This provides a good opportunity for young artists to practice shape construction, symmetry, and details.
Additionally, it is important to note that learning how to draw a cat paw will help you develop the skills to draw a cat with more detail. The knowledge gained here will also allow you to draw paws for dogs and other mammals.
Cats and their paws vary in form and structure. To draw a cat paw in greater detail and depict it accurately in different forms, I have prepared an additional lesson on drawing a cat paw, which you will find at the end of this article.
Cat Paw Drawing Tutorial
Materials
- Pencil
- Paper
- Eraser
- Coloring supplies
Time needed: 25 minutes
How to Draw a Cat Paw
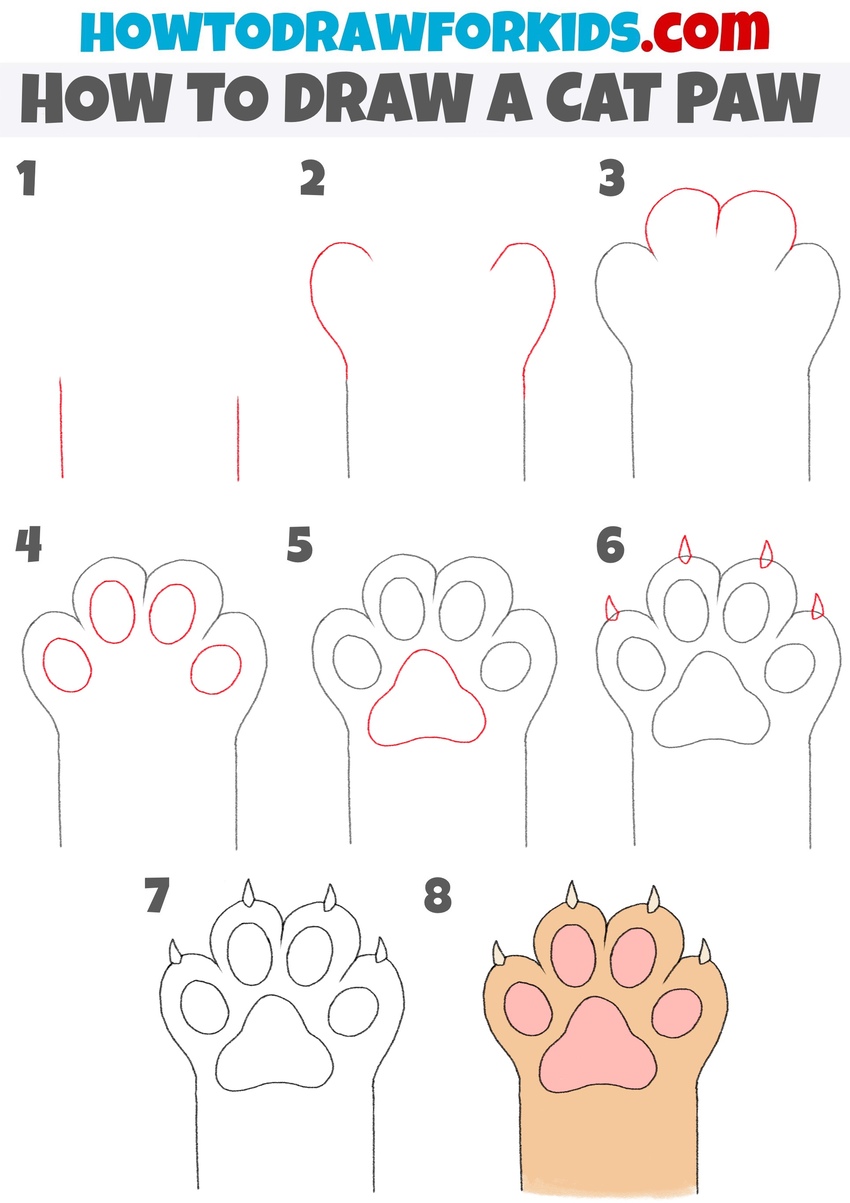
- Draw the base of the cat paw.
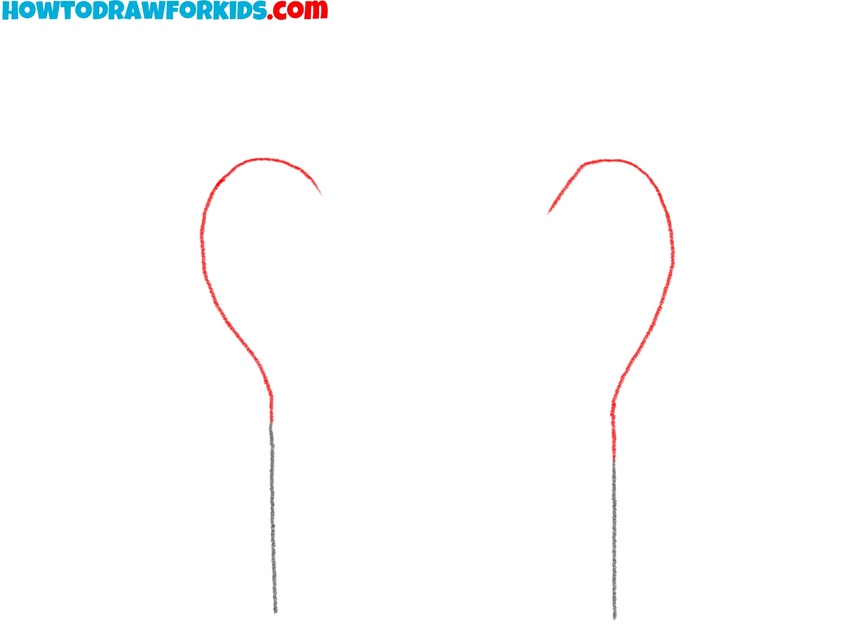
To begin this tutorial on how to draw a cat paw, sketch two straight vertical lines that are parallel to each other. These lines represent the sides of the paw’s base. You can make these lines slightly curved at the top to hint at the natural rounded structure of the cat’s paw. Keep these lines simple and smooth.

- Start sketching the toes.
In this step, focus on adding the rounded toes at the top of the paw. Starting from the top of each vertical line you created earlier, draw a large curved line to illustrate the outer toes of the cat. Keep the curves smooth and natural so the paw looks soft and realistic.
- Complete the shape of the toes.
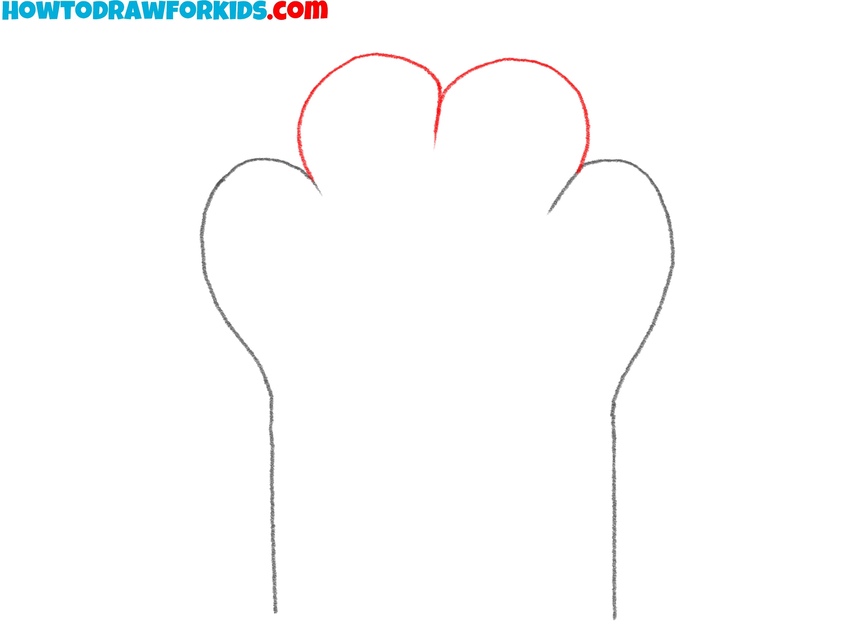
It’s time to complete the full outline of the cat paw. To do this, draw two more round lines to represent the middle toes on the cat paw. Make sure the overall shape resembles a rounded, soft mitten. Check the symmetry on both sides to maintain balance.
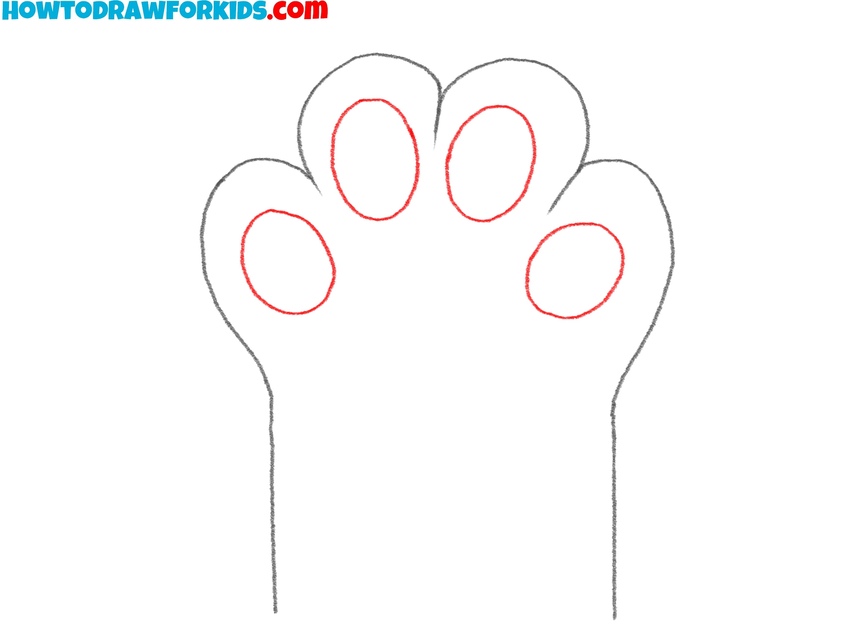
- Sketch the small toe pads.
Inside the curved sections at the top, sketch four rounded oval shapes. Each oval represents a single toe pad, and they should align with the arches of the paw. Make sure the shapes remain soft and round without any sharp edges. Lightly sketch them first so you can adjust their position and size if needed.
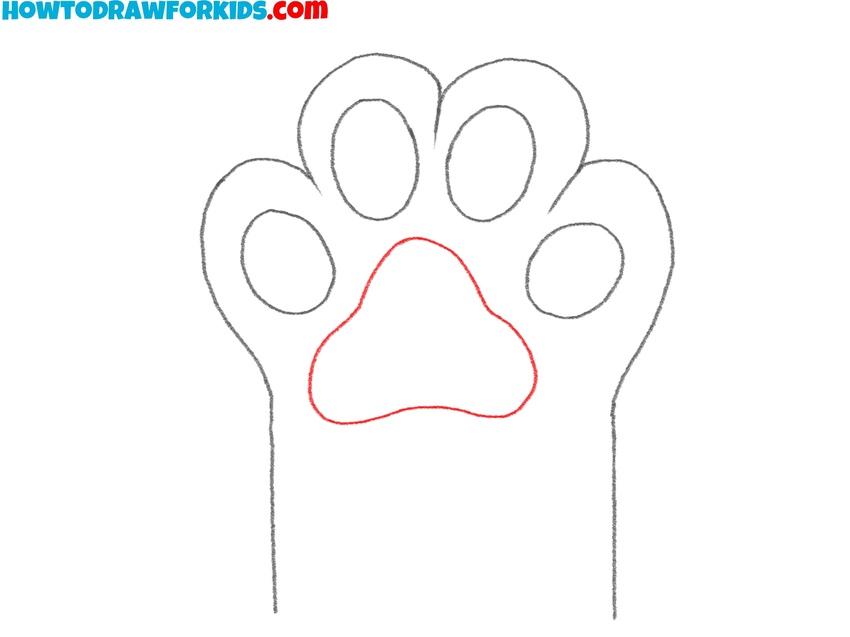
- Add the central paw pad.
Below the smaller toe pads, sketch a large rounded triangle with slightly curved edges. The base of this triangle should face downward. Keep the corners of the triangle soft and smooth to match the soft, rounded look of the paw. If you need guidance, lightly sketch the shape first before committing to the lines.
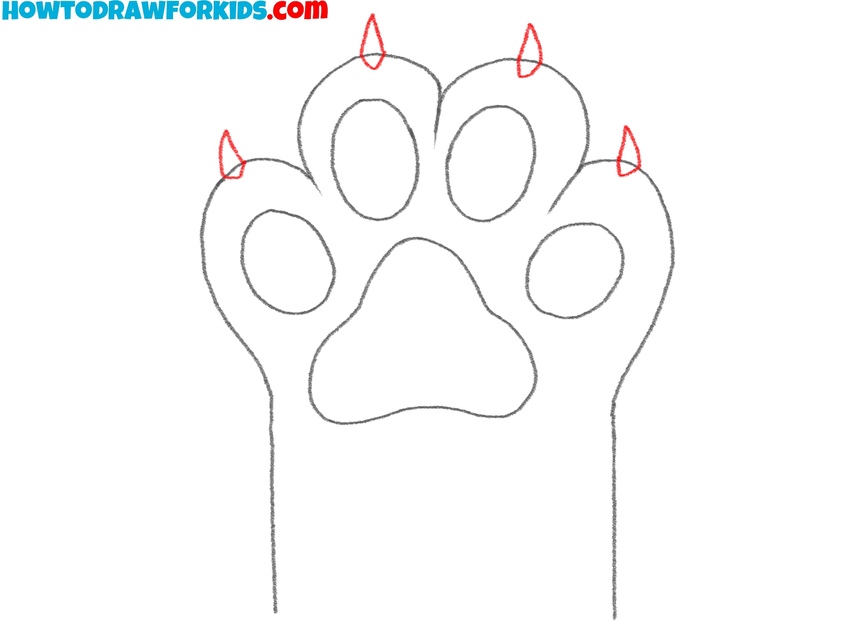
- Sketch the claws.
To make the drawing of your cat paw more detailed, add the claws at the tips of each toe. Starting above each small toe pad, draw tiny pointed triangles that extend outward slightly. These triangles should be narrow and curved, resembling small hooks. The claws should appear sharp.
- Finalize the paw outline.
Review the edges of the paw, ensuring the curves flow smoothly and all lines look polished. Check the toe pads and central pad, making adjustments if any shapes appear uneven. Refine the claws to sharpen their points and smooth out the lines. Erase any unnecessary guidelines.

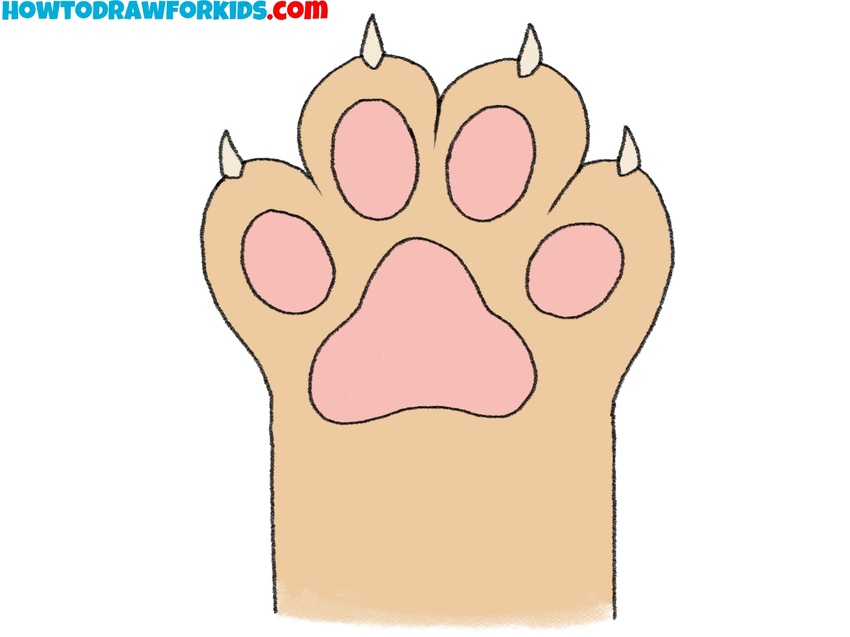
- Add color to your cat paw.
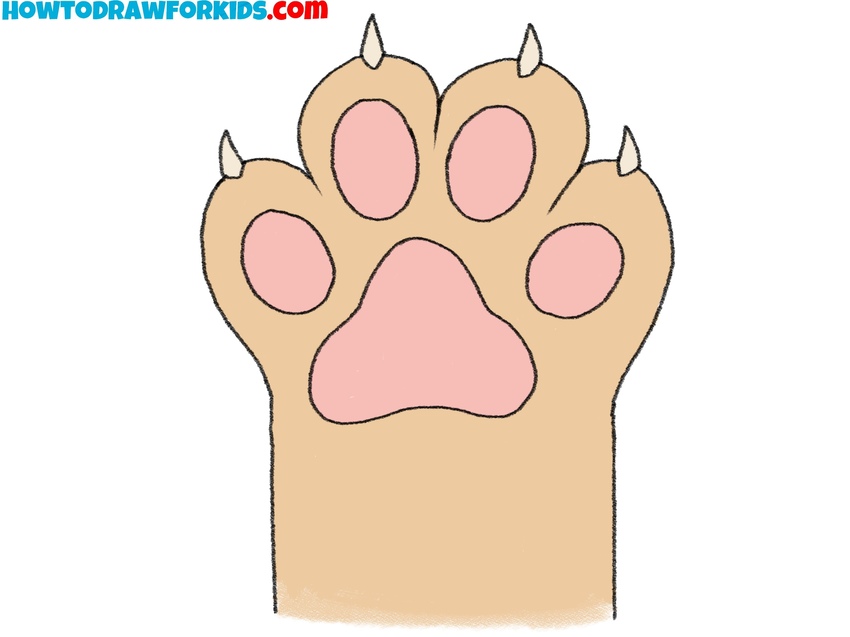
Choose a light brown or beige color for the main part of the cat paw. Use a pink or peach shade to fill in the toe pads and the central pad. Cats come in a variety of colors, so you can use either the colors I suggested or any other shade. Next, paint the claws of the cat using beige, brown or black.
Alternative Cat Paw Drawing Tutorial
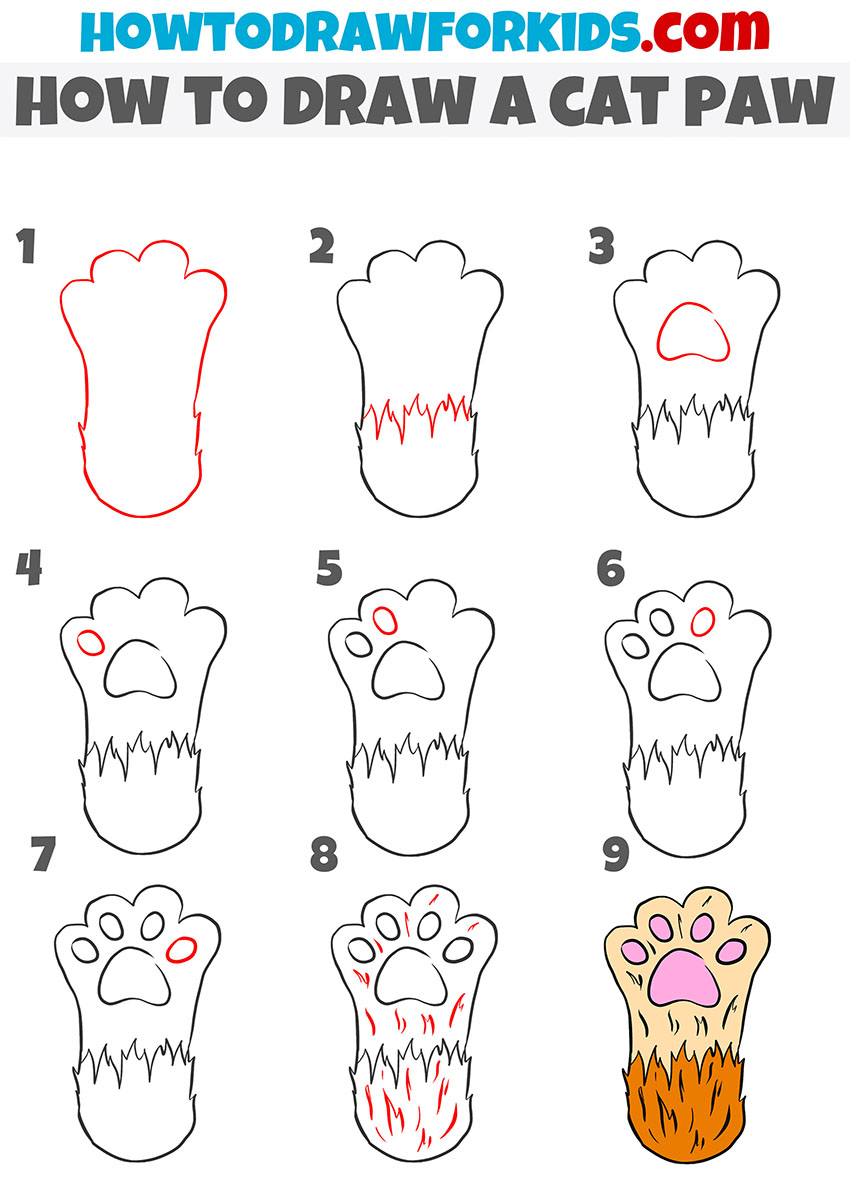
The main difference between this and the first tutorial on how to draw a cat paw lies in the addition of fur details and texture on the lower part of the paw. This tutorial also includes refined lines that give the cat paw a more detailed appearance. Also, this tutorial demonstrates a very different sequence of steps.
To draw a cat paw using this technique, start by creating the outline. Draw a rounded top with four arches for the toes and a slightly tapered base. Add jagged lines near the lower part of the paw to represent fur texture. Draw the central pad as a rounded triangle with curved edges. Next, add the smaller ovals for the toe pads evenly spaced at the top. Make sure to keep the lines soft and natural.
Add details like fur lines at the lower portion of the paw to enhance its texture. Use thin strokes to create a realistic effect. Clean up any guidelines and finalize the shapes. Color the pads pink, the paw light beige, and the fur area darker brown for contrast.
Traditionally, I have prepared a PDF file for you with a short version of this tutorial. You can download this file and use it at any time convenient for you, even without the Internet.
Conclusion
I think that you have made this cat paw drawing very cute and beautiful. If you liked this tutorial, you can share it with your friends and draw with them.
To take your drawing skills to the next level, be sure to check out my other drawing lessons to learn how to draw a dog or draw a sitting cat, as well as learn techniques for drawing a variety of animals.
Do not forget to leave your comments and share your impressions of this lesson. You can also ask questions and suggest your ideas for new step by step drawing lessons.


