How to Draw a Fish
Learn how to draw a fish using seven simple techniques. Follow these easy guides and train your drawing skills. Scroll down to start learning now!
How to Draw a Fish: Basic Information
This tutorial focuses on drawing water creatures, specifically fish, which can improve your understanding of simplified animal anatomy, train your ability to draw animals in a simplified style, and refine your general drawing techniques.
Drawing a fish starts with simple shapes like ovals and circles. This foundational skill is really important in all forms of art, helping artists break down complex subjects into simple parts.
Understanding the basic anatomy of water creatures, such as fish, aids in drawing other animals. Recognizing where fins, gills, and tails are placed helps artists create more accurate representations.
In addition to the basic steps, this fish drawing tutorial includes additional techniques at the end to further improve your drawing. These techniques cover advanced line drawing, texture detailing, and different color application, helping you add more unique style for your artworks. These extra tips will help you train your skills and make your drawings even more impressive.
Fish Drawing Tutorial
Materials
- Pencil
- Paper
- Eraser
- Coloring supplies
Time needed: 40 minutes
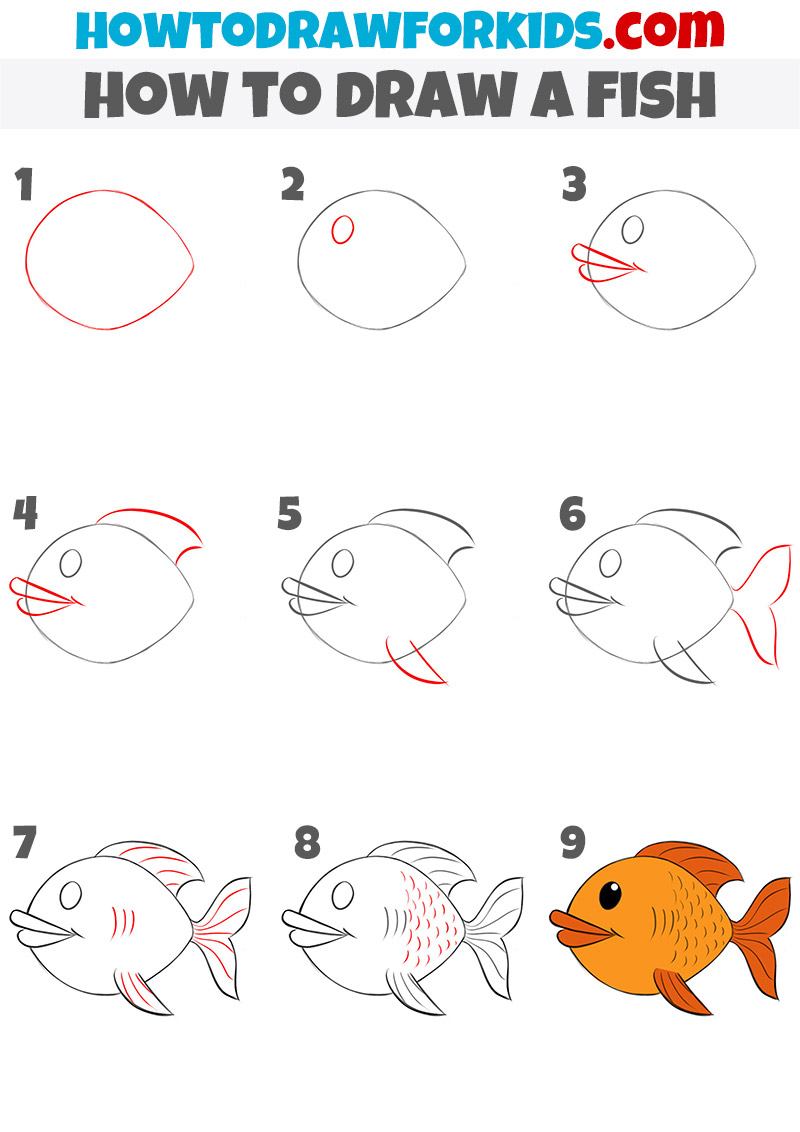
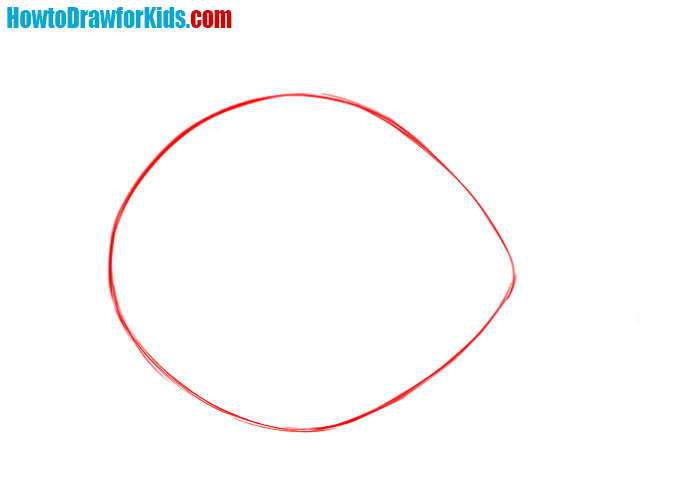
How to Draw a Fish
- Draw the basic shape of the fish.
Begin by drawing a simple oval shape to outline the body of the fish. Make sure the oval is slightly tilted to the right, representing the streamlined form of a fish. This shape will serve as the main structure upon which the rest of the fish’s features will be added.
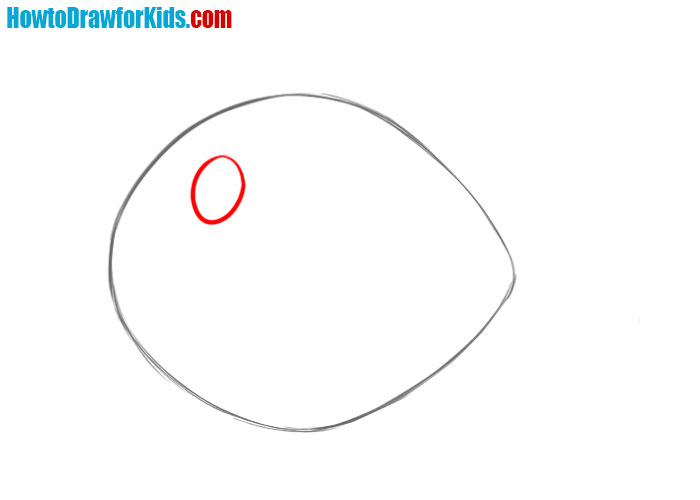
- Draw the eye of the fish.
So, let’s focus on the fish’s eye and its positioning. Place a small oval towards the front of the body shape you’ve drawn. The placement of the eye is crucial as it can affect the fish’s expression and the direction it appears to be looking. Keep the eye relatively simple; this isn’t the stage for intricate detail.
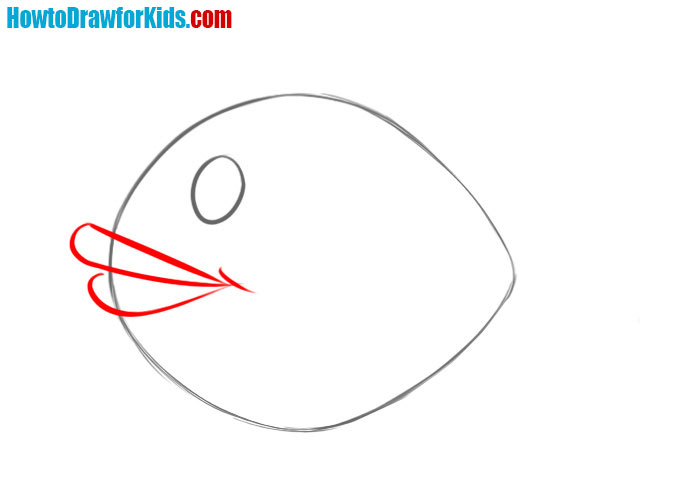
- Illustrate the mouth.
Draw two curved lines extending from the front of the oval, just below the eye. First, draw a line central line of the middle. Then extend this simple line upward and form the upper lip of the fish. After that, extend this line down and illustrate the lower lip.
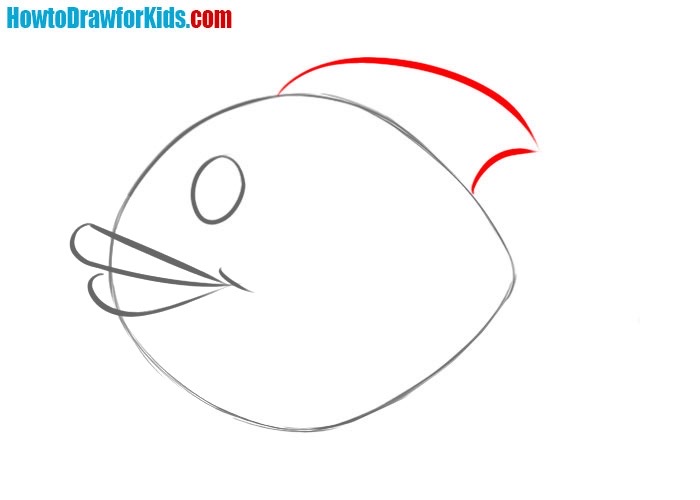
- Add the top fin.
With the basic body, eye, and mouth in place, draw the fish’s top fin. Start from the top edge of the oval, slightly behind the eye. Draw a curved line upward and back down to the body, creating a triangular shape. The fin on the back performs the same functions as the sail of a yacht.
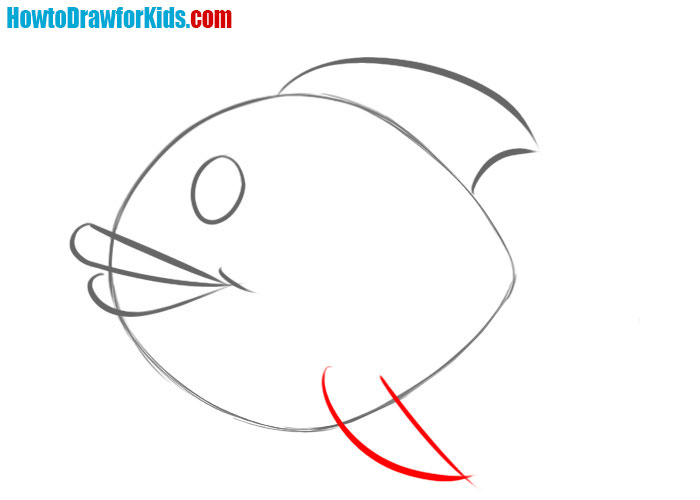
- Illustrate the side fin.
Start from the middle of the oval’s right side and draw a curved, leaf-like shape extending outward. This fin should be slightly tilted downwards to follow the natural flow of the fish’s body. Use sweeping, graceful strokes to suggest the fins’ flexibility and mobility.
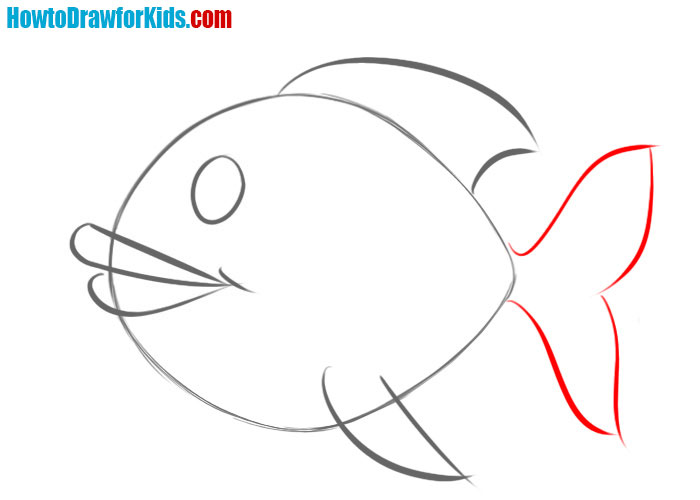
- Add the tail fin.
Begin by extending two curved lines from the rear end of the oval body. These lines should diverge slightly, creating the basic shape of the tail fin. At the ends of these lines, connect them with a series of curved lines that form the distinctive shape of the tail fin.
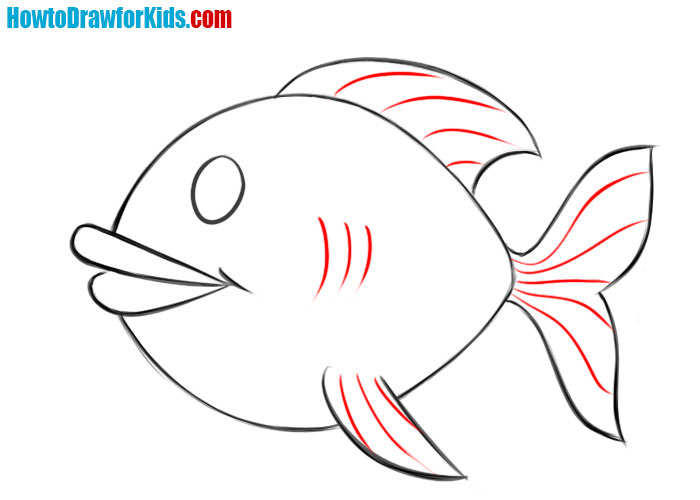
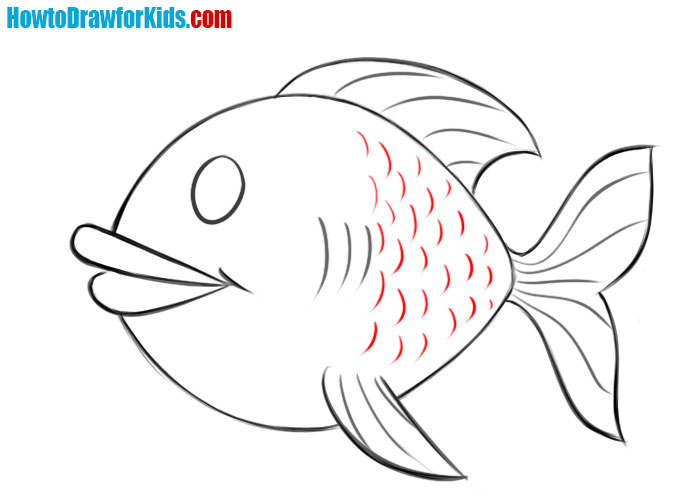
- Draw the gills and detail the fins.
Add the gills by drawing three curved lines behind the eye, originating from the middle of the body and curving towards the tail. Next, detail the fins by drawing short, curved lines from the base to the tips of the top, side, and tail fins, representing the fin rays.
- Illustrate the scales.
To give your fish a more textured look, draw small, curved lines all over the body to represent scales. Start from behind the gills and work your way towards the tail, making sure the scales follow the natural curve of the fish’s body. These scales will give your fish a more detailed appearance.
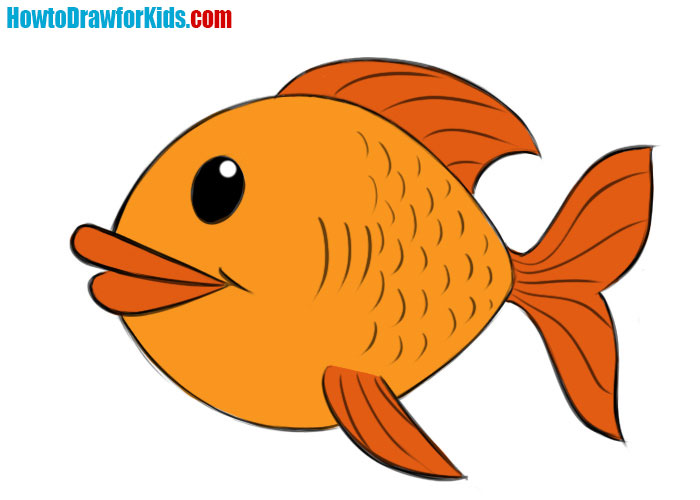
- Color the fish.
You can use shades of orange for the body, with darker tones for the fins and tail. Apart from orange, you can choose any color that suits the fish drawing. You can add a bit of shading to give dimension to your fish. Don’t forget to color the eye, leaving a small white spot to make it look shiny.
How to Draw a Fish: Alternative Techniques
Now that you have mastered the fundamental techniques, it’s time to train your skills further. In the following section, I will introduce additional instructions that will show you some advanced techniques. In these instructions, I will demonstrate both simplified methods for drawing fish, great for younger artists, and a slightly more complex technique for those aiming to create a more realistic depiction.
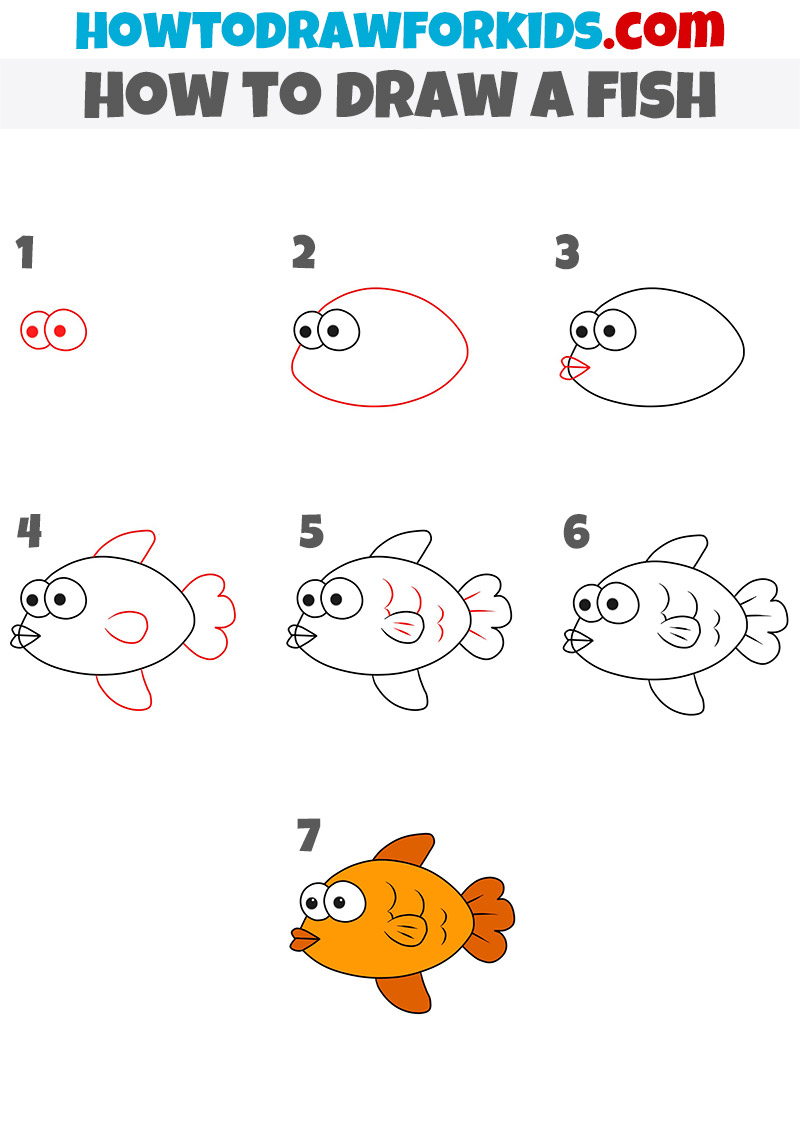
Drawing a Fish in the Simplest Way
This additional tutorial provides another fun and simple method to draw a fish, complementing the first tutorial. While the initial guide focused on a little more realistic approach, this tutorial emphasizes a maximum cartoonish style with exaggerated features, making it perfect for those seeking a simpler look.
Begin by drawing two large, circular eyes, adding smaller circles inside for pupils. Then, sketch an oval body around the eyes. Add small, curved lines for the mouth and rounded shapes for the fins and tail, attached to the sides and back of the body.
Outline the top and bottom fins, maintaining symmetry. Add three curved lines behind the eyes to depict gills. Finally, color your fish, predominantly using orange, but feel free to experiment with different colors that suit your drawing.
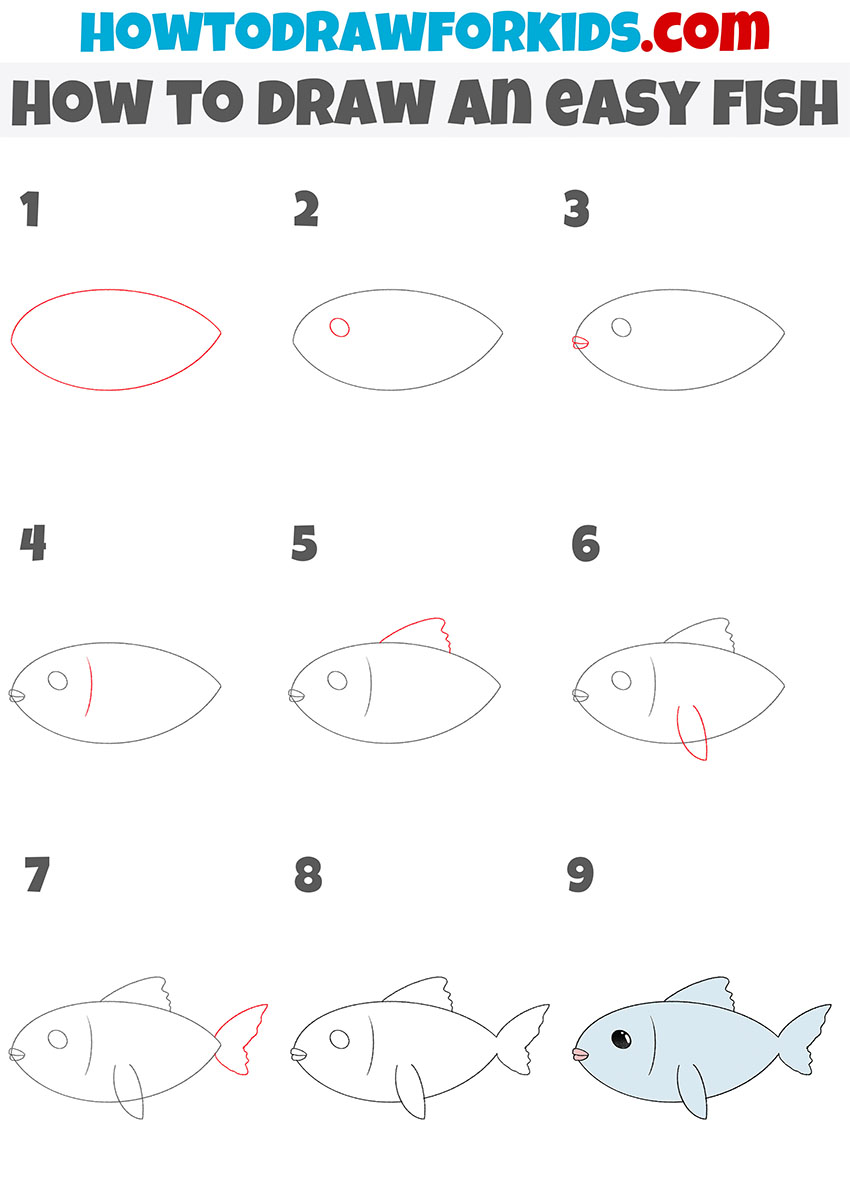
Drawing an Easy Fish Without Scales
This additional tutorial also offers a simpler approach to drawing a fish. Unlike the first tutorial, which focused on a little more detailed and structured drawing, this guide emphasizes basic shapes and easy steps to create a cute, simple fish illustration.
Start by drawing an oval shape for the fish’s body. Next, add a small circle for the eye, positioned near the front of the oval. Draw small lines for the mouth just below the eye. Add a curved line from the top to the bottom of the body to represent the gills. Then, sketch a small, wavy fin on the top of the body and another on the side. Add the tail fin at the back of the body.
Finally, color your fish, primarily using light blue, but feel free to use any color that suits your preference. This tutorial is ideal for those seeking a quick and easy way to draw a charming fish.
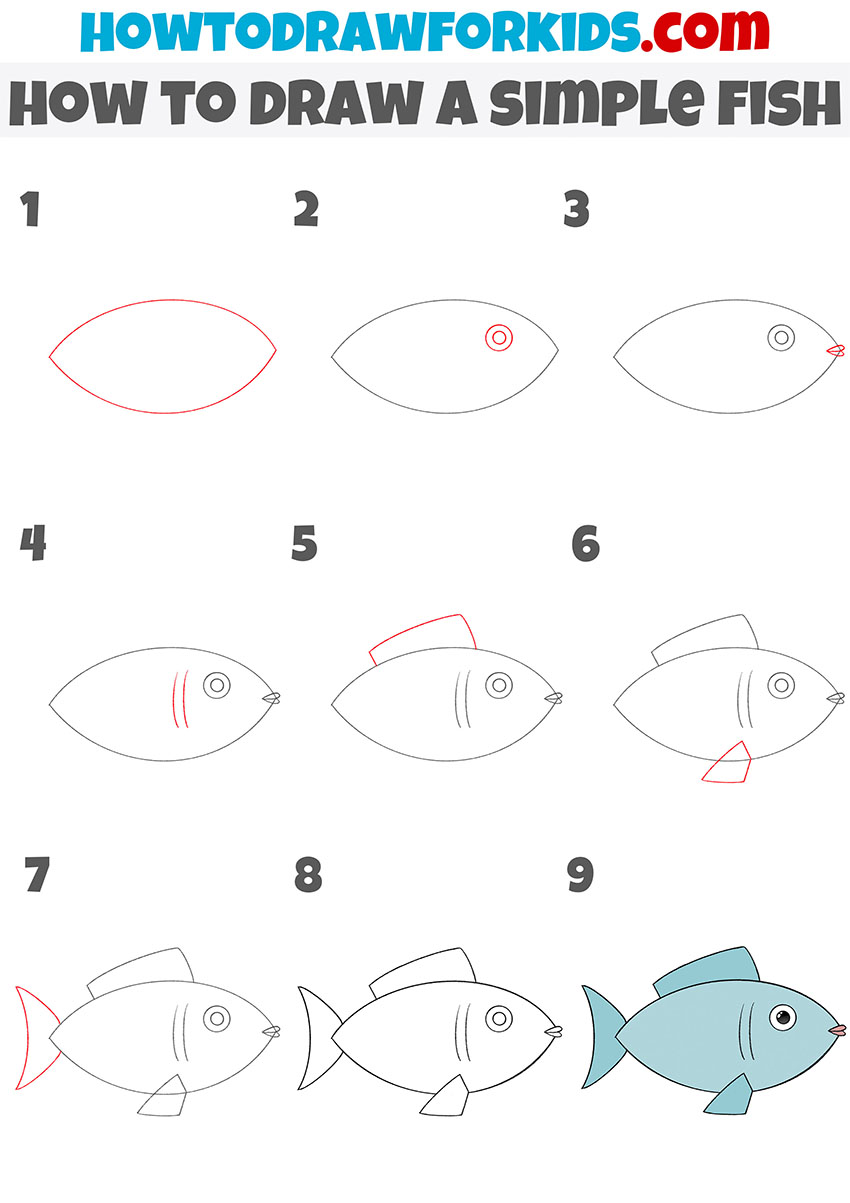
Drawing a Simple Fish
Begin by drawing an oval shape for the fish’s body. Add a small circle near the front for the eye, and inside it, draw a smaller circle for the pupil. Sketch tiny lines for the mouth just below the eye. Add two curved lines behind the eye to represent the gills.
Draw a simple dorsal fin on top of the body and a similar shape for the pectoral fin on the side. Sketch a triangular tail fin at the back of the body. Finally, color your fish primarily in blue, or any color of your choice.
This instruction uses simple lines and a minimum of elements. But if you want, you can improve your drawing. For example, you can add scales on the body of the fish, or stripes on the tail and fins. As a result, you will get a great drawing.
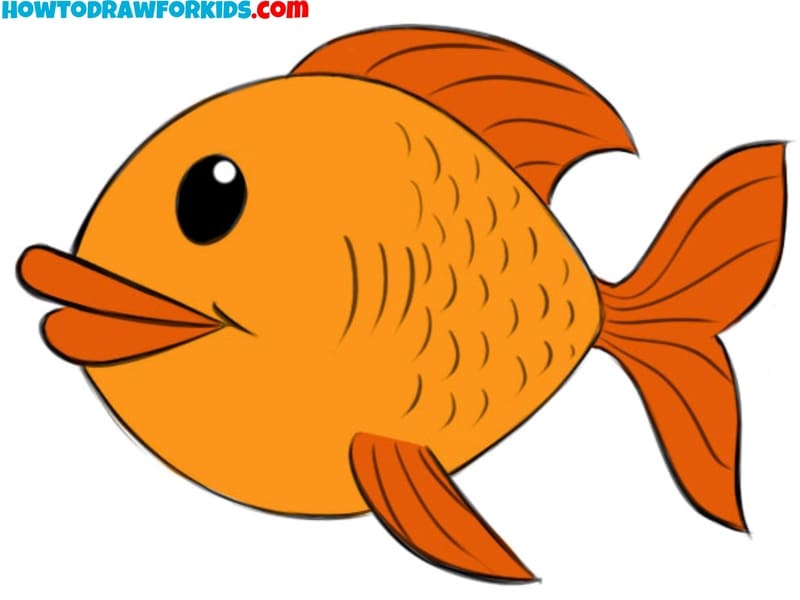
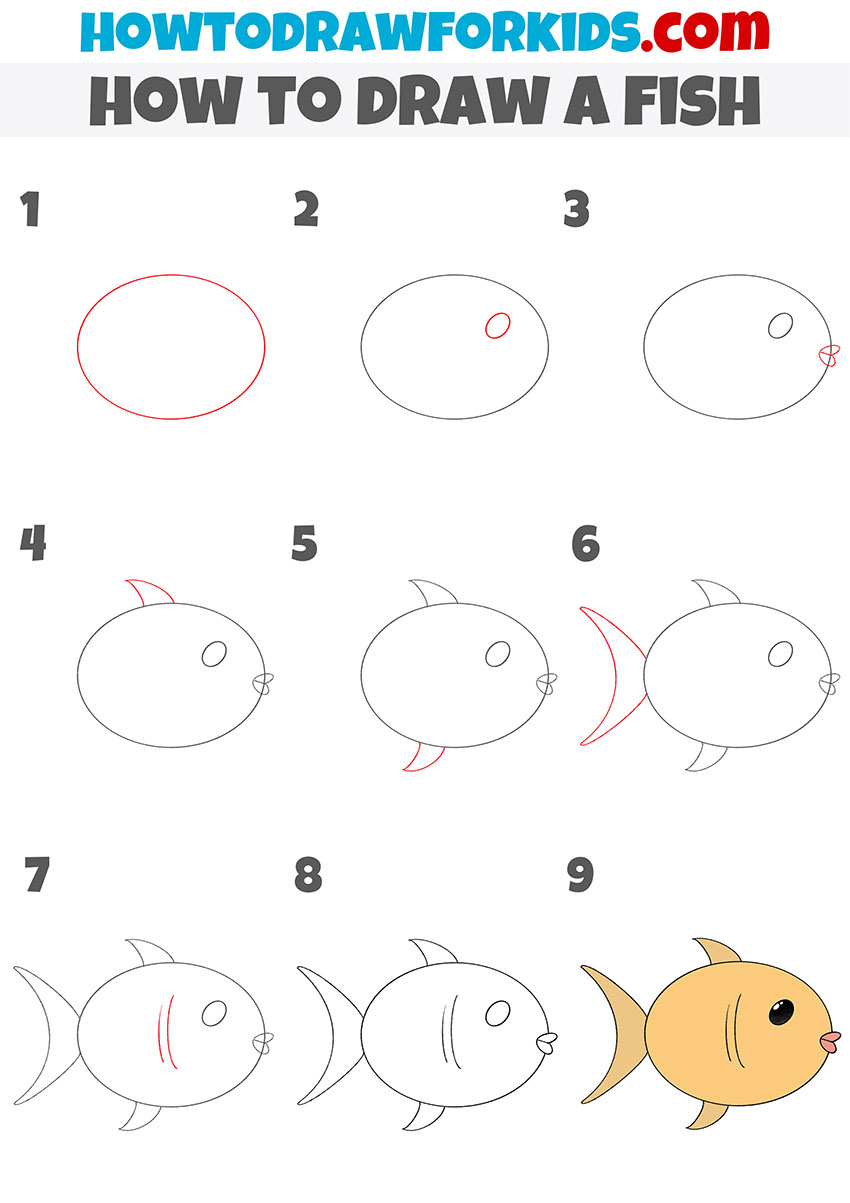
Drawing the Fish With Rounded Body
In the picture, you see a fish that has a rounded body shape and pointed fins. Here simple elements and a minimum of details are used. In this lesson, you will need your ability to draw smooth rounded lines. Try to make all the lines carefully, take your time during this task. This guide focuses on basic shapes and minimalistic details to create an easy, rounded fish illustration.
Start by drawing an oval shape for the body. Next, add a small circle near the front for the eye. Add tiny lines for the mouth just below the eye. Draw a small, curved fin on the top of the body and a similar shape on the bottom. Sketch a large, curved tail fin at the back of the body.
Add two curved lines near the eye to indicate the gills. Finally, color your fish primarily in a light shade, such as orange, or any color you prefer. This tutorial is ideal for those seeking a quick and easy method to draw a simple, rounded fish.
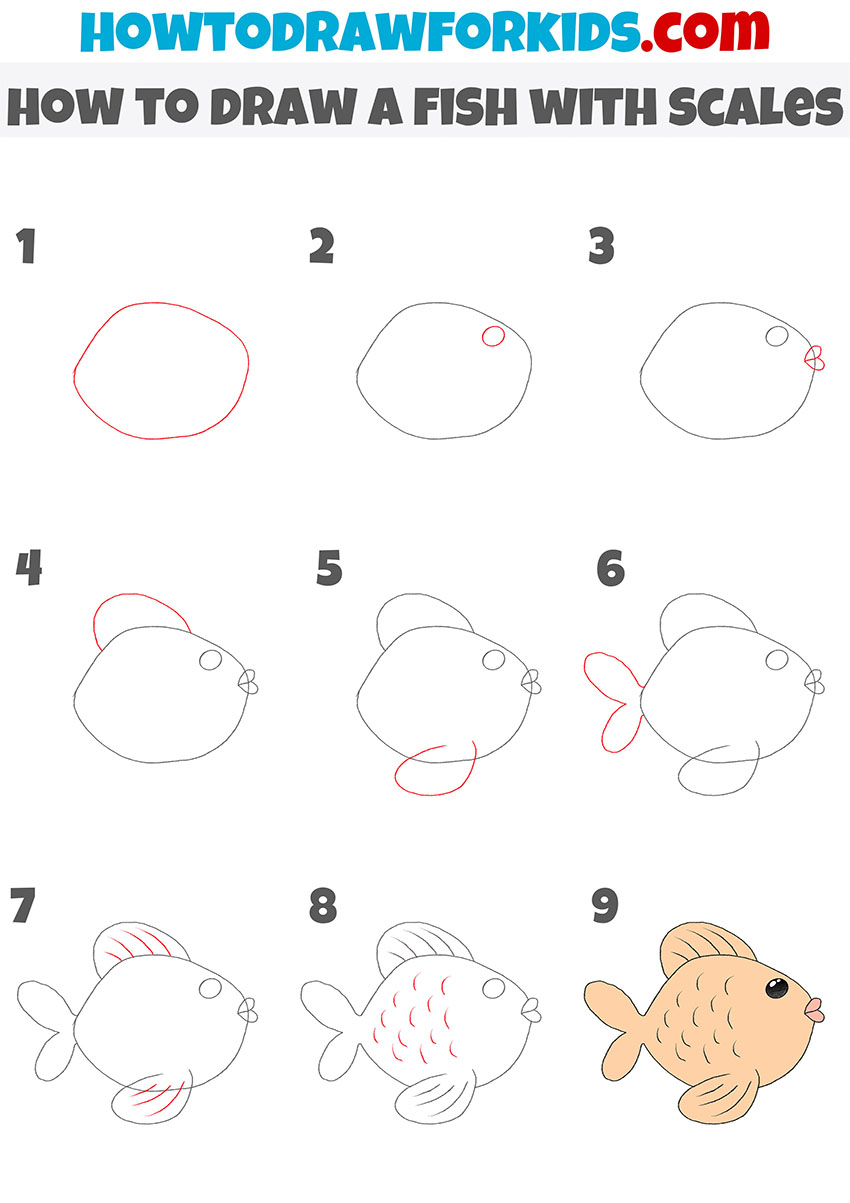
Drawing a Fish With Scales
This additional tutorial builds on the first by guiding you through drawing a fish with scales, offering another method to train your drawing skills.
Begin by sketching an oval shape for the fish’s body, followed by adding a small circle for the eye. Draw the mouth near the front. Next, outline the fins and tail with smooth, rounded shapes. Once the basic outline is complete, start detailing the fins and tail with lines to represent texture.
The key difference in this tutorial is the addition of scales-small, curved lines spread across the fish’s body, giving it a more lifelike appearance. Finally, color your fish, using shades that highlight the scales and other details.
Drawing a Realistic Fish
This additional tutorial builds on the first by teaching you how to draw a realistic fish, offering a little more detailed approach. Unlike the earlier cartoonish styles, this guide focuses on capturing the natural appearance of a fish with more precise lines and details.
Start by sketching the basic outline of the fish’s body with a streamlined shape. Next, add the tail fin, ensuring it flows naturally from the body. Draw the dorsal fin on top of the body, followed by the pelvic and anal fins underneath. Detail the head by adding an eye, gills, and a curved line for the mouth. Continue by drawing the pectoral fin near the head.
Add scales across the body, starting from behind the gills and working towards the tail. Finally, color the fish, using realistic shades to show its natural look. This instruction is great for those looking to advance their drawing skills and achieve a little more realistic illustration of a fish.

Conclusion
In this tutorial, kids learned how to draw a fish using simple steps and basic shapes. They learned different techniques for creating both cartoonish and more realistic fish illustrations, training their drawing skills.
If you really like drawing animals, I highly recommend checking my other tutorials as well. For instance, you can find a detailed guide on how to draw a dog, which is great for training your skills. These tutorials offer step-by-step instructions that make learning to draw different animals really easy.
If you enjoyed this tutorial, please share it with your friends and family. Don’t forget to subscribe to my social media for more cool and easy drawing tutorials. Also leave your comments with any wishes, questions, or suggestions below.