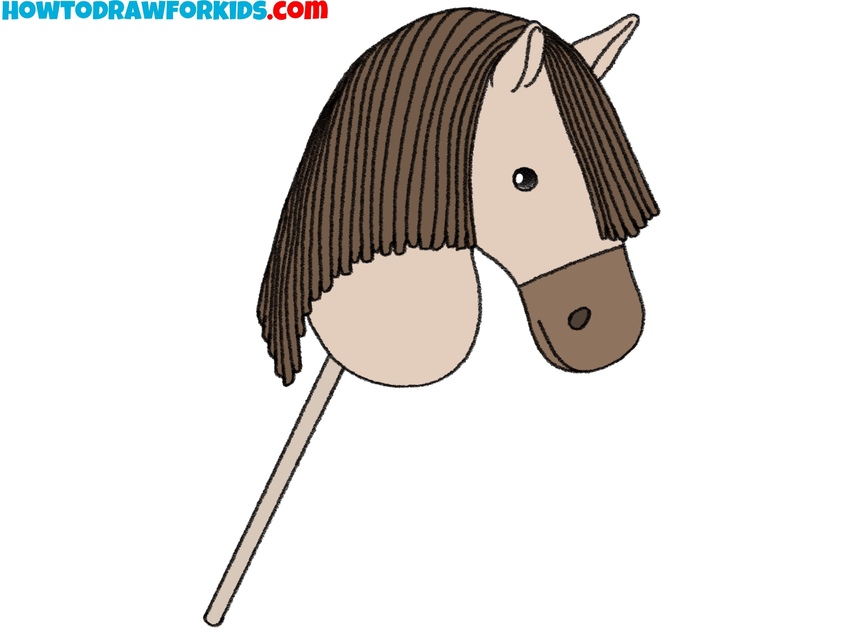
How to Draw a Hobby Horse
In this simple lesson, I want to show you how to draw a hobby horse, a wooden toy featuring a horse’s head on a long stick.
How to Draw a Hobby Horse: Introduction
Besides drawing animals, we often draw various toys as well. To continue this category, today I’ll show you how to draw a hobby horse.
In many ways, this lesson will resemble my tutorial on drawing a horse. We’ll start by drawing a horse’s head, giving it a toy-like appearance. Then, we’ll add the stick and decorate the horse’s head with artificial hair.
The most important part of this hobby horse drawing tutorial is making sure the drawing clearly represents a toy rather than a real horse’s head. It should be obvious that it’s a handmade toy rather than a living animal.
Hobby horses come in many different styles, with variations in head shape, hairstyle, and other details. You can customize your drawing by adding or changing certain features to make your hobby horse unique. The color palette is also flexible – you’re free to color your toy however you like.
Hobby Horse Drawing Tutorial
Materials
- Pencil
- Paper
- Eraser
- Coloring supplies
Time needed: 30 minutes
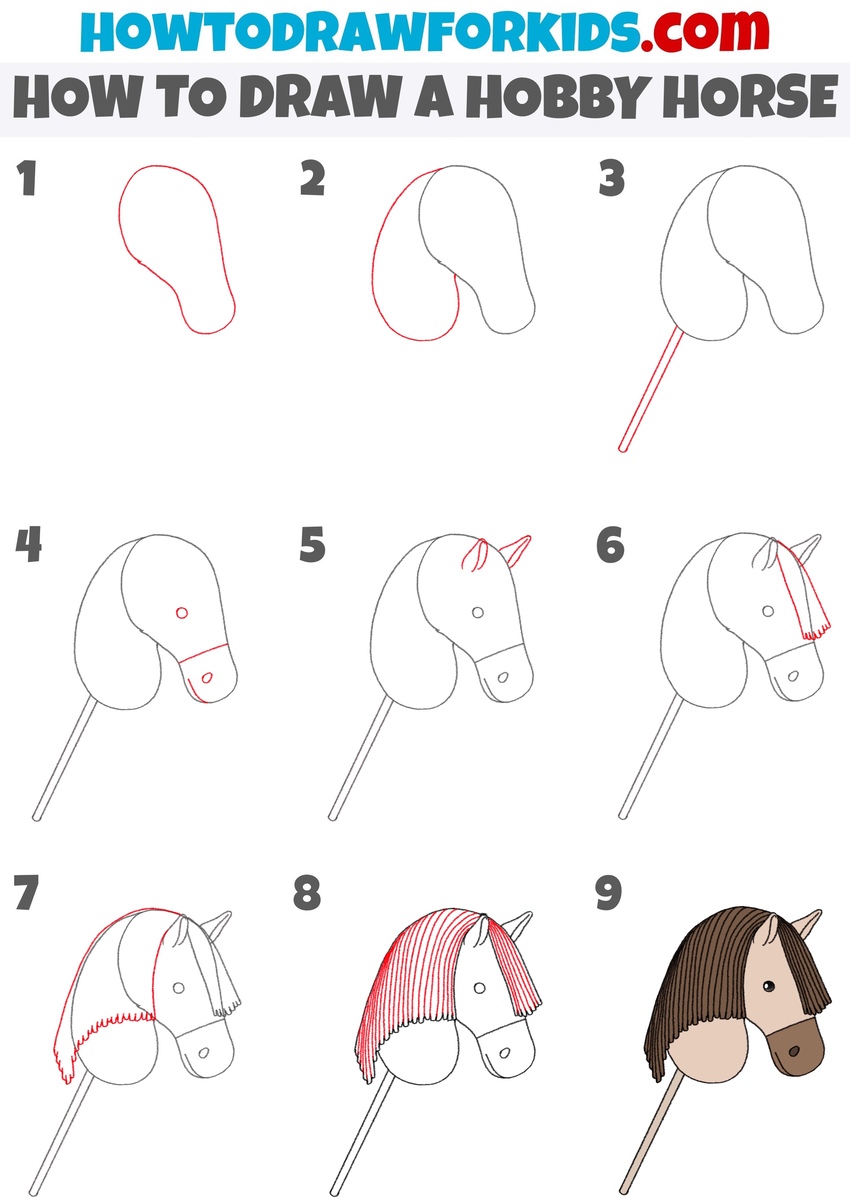
How to Draw a Hobby Horse
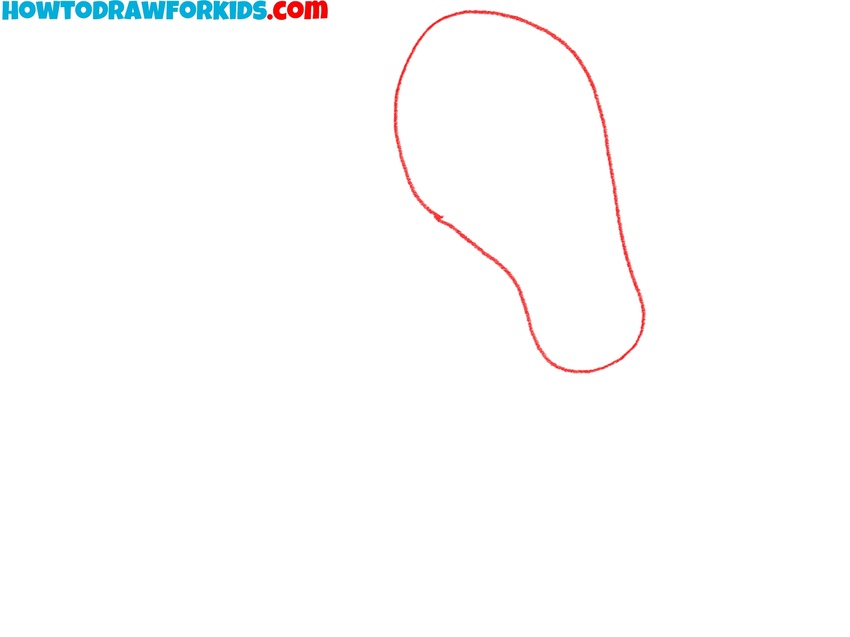
- Draw the basic shape of the head.
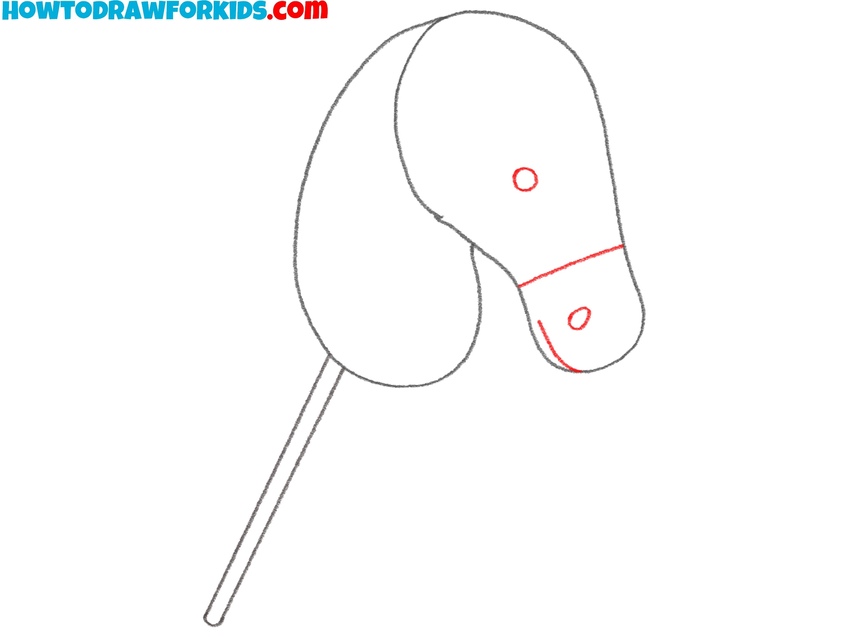
Let’s begin this tutorial on how to draw a hobby horse by sketching the general outline of the toy’s head. The shape should resemble an upside-down teardrop or a slightly curved peanut. The top part should be slightly wider, while the bottom tapers gently to form the snout. Use smooth and light lines.
- Draw the hobby horse’s neck.
Now, extend the shape by adding the neck of the hobby horse. Start by drawing a curved line from the top part of the head. Then, add another curved line from the lower part of the head, connecting it smoothly to the first line. This will form the base of the neck. The neck should be slightly thicker toward the bottom.

- Draw the stick of the hobby horse.
Now, draw a straight diagonal line coming from the lower part of the head. Then, add a parallel line next to it to create the thickness of the stick. The length of the stick can vary depending on how long you want it to appear. Try to keep both lines straight and even.

- Add the facial features.
First, draw a small circle for the eye, positioning it near the upper middle part of the head. Next, add a smaller oval shape near the snout to represent the nostril. After that, draw the hobby horse’s mouth with a short curved line. Draw the snout separation using another small and curved line.
- Draw the hobby horse’s ears.
For the ears, draw two triangular shapes on top of the hobby horse’s head. The size of the ears can vary depending on how stylized you want the drawing to be. Once the outer ear shapes are in place, add a simple curved line inside each ear to give them more detailed look.

- Begin sketching the mane.
Start by sketching the front portion of the mane, drawing a series of downward curved lines from the top of the head. The ends of the mane should have small jagged edges to indicate individual strands of hair. Make it appear as if the hair is resting on the horse’s forehead.

- Complete the toy’s mane.
Now, extend the mane to cover the back of the hobby horse’s head. The mane should appear thick and plush, similar to how a real hobby horse might have fabric or yarn hair. Like before, use short, slightly jagged lines at the ends to give it a natural look. The length and shape of the mane can vary.

- Add texture to the mane.
Use closely spaced vertical lines to create the appearance of hair, following the direction of the mane. Keep the strokes gentle, and don’t overfill the area – too many lines might make it look cluttered. If you want, you can draw woot texture on the stick to make it look more realistic.

- Color the hobby horse.
Use a light brown or beige shade for the horse’s head to resemble a traditional wooden toy. The snout and stick can be slightly darker or lighter brown to create contrast. For the mane, use a deep brown. The eye should be black with a small white highlight to make it look shiny.

Conclusion
Today, we learned how to draw a hobby horse using the simplified design and traditional style featured on my website. As I mentioned earlier, toy horses can come in many different forms. For example, some toy horses don’t just have a head on a stick but instead resemble full wooden horses with wheels or other unique designs.
Try drawing a toy horse in a different style by applying what you’ve learned in this lesson. You can also combine these skills with those from my horse or donkey drawing tutorials to create something new.
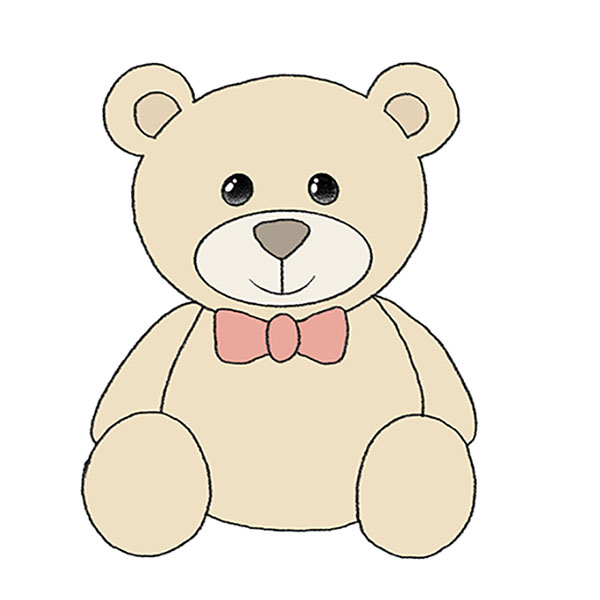
I’d like to remind you that my website offers a wide variety of drawing lessons. If you’re interested in toy-themed drawings, you can also learn how to draw a teddy bear.
I regularly publish new drawing tutorials, so be sure to follow me on social media to stay updated and never miss a new lesson!