How to Draw a Mouse
Do you want to learn how to draw a mouse? Then you will really like this easy lesson! There’s a free PDF for you at the end!
The lesson on drawing a mouse is designed specifically for beginner artists, and therefore it uses simple lines that you can easily repeat.
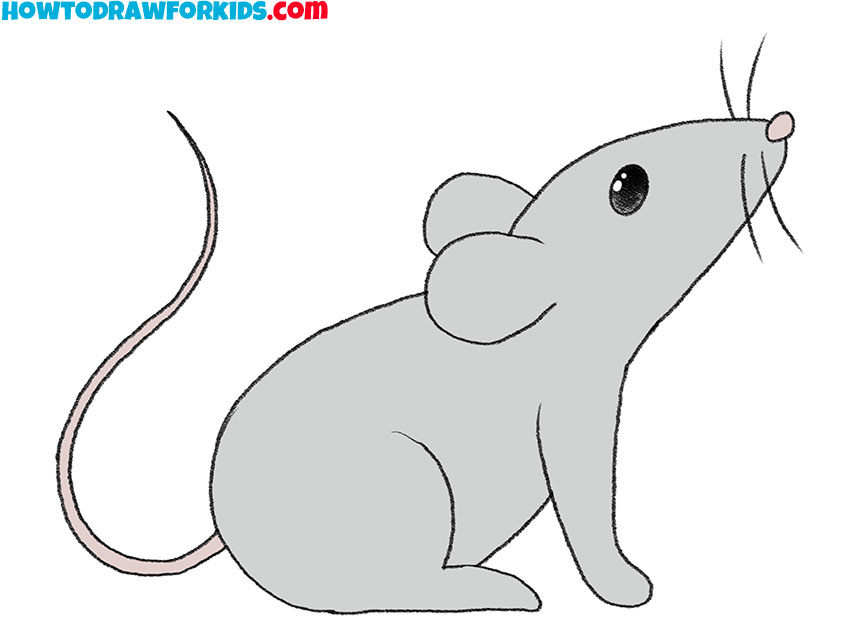
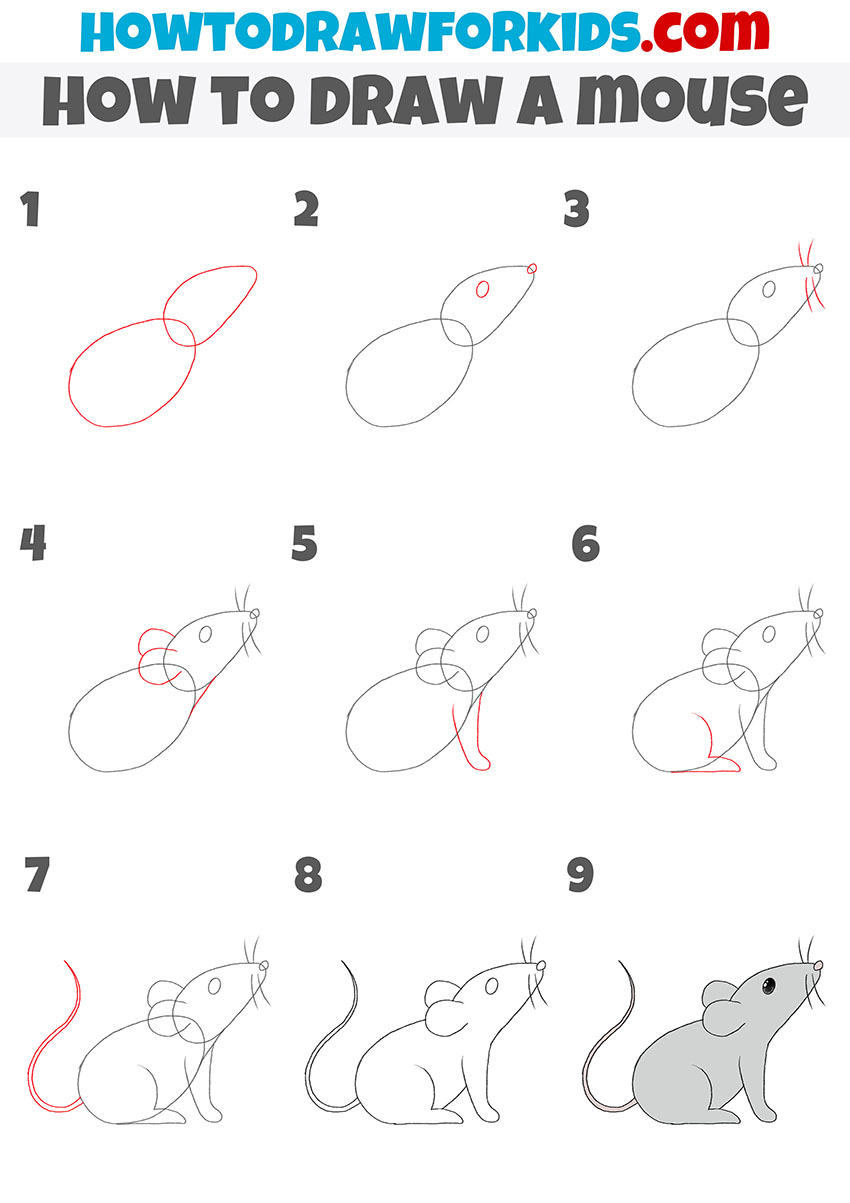
Table of Contents
- Basic information
- Steps on how to draw a mouse
- Additional content
- Alternative drawing techniques
- Conclusion
Basic Information on How to Draw a Mouse
Before you begin the lesson on how to draw a mouse, I want to remind you of one important rule in fine art – every object can be represented as geometric shapes connected to each other. In this lesson you will draw a mouse whose head and body are shaped like ovals. First you will draw the main outlines and then you will add small elements.
The mouse you draw with this tutorial will look very cute and funny. This animal will be shown in profile, which will help you practice drawing animals more realistically. In the drawing, the mouse raised its head as if sniffing something, so this drawing looks alive and dynamic.
As you work, stop periodically and compare your drawing with my example. Try to identify errors in a timely manner. You can correct any inaccuracies before coloring. If you are not yet confident in your abilities, I recommend that at the initial stage you use only thin lines that can be easily corrected.
Materials
- Pencil
- Paper
- Eraser
- Coloring supplies
Steps on How to Draw a Mouse
Time needed: 30 minutes
How to Draw a Mouse
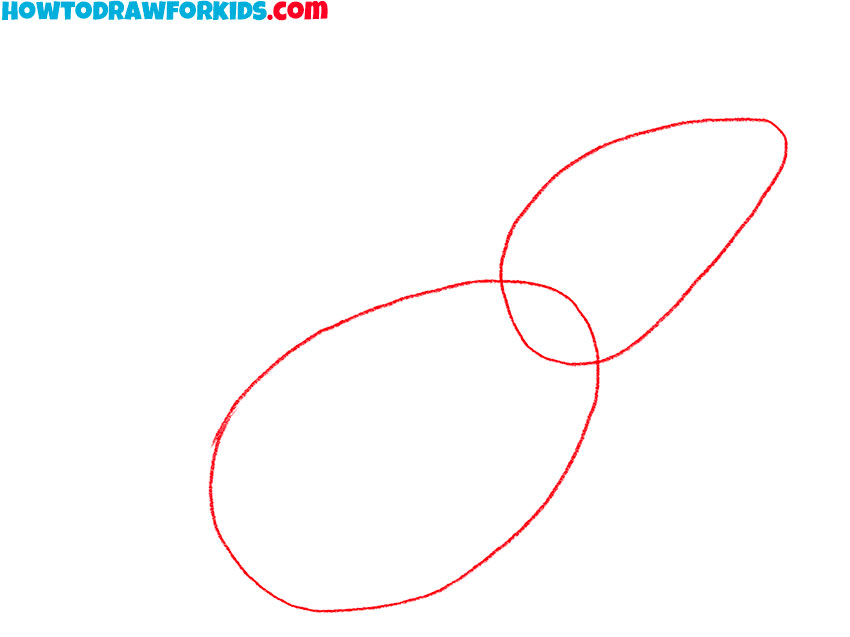
- Draw the contours of the head and torso of the mouse.
Depict the body in the form of an oval, and also add the head in the form of an uneven oval.
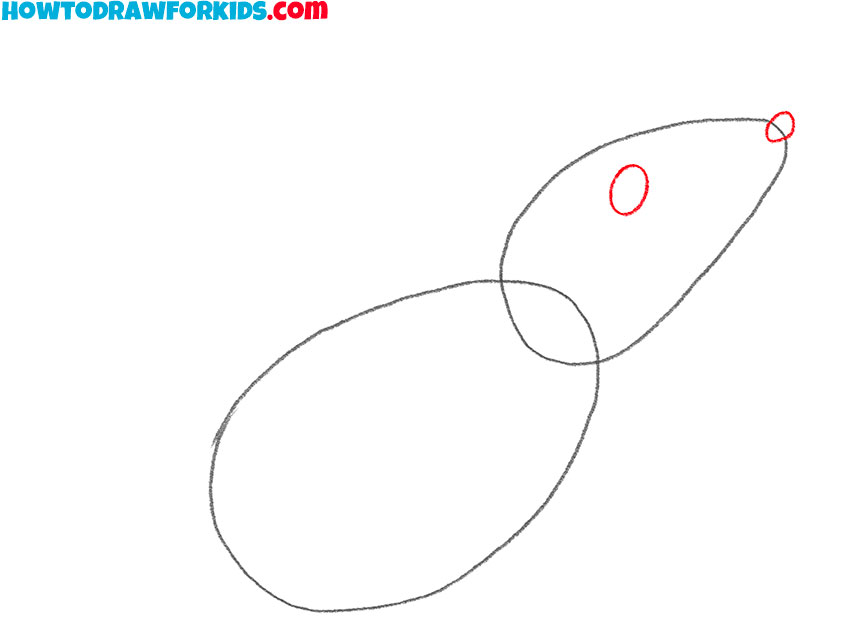
- Add the mouse’s facial features.
Draw an oval eye inside the drawn outline of the head, and add a nose at the top of the head.
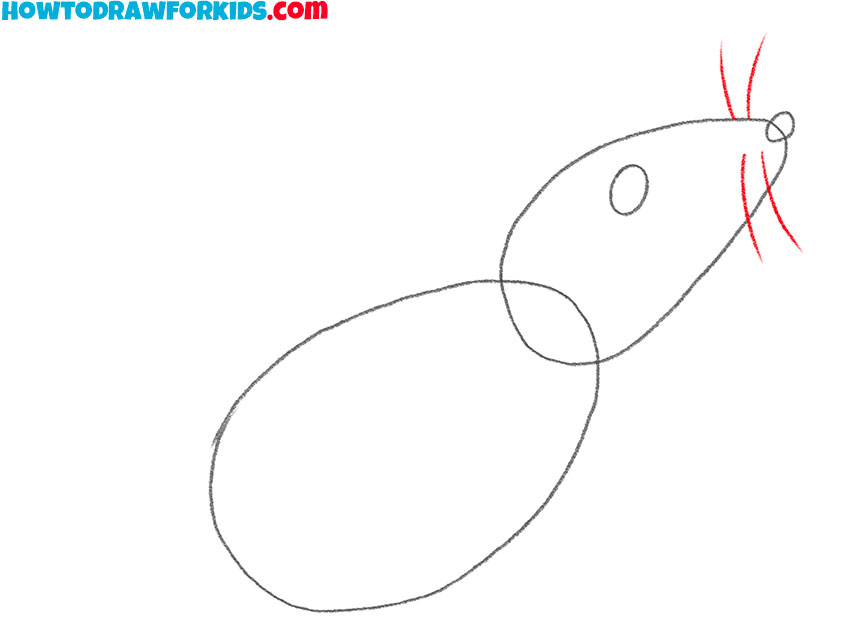
- Sketch out the mouse’s whiskers.
Near the previously drawn nose, draw four curved lines, as shown in the figure.
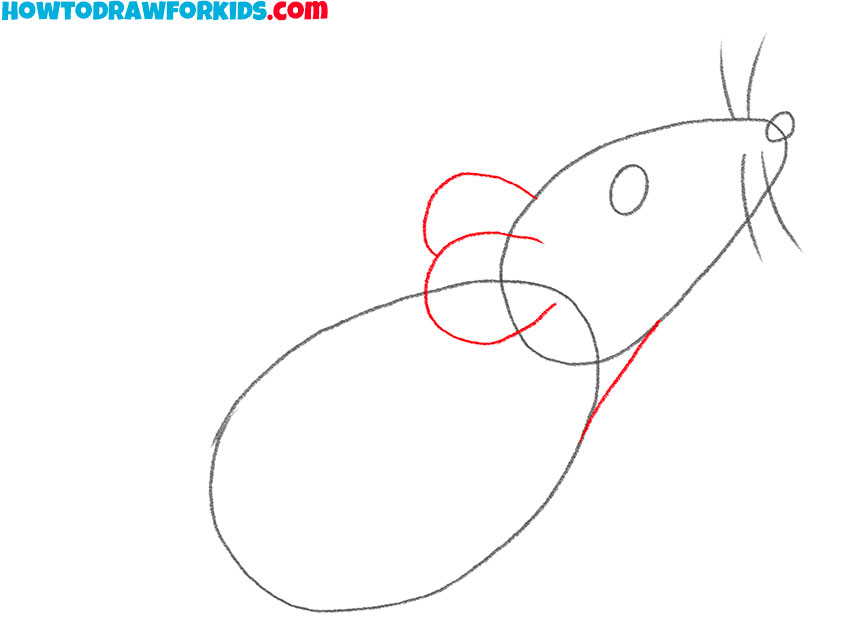
- Add the ears and neck of the mouse.
To draw the ears, use arcs, to connect the contours of the head and torso with a line.
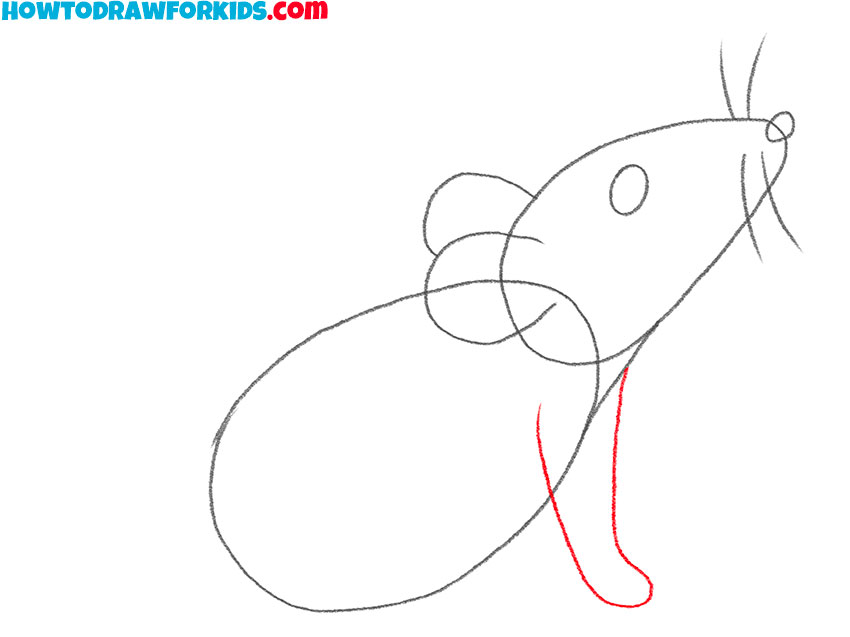
- Depict the front paw of the mouse.
From the previously drawn mouse neck line, draw one long, curved line as shown.
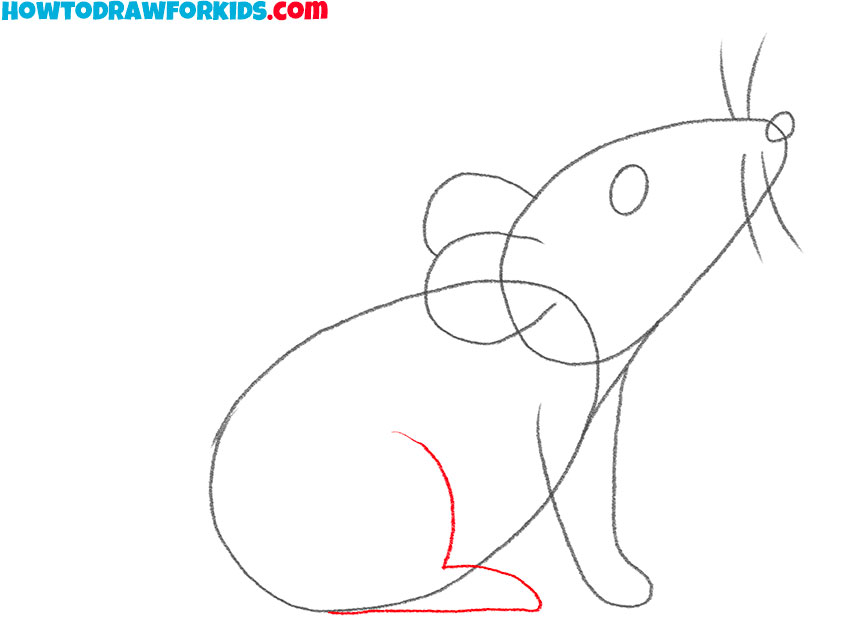
- Add the outline of the hind paw of the mouse.
In the back of the mouse’s torso, draw the paw using arcs and a straight line.
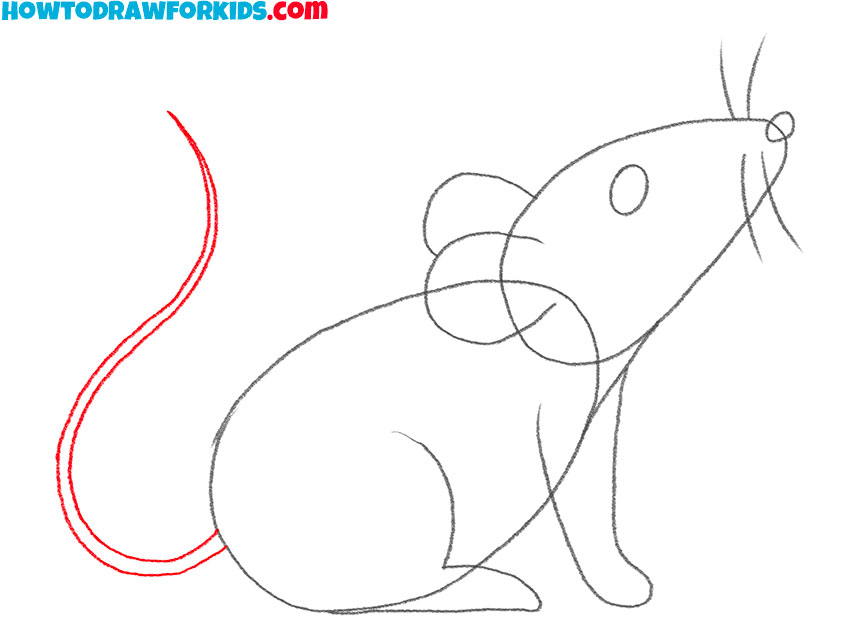
- Draw the mouse tail.
To depict the thin, long and pointed tail of the mouse, use smooth curved lines.
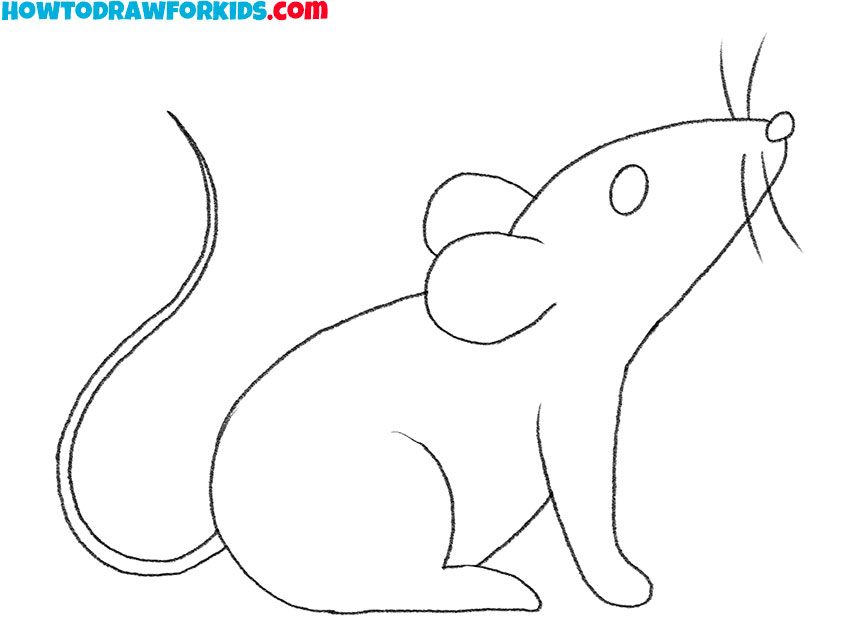
- Correct inaccuracies.
Now you can use the eraser to remove the extra lines.
- Color the mouse.
To color the drawing, use gray, pink and black. Add the highlights to the mouse’s eye.

Additional Content
I invite you to download a PDF with a short version of this step-by-step guide. The file contains quick instructions, a coloring sheet, a tracing worksheet, and a grid drawing worksheet. I have prepared these materials specifically for your convenience, so that you can return to the lesson at any time and draw the mouse again if necessary.
Alternative Ways to Learn How to Draw a Mouse
To help you practice and improve your artistic skills, I have prepared some more mouse drawing techniques for you. These methods are also simple and you can easily handle them. This approach will help you develop your imagination, and in the future you can draw a mouse using your own method.
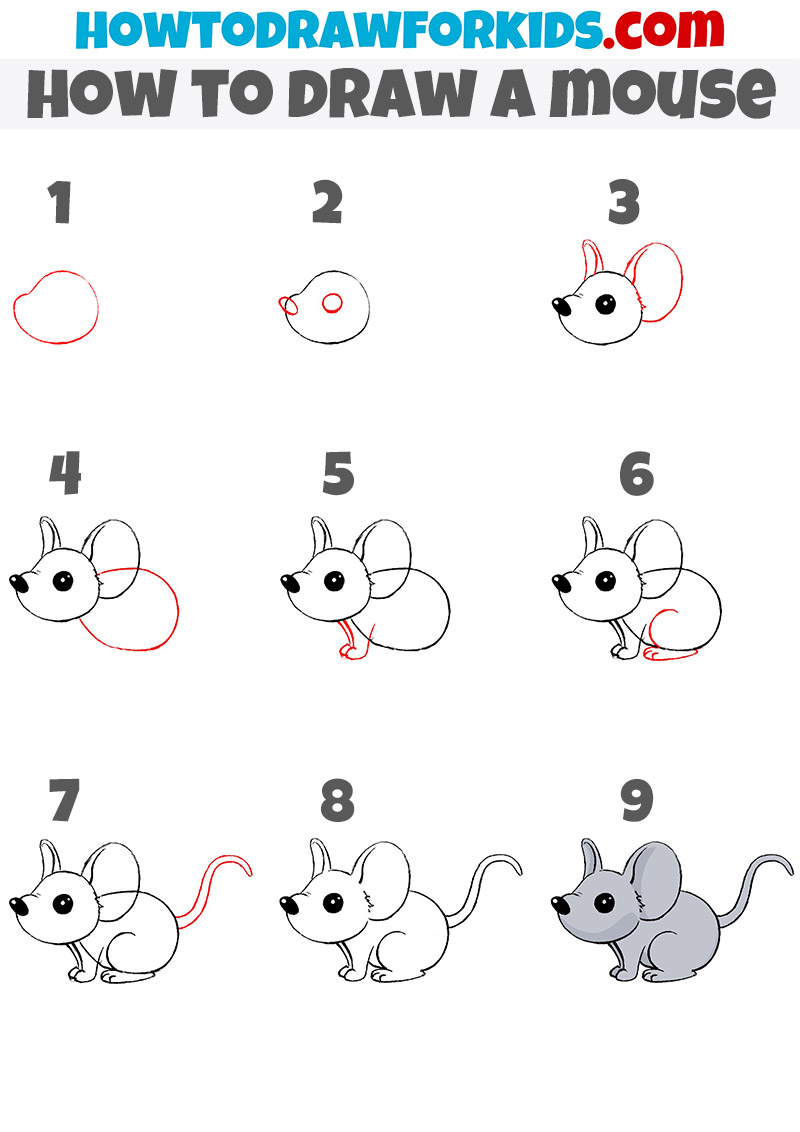
Method 1: How to Draw an Easy Mouse
In the figure, the mouse is shown in a sitting position, with the front and hind legs located side by side. Try to depict this body position correctly. Pay attention to the proportions; the mouse has a relatively large head and large ears. The front part of the muzzle is more elongated.
Method 2: for Kindergarten
If you avoid complex shadows, highlights and details, then this method is for you! This is the most simplified version of drawing a mouse in just four easy steps. This method of drawing a mouse was originally prepared for kindergarten, but all beginners can start practicing drawing this animal from this lesson.

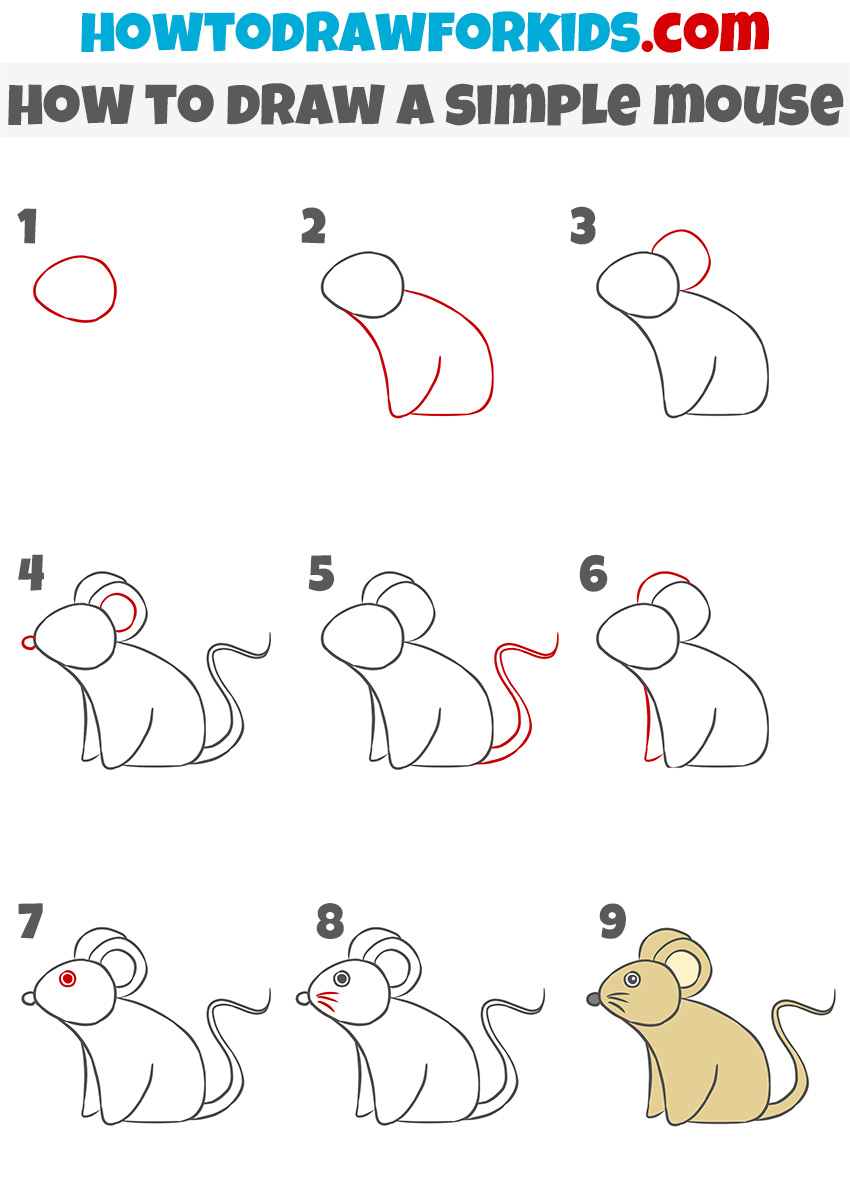
Method 3: How to Draw a Simple Mouse
Now you will learn how to draw a simple mouse. There are no complex contours here. In this tutorial I used only smooth lines and simple rounded shapes. This will help you get good results, even if this is your first time picking up a pencil.
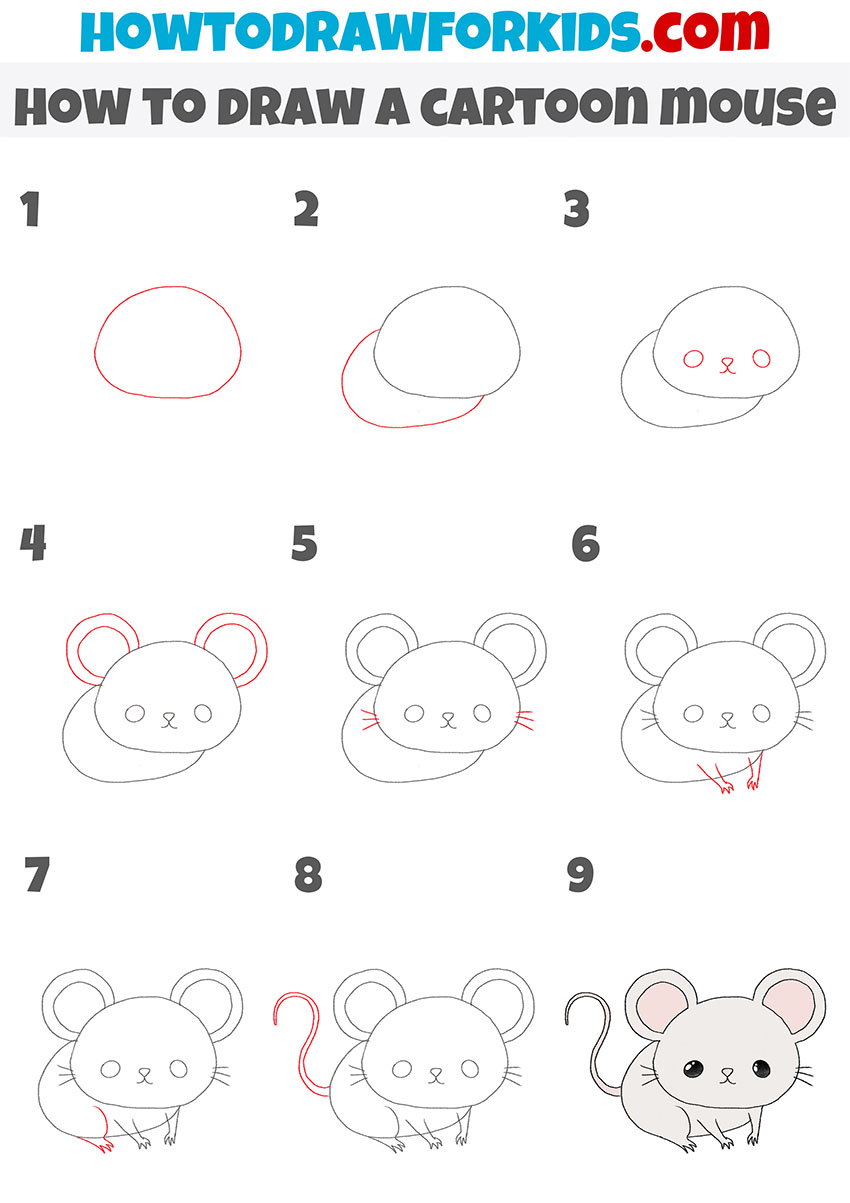
Method 4: How to Draw a Cartoon Mouse
This is an instruction for drawing a cartoon mouse. In this lesson, the mouse looks unrealistic, but very funny and therefore evokes only pleasant emotions. This tutorial will require you to be able to draw smooth, rounded lines, since the main parts of the mouse’s body are rounded.
Conclusion
Were you able to draw the mouse correctly the first time or did you encounter any difficulties during the process? Don’t worry if it doesn’t work out the first time. I specifically suggested several methods for drawing a mouse so that you can practice more, since artistic skills improve only with practice. If you have any difficulties, go back to the beginning of the lesson and try until you like the result.


