How to Draw a Raspberry
In this drawing lesson, I will tell you how to draw a raspberry step by step. This step-by-step instruction consists of nine simple steps.
I suggest you complete an excellent and very useful drawing lesson for each of you, in which I will tell and show you how to draw a raspberry step by step. This is another fascinating drawing lesson dedicated to the image of plants and well-known food. To complete this lesson in a quality and beautiful way, you need to be able to draw rounded lines.
Each of you has definitely ever seen or tasted raspberries. Raspberry is a forest and garden crop, which is a dense shrub about two meters high. It has semi-oval green leaves. The stems of the plant are straight, light green and brown with small needles.
Raspberries are juicy, sweet burgundy or red berries the size of a cherry, empty inside. There are also black and yellow raspberries. Berries consist of many small slices that are interconnected. When ripe, they become soft and lush, easily separated from the branches. Used fresh, dried and frozen. They also make jams and compotes. Raspberry is a medicinal plant because it contains many vitamins and nutrients.
By learning how to draw a raspberry step by step with the help of this simple instruction, you can easily draw it as the main object of your drawing in the future, as well as depict some kind of still life and complement your drawing with an image of a raspberry, or draw a raspberry against a natural landscape, grass, flowers or other plants.
Raspberry Drawing Tutorial
Materials
- Pencil
- Paper
- Eraser
- Coloring supplies
Time needed: 30 minutes
How to Draw a Raspberry
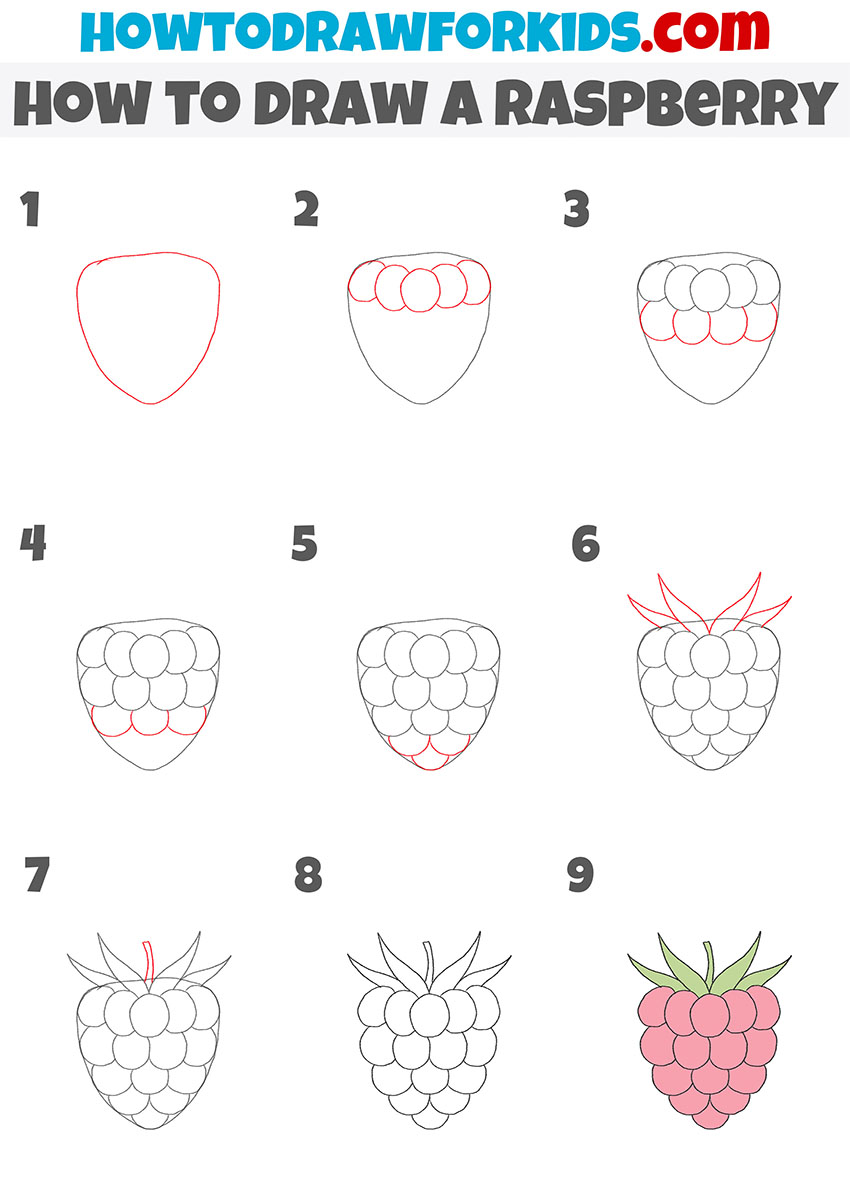
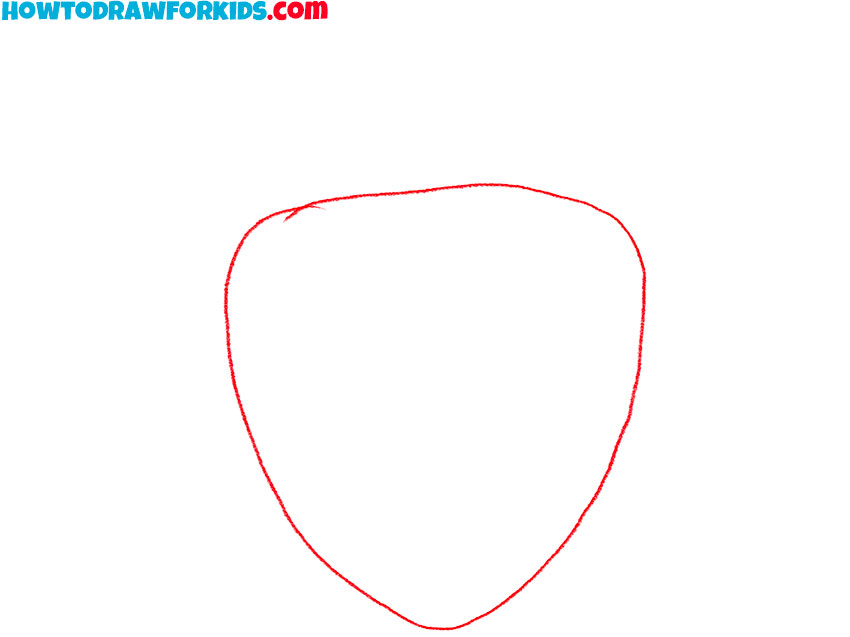
- Draw an auxiliary outline of the raspberry.
To indicate the size and shape of the raspberry, you should depict the figure using a curved line.
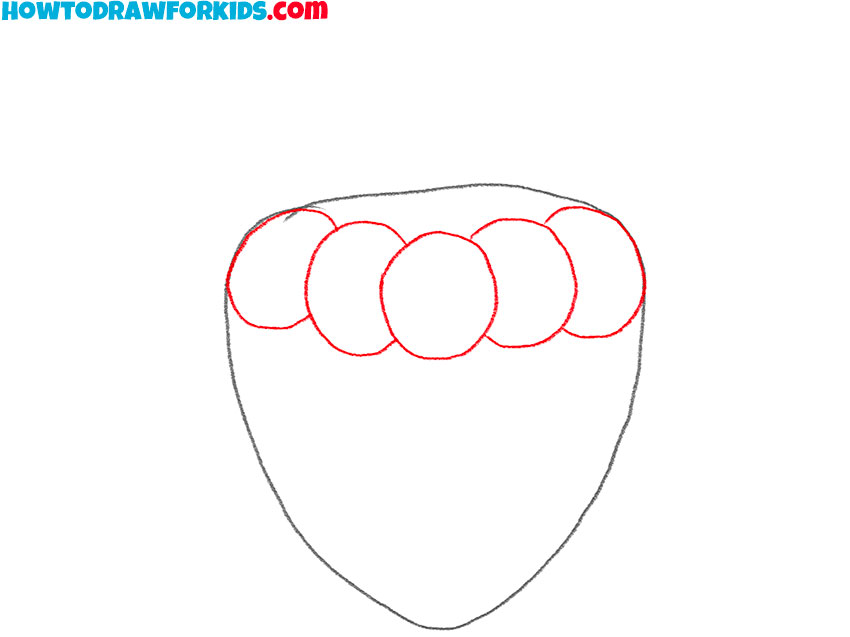
- Start drawing the top of the raspberry.
To draw the top of the raspberry, you need to draw one oval, as well as several incomplete ovals.
- Continue drawing the raspberries.
Below the previously drawn elements, add a few more arcs, as shown in the figure.
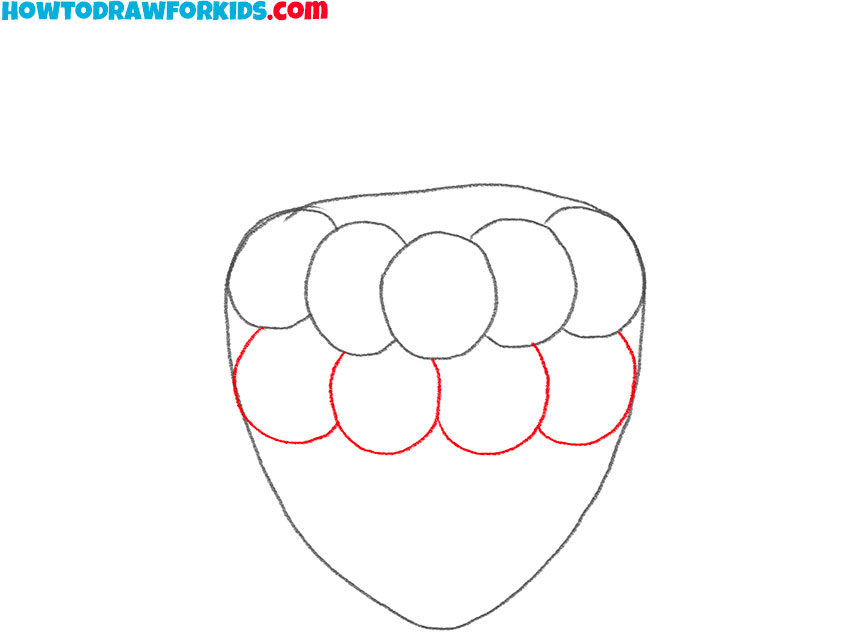
- Add the next row of berry elements.
Below the drawn arcs, add three more arcs of different lengths, as shown in the figure.
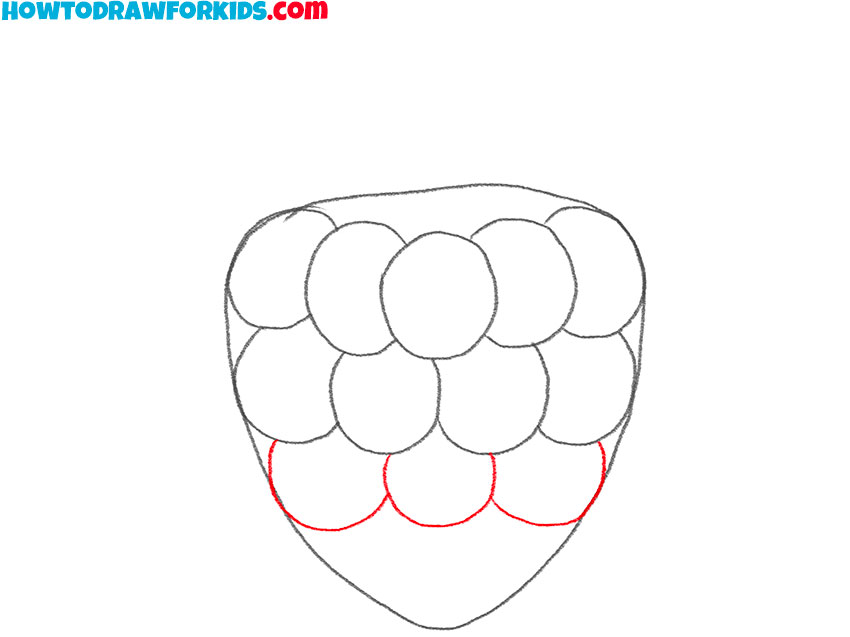
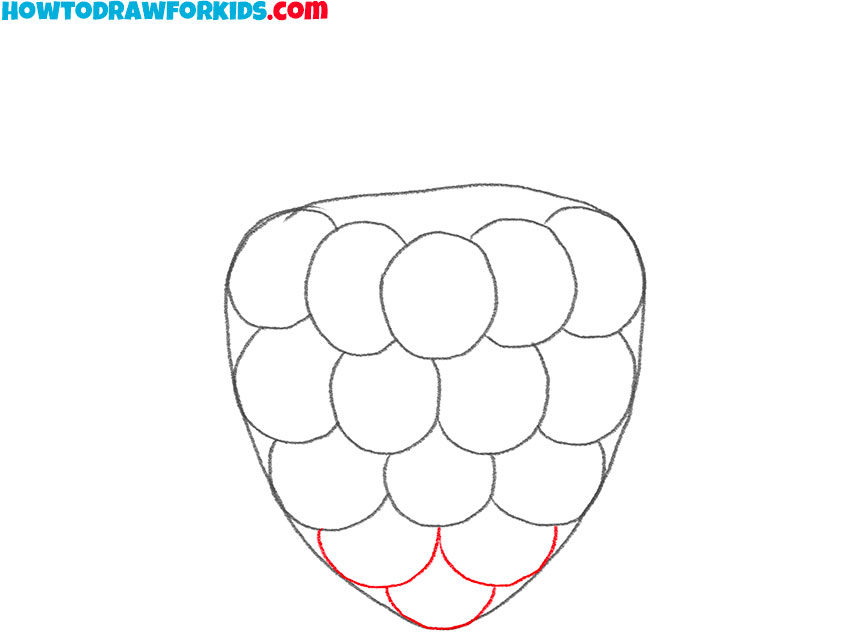
- Draw the bottom of the raspberry.
Below the previously drawn arcs, draw two identical arcs, and also add another arc below them.
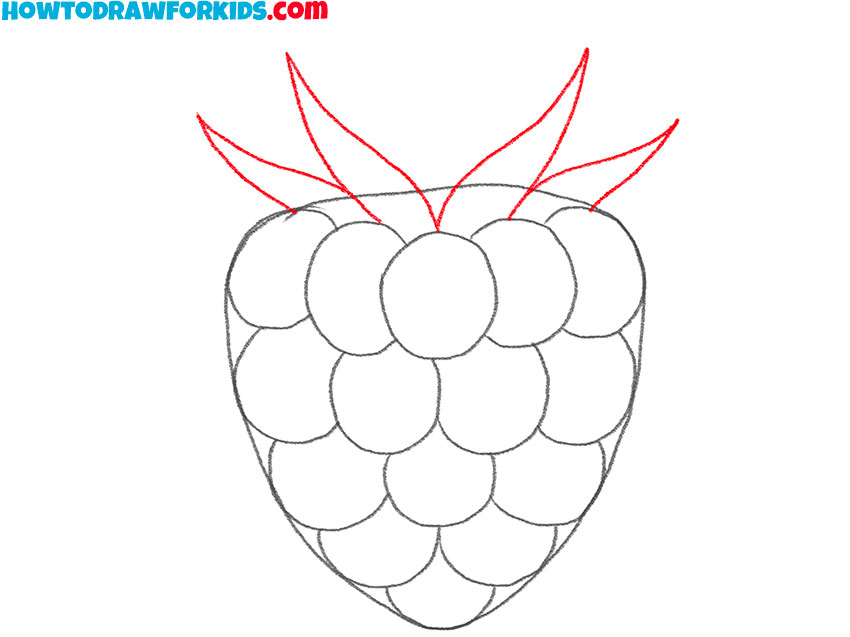
- Add the raspberry leaves.
At the top of the berry you’ve drawn, add four pointed leaves using curved lines.
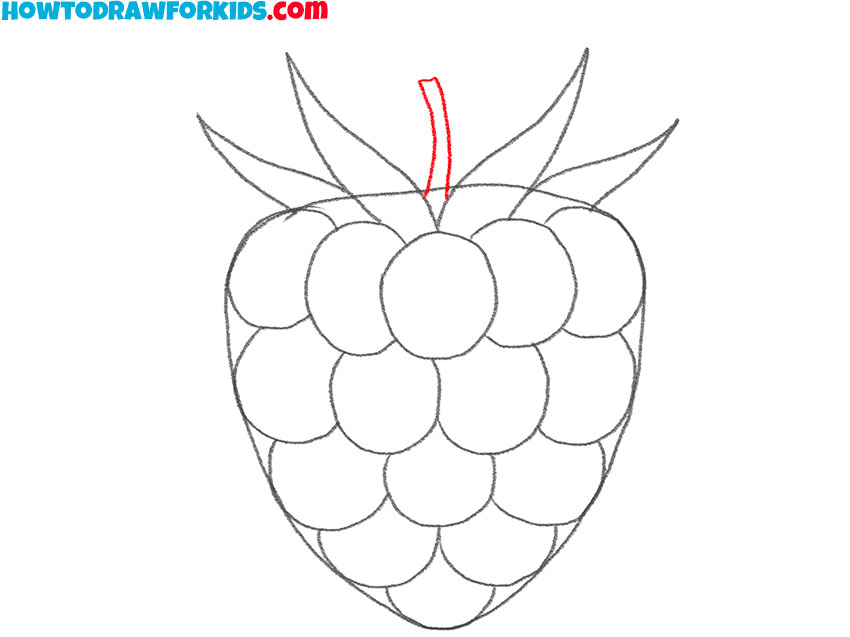
- Sketch out the tail on the berry.
Between the drawn leaves, add the ponytail using curved lines and a short, straight line.
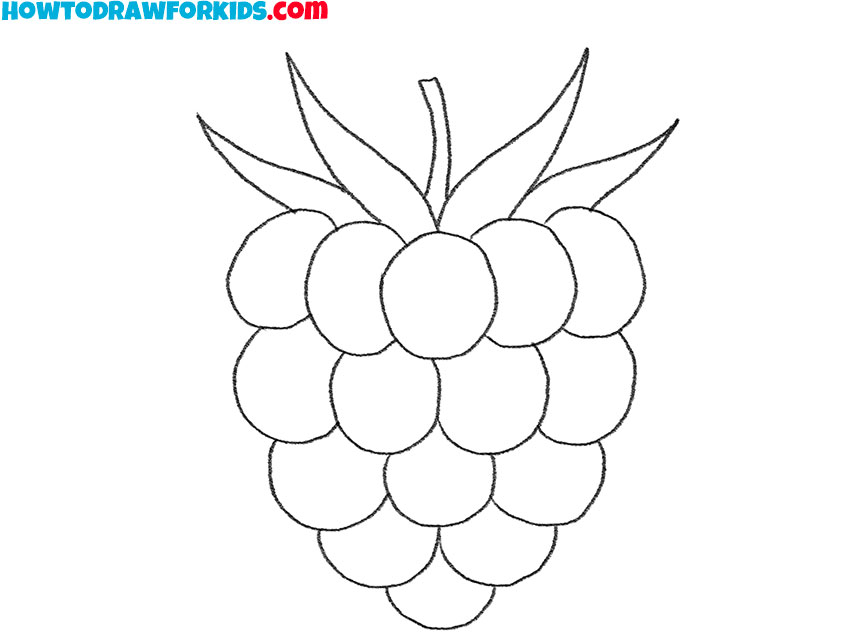
- Correct inaccuracies.
To prepare the drawing for coloring, use the eraser and remove unnecessary elements.
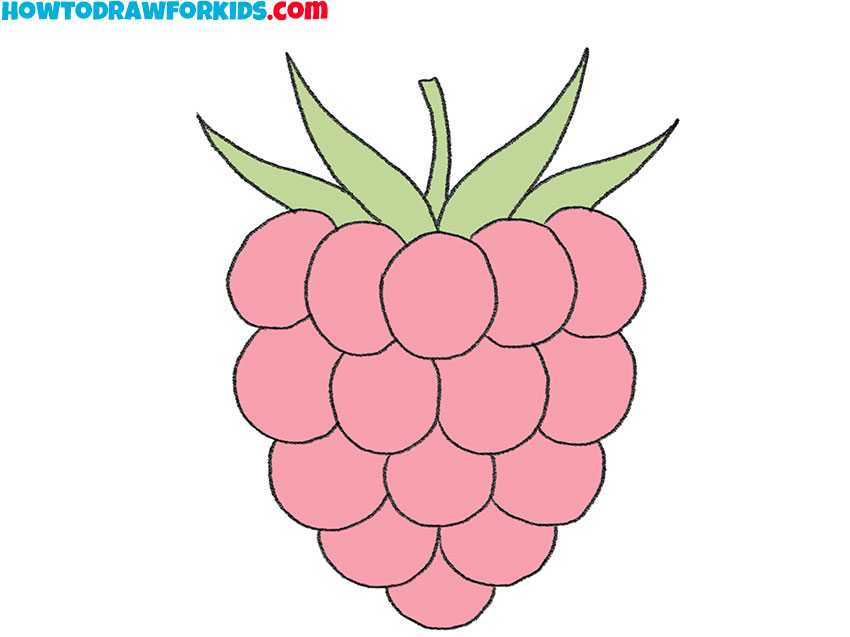
- Color the drawing.
To color the raspberry, you can use pink and green.
Don’t forget to download the PDF file, which contains a short version of this lesson, as well as additional practice materials to help you complete it.
i love the drawing you make
I love your drawings❤️