How to Draw a Forest
In this step-by-step lesson, you’ll learn how to draw a forest made up of several layers of trees of different shapes and sizes.

How to Draw a Forest: Introduction
Drawing a forest is a good exercise for learning how to combine many similar forms into one composition.
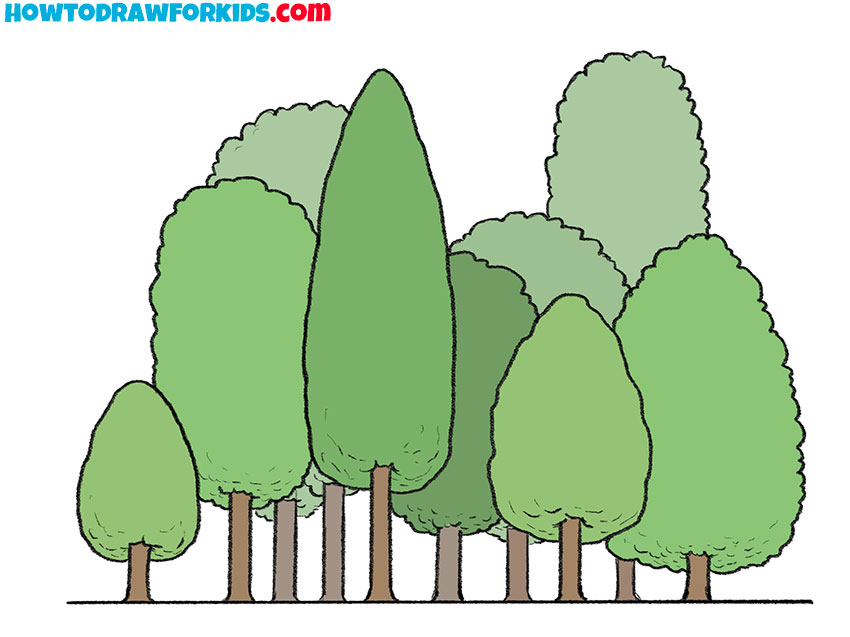
In this tutorial, we’ll draw trees that differ in height, width, and shape but still look natural together.
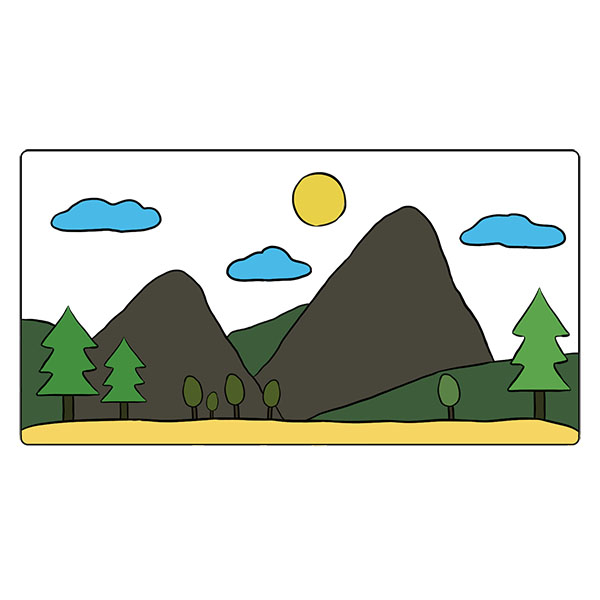
The forest in this lesson consists of trees with varied outlines, showing how to create a sense of depth and create a complex landscape, using simple shapes.
You’ll see how to position the trunks and crowns to make the scene appear full and consistent without unnecessary details.
The method is based on simple shapes that gradually form a complete forest scene. It will help you understand how to organize elements, keep proportions, and avoid symmetry that makes drawings look artificial.
Forest Drawing Tutorial
Materials
- Pencil
- Paper
- Eraser
- Coloring supplies
Time needed: 30 minutes
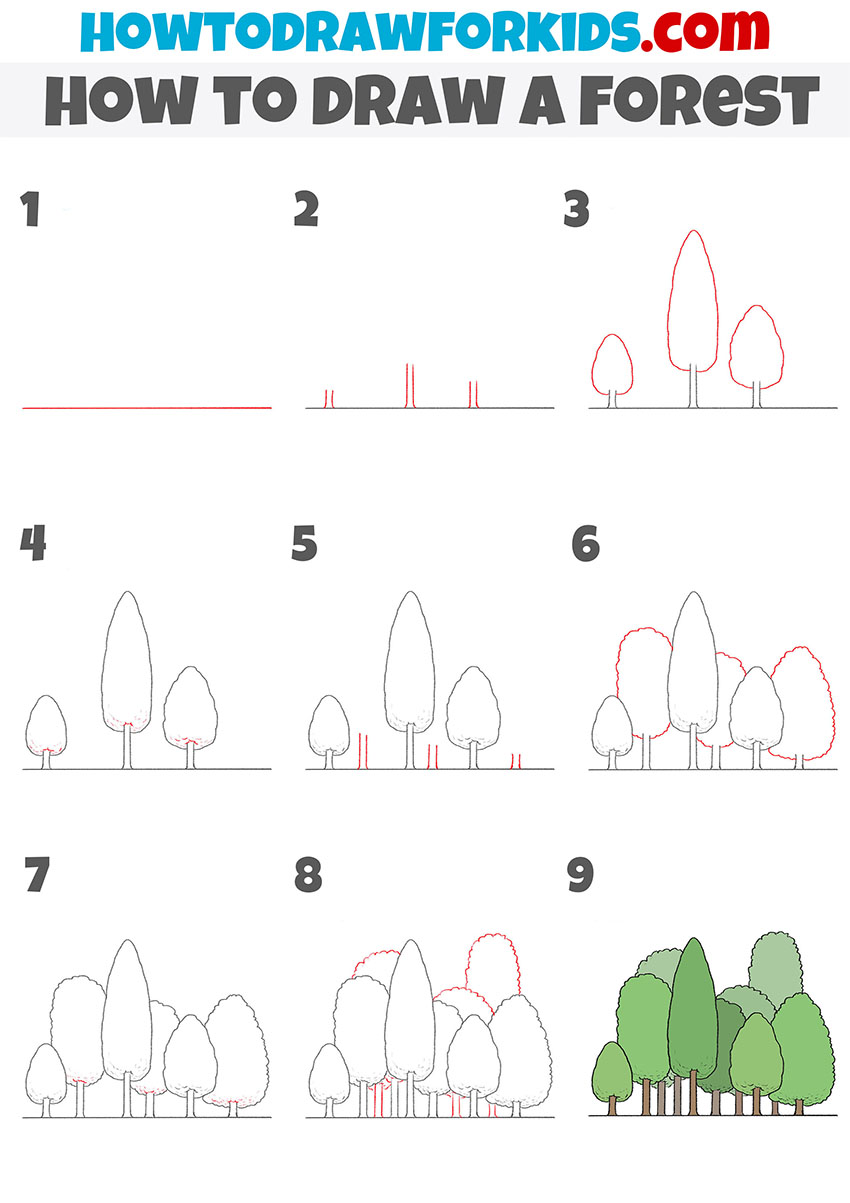
How to draw a forest step by step
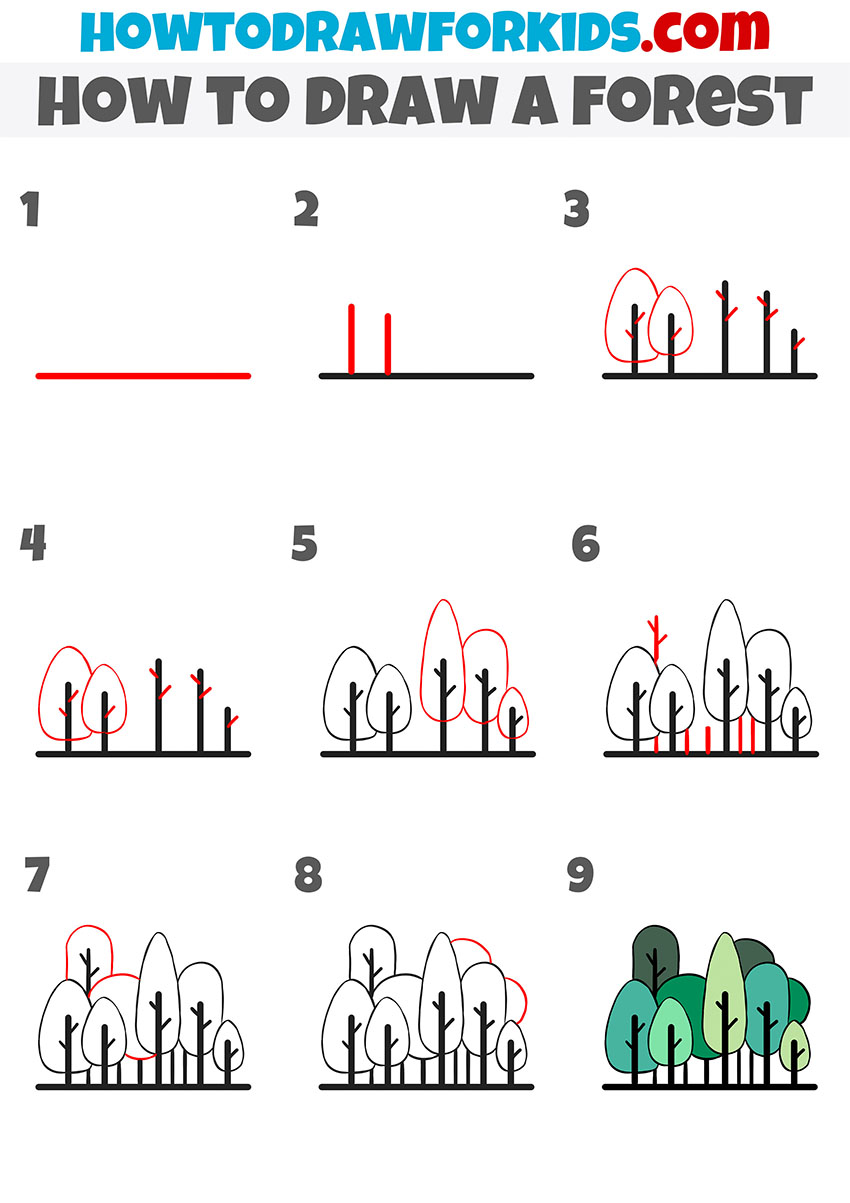
- Sketch the horizon line for the trees.
Perspective needs a simple baseline so the forest sits naturally on the page. Draw a long, straight horizontal line near the lower third to indicate the forest floor or horizon of the woodland scene. Keep the stroke light because some portions will hide behind tree trunks later. Extend the line past the future edges of the group to give room for overlapping trees.

- Draw the first tree trunks of the forest.
Now, draw the trunks that will define near and mid-ground trees. Sketch a few short vertical pairs rising from the ground line to mark slender trunks. Vary spacing: a narrow pair for a small sapling at left, a taller pair near center for the main conifer, and another mid-height pair to the right. Keep the lines parallel and slightly tapered upward.

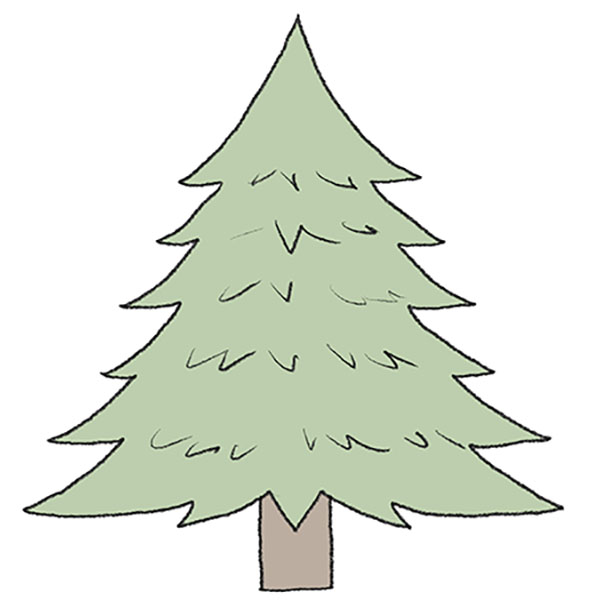
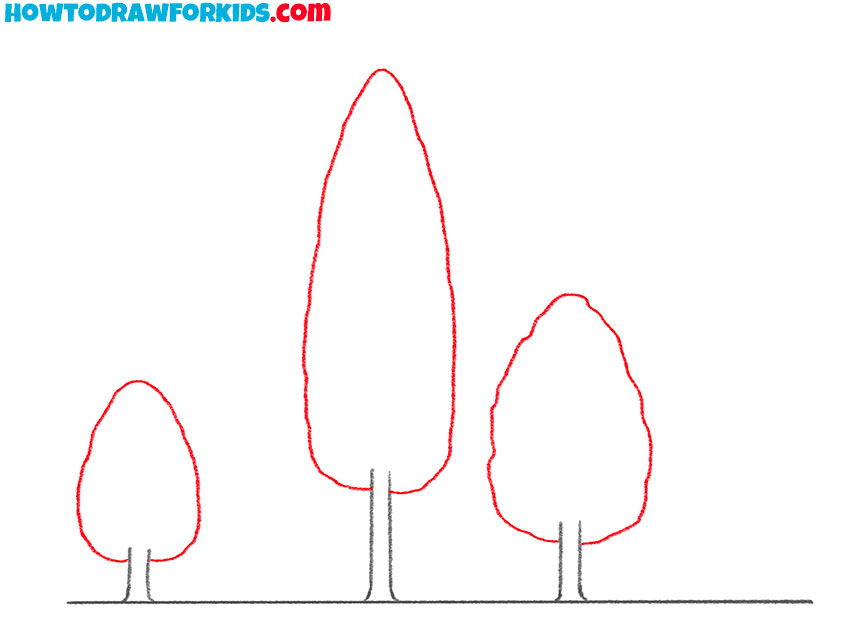
- Sketch the first tree crowns.
Draw the rounded and simple crown of a small shrub at left. Over the tall center trunk, sketch an elongated teardrop crown like a narrow fir or cypress. On the right trunk, outline an oval, bushy canopy typical of a deciduous tree. Let each crown slightly overlap the trunks.
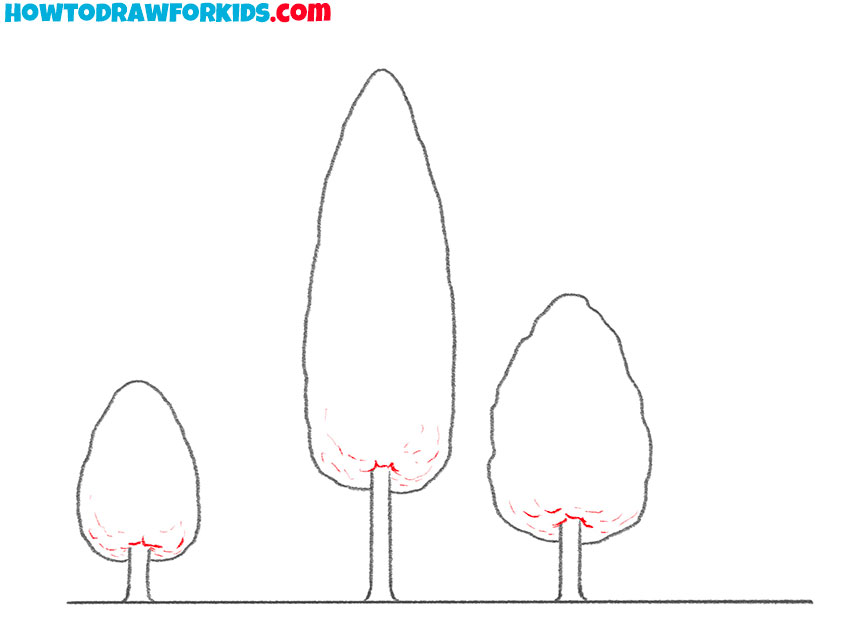
- Add bark texture and base details.
At each trunk base, draw bark texture using short and broken lines. On the lower portions of the crowns, sketch small scalloped strokes to imply dense leaves. Keep texture denser near overlaps and bases where foliage thickens.
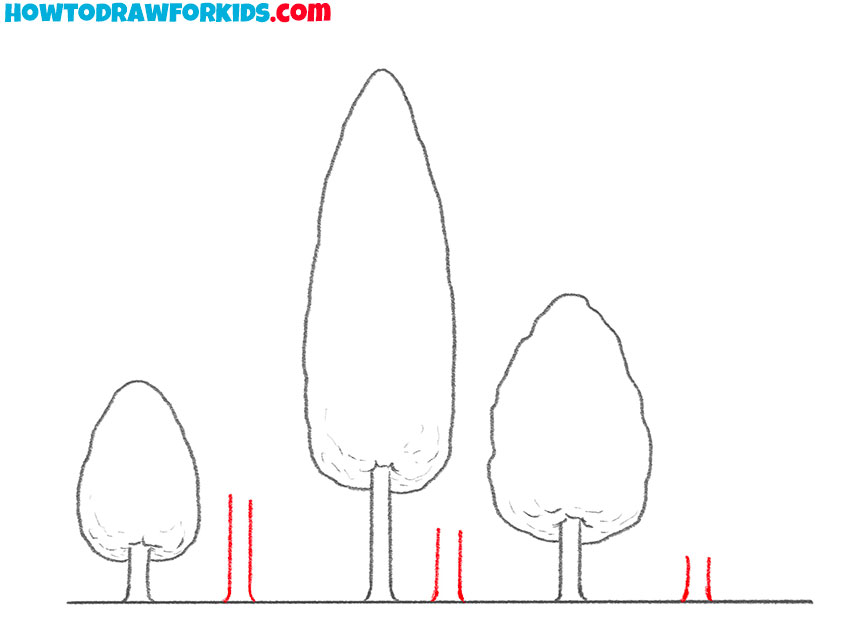
- Add trunks for background trees.
From the ground line between existing trees, sketch additional parallel trunk pairs of varying heights. Keep them slightly thinner than the foreground trunks to imply distance. Place one very short pair far right and several medium pairs between the main trees.
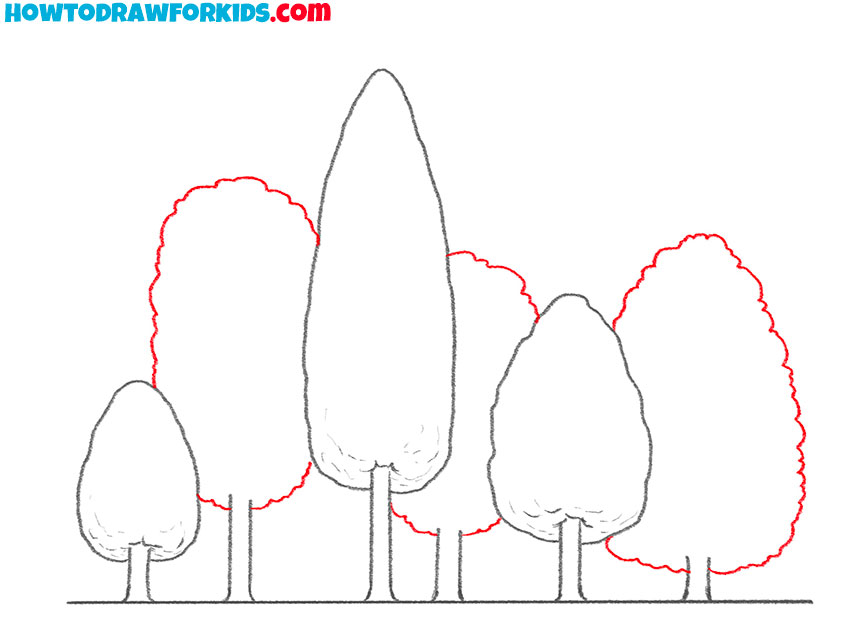
- Draw the crowns of background forest trees.
Behind the first trio, draw the rounded crown shapes of a background tress, letting its contours overlap the previous ones. Keep edges bumpy to indicate leaves. To draw the leaves, use small, short, curved lines along the edges.
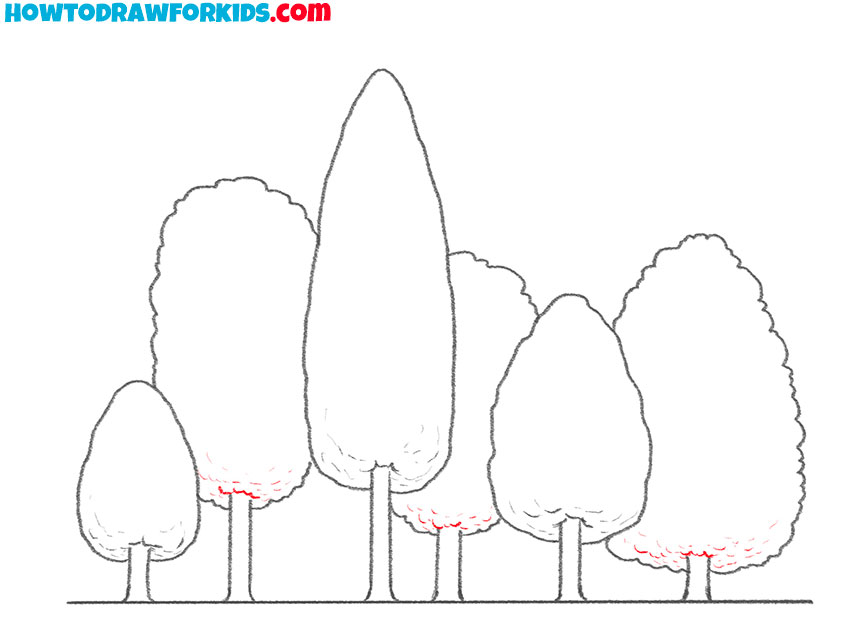
- Complete the back row of trees.
Draw the subtle and uneven edges of foliage for new trees where crowns touch, using short scallops and broken lines. Reinforce trunk bases with tiny vertical marks to indicate texture. Check spacing so no two gaps match.
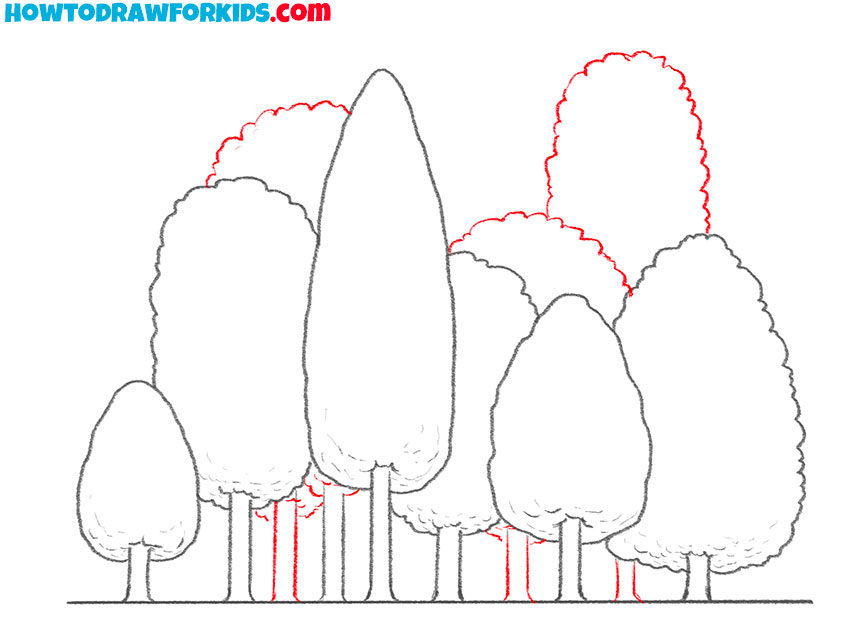
- Complete and clean up the forest drawing.
Now, darken the final outer contours of all crowns and trunks with steady strokes. Add a few more threes at the background varying their shapes and sizes. Erase construction extras from the trunks and foliage. Keep only the necessary outlines so the forest drawing looks crisp and readable.
- Add greens and browns to trees.
Now it’s time to complete the forest drawing by adding the right colors and tones. Use shades of green to paint the crowns. Vary the tones to make the sketch look natural and realistic. Next, paint the tree trunks, also varying the tones.
Additional Content
To go with the forest drawing tutorial, I’ve prepared a free downloadable PDF version. It includes the key steps and examples from the full lesson in a compact format that’s easy to use offline.
The file can be printed or used on a tablet, making it simple to practice drawing trees and forest compositions anywhere. Inside, you’ll find all the main stages of the process and a few extra materials for steady progress.
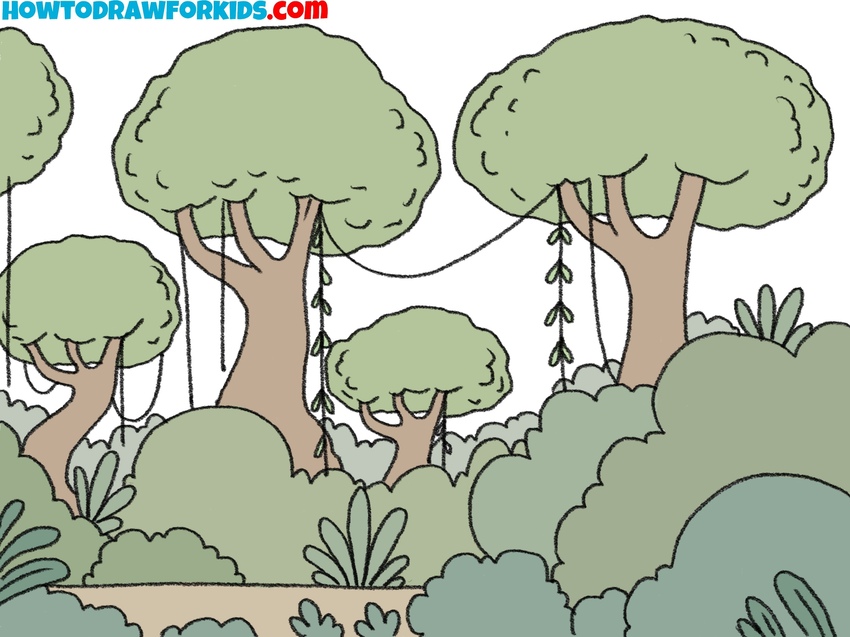
How to Draw a Forest: Alternative Technique
Alongside the main tutorial, there’s also an alternative way to sketch a simple forest. This approach shows another method of arranging trees and adding variety to the composition.
In this version, the drawing process focuses on creating a dense forest with simple outlines and minimal detail.
This uncomplicated method helps beginners quickly understand the basic structure of a forest scene. It allows them to draw confidently and see results without confusion or difficulty.
Conclusion
This forest drawing tutorial is complete, but you can continue improving your skills with other lessons on the website. Try drawing a lotus to practice smooth organic shapes or try to draw a palm tree to practice sketching different shapes.
To keep up with new tutorials, follow the project on social media and check the updates section regularly. Your comments and suggestions help guide future lessons, so feel free to share your thoughts and ideas. Keep drawing and developing your technique step by step.