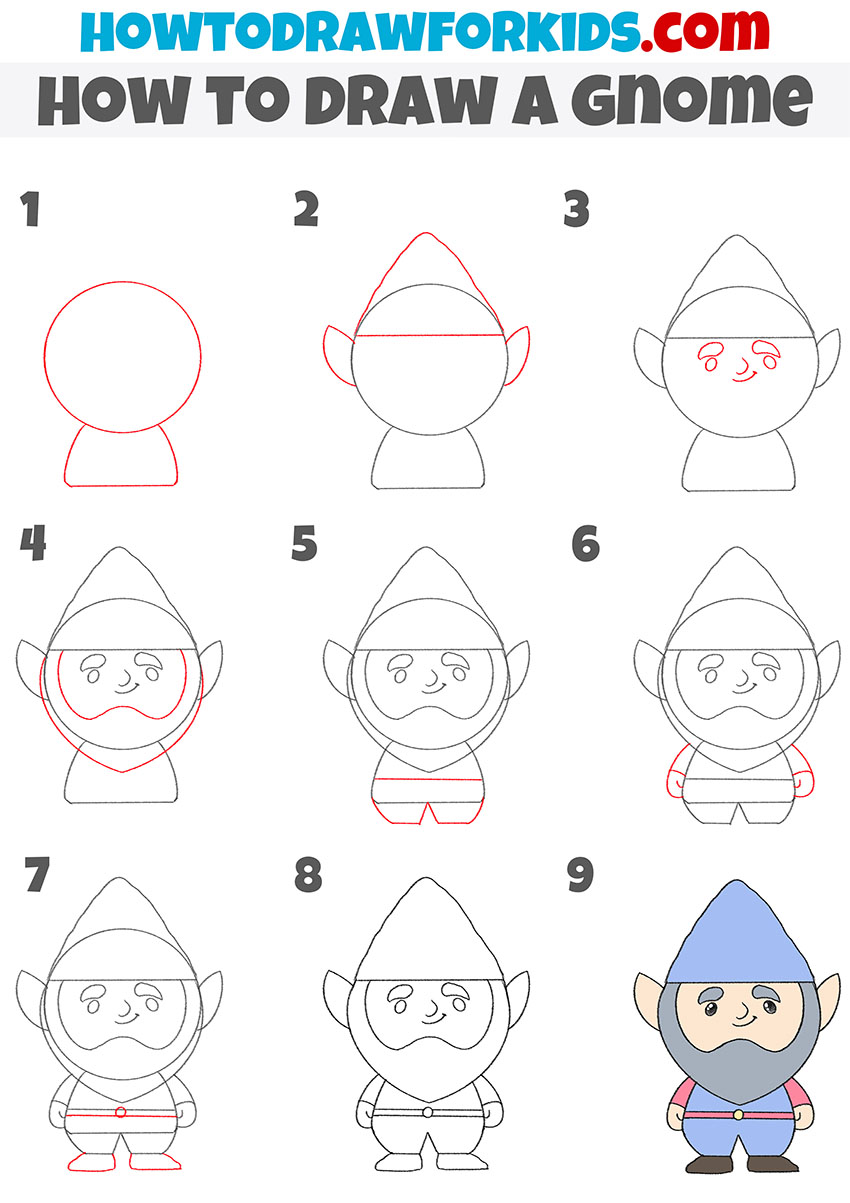
How to Draw a Gnome
This tutorial will show you how to draw a gnome with simplified, iconic proportions, featuring the characteristic hat and pointed ears.

Now you are in for a very interesting lesson, in which you will learn how to sketch a canonic gnome. It is a popular character that is often found in fairy tales and ancient myths.
In appearance, the gnome looks like a little man with a beard, and he has a hat on his head. It is believed that gnomes are living underground and guarding the treasures. Sometimes these little people have magical powers and can use that for good or for bad.
There are many mysteries and wonders about gnomes. I think you will find it interesting to draw this character. There is a cute little gnome in this picture.
Pay attention to the proportions of the body. The head is much larger than the torso, and the arms and legs are very short. This tutorial is specially created for beginner artists, so you will easily repeat all the steps of drawing and you will have a great gnome.
You will use simple lines and geometric shapes to draw this object. So, prepare everything you need to do this lesson and get to work!
Gnome Drawing Tutorial
Materials
- Pencil
- Paper
- Eraser
- Coloring supplies
Time needed: 30 minutes
How to draw a gnome step by step
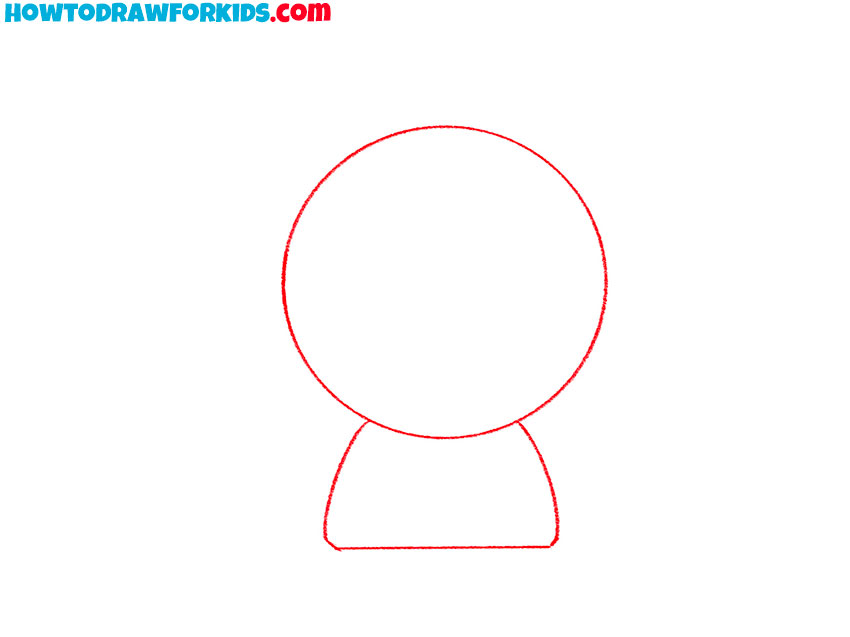
- Create the basic shapes of the character.
Proportion set-up first so later details sit correctly. Sketch the head of the gnome as a large circle. Under it, draw the short and slightly flared torso as a trapezoid with rounded corners; its top edge tucks under the circle to imply the neck and shoulders hidden by a beard later.
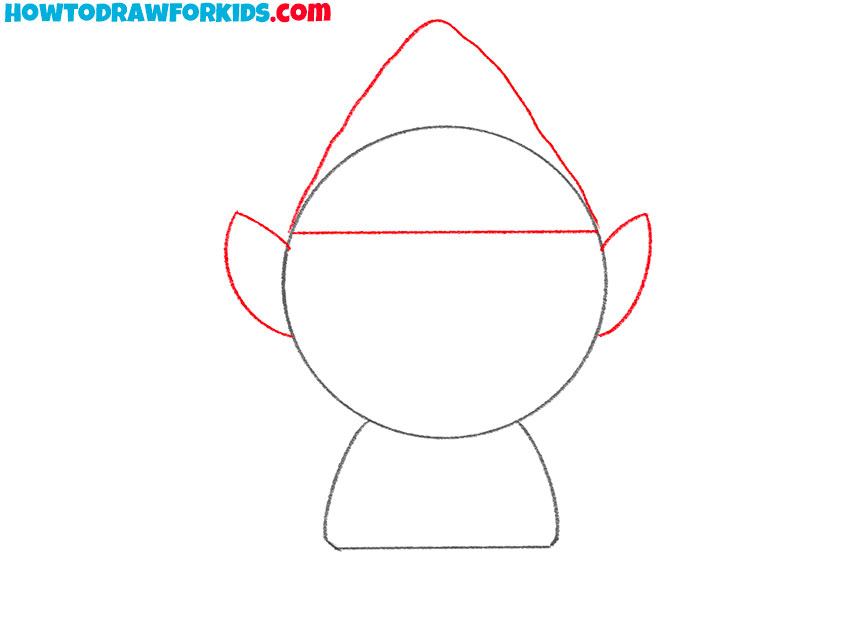
- Add the pointed hat and ears.
Across the head, draw the straight horizontal hat band just above the upper third. Above the band, outline the tall, pointed cap as a soft triangle with curved sides that meet at a rounded tip. On each side of the head, sketch the wide and leaf-shaped ears that taper toward the top.
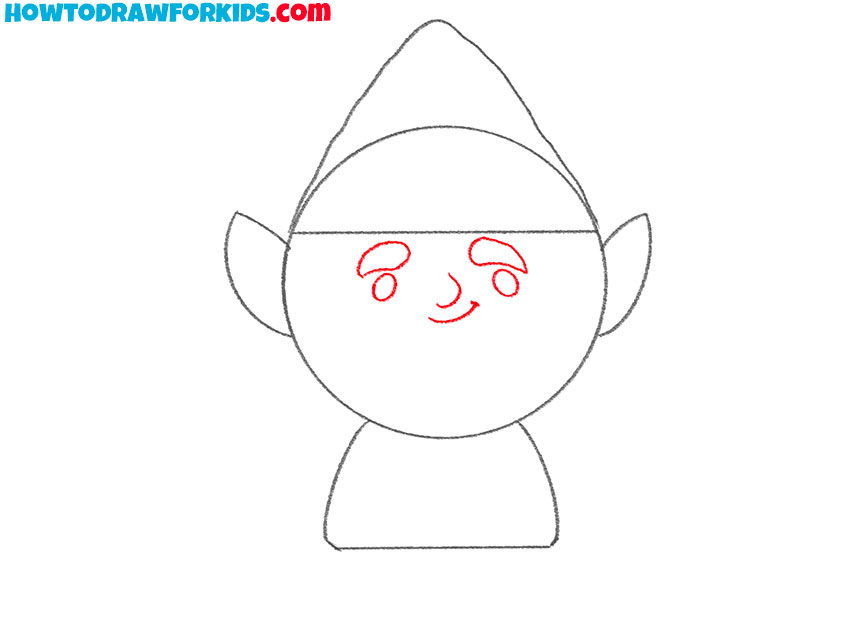
- Draw the facial features of the gnome.
Now, draw the eyes as two small filled ovals placed under the hat band. Between them, sketch the nose as a short curved droplet. Under the nose, add a gentle smile with a shallow arc. Indicate simple eyebrows as tiny curved dashes above the eyes.
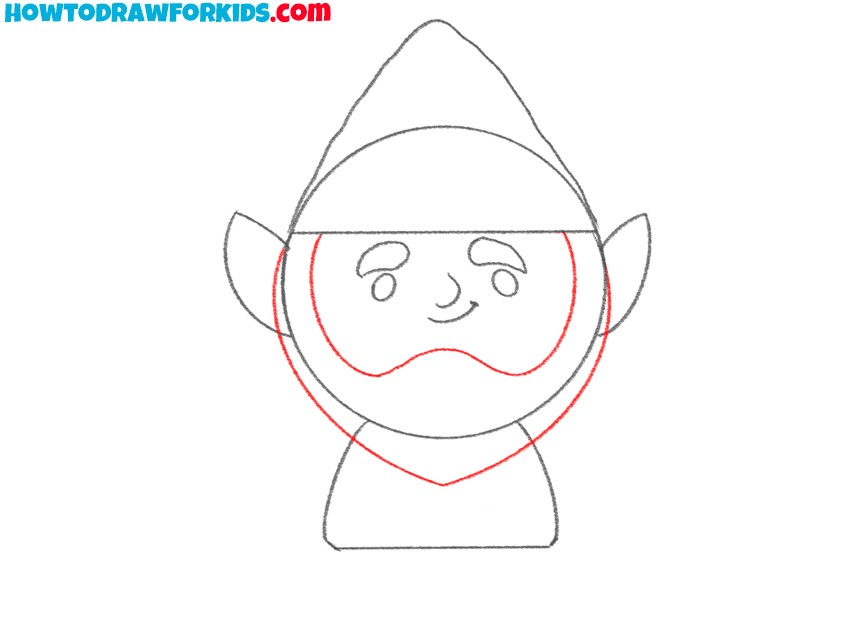
- Sketch the beard around the face.
The beard frames the face and connects head to body. Starting near one ear, draw the large and rounded beard contour that follows the cheek line, dips under the chin, and rises to the opposite ear. Inside this contour, add theupper-beard line as a smooth wavy band.
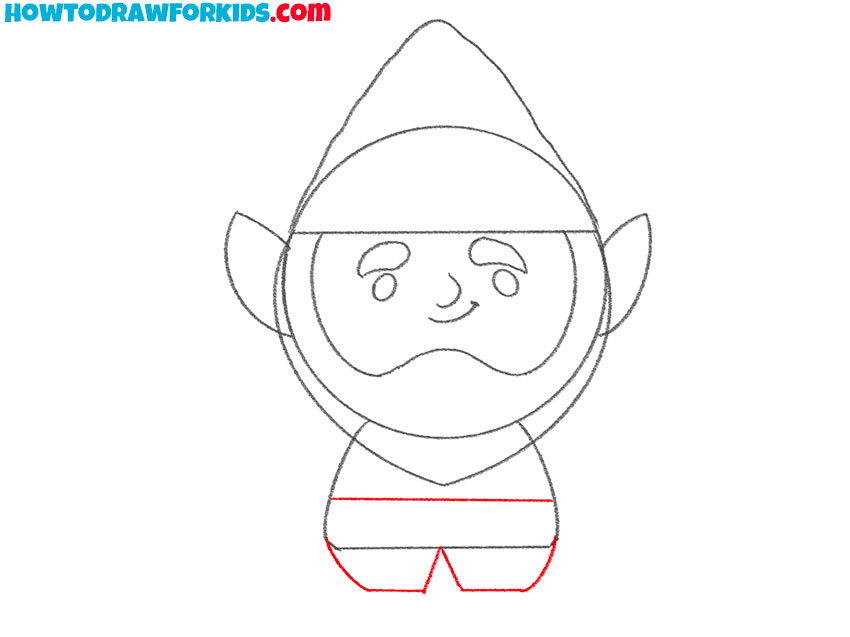
- Draw the belt and pants of the gnome.
Across the lower torso, draw a straight belt line. From the belt down, draw the pants as two short, blocky legs with a small inverted V-shaped gap between them. Use very smooth lines and keep the widths and length of the legs equal.
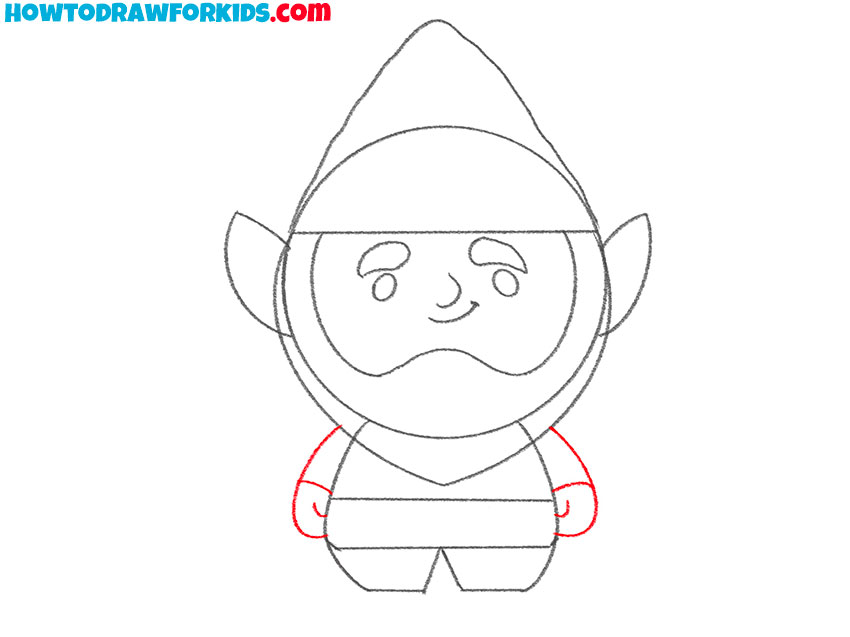
- Sketch the sleeves and small hands.
Arms complete the silhouette, so on both sides of the the upper body, draw the uneven and simple sleeves as rounded shapes that connect at shoulder height and end near the belt. At each sleeve end, illustrate a small hand with a thumb bump and curved fingers.
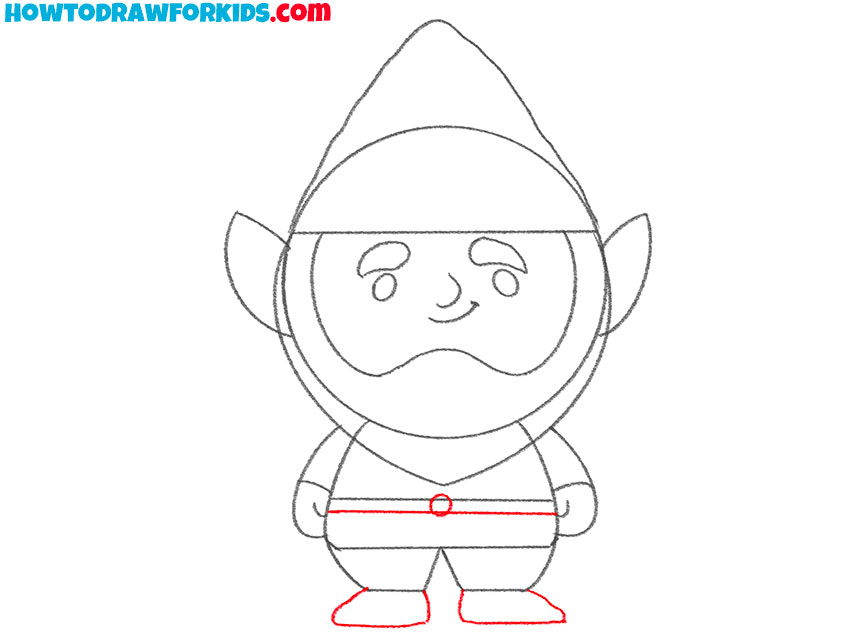
- Add the shoes and belt buckle.
Under each leg, draw a flat and slightly elongated shoe with a curved top and straight sole. Centered on the belt line, place a small circle for the buckle. You can also indicate a simple seam from the beard to the center of the buckle.
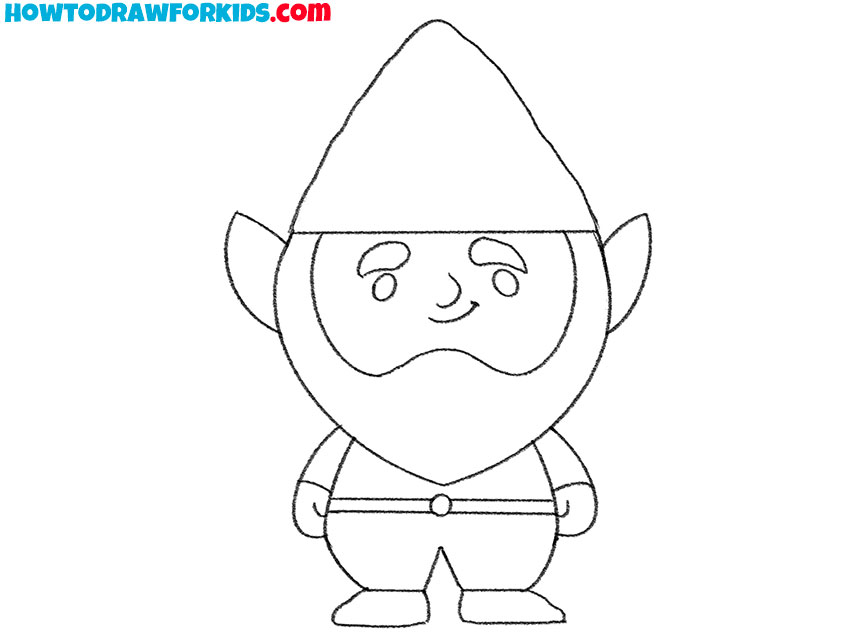
- Define the final outline of the gnome.
Clean contours of the sketch improve readability and help it look more complete before color. Darken the final outer lines of mythical creature. Then erase construction marks: remove the head circle segments hidden under the hat and beard, erase extra torso lines concealed by the beard and belt.
- Paint the gnome with simple tones.
Simple flats suit a children’s drawing style, so paint the tall pointed hat with a cool blue or any bright hue. Color the skin with a light peach for face and ears. Shade the beard and mustache with a neutral gray. Paint the shirt a warm red or pink, the belt dark brown with a yellow buckle, and the pants a muted blue. Make the shoes a deeper brown.

The lesson is over and it’s time to check the result. I hope you did everything right and that the gnome you drew turned out just the way you wanted.
To conclude the lesson, I’ve prepared a PDF file for you that contains a short version of this guide. Download the file and use it whenever you want to draw.