How to Draw a Fairy
Learn how to draw a fairy in a very simple style with delicate wings and a small magic wand in three very easy step-by-step ways.
How to Draw a Fairy: Introduction
In this step-by-step tutoria, you’ll learn how to sketch a cute and authentic fairy in a simple and clear way, starting with basic shapes and smooth lines.
You will create graceful figure with delicate wings and cartoon proportions. Before you begin, prepare a pencil, eraser, and sheet of paper.
It’s better to draw with light strokes first and refine the details as you go. You can slightly adjust the body position or the wing angle depending on how you want your fairy to look.
In this lesson, I’ve applied many of the basic principles from the previous tutorial on drawing a girl, so understanding those ideas will help you draw this fairy character more accurately and realistically.
Fairy Drawing Tutorial
Materials
- Pencil
- Paper
- Eraser
- Coloring supplies
Time needed: 35 minutes
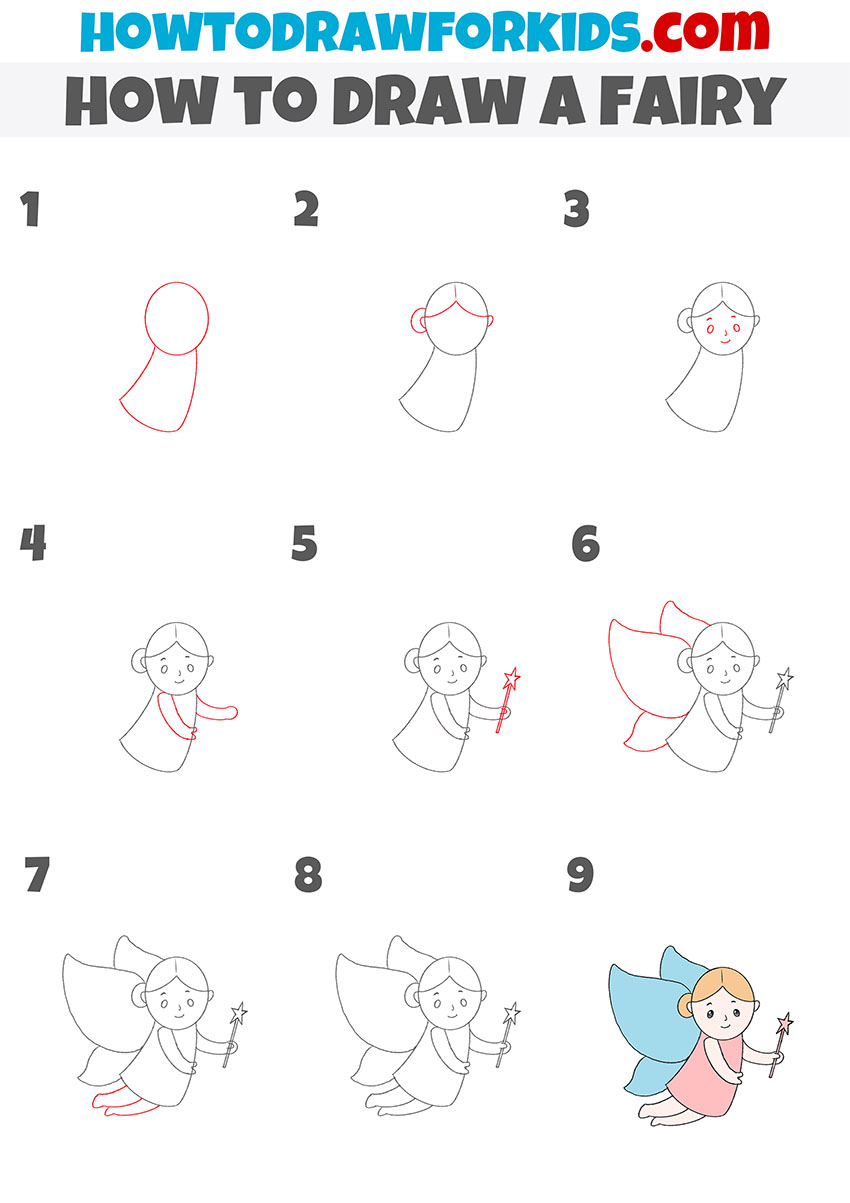
How to draw a fairy step by step
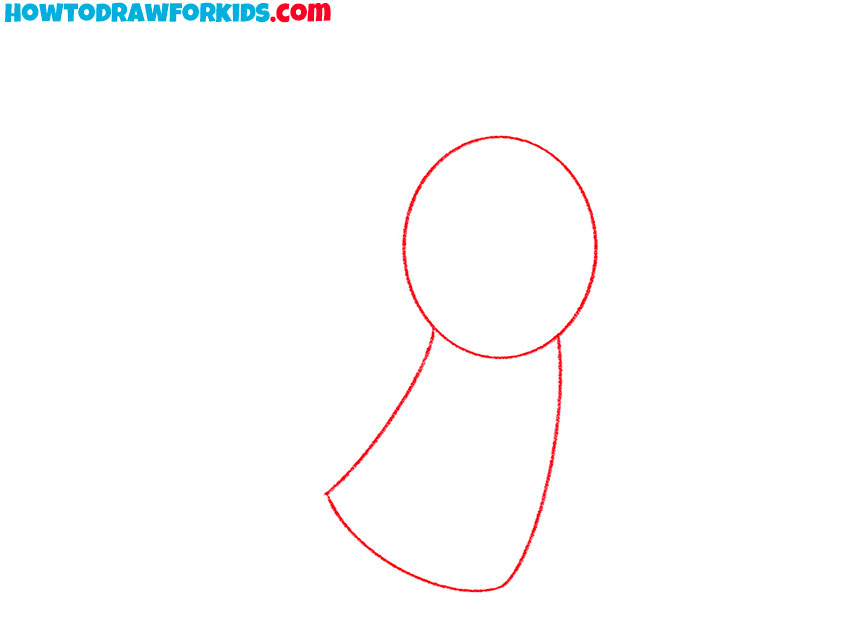
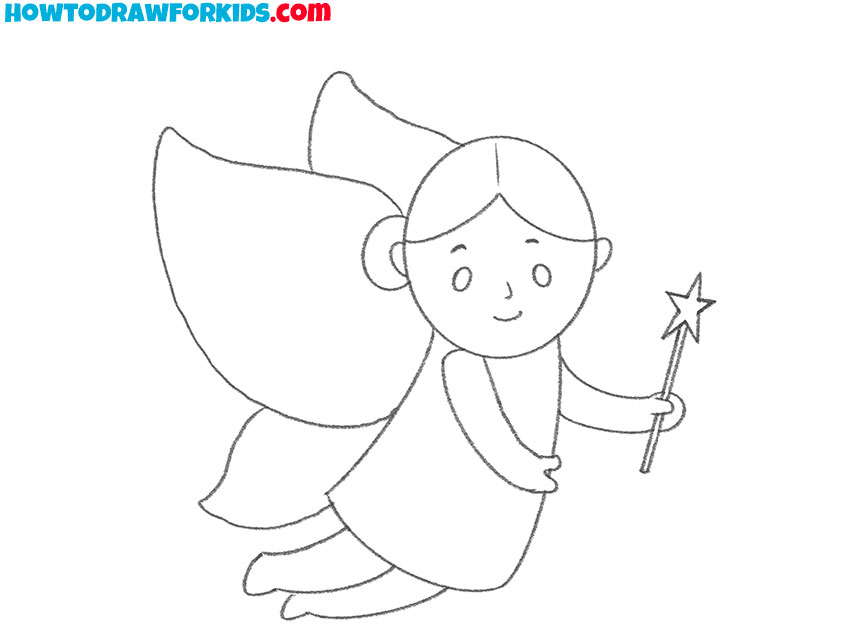
- Outline the head and dress base.
Sketch a circle for the fairy’s head and add a curved shape below it for the body. The body should be narrow at the top and widen slightly toward the bottom, creating the look of a small dress. Keep the curve of the dress smooth and natural.
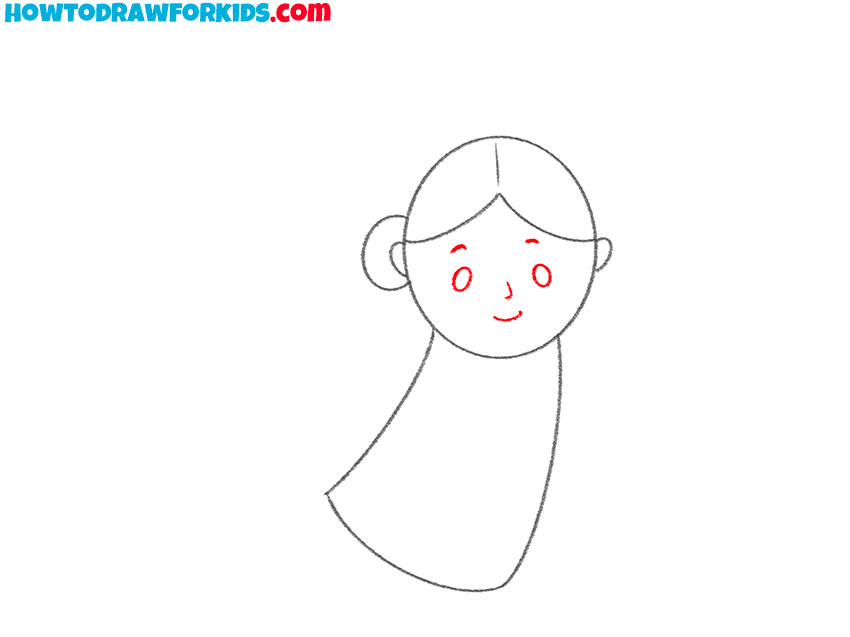
- Add the hairstyle and ears.
Now sketch the hairstyle and ears to define the fairy’s head more clearly. Draw a curved hairline across the forehead. Next, mark a small bun at the back of the head. Add small round ears on each side. You can mark small lines inside the ears for inner details.

- Add the mythical character’s facial features.
Now, draw the eyes near the middle of the head, a tiny nose between them, and a curved mouth below. You can add small curved eyebrows above the eyes. Make sure both eyes are the same size and level. You can make small adjustments to the facial features for a more unique look.
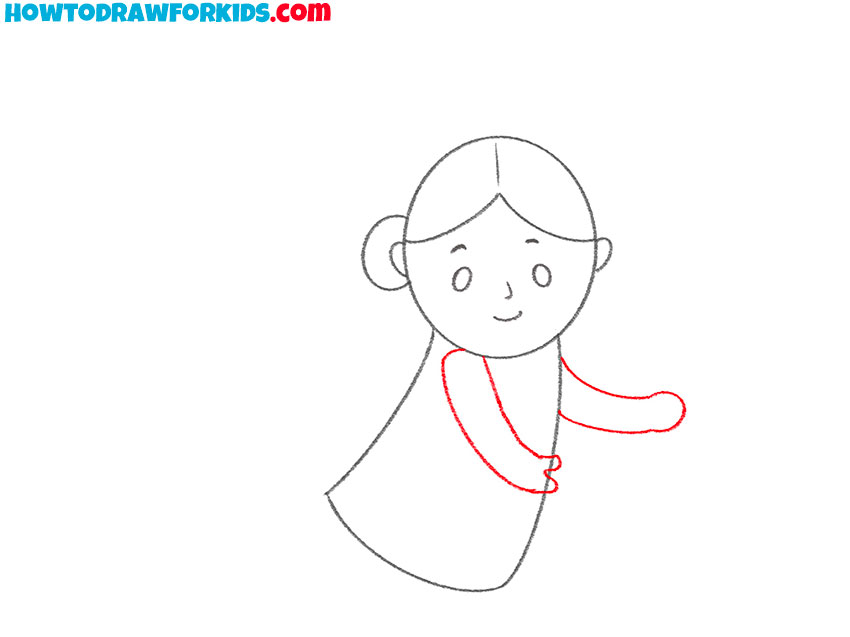
- Sketch the magic character’s arms.
Starting from the sides of the body, sketch tow long curved shapes. The arms should look soft and simplified, consistent with the fairy’s overall cartoon style. Then, draw the hands with small rounded shapes. Don’t use too detailed forms.
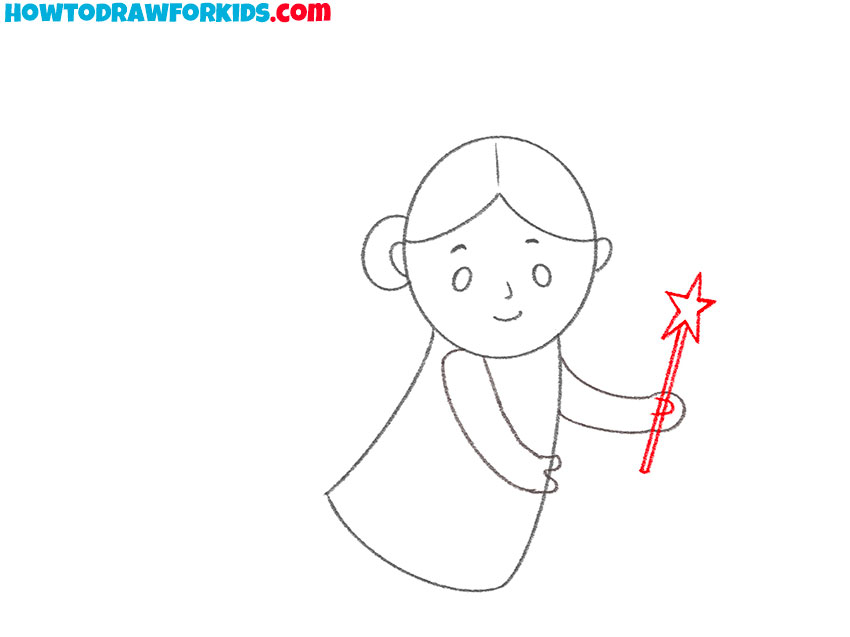
- Draw the magic wand of the fairy.
At the end of the fairy’s left arm, draw the magic wand, finishing it with a small five-pointed star on top. The wand should tilt slightly to the side. You can give the wand in your drawing a slightly different look, for example by drawing a different tip or by giving the shaft of the wand a more organic look.
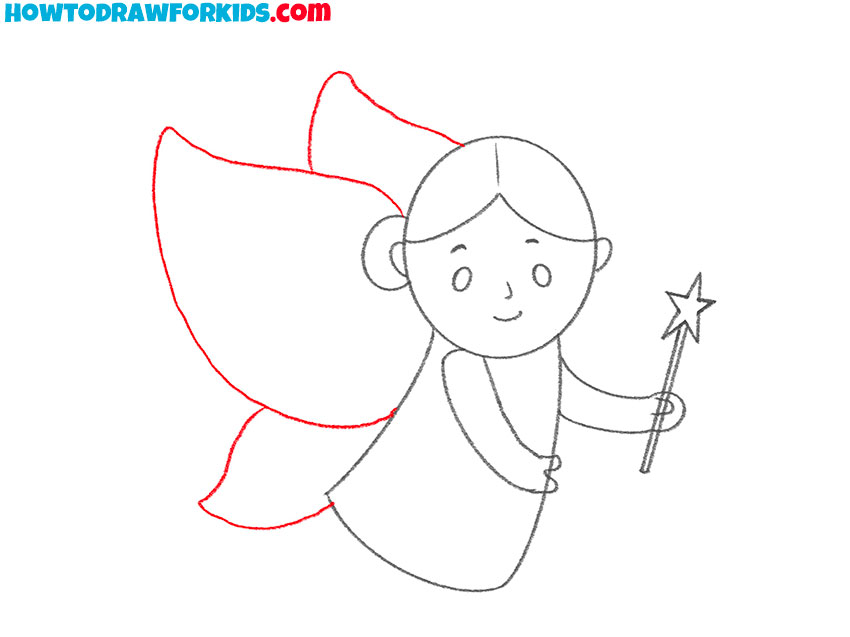
- Sketch the large fairy wings.
Now, draw the fairy wings behind the back of the character, to convey the iconic look. Outline two large upper wings shaped like rounded triangles. Beneath them, add two smaller lower wings. The upper wings should be broader.
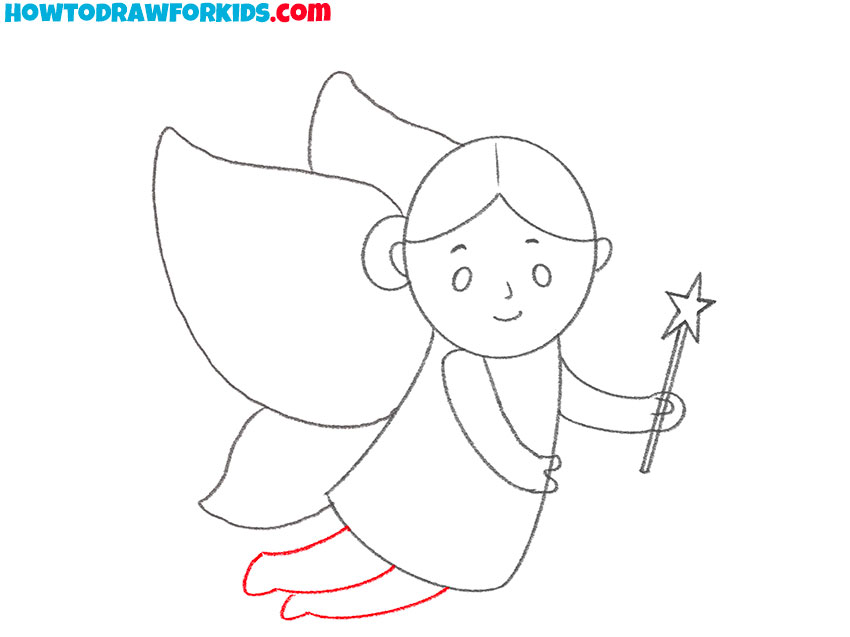
- Sketch the legs in flight.
Extend the fairy figure by adding the legs in a flying pose. Sketch two slightly curved shapes emerging from the lower part of the dress, angled backward. Try to sketch the legs slender and tapering toward the feet. Draw the shoes with simple pointed ends.
- Remove guidelines and smooth edges.
Clean up the fairy drawing by erasing any extra guidelines and overlapping construction lines around the head, dress, and arms. Correct uneven or doubled lines where the initial sketch may have been rough. Check the symmetry of the wings and the balance of the figure.
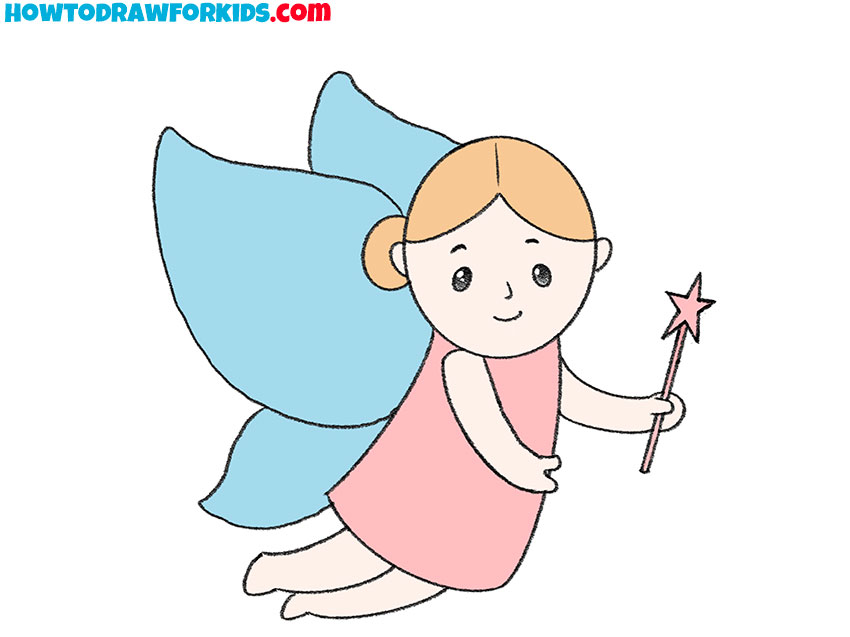
- Color the fairy drawing.
To complete the sketch, paint the fairy drawing with soft pastel tones. Use pink or purple for the dress, blue or green for the wings, and light beige for the skin. The hair can be any shade – yellow, brown, or orange all work well.

Additional Content
I’ve prepared a free PDF file based on this fairy drawing lesson. It includes a simplified version of the main steps that you can download and use offline.
The PDF is convenient for practicing when you don’t have internet access. You can use it to review the basic structure, practice proportions, or work on your coloring.
It also includes additional materials such as a coloring page, tracing worksheet, and grid drawing sheet. You can print it out and continue improving your drawing skills anytime and anywhere.
Alternative Ways to Draw a Fairy
For those interested in developing their drawing skills, this section presents several additional ways to sketch a fairy. Alongside the main tutorial, these methods show different approaches to constructing the figure and its details.
Here you can practice various techniques, study proportions, and try alternative poses or wing shapes. Keep your sketchbook ready and use these examples to gradually improve your understanding of how to depict fairies accurately.
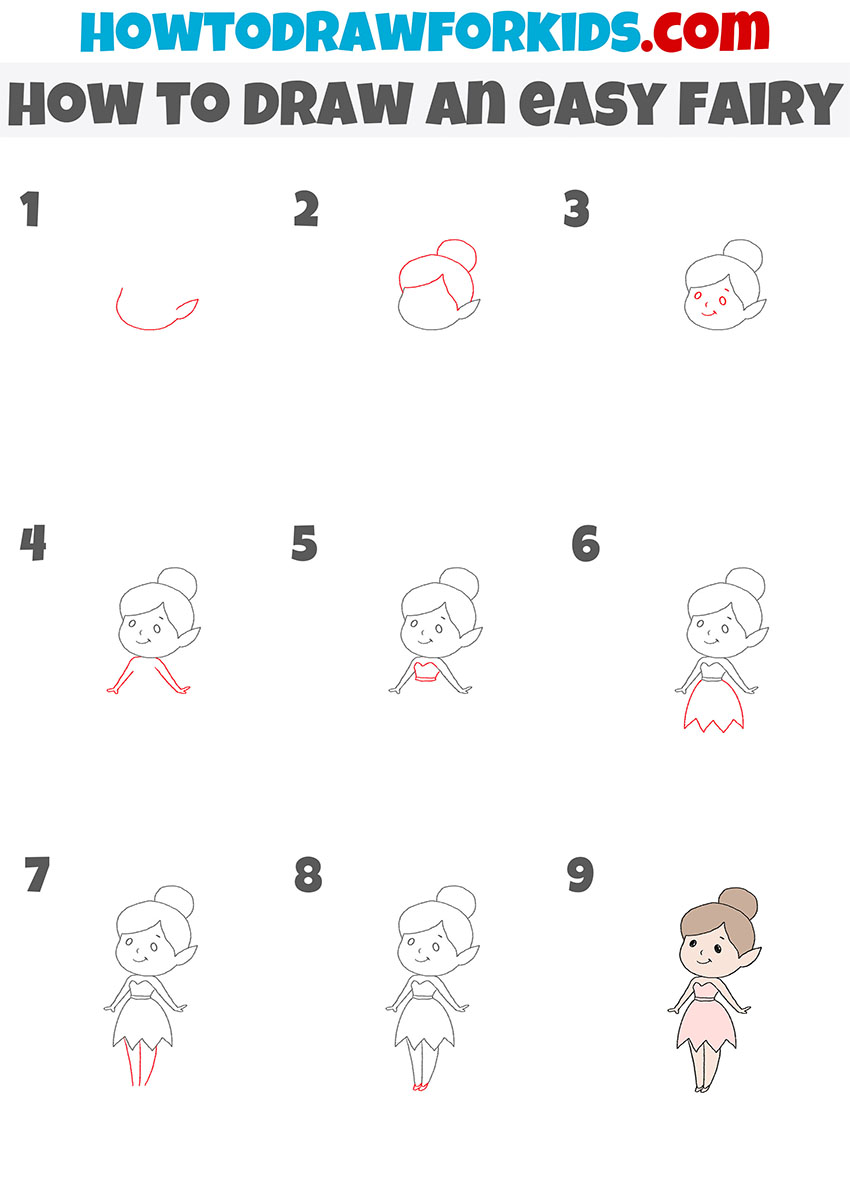
How to Draw a Fairy Without Wings
This drawing method is a step-by-step process for creating a cute, chibi-style fairy, characterized by an oversized head and large expressive eyes, which give it an endearing childlike appearance.
Additionally, in this bonus lesson, you’ll draw elf ears on a fairy and create an image of this cute flying character without wings.
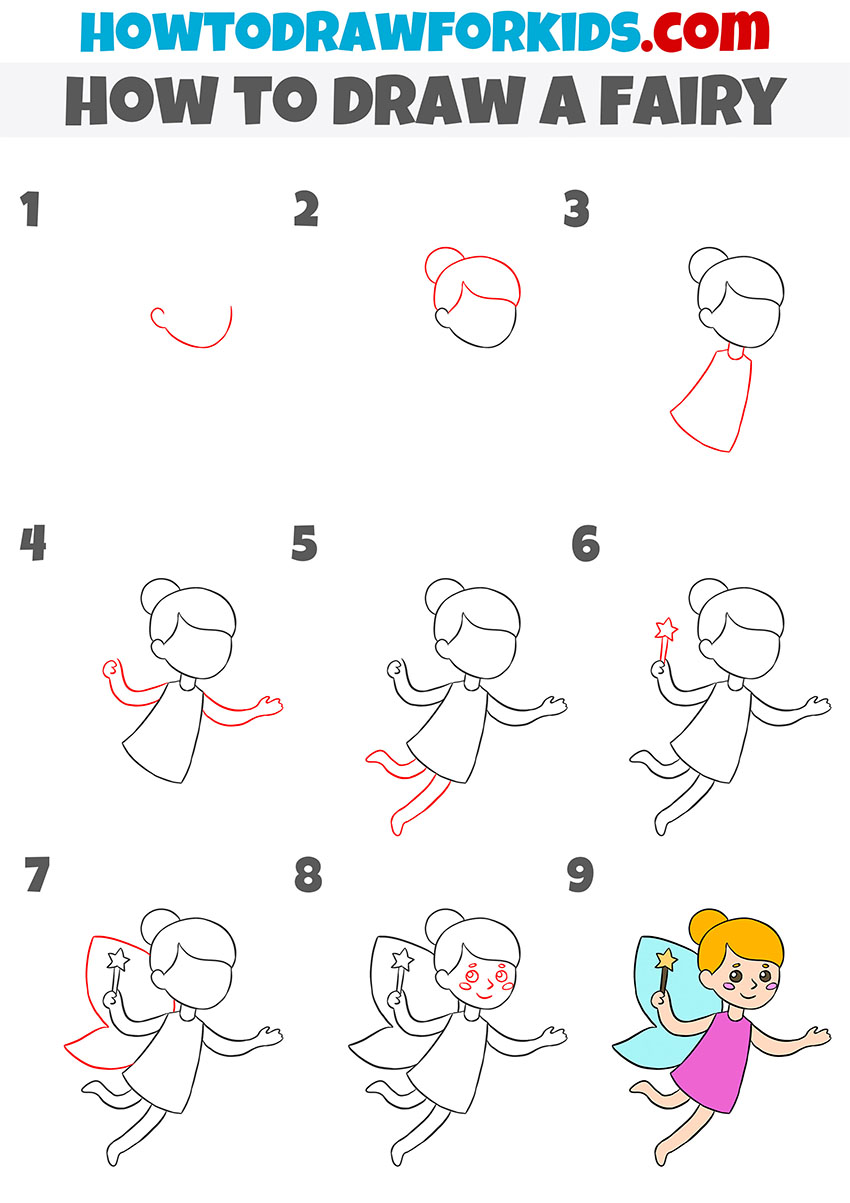
Alternative Fairy Drawing Technique
So, this technique is a super simple approach that breaks down the process into clear and easy steps, avoiding complex details. Starting with basic shapes for the head and body, the technique gradually adds features such as eyes, hair, and clothing in a way that’s accessible and straightforward.
The progression from a basic outline to a fully colored and cheerful fairy character is designed to be achievable for artists of all ages, encouraging a successful and enjoyable drawing experience.
Conclusion
This concludes the fairy drawing tutorial, but you can continue practicing by visiting other lessons on the website. You might want to try the dragon drawing tutorial or the Cupid drawing guide as your next project.
You can also visit my cute collection of fairy coloring pages, where I have created many different illustrations of this character in different styles and poses.
To keep up with new lessons and updates, follow the website on social media. This way, you’ll always know when new tutorials are available. Keep your pencils ready and continue improving your drawing skills.


It was pretty good 😊 and the weather is beautiful today
Thank you! And yes, the weather is perfect today.