How to Draw Eric Cartman
I’m excited to share my tutorial on how to draw Eric Cartman. This guide is clear and simple, making it fun for anyone to draw their favorite character from South Park.

How to Draw Eric Cartman: Basic Information
Drawing a character like Eric Cartman, known for his distinctive and exaggerated features, helps young artists to understand the importance of proportions in cartooning. Cartman’s round body and relatively small head are perfect examples of how cartoon characters often have exaggerated proportions to emphasize their unique traits.
Another really important aspect this tutorial emphasizes is the use of simple shapes to build complex forms, a hallmark of the cartoonish drawing style. By breaking down Cartman into basic geometric shapes you will learn how to deconstruct and reconstruct characters.
The various features of Cartman, such as his hat, eyes, and clothing details, require careful attention to capture his unique look. By focusing on these small but significant elements, you will enhance your ability to capture the unique characteristics that define different subjects in a cartoonish style.
At the end of this lesson, I will demonstrate several techniques to make your drawing of Eric Cartman stand out. This will include adding unique elements and creative touches that can transform your artwork into something truly distinctive. By incorporating these additional features, you can learn new artistic possibilities and develop a style that is uniquely yours.
Eric Cartman Drawing Tutorial
Materials
- Pencil
- Paper
- Eraser
- Coloring supplies
Time needed: 30 minutes
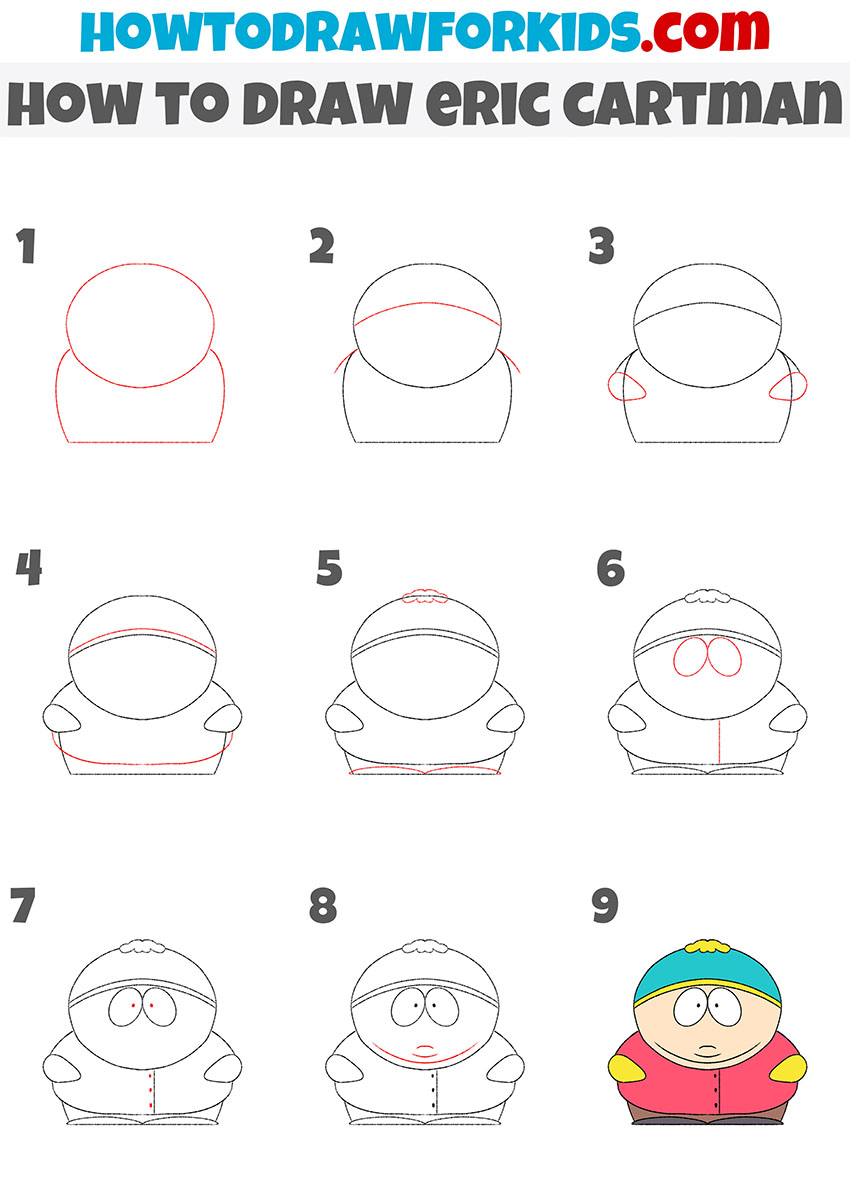
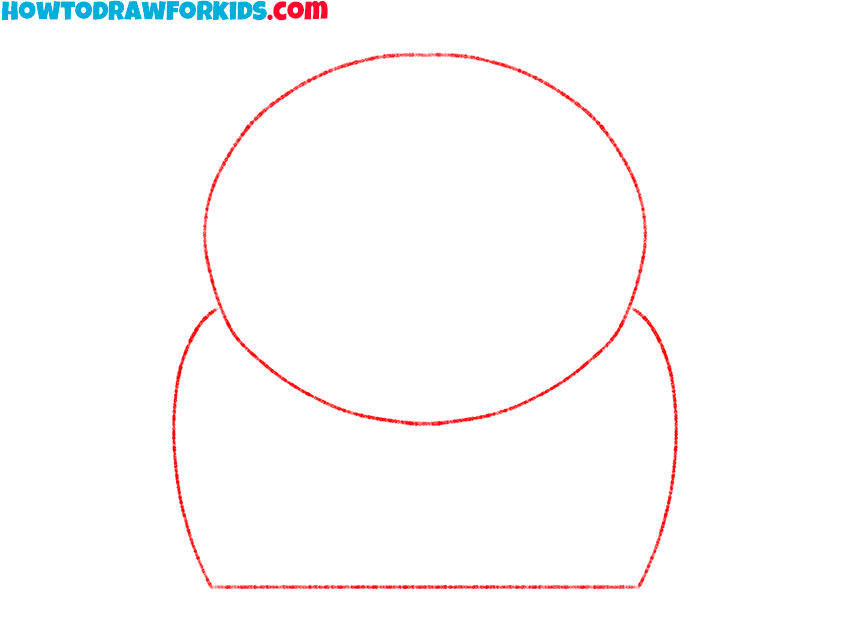
How to Draw Eric Cartman
- Sketch the head and torso of Eric Cartman.
Start with an oval shape for the head, which should be slightly wider than it is tall. Below the head, draw a larger, rounded rectangle shape for the torso. Use light, smooth strokes for these initial lines as they will act as guides for the rest of the drawing.
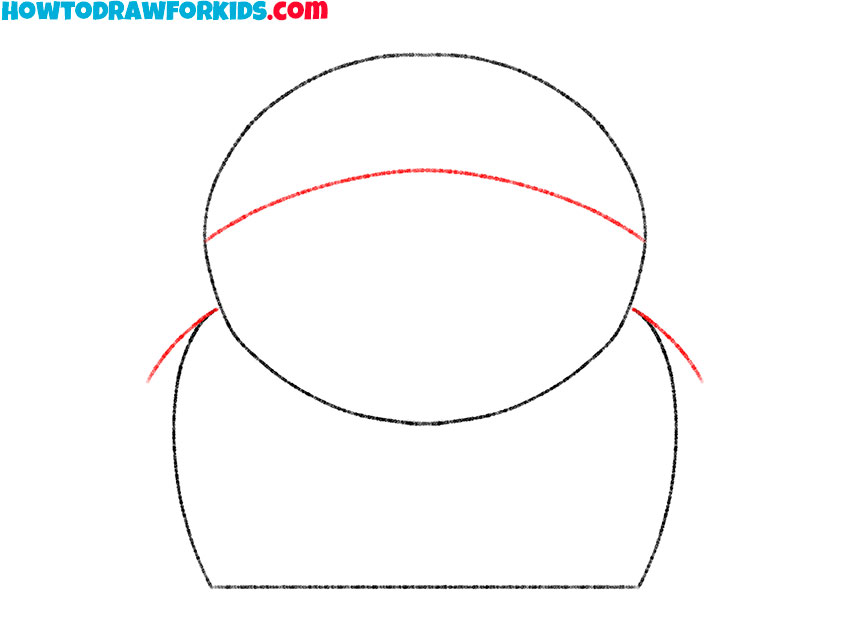
- Add the shoulders and outline of the hat.
Draw a curved line across the top part of the head oval to represent the bottom edge of Cartman’s hat. Extend lines slightly outward from the sides of the torso to form the outer contours of the arms. These lines should be slightly curved, suggesting the rounded shape of the arms.
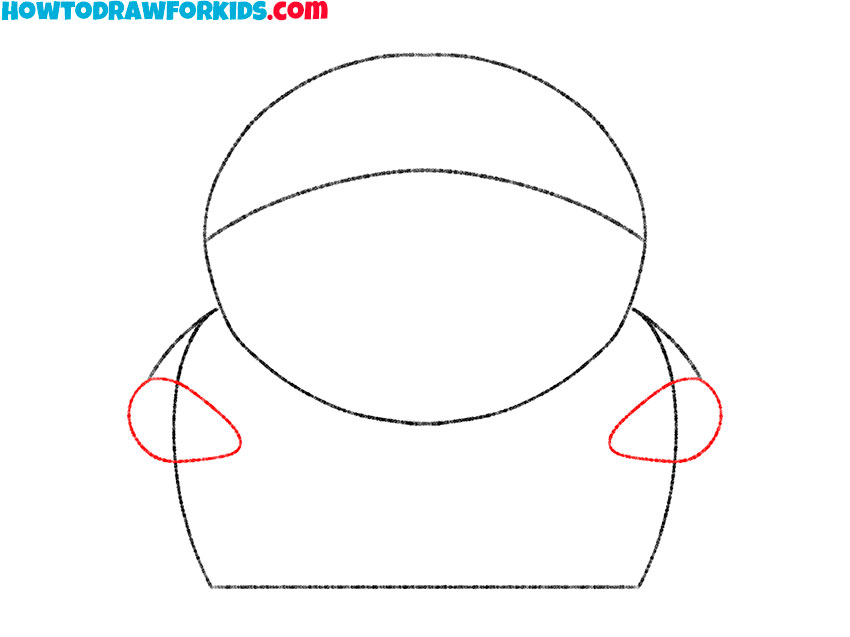
- Draw the hands of Cartman.
At the ends of the arm outlines, draw simple, mitten-like shapes to represent his hands. These should be rounded and slightly bulbous, fitting the cartoon style. Each hand should look like a small oval attached to the arm, with the thumbs pointing inward towards the body.
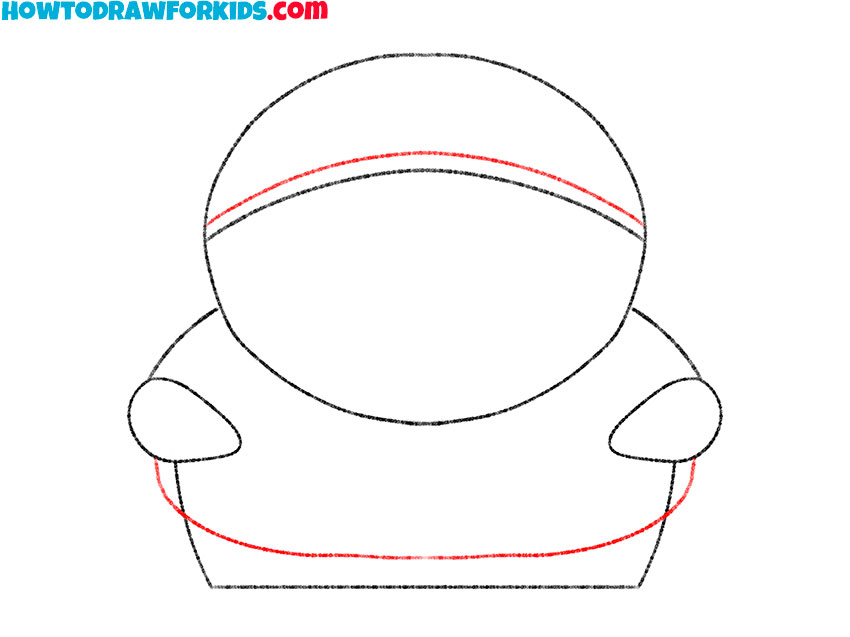
- Detail the clothes.
Add another curved line above the initial hat line to complete the hat’s shape. Then, draw a horizontal line across the bottom of the torso to indicate the lower edge of Cartman’s coat. Ensure this line is parallel to the bottom of the torso and slightly curved to match the body’s rounded shape.
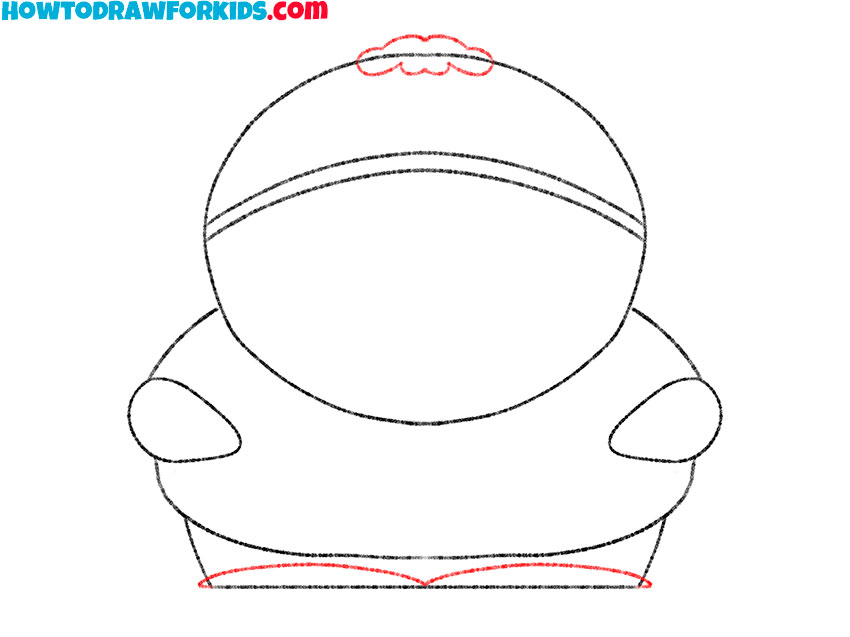
- Draw the shoes and pompom on the hat.
For the pom pom, draw a small, rounded shape with a slightly jagged edge on top of the hat to illustrate its fluffy texture. For the shoes, draw two small, curved shapes at the bottom, slightly wider than the width of the body, to represent Cartman’s feet.
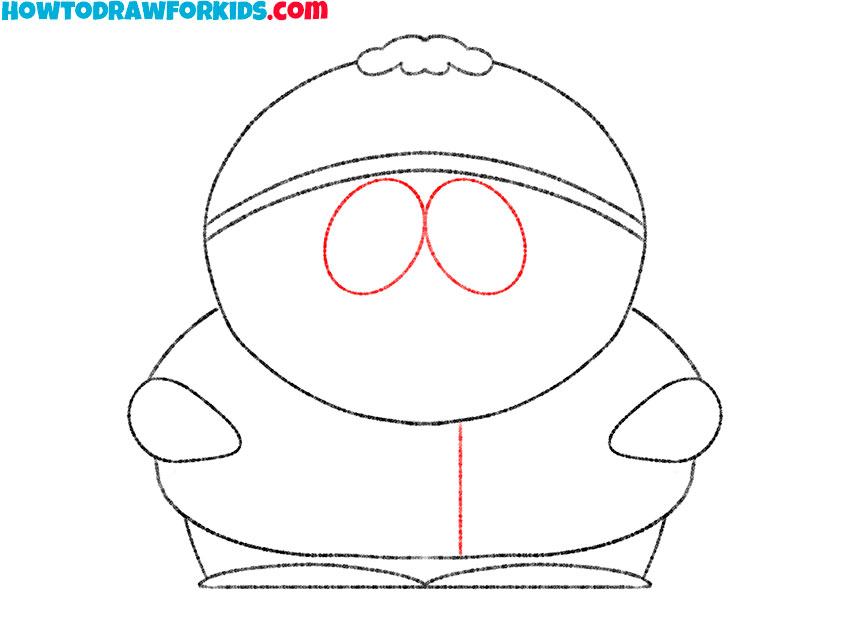
- Draw Eric Cartman eyes and zipper.
Begin by drawing two large, oval shapes in the middle of his head for the eyes. Then, draw a vertical line down the center of the torso to indicate the zipper of Cartman’s coat. This line should be straight and run from the bottom of the torso to the middle of the chin.
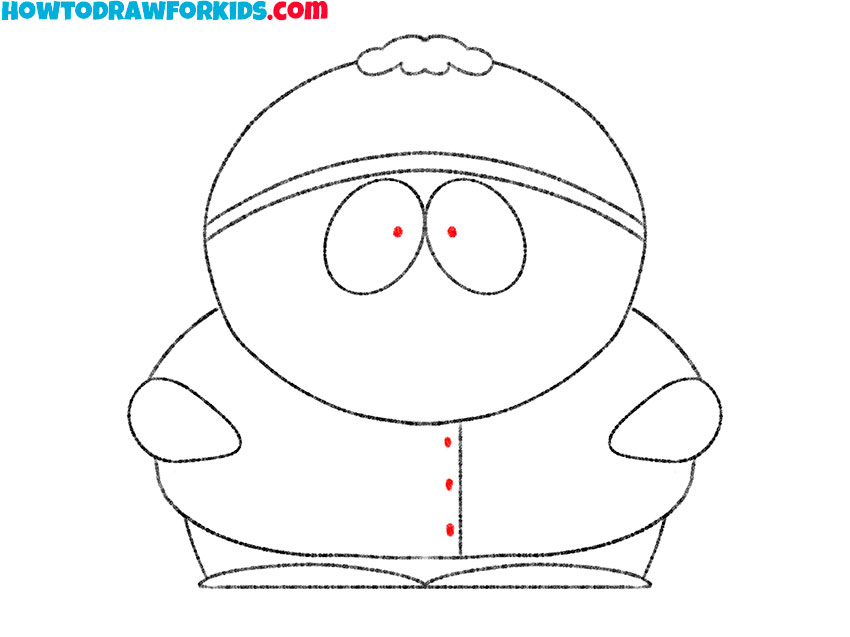
- Sketch out the pupils and buttons.
Inside each eye, draw a smaller dot towards the center to represent the pupils. By changing the position of the pupils, you can change the direction of the gaze. Next, draw small dots along the vertical zipper line to indicate the buttons. Space the buttons evenly from the top of the torso to the bottom.
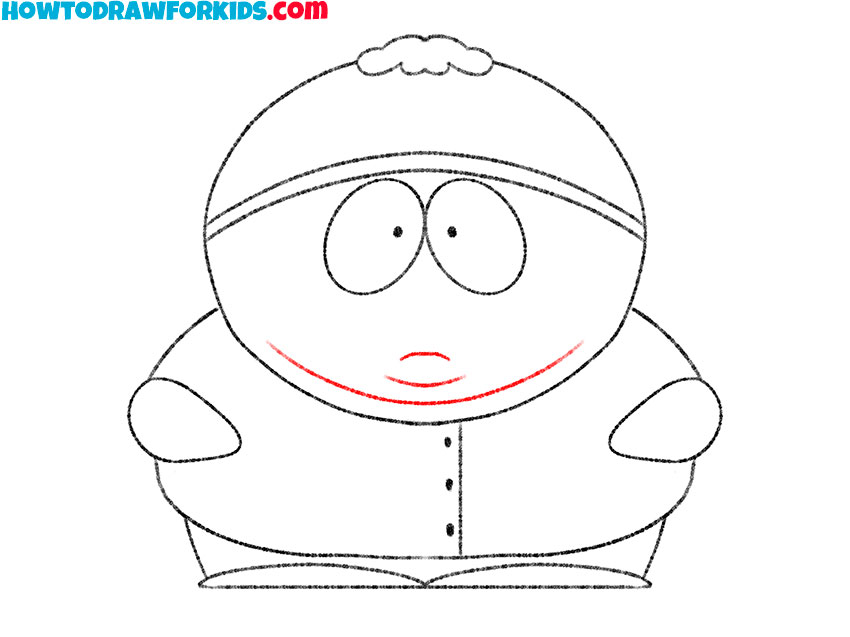
- Add the mouth and chin.
Below the eyes, draw a small, curved line for Cartman’s mouth, giving him a slightly neutral or unimpressed expression. To indicate the chin, draw a short, curved line just below the mouth, slightly wider than the mouth itself. Next, draw a long curve under the chin to illustrate a fold.
- Color your Eric Cartman drawing.
Fill in Cartman’s hat with a blue color and add yellow for the brim and the fluffy pom pom. Color his face with a light peach tone. His jacket should be red, and the mittens should be yellow. Finally, color his pants dark brown and his shoes black.
Additional Content
I’ve prepared a PDF file that contains a condensed version of this drawing lesson, and I’m excited to share that it’s completely free. Moreover, once you download the file, you can enjoy drawing even if you’re offline, so you’re not dependent on an internet connection.
This way, furthermore, you can practice your drawing skills anytime, anywhere. Additionally, this PDF is designed to be print-friendly, so you can easily have a physical copy to refer to.
Technical Nuances
These technical nuances will help you accurately capture the iconic character of Eric Cartman when drawing this character. Here’s a brief summary of key points to keep in mind.
- Start with a clean, smooth paper that won’t smudge your lines as you sketch the Eric Cartman drawing.
- Use a pencil with a good eraser, as you might need to make adjustments when you draw Eric Cartman.
- Ensure that your initial outlines are light, so they can be easily modified or erased if necessary.
- Be patient with your strokes; take your time to get the curves of Eric Cartman figure just right.
- Pay attention to the proportions, especially when you draw Eric Cartman head and body, to maintain his characteristic appearance.
- Add details gradually; don’t rush into the final touches before the basic shapes are in place.
How to Draw Eric Cartman
You learned to draw Eric Cartman, but in the animated series South Park you rarely saw this and other characters just on a white background. So let’s learn how to make Eric Cartman’s drawing more interesting by using interesting backgrounds:
- Add a colorful playground setting complete with swings, slides, and a few trees. You can draw children playing in the background, with a basketball hoop, hopscotch outlines, and even a sandbox. This background reflects Cartman’s typical environment from South Park Elementary, where many of his antics take place. Consider adding details like a school building in the distance or a fence surrounding the playground to create a familiar setting.
- Draw Cartman against a backdrop of majestic mountains with a clear blue sky, a few fluffy clouds, and perhaps an eagle soaring above. You can include a winding trail leading up the mountains, pine trees dotting the landscape, and a stream flowing through the scene. This setting emphasizes the mountainous region of Colorado, where South Park is located.
- Create a bustling small-town scene with shops, a bus stop, and other characters from the show walking around. Include buildings with colorful facades, streetlights, and parked cars to give the area a lively atmosphere. You might draw familiar locations like Tom’s Rhinoplasty, the local diner, or the movie theater. Adding pedestrians, street vendors, and other town-specific details situates Cartman in his familiar town environment.
- Show Cartman inside a classroom with rows of desks, a chalkboard filled with doodles and lessons, and educational posters on the walls. You can add a teacher’s desk with an apple, bookshelves, and students’ artwork pinned on a bulletin board. Consider including classmates sitting at their desks, a globe on a stand, and windows with a view of the schoolyard.
- Place Cartman in a snowy landscape with snow-covered trees, snowdrifts, and falling snowflakes. You can add elements like a snowman wearing a hat and scarf, and footprints in the snow. This is perfect for capturing the winter scenes often depicted in South Park. Adding a frozen pond with ice skaters or kids having a snowball fight can make the scene more dynamic and festive.
- Place Cartman in a forest campsite with a tent, a glowing campfire, and surrounding trees. You can add camping gear like sleeping bags, backpacks, and a cooking pot over the fire. This outdoor setting can illustrate one of the group’s many camping episodes. Consider adding wildlife like birds, a deer peeking through the trees, or a raccoon near the trash.
- Place Cartman in front of a well-known historic landmark, such as the Statue of Liberty, the Eiffel Tower, or the Great Wall of China. You can add tourists taking photos, informational plaques, and surrounding scenery that matches the landmark’s location. This unusual setting can add humor to your drawing.
Conclusion
Congratulations on completing this tutorial! Throughout the process, you have learned how to draw Eric Cartman, one of South Park’s most iconic characters.
The tutorial guided you through detailing Cartman’s features, such as his hat, eyes, and clothing. Additionally, you learned to add color to your drawing with vibrant hues that match his animated counterpart.
Moreover, the tutorial introduced you to various background ideas, demonstrating how to place Cartman in different settings to make your drawing more unusual. By experimenting with different backgrounds, you developed a better sense of context and composition.
Leave a comment below to let me know how you enjoyed this tutorial and what you found most helpful. Do you have ideas for future tutorials or specific characters you’d like to learn to draw next? Share your suggestions with me!
Be sure to follow me on social media for more tips and updates, and check out my website for a variety of drawing lessons, including characters from “South Park”!