How to Draw a Flower
In this tutorial, I aim to demonstrate how to draw a flower using the traditional simplified method for my website. On the page, you’ll find the main tutorial along with six additional guides to further train your drawing skills.
How to Draw a Flower: Basic Information
Many children love drawing flowers, but not all can achieve the result they desire. The truth is, even drawing a simple flower requires some basic drawing skills.
I designed this lesson specifically for children and beginner artists to teach them how to draw a flower. To achieve this, I developed several sets of instructions, each providing a different method, style, and step-by-step sequence.
We’ll start by drawing a flower using a basic lesson. This will be a very simple flower with round petals and minimal details, making it easy for even the most inexperienced artists to follow.
Next, we’ll move on to additional instructions, gradually improving your skills step by step. In each lesson and at every stage, I’ll share helpful tips that are really important for anyone looking to learn how to draw flowers.
Flower Drawing Tutorial
Materials
- Pencil
- Paper
- Eraser
- Coloring supplies
Time needed: 40 minutes
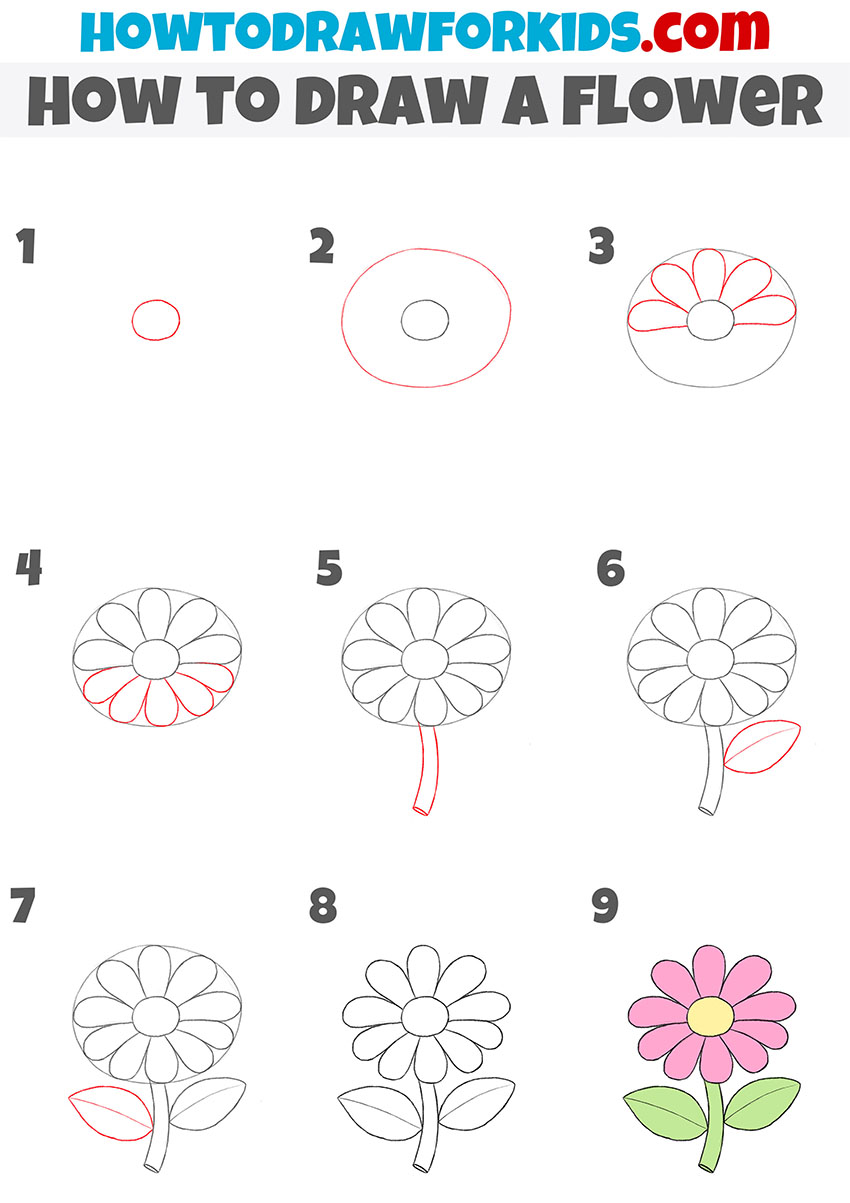
How to Draw a Flower
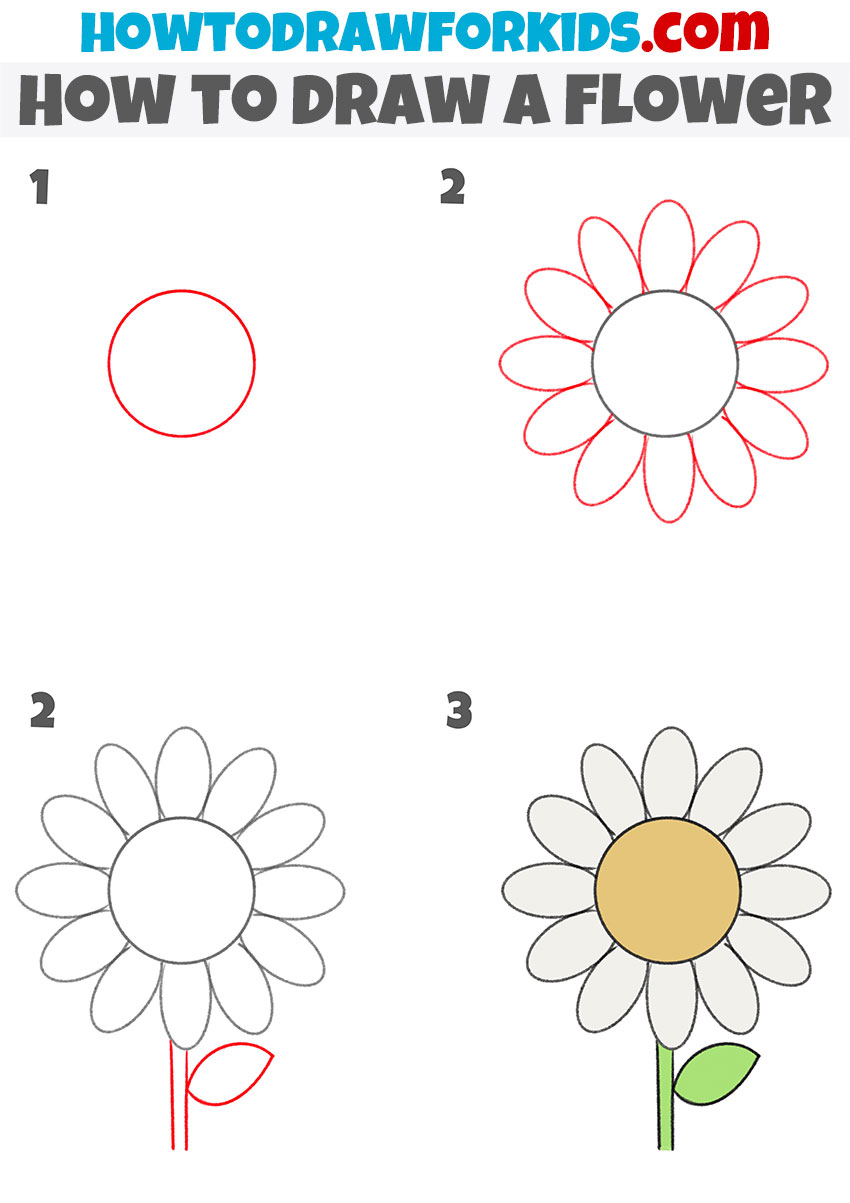
- Draw the center of the flower.
Begin by drawing a small circle in the center of your paper. This circle will form the core of the flower, around which all the petals will be arranged. Ensure that the circle is evenly round, as this will help maintain the symmetry of the flower as you add more elements.

- Outline the petal area.
Next, draw a larger oval shape around the small circle you created in the first step. This oval will represent the outer boundary of the flower, indicating where the tips of the petals will end. Make sure this oval is slightly elongated, as it will help give the flower a full and rounded appearance.

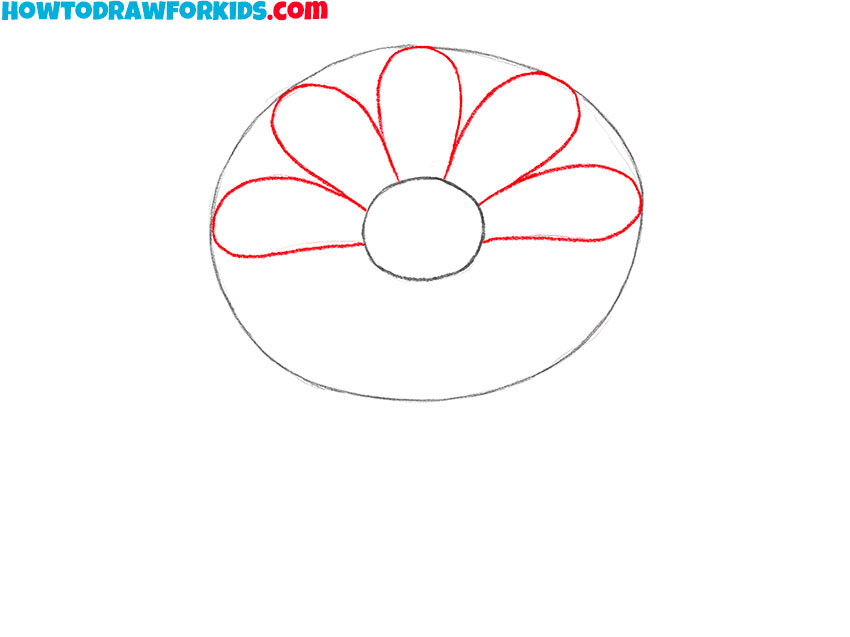
- Start adding petals.
Now, begin adding the petals by drawing a series of rounded shapes that extend from the small central circle to the edge of the larger oval. Start with one petal at the top, and then work your way around, adding more petals. These initial petals will help guide the placement of the remaining petals.
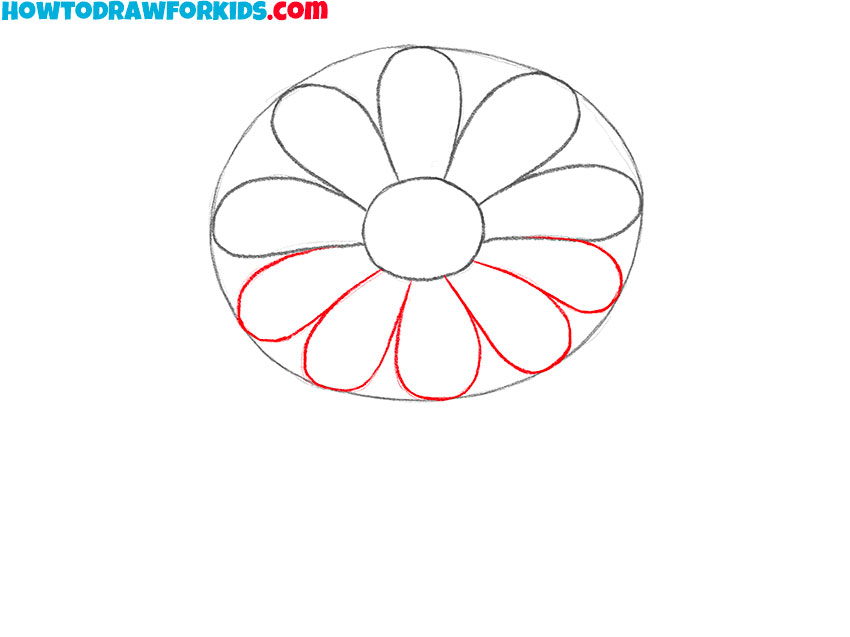
- Complete the petals of the flower.
Continue adding petals around the center until the entire flower head is filled. Ensure that each petal is roughly the same size and shape as the ones you previously drew. By now, your flower should have a full, circular appearance, with all petals radiating out evenly from the center.
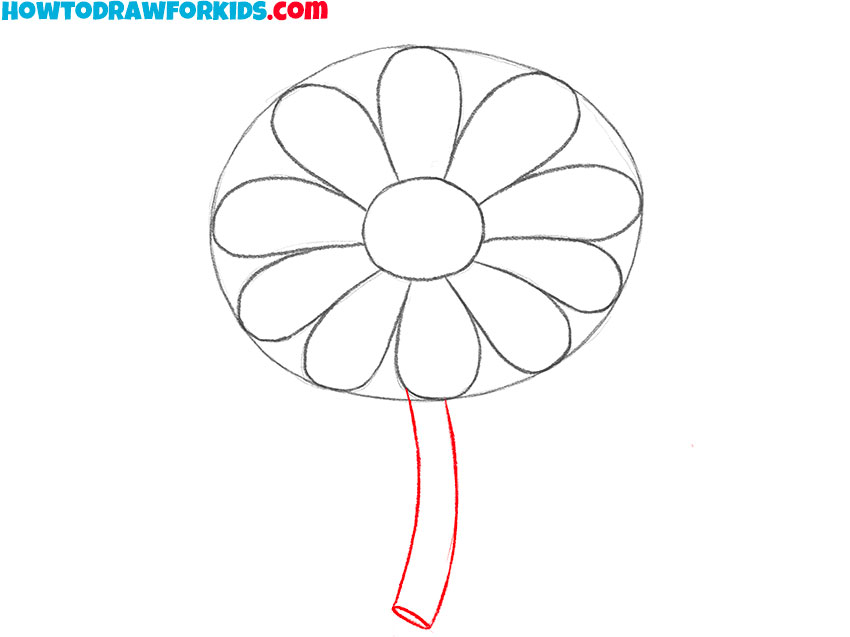
- Draw the stem of the flower.
Once the petals are complete, it’s time to add the stem. Draw a slightly curved line extending downward from the center of the flower. The curve of the stem gives the flower a natural, lifelike appearance. Take care to draw the stem smoothly.
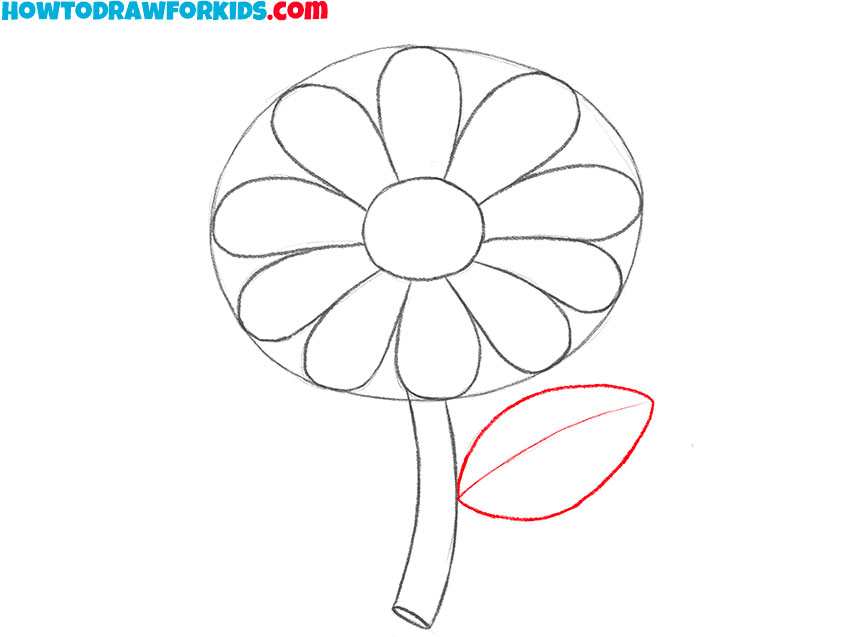
- Add the leaf outline.
Next, draw an outline of a single leaf attached to the side of the stem. This leaf should be an oval shape with a pointed tip, positioned near the middle of the stem. Next, draw a curved line through the center of the leaf. This will add realism, giving the leaf a more three-dimensional appearance.
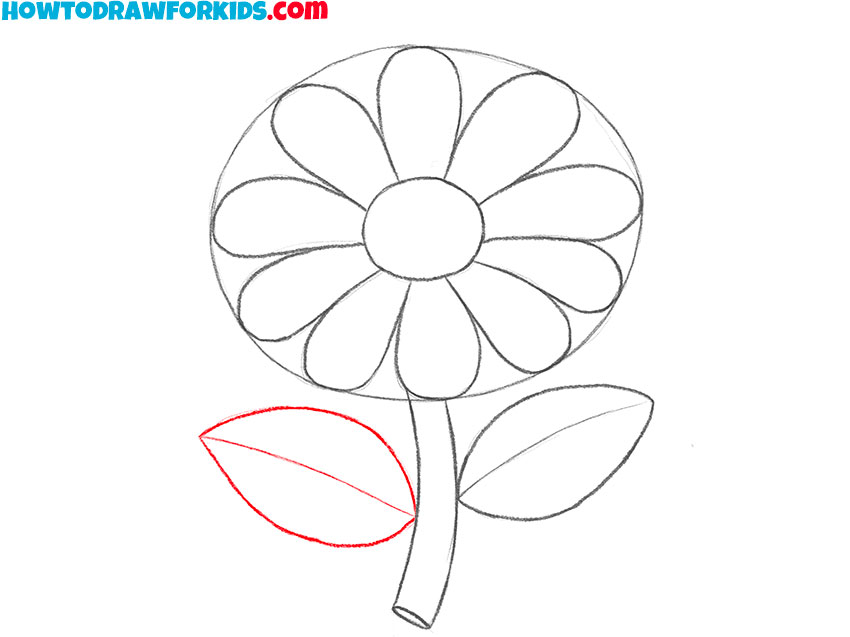
- Draw the second leaf.
In this step, draw a second leaf on the opposite side of the stem, slightly lower than the first. This leaf should be similar in size and shape to the first one, maintaining symmetry. Ensure both leaves are drawn with smooth, even lines.
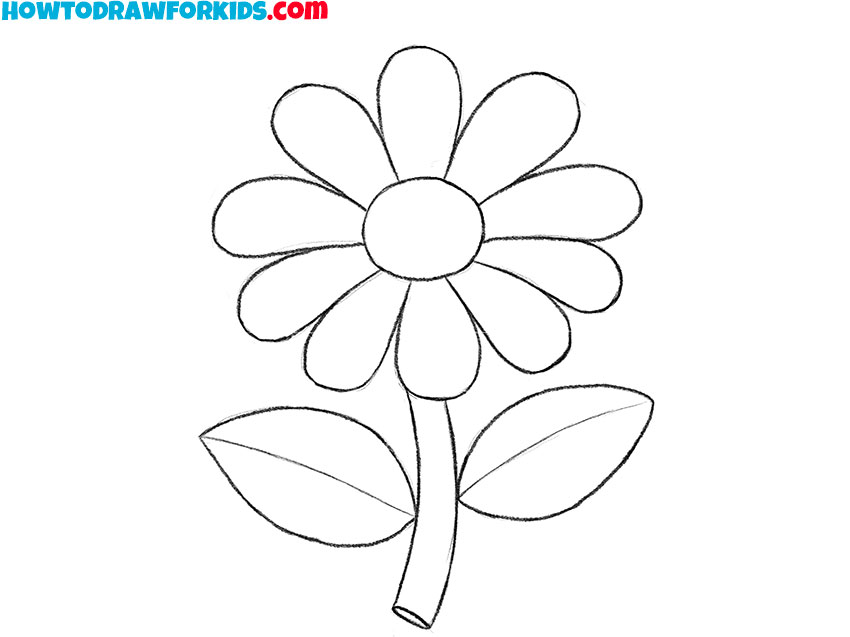
- Finalize the outlines of the flower.
With all the major elements in place, go over your flower drawing to finalize the outline. Carefully trace over the petals, stem, and leaves, refining their shapes and smoothing out any rough lines. This step helps to clean up the drawing, making it ready for coloring or further detailing.
- Color the flower.
Choose a bright color for the petals, such as pink or yellow, and a contrasting color for the center. The stem and leaves should be colored green, with varying shades to give a more natural appearance. Take your time to color within the lines, using even strokes to avoid streaks.

How to Draw a Flower: Video Tutorial
Additional Content
Alongside the online tutorial, I’ve created a free PDF that complements the flower drawing lesson. This PDF is easy to download and use offline, allowing you to practice anytime.
The PDF goes beyond the basic lesson, offering additional material to further develop your drawing skills. It provides exercises to deepen your understanding and improve your technique.
How to Draw a Flower: Alternative Techniques
To help you boost your skills in drawing flowers, I’ve created a set of alternative techniques. These methods introduce new approaches to sketch these beautiful plants.
Learning these techniques will help you improve your ability to illustrate the curves and details of flowers. They are designed to challenge you and motivate experimentation with different forms and compositions.
As you practice these methods, you’ll gradually train your ability to draw flowers with accuracy and style. So, take your art supplies and let’s continue sketching.
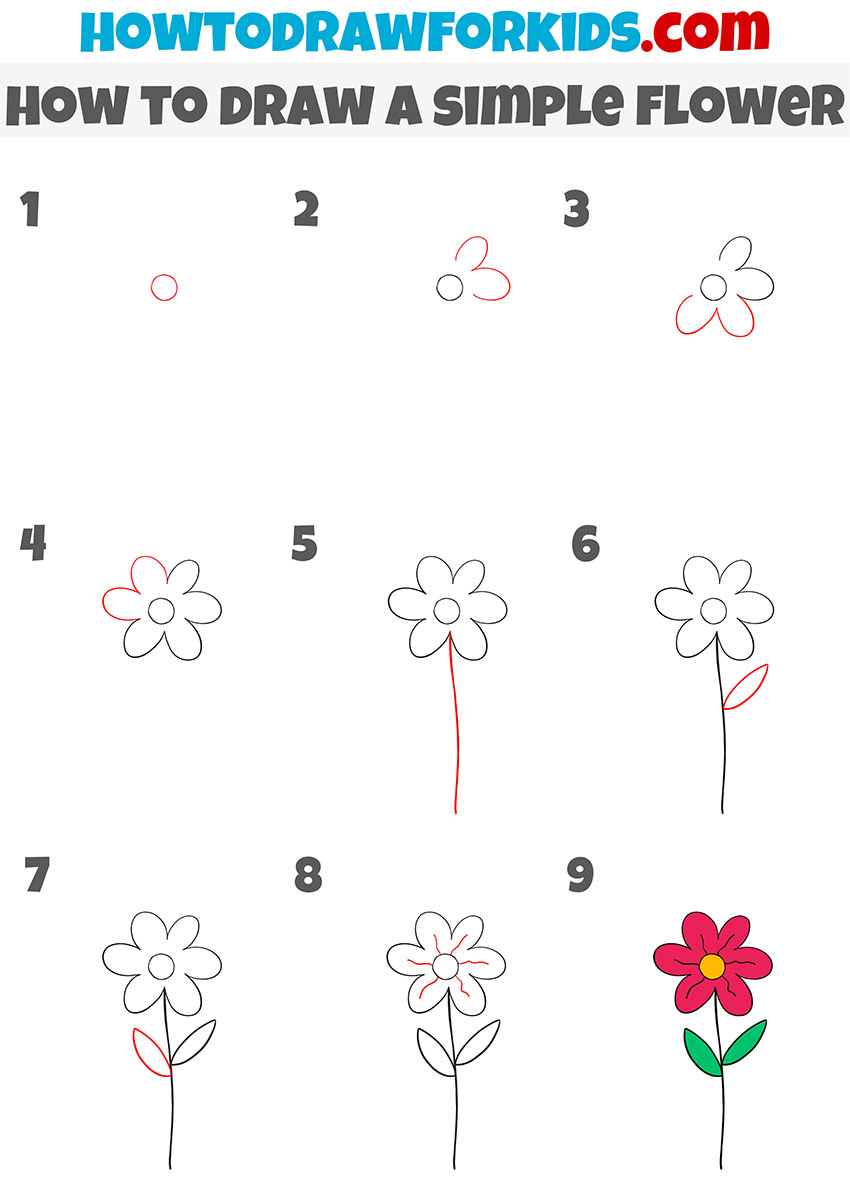
How to Draw a Simple Flower
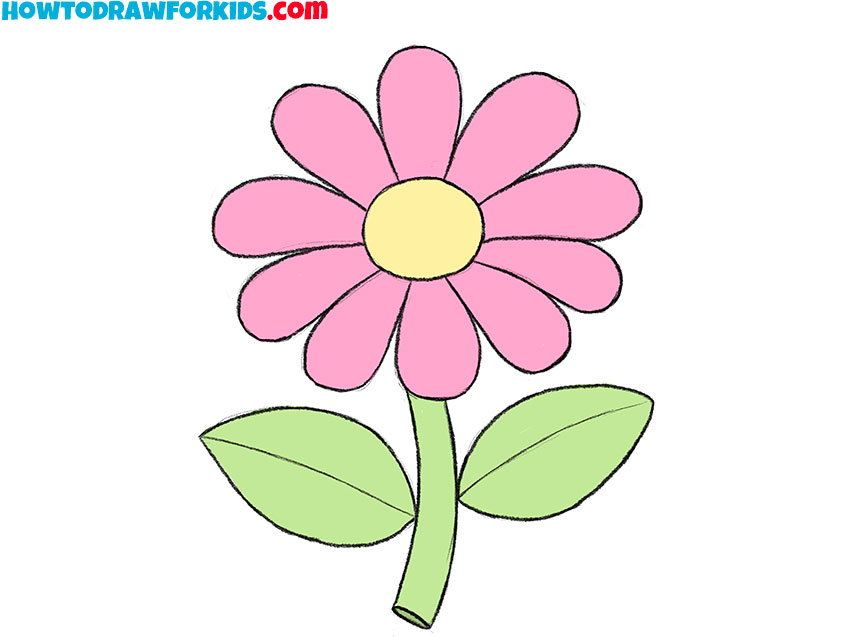
The flower in this tutorial is simple, with five rounded petals, a central circle, and two oval leaves on a slender stem. The petals are evenly spaced and have a smooth, curved shape, giving the flower a simple and cute appearance.
To draw this flower, start by drawing a small circle for the center. Next, add two rounded petals around the circle. Continue by drawing more petals to complete the flower. After that, draw a long, straight line extending downward from the flower center to form the stem.
Attach an oval leaf on one side of the stem, then add another leaf on the opposite side. Finally, draw simple curved lines inside the petals to add detail. Finish by coloring the flower petals in a bright color, the center in a contrasting shade, and the leaves in green.
Drawing a Flower for Kindergarten
The flower in this tutorial is the simplest one among the presented options, featuring a large, circular center with evenly spaced, elongated petals. It has a single stem with one leaf attached.
To draw this flower, start by drawing a large circle in the center of your paper. This will be the middle of the flower. Next, add a series of oval-shaped petals around the circle, making sure they are evenly spaced and similar in size.
Once the petals are complete, draw a straight line downward from the bottom of the flower to form the stem. Attach an oval leaf to the side of the stem, near its base. Finally, color the petals in a light shade, the center of the flower in a contrasting color, and the leaf and stem in green. This will complete your simple flower drawing.
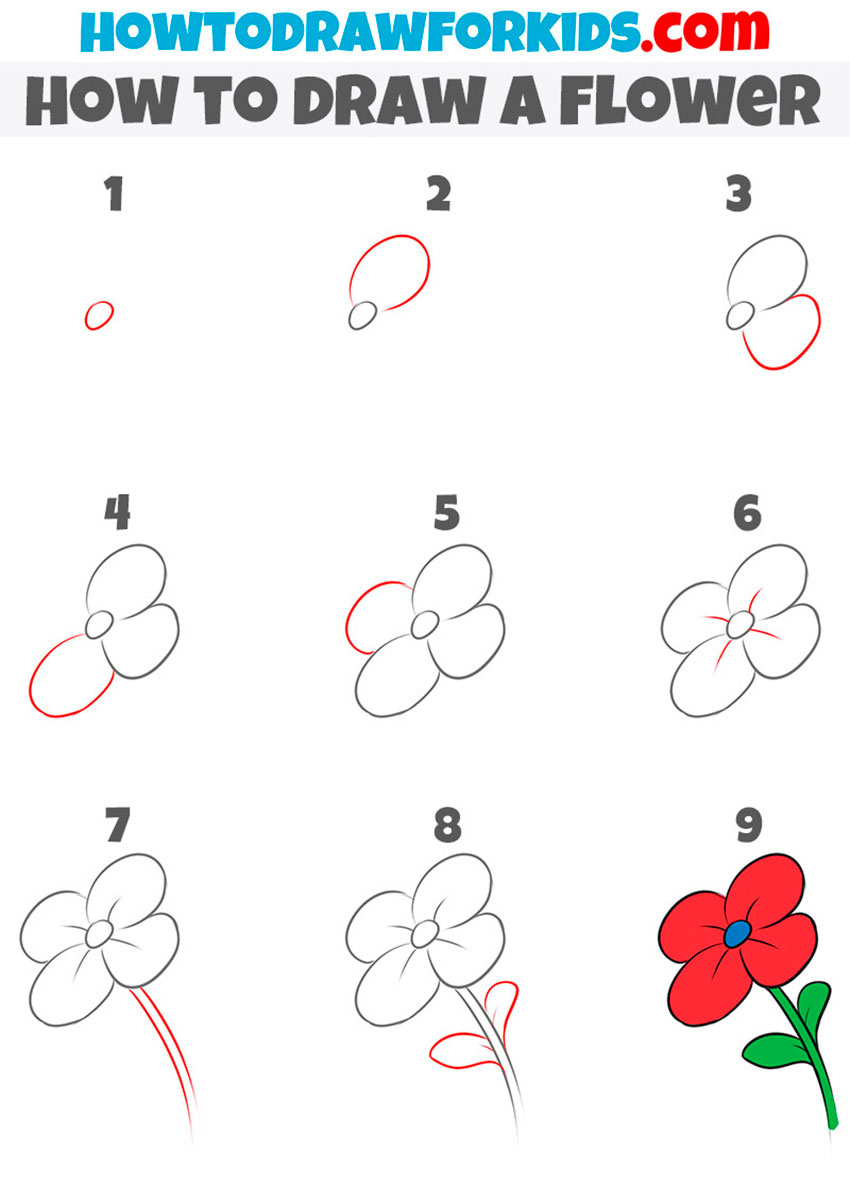
Drawing a Flower With Minimal Details
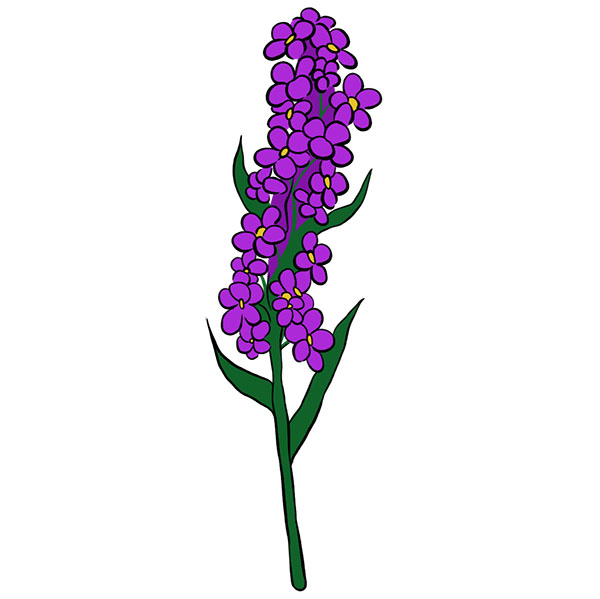
The flower in this tutorial has a distinctive appearance with four rounded petals that are slightly overlapping and a small, circular center. It features a curved stem and two simple, elongated leaves. The petals are drawn with a slight tilt.
To draw this flower, start by drawing a small oval for the center. Next, add the first petal by drawing an elongated oval shape attached to the center. Continue adding three more petals around the center, slightly overlapping each other to create a cohesive look. Draw the petals in a slightly tilted manner to give the flower a natural appearance.
After the petals are complete, draw a curved stem extending from the base of the flower. Attach two elongated leaves to the stem, positioning them on opposite sides. Finally, color the petals in a bright shade, the center in a contrasting color, and the stem and leaves in green.
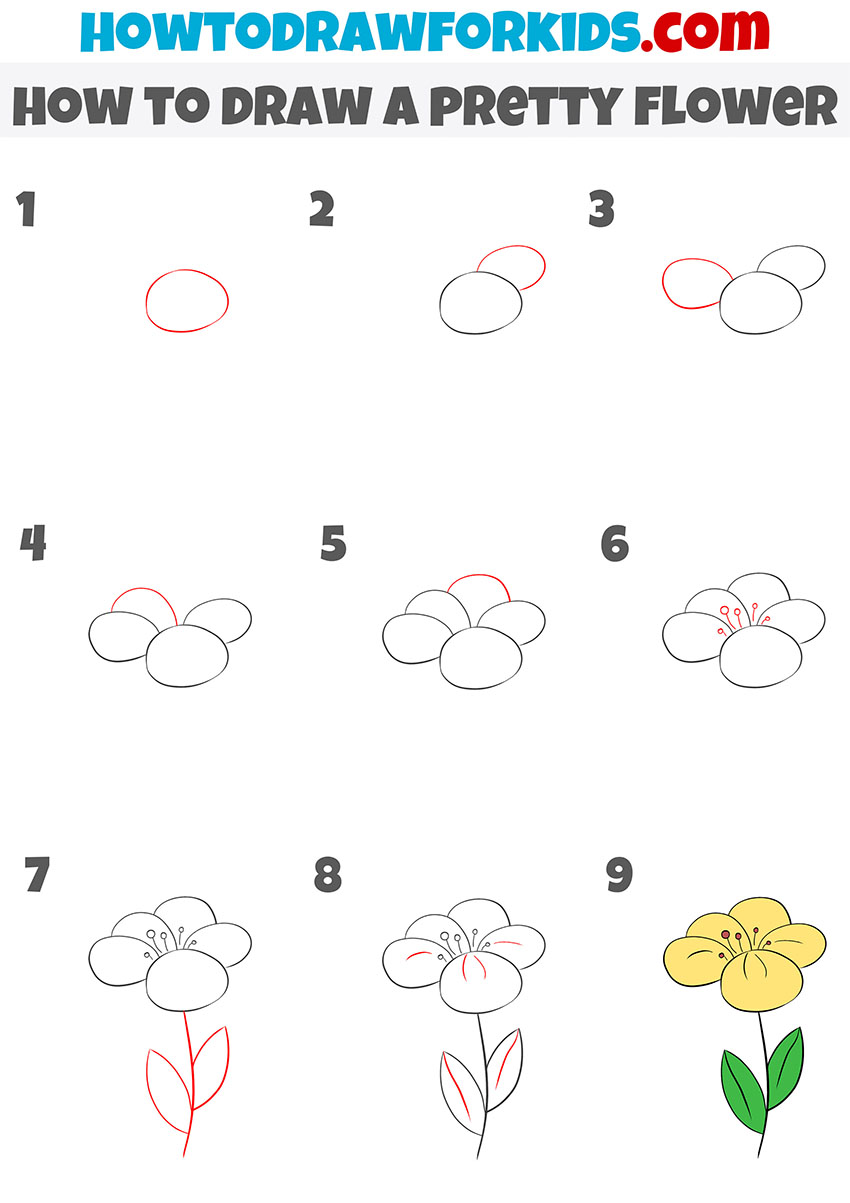
Drawing a Detailed Flower
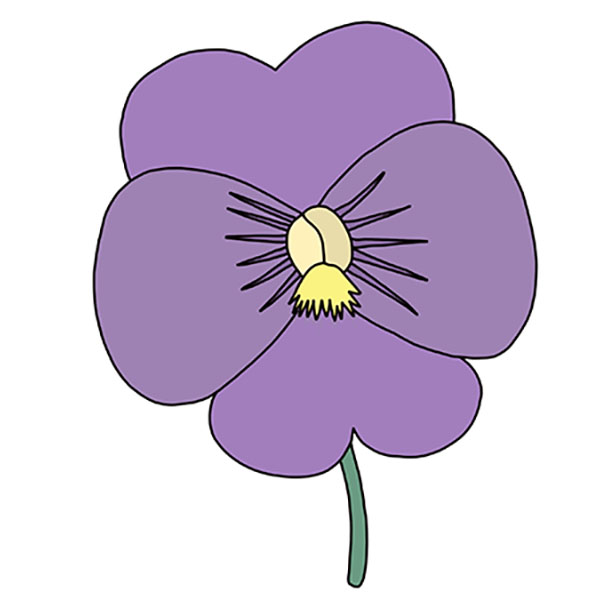
The flower in this tutorial is characterized by its rounded petals that slightly overlap, creating a soft and full appearance. The flower has a circular center with detailed stamen, a slender stem, and two simple leaves.
To draw a flower with this method, start by sketching an oval shape for the first petal. Then, add another overlapping oval to the side, gradually building the flower’s shape. Continue adding more ovals, overlapping each one to create the appearance of rounded, layered petals.
Once all the petals are in place, draw small stamen in the center of the flower, adding fine details to the middle. Afterward, draw a curved stem extending from the base of the flower and attach two leaves to it. Add lines inside the petals and leaves for extra definition. Finally, color the petals in a soft shade, the center in a contrasting color, and the leaves and stem in green.
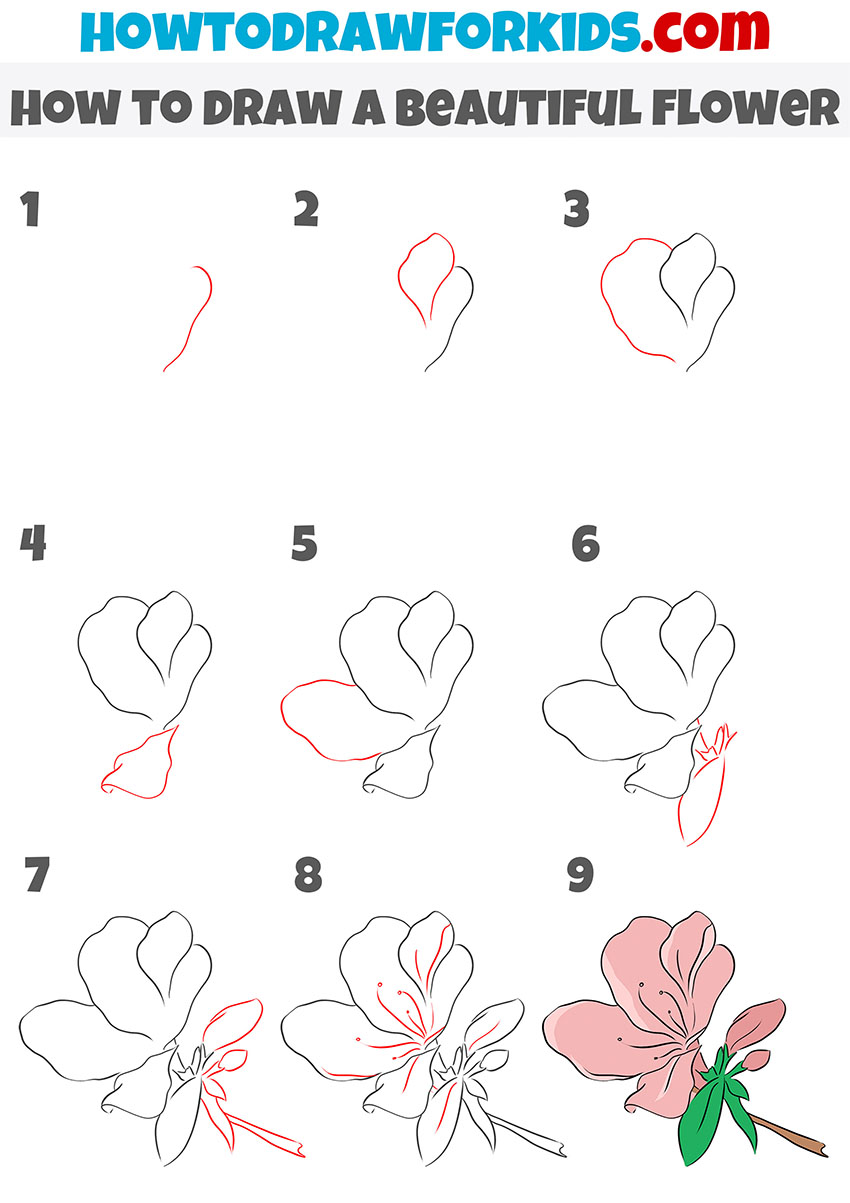
Drawing a Beautiful Flower
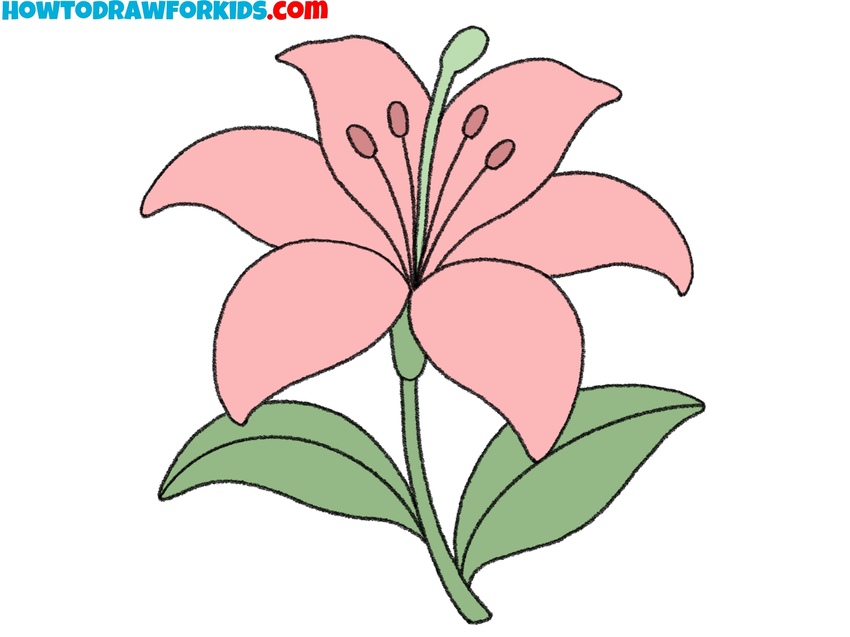
The flower in this tutorial has a delicate and natural appearance, with petals that are softly curved and asymmetrical, giving it a realistic and graceful look. The flower features several layers of overlapping petals, a detailed center with stamen, and a bud attached to a stem with a few leaves. The distinctive feature of this flower is its natural, flowing petal shapes and the inclusion of a bud, which adds to its overall realism and beauty.
To draw a similar flower, start by sketching a gently curved line for the first petal. Add another petal next to it, slightly overlapping the first one. Continue by drawing additional petals around the center, varying their sizes and shapes to create a more natural, asymmetrical arrangement. As you add each petal, focus on illustrating the organic curves and folds that give the flower its realistic appearance.
Next, draw a small bud on one side of the flower, followed by a few leaves extending from the stem. Finally, add stamen details in the center of the flower, then color the petals with soft, blended shades, the bud and leaves in green, and the stem in brown.
Drawing a Small Flower
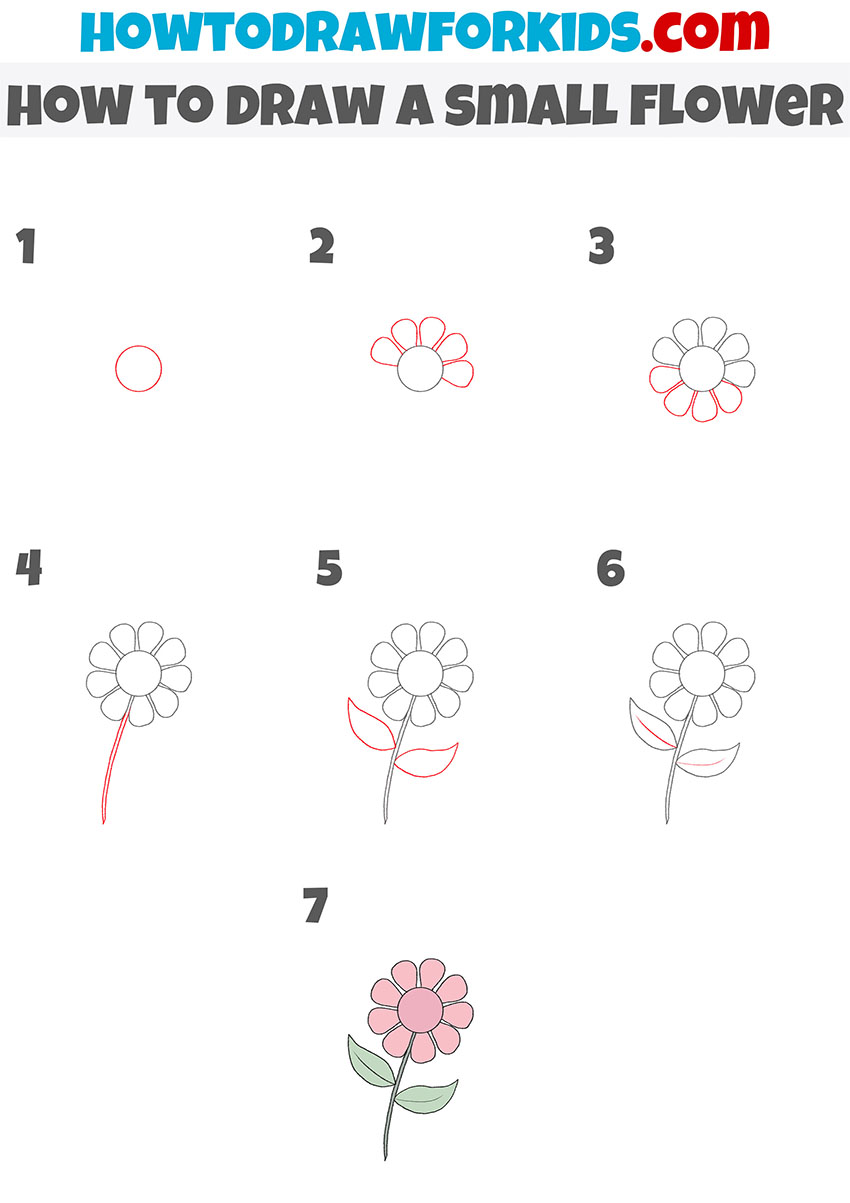
The flower in this tutorial is small and simple, featuring a round center with evenly spaced petals arranged in a symmetrical pattern. It has a thin, curved stem with two pointed leaves attached, giving it a recognisable and simple appearance.
To draw a flower with this method, start by sketching a small circle for the center. Next, add rounded petals around the center. Continue adding petals until the flower head is complete, forming a neat shape. After finishing the petals, draw a curved stem extending downward from the center of the flower.
Attach two leaves to the stem, positioning them on opposite sides. Finally, add veins to the leaves for a bit of detail. Once the drawing is complete, color the petals in a light shade, the center in a contrasting color, and the leaves and stem in green.
Drawing a Realistic Flower
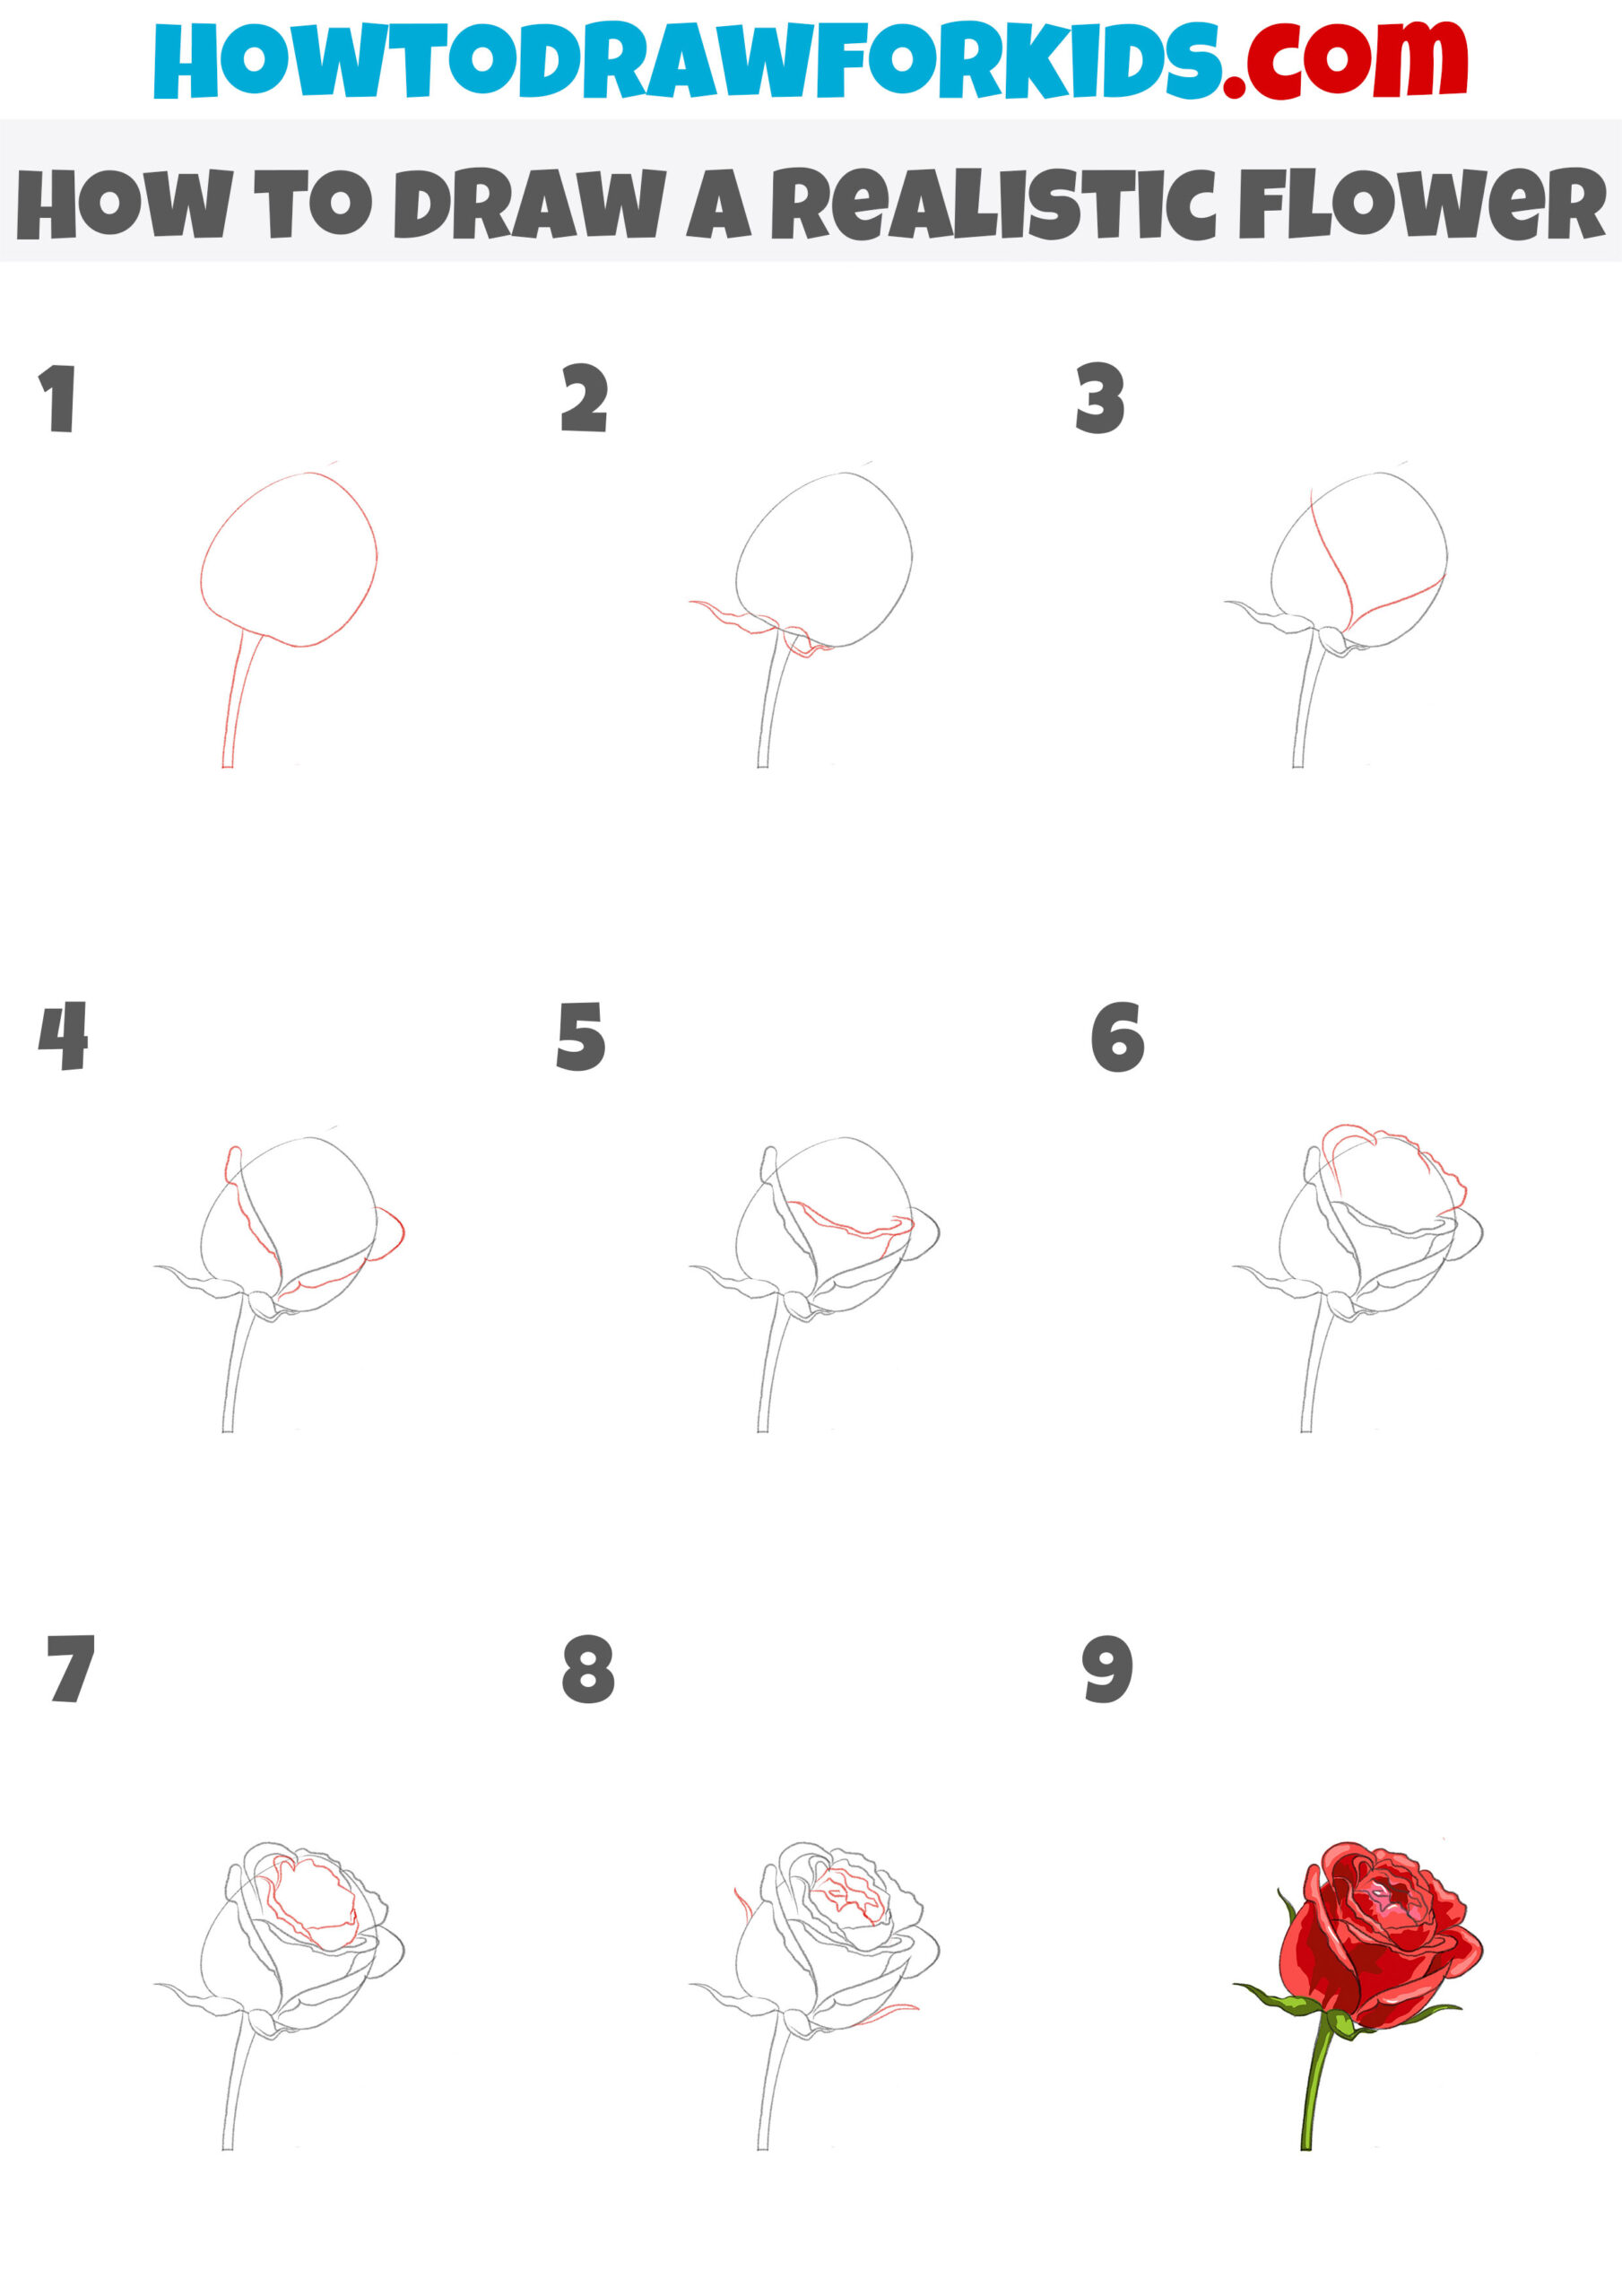
The flower in this tutorial is a realistic depiction of a rosebud, featuring intricate, layered petals that curl naturally around the center. The stem is slender with small leaves attached, and the overall look is elegant and realistic.
Start by sketching an oval shape tilted at an angle for the bud, and draw a curved line extending downward to form the stem. Next, add the first layer of outer petals, using gentle, wavy lines to illustrate the natural curves of the rose petals. Continue by drawing the inner petals, gradually working your way inward, ensuring that each layer overlaps slightly with the one before it.
Add the small leaves at the base of the bud, where it connects to the stem, giving the rose a more realistic appearance. As you progress, refine the details of the petals, drawing the delicate folds and subtle curves that make a rose so distinctive. Finally, color the rose in rich, vibrant shades, with deep red for the petals and green for the stem and leaves.
Conclusion
We’ve reached the end of this tutorial, but there are more drawing lessons available on my website. You can explore tutorials on drawing different flowers, plant and trees, each offering new skills and interesting ideas.
Join me on social media to stay updated on new tutorials. If you have suggestions for future lessons, feel free to leave a comment below. Your feedback helps shape the content of upcoming tutorials.