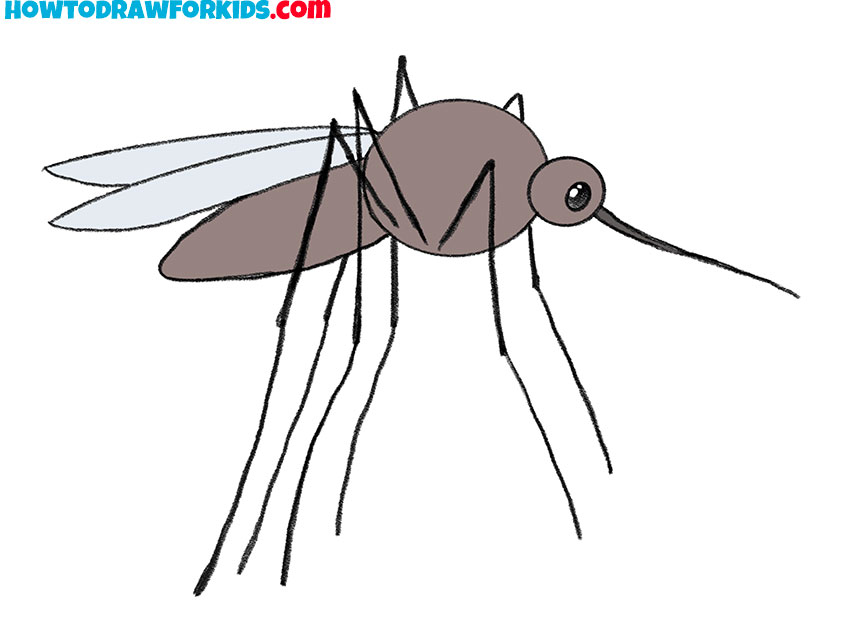
How to Draw a Mosquito
In this very simple drawing lesson I will demonstrate how to draw a mosquito. I’ll zoom in a little so you can see all the parts of the mosquito’s body and then I’ll show you how to draw it.
In this drawing lesson on how to draw a mosquito, I will focus on creating a detailed and accurate representation. The mosquito in the sample is presented in an enlarged form, allowing to closely observe and understand the unique structure of its body. This enlargement is crucial for capturing the intricate details and proportions that characterize these fascinating insects.
Mosquitoes have evolved to possess a very interesting structure, which is both delicate and complex. Understanding this evolutionary aspect can help you appreciate the importance of accurately depicting each part of the mosquito. As an artist, it is essential to pay attention to the fine details that define the mosquito’s form, such as its slender legs, elongated abdomen, and thin wings.
Drawing the thin but graceful parts of a mosquito requires a steady hand and careful observation. Maintaining the correct proportions is key to ensuring that your drawing looks realistic and balanced. Each part of the mosquito, from its head and proboscis to its legs and wings, must be proportionately aligned to create a cohesive and accurate depiction.
Throughout this lesson, I will guide you step-by-step to ensure you capture the mosquito’s distinctive features. By following these detailed instructions, you will develop a better understanding of the mosquito’s anatomy and improve your skills in drawing delicate and detailed subjects. Remember, patience and practice are essential as you work to refine your technique and achieve a well-proportioned and realistic drawing.
Mosquito Drawing Tutorial
Materials
- Pencil
- Paper
- Eraser
- Coloring supplies
Time needed: 30 minutes
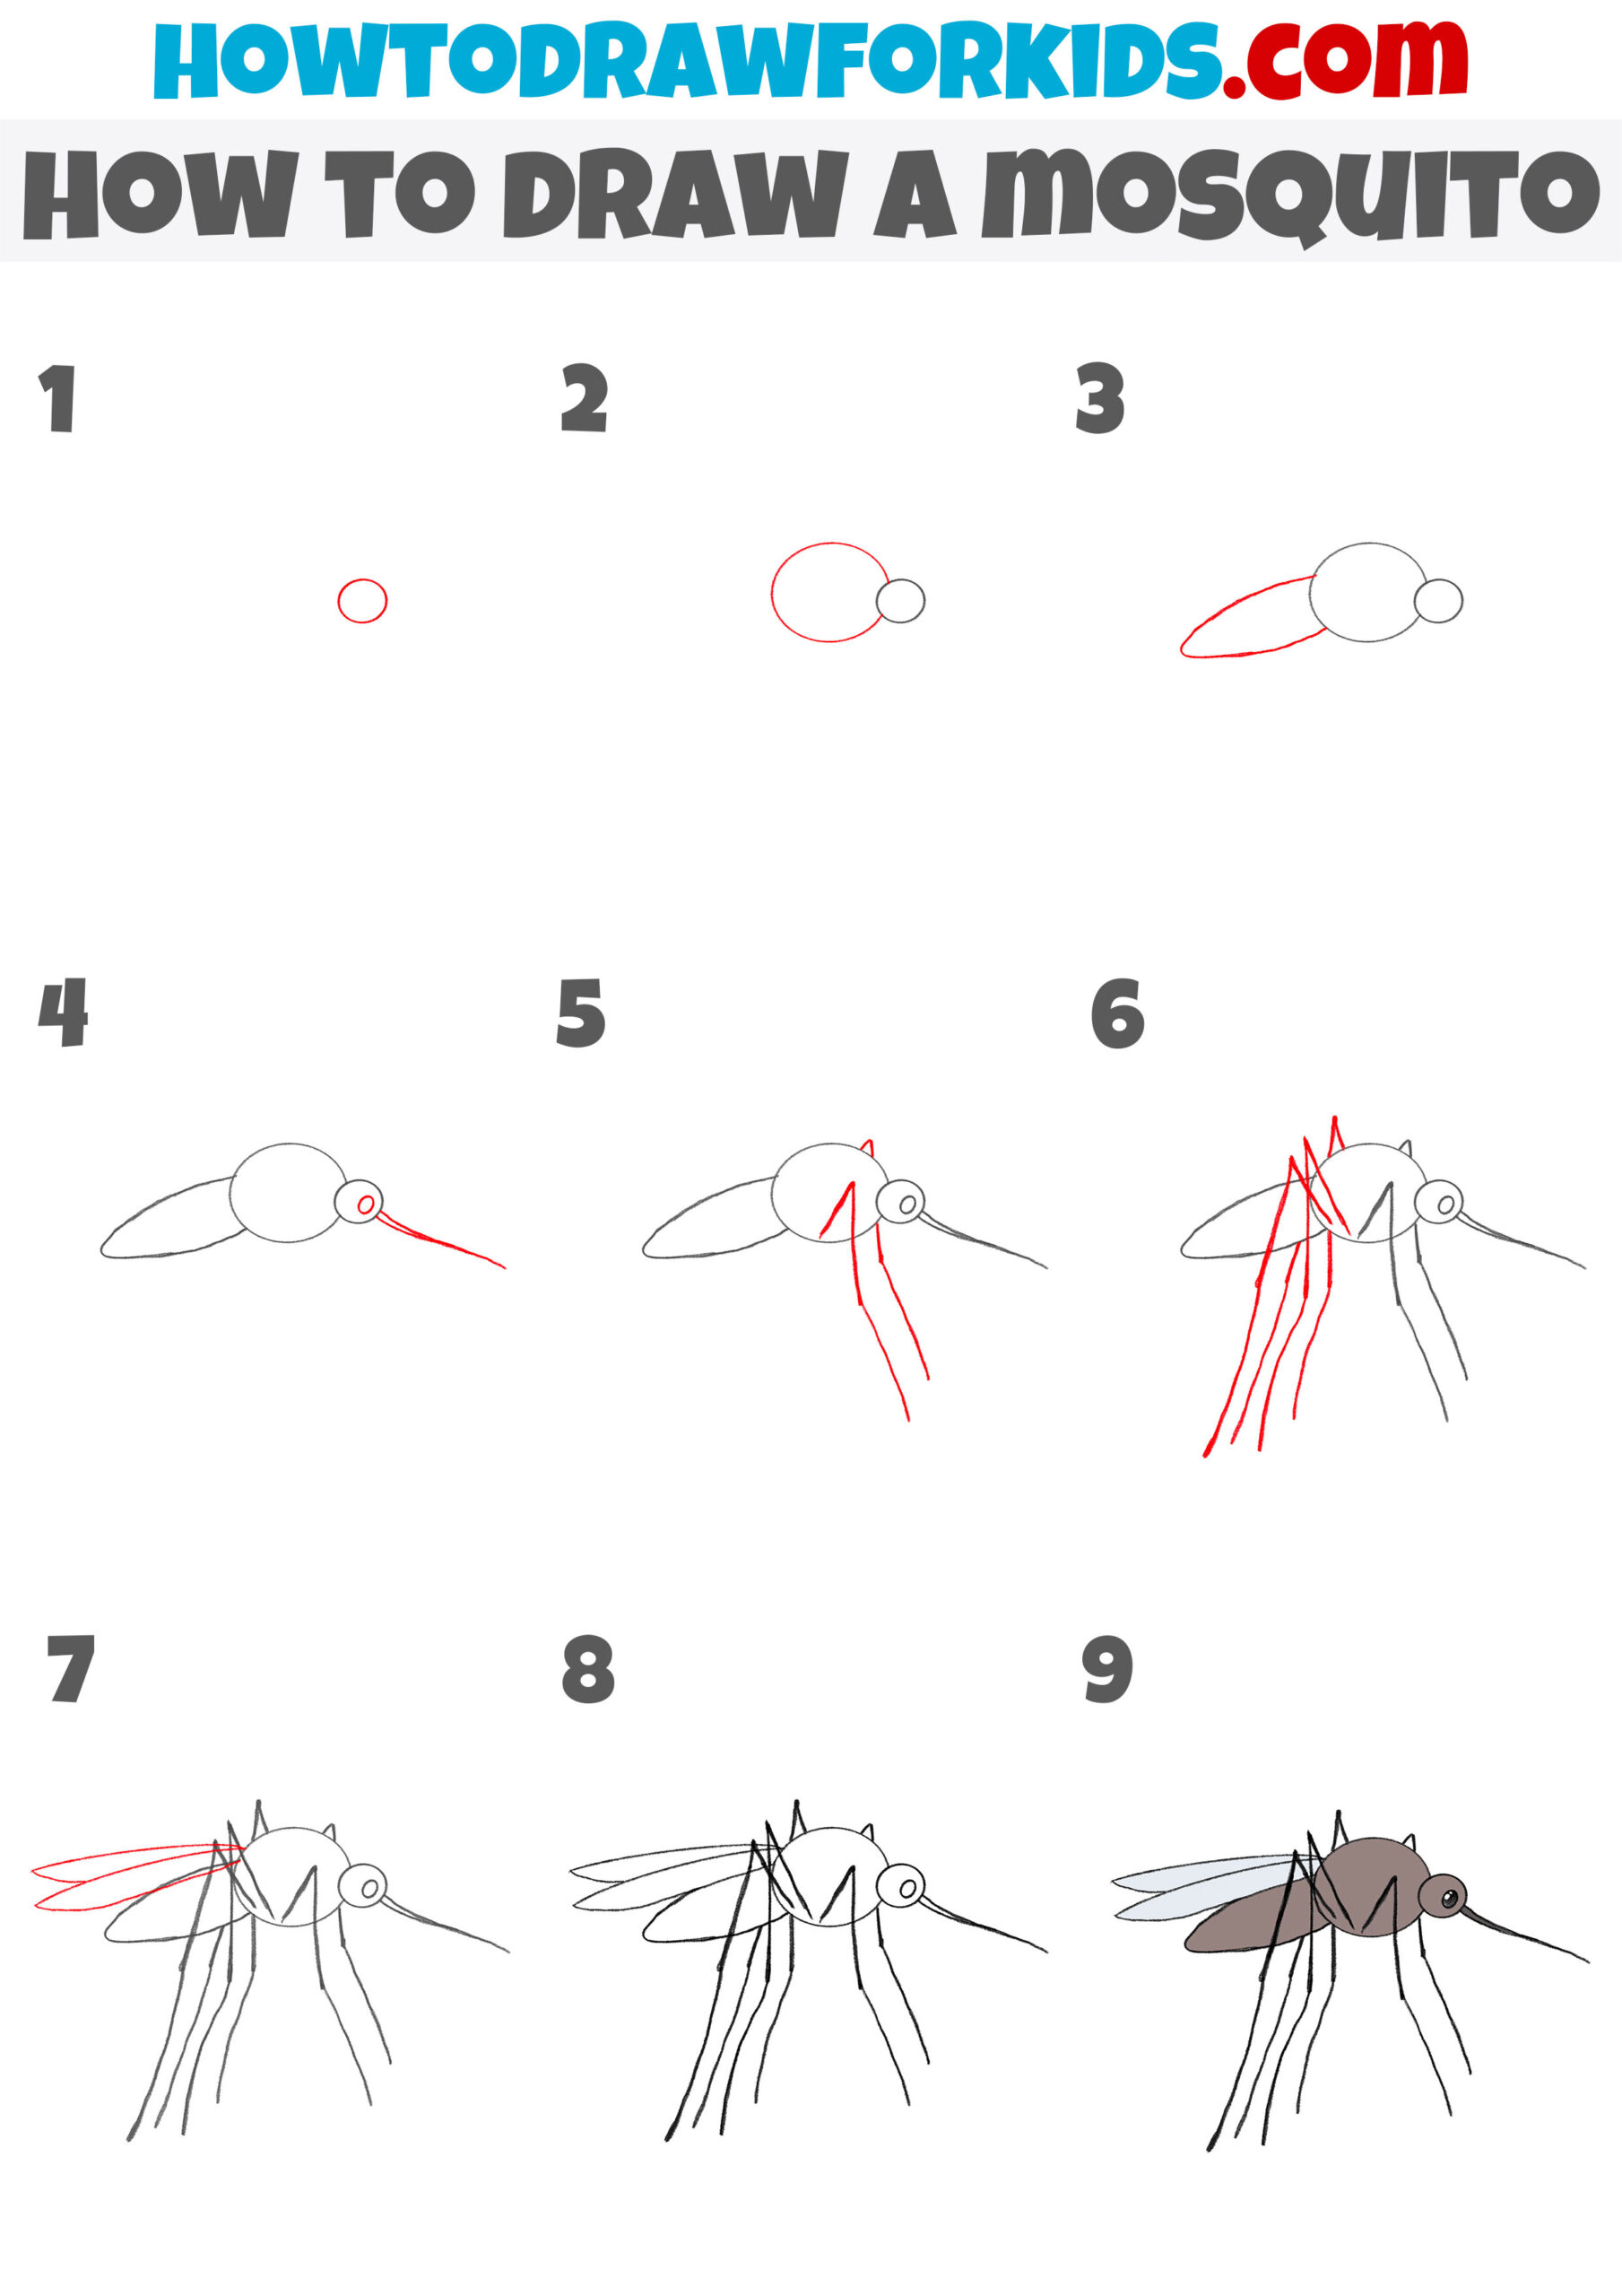
How to Draw a Mosquito
- Draw the head.
Begin by drawing a small circle near the top left of your paper. This will form the mosquito’s head. Use light, smooth strokes to ensure that the circle is even and well-proportioned. Keeping your pencil strokes light allows for easier erasing and adjustments.

- Add the middle part of the torso.
Next, draw a slightly larger circle to the right of the head. This circle will represent the thorax, which is the central part of the mosquito’s body. Position this circle so that it overlaps slightly with the head. This overlapping will help in creating a natural transition between the two body parts.

- Depict the belly.
To draw the abdomen, use long, smooth strokes to create an even and symmetrical shape. Keep the oval’s width narrower than the thorax and ensure the length is appropriate to maintain proportions. This step requires careful attention to the curvature and length to accurately depict the mosquito’s body structure.

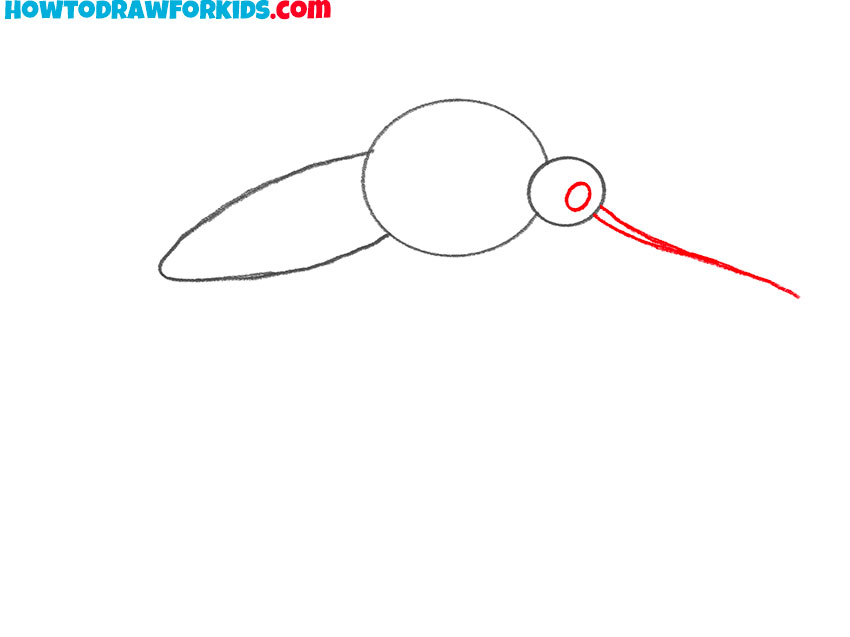
- Draw the proboscis and the eye.
From the head, draw the straight, thin lines extending outwards to represent the proboscis. This is the mosquito’s feeding tube, and it should be slightly longer than the head itself. Start at the center of the head and use light, continuous strokes to create a straight, precise line.
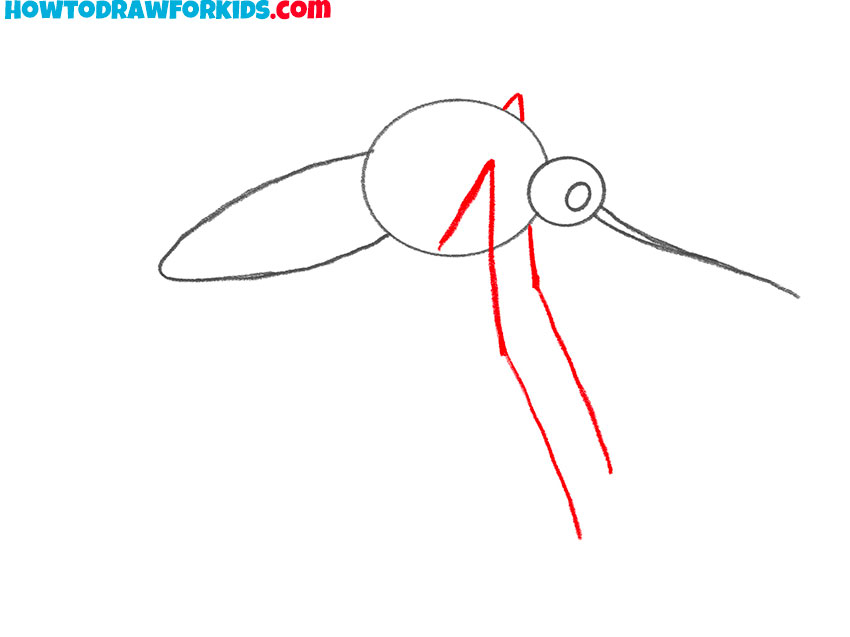
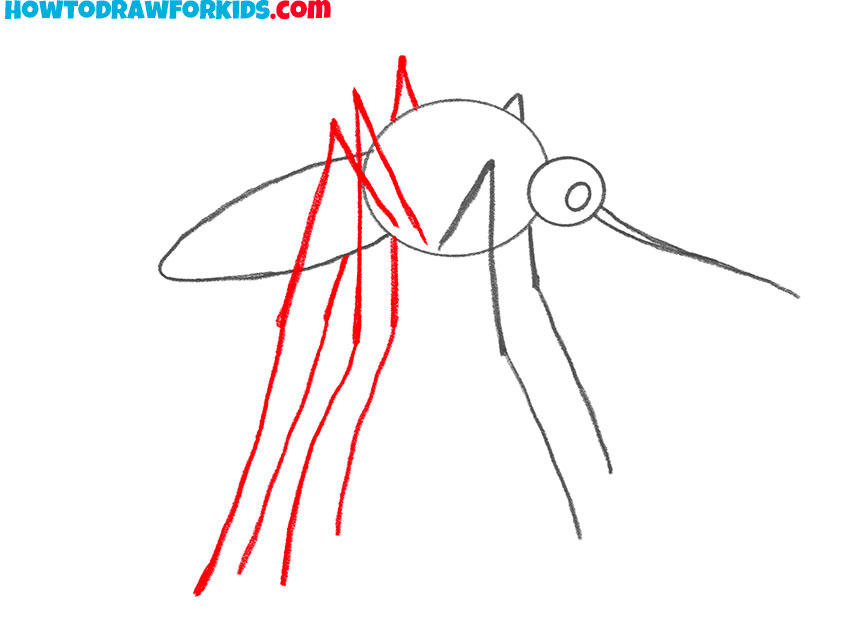
- Sketch out the two front paws.
When drawing the legs, start with light guidelines to determine the direction and length. Then, refine these lines by making them more defined. The angles and bends should be natural, reflecting the mosquito’s delicate leg structure. Practice maintaining consistent thickness throughout the leg segments.
- Add the rest of the paws.
Add two more legs in front of the previously drawn ones, following the same method. Each leg should have a noticeable joint and be similar in length and thickness to the first set. These legs should be positioned to show depth, with some overlapping to indicate the mosquito’s three-dimensional structure.
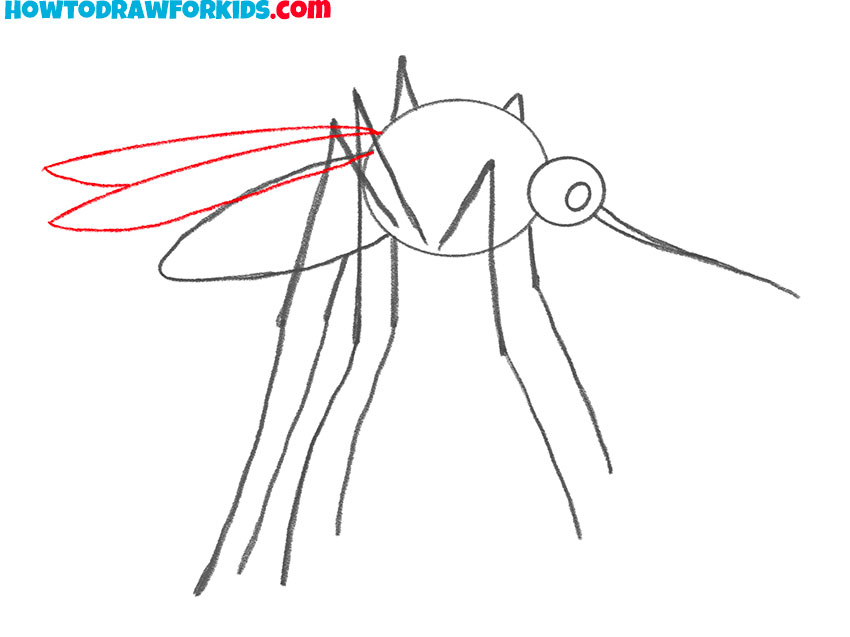
- Depict the wings.
Draw two long, narrow wing shapes starting from the top of the thorax. The wings should be slightly curved and extend back over the abdomen. Each wing should be similar in size and shape, with a smooth, flowing outline.
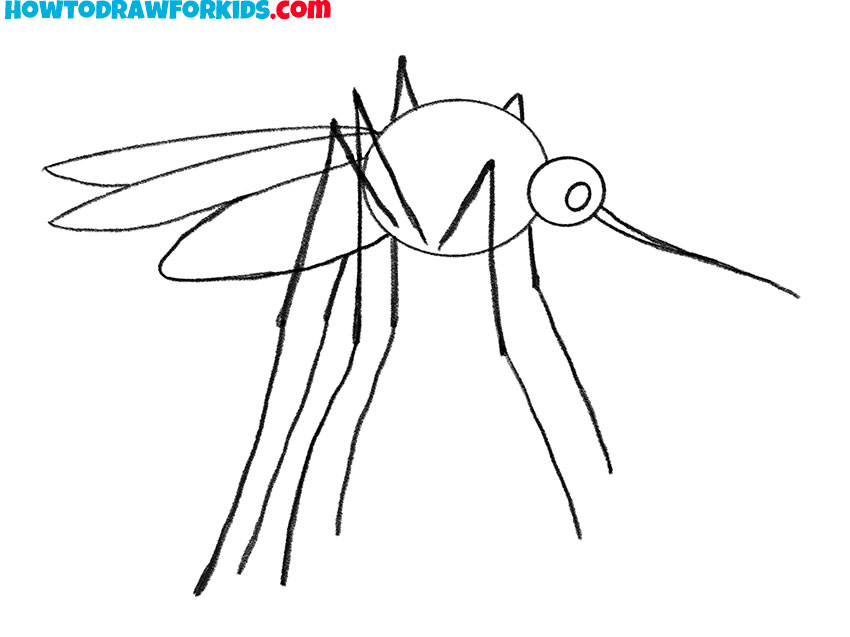
- Correct inaccuracies.
Check for any extra lines or overlaps, and erase them to clean up your drawing. Make sure the legs are properly aligned and appear natural in their position and curvature. Next, refine the wings, ensuring they are symmetrical and properly attached to the thorax.
- Color the mosquito.
Add color to your mosquito drawing. Use shades of brown and grey for the body, and lighter colors for the wings to show their transparency. Then, add shading to the legs and body. When coloring, use smooth, even strokes to apply the color.
Additional Content
After completing the dawing guide on how to draw a mosquito, you’ll find a PDF document with several options for drawing. This PDF can be downloaded in advance and used even when there is no Internet access, making it a handy resource for offline practice and improvement.
Conclusion
By following this drawing lesson, you have learned how to create a detailed and proportionate representation of a mosquito. Practicing the drawing of various animals and insects will help you develop more confident lines and a better understanding of different forms and structures. This practice will enhance your overall drawing skills and allow you to tackle more complex subjects with ease.
I encourage you to continue improving your skills by exploring more drawing lessons and expanding your portfolio. Stay connected on social networks, especially YouTube and Pinterest, for more tutorials and inspiration.