How to Draw a Snowman Face
In this tutorial, you will learn how to draw a snowman face. This lesson will be interesting, useful, and really simple. At the very end of the guide, I will share with you important tips that will help make your artwork even more interesting.

How to Draw a Snowman Face: Introduction
Snowman is one of the most popular objects to draw. Even a novice artist can put in a little effort and get great results. The snowman consists of several circles. While drawing circles, you practice your skills in drawing symmetrical shapes.
Another significant aspect of this tutorial is the emphasis on creating expressions. The snowman’s face, with its simple features, provides an excellent field to learn how slight variations in the shape and placement of the mouth and eyes can convey different emotions.
Additionally, the tutorial introduces the concept of adding details to enhance the overall appearance. The inclusion of the hat, for instance, teaches young artists how accessories can contribute to a character’s identity and make the drawing more interesting.
Drawing a snowman’s face is also a useful exercise for creating portraits. It’s kind of like a very simplified human face, so you might want to practice drawing a snowman’s face a little before you get into the advanced tutorials.
Snowman Face Drawing Tutorial
Materials
- Pencil
- Paper
- Eraser
- Coloring supplies
Time needed: 30 minutes
How to Draw a Snowman Face
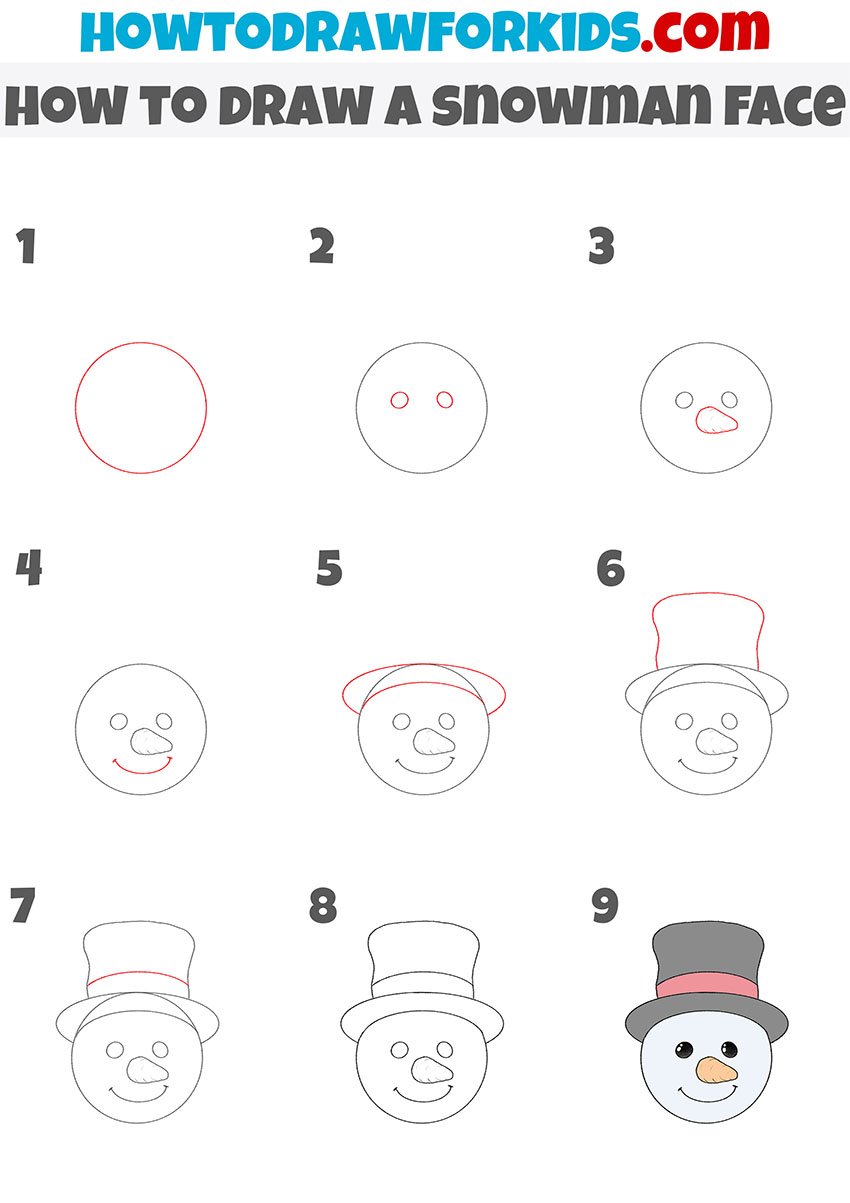
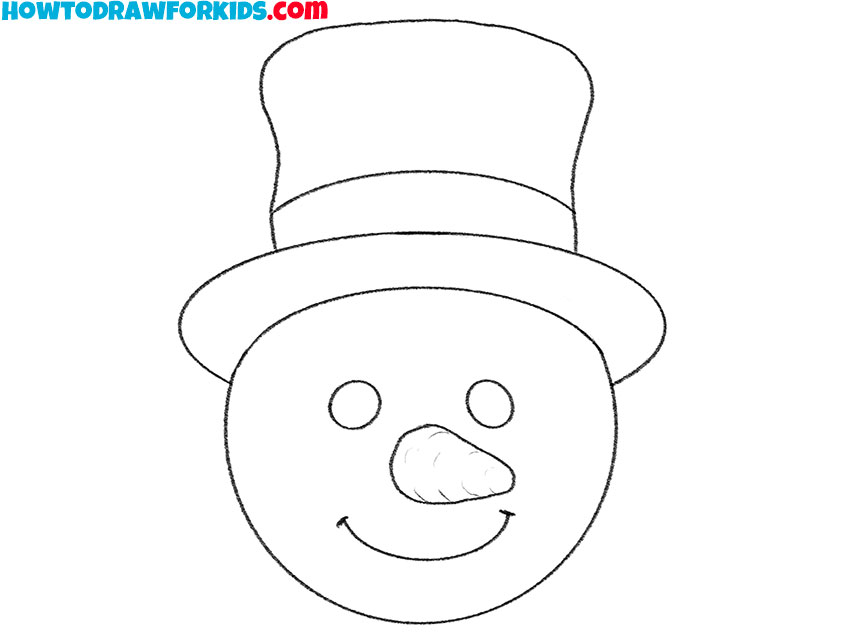
- Draw the outline of the snowman face.
To begin drawing the snowman’s face, start by sketching a large, perfect circle in the center of your paper. This circle will serve as the head of your snowman. Use a light pencil stroke to outline the circle so you can easily make adjustments if needed.
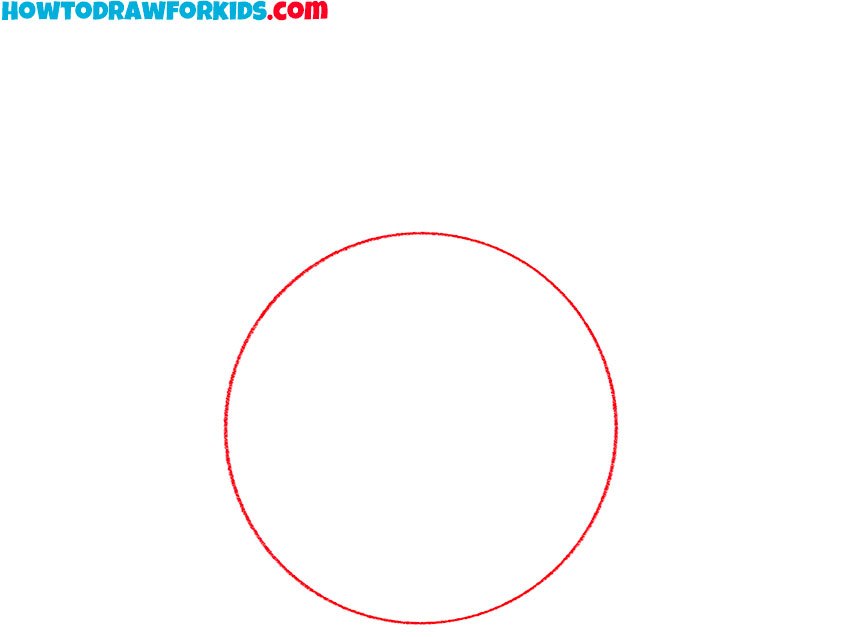
- Add the eyes of the snowman.
Next, draw two small circles inside the larger circle to represent the snowman’s eyes. Place them symmetrically, with enough space between them to accommodate the other facial features. The eyes should be relatively small compared to the head but large enough to be clearly visible.
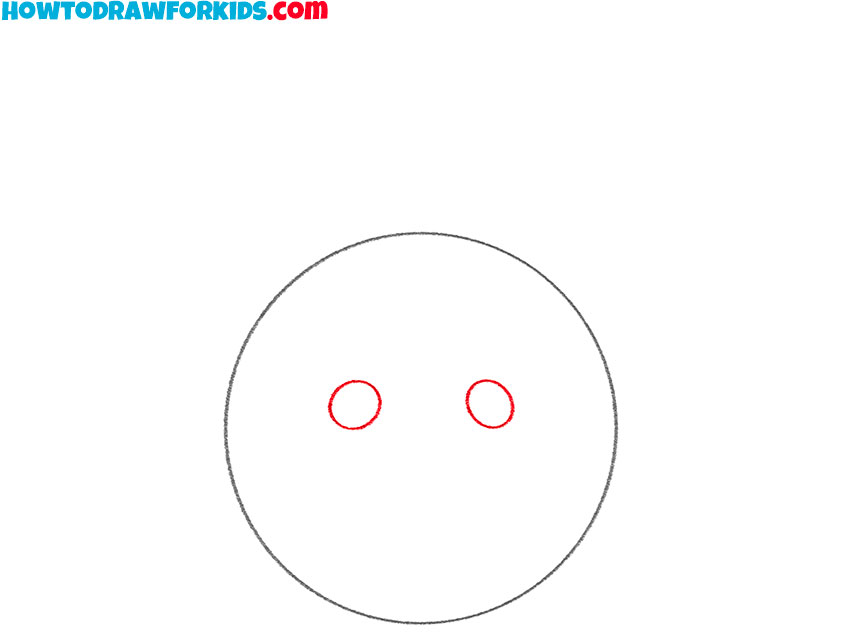
- Illustrate the nose.
Now, add the snowman’s nose by drawing a small, rounded triangular shape beneath the eyes. The nose should be positioned centrally and slightly lower than the eyes to create a balanced look. This shape represents the classic carrot nose commonly associated with snowmen.
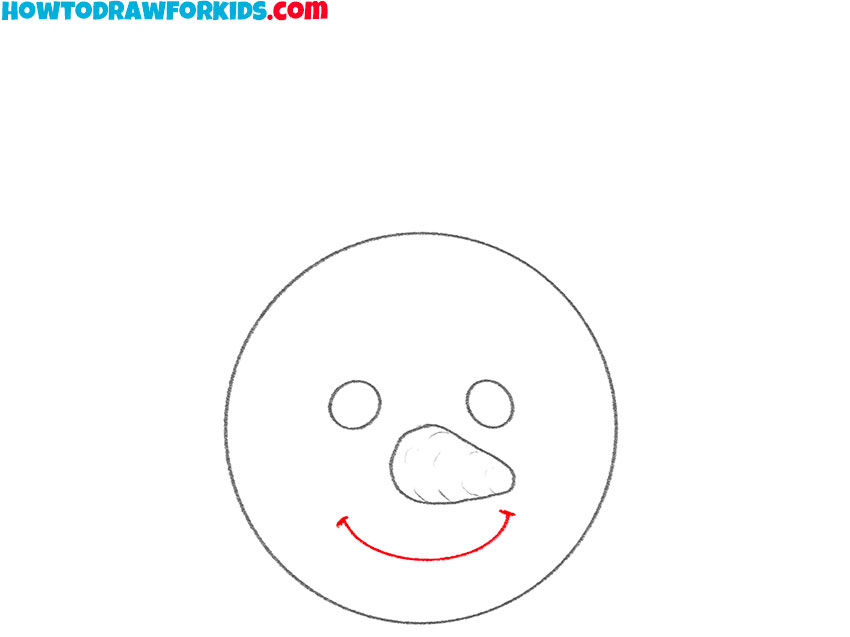
- Sketch the mouth.
Create a curved line that starts from one side of the face, arches downward, and ends at the opposite side. The smile should be wide and gentle, giving the snowman a friendly and welcoming expression. Make sure the mouth is centered and positioned below the nose.
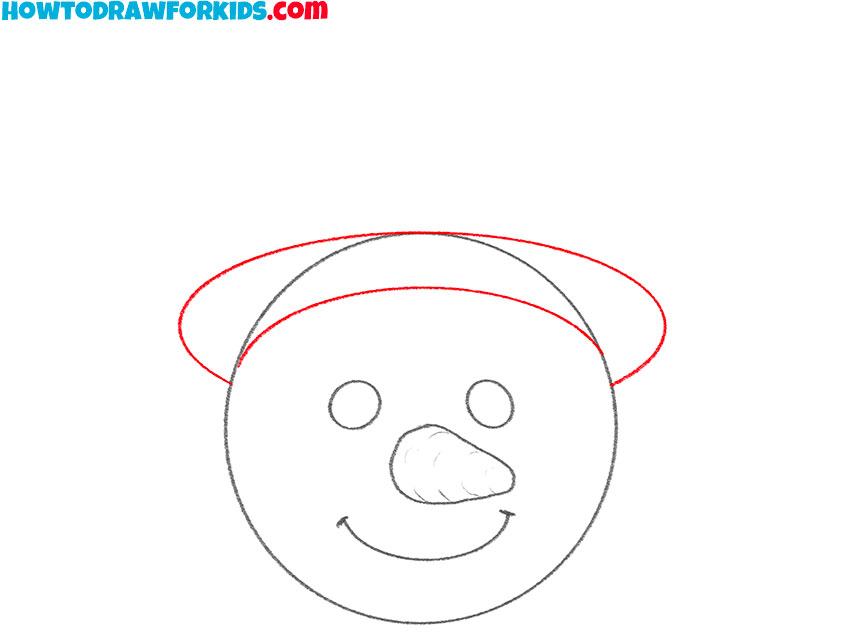
- Draw the brim of the hat.
To begin drawing the snowman’s hat, sketch an oval shape on top of the head, slightly overlapping the top of the circle. This oval will form the brim of the hat. Make sure it extends equally on both sides of the head to create a symmetrical appearance.
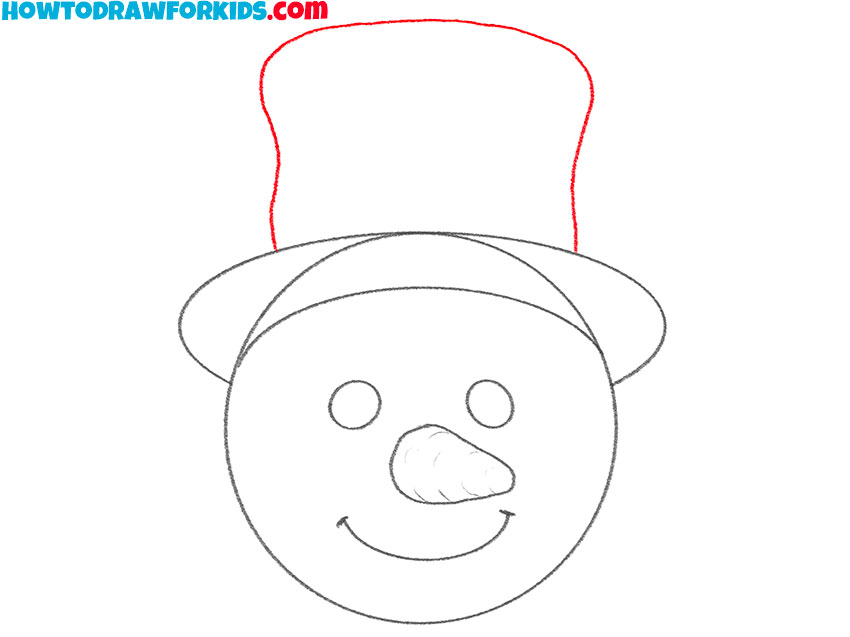
- Draw the rest of the hat.
Continue by drawing the main part of the hat above the brim. Extend two vertical lines upward from the edges of the brim, then connect these lines with a slightly curved line at the top. The hat should have a tall, cylindrical shape, tapering slightly towards the bottom.
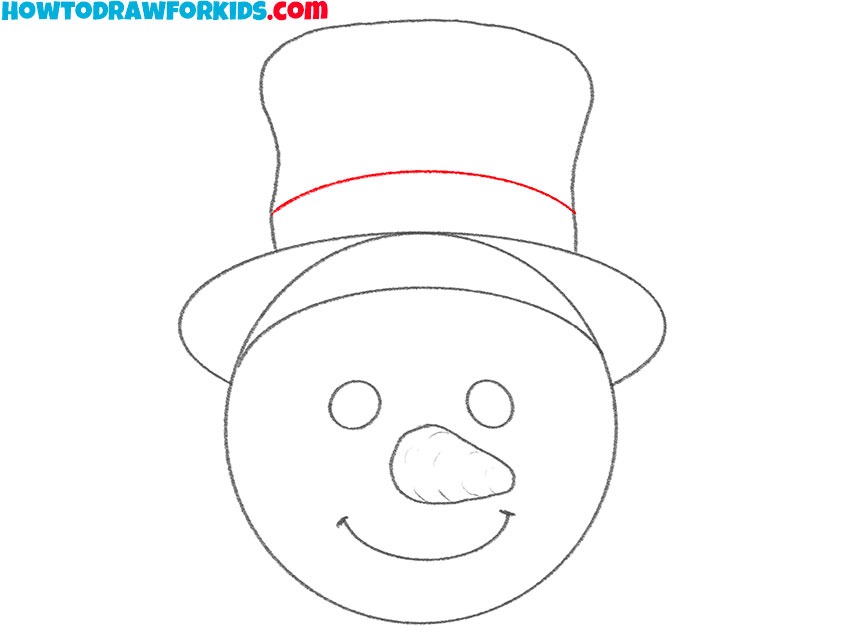
- Add the cross strip.
Add details to the hat by drawing a band around it, just above the brim. Sketch a horizontal line that wraps around the hat, giving it a distinct, stylish look. You can also refine the edges of the hat and brim, making them smoother and more finished.
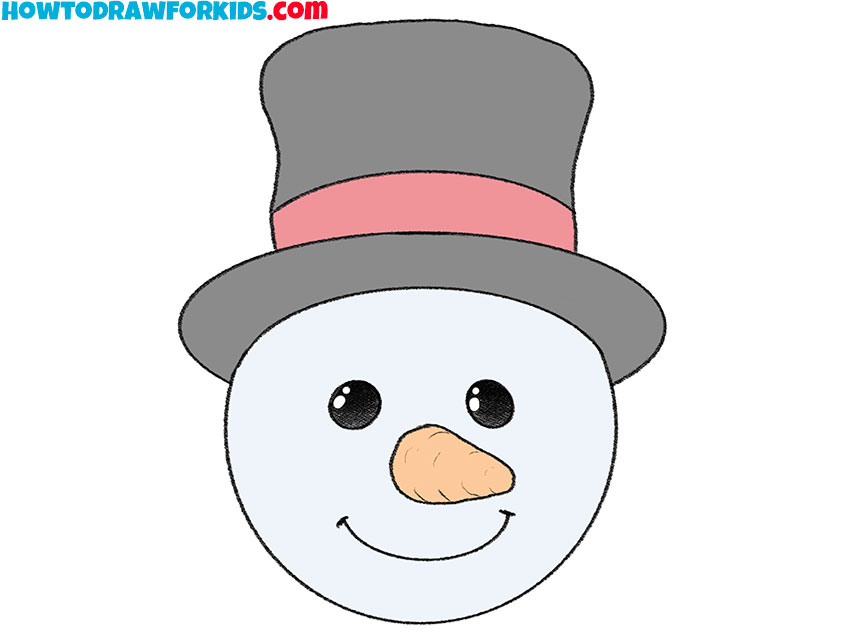
- Refine your snowman face.
Review your drawing and go over the entire snowman’s face with a darker pencil or pen to finalize the outline. Trace over the eyes, nose, mouth, and hat, making sure all lines are clear and well-defined. Erase any unnecessary pencil marks or guidelines, leaving a clean and polished drawing.
- Add colours to the the snowman drawing.
Use orange for the carrot nose, black for the eyes and mouth, and a combination of colors for the hat. Traditionally, the hat might be black with a red band, but feel free to get creative with your color choices. You can add shading and highlights to give the snowman a three-dimensional appearance.
Additional Content
If you want to draw a snowman when there is no Internet, download this PDF. It provides a cool and useful resource, including various guides on how to draw a snowman, making it versatile for different styles. The PDF features a short, convenient version of the step-by-step tutorial for easy offline use.
To add more fun, the PDF offers a coloring page where you can creatively customize your snowman. To help you improve your drawing skills, the PDF contains a tracing worksheet and a grid drawing worksheet. These are designed to aid in practicing and perfecting your technique, ensuring your snowman looks great.
How to Draw a Snowman’s Face: Tips and Tricks
You have a freedom to change the shape of various parts of the snowman’s face. For instance, you can modify the hat to suit your design preferences, whether it be a top hat, a beanie, or any other type of headwear you envision. This allows you to give your snowman a unique style.
Extend your drawing by adding the rest of the snowman’s body. This includes the iconic round snowballs that make up its torso and legs. You can add details like buttons, a scarf, and arms made of sticks to complete the look.
Make your snowman drawing more interesting by painting or drawing the surrounding landscape. Consider adding elements like a snowy ground, trees, a background with falling snowflakes, or a winter scene.
Challenge yourself by drawing circles and lines without using auxiliary tools like compasses or rulers. Initially, your circles and lines may be asymmetrical and uneven, but this practice will significantly improve your freehand drawing skills over time. As you continue to draw, you will notice a marked improvement in your ability to create more accurate and symmetrical shapes.
Conclusion
I hope you thoroughly enjoyed this drawing lesson and had a lot of fun drawing your snowman. If you encountered any mistakes and your snowman turned out differently than you envisioned, don’t worry. Simply go back and trace the step where the error occurred, and make the necessary corrections.
I love hearing from you and are always eager to see your comments on my articles. Your feedback is invaluable to me and helps me improve my tutorials. So, don’t hesitate to share your thoughts and impressions with me. Whether you have suggestions, questions, or just want to tell me about your experience, I am here to listen.