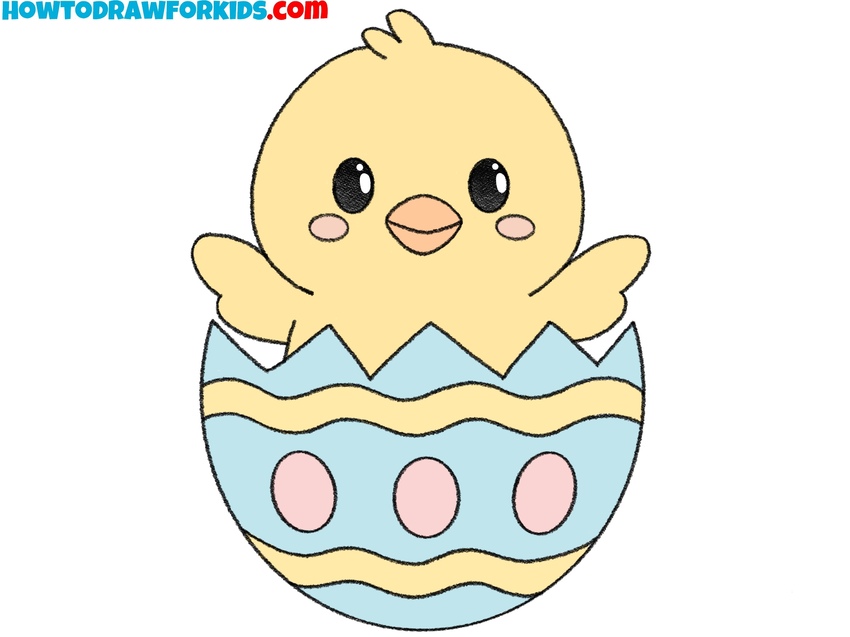
How to Draw an Easter Chick
Let’s sketch another symbol of the spring holiday of Easter with this tutorial on how to draw an Easter chick hatching from a decorated egg.
How to Draw an Easter Chick: Introduction
We often draw various seasonal illustrations together and learn how to create seasonal characters. These drawings help build up skills while also letting us celebrate different holidays and times of the year through simple and fun artwork.
For example, in one of the previous tutorials, we already drew an Easter Bunny. Continuing with the theme of this cheerful spring holiday, today we’ll learn how to draw an Easter chick that has just hatched from a beautifully decorated egg.
This lesson is part of my growing Easter collection, which also includes Easter coloring pages and many other related tutorials. It’s designed to be simple and easy to follow, even if you’re just starting to learn how to draw.
You don’t have to copy everything exactly as shown in this tutorial on how to draw an Easter chick. You can change the pattern on the egg to create a completely different design. You can also adjust the position of the chick’s wings or modify the facial expression to make it more unique.
Easter Chick Drawing Tutorial
Materials
- Pencil
- Paper
- Eraser
- Coloring supplies
Time needed: 30 minutes
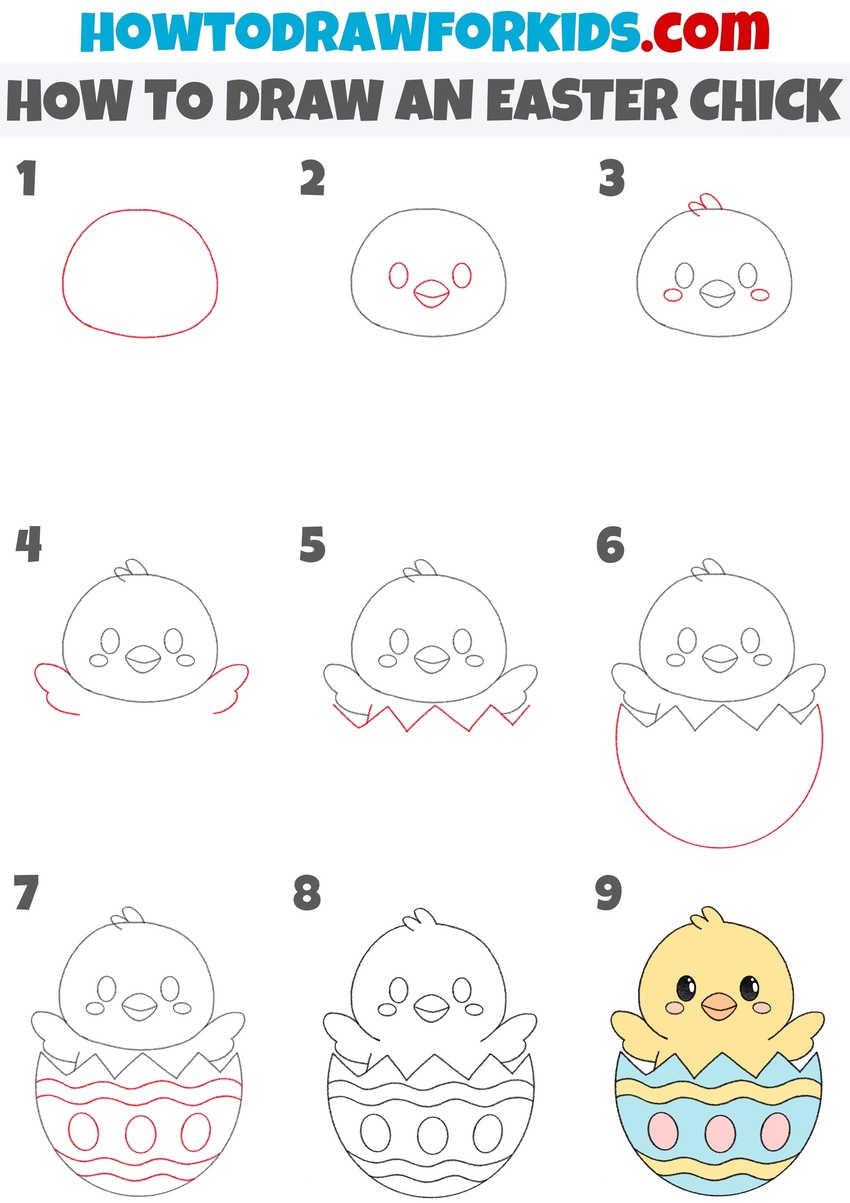
How to Draw an Easter Chick
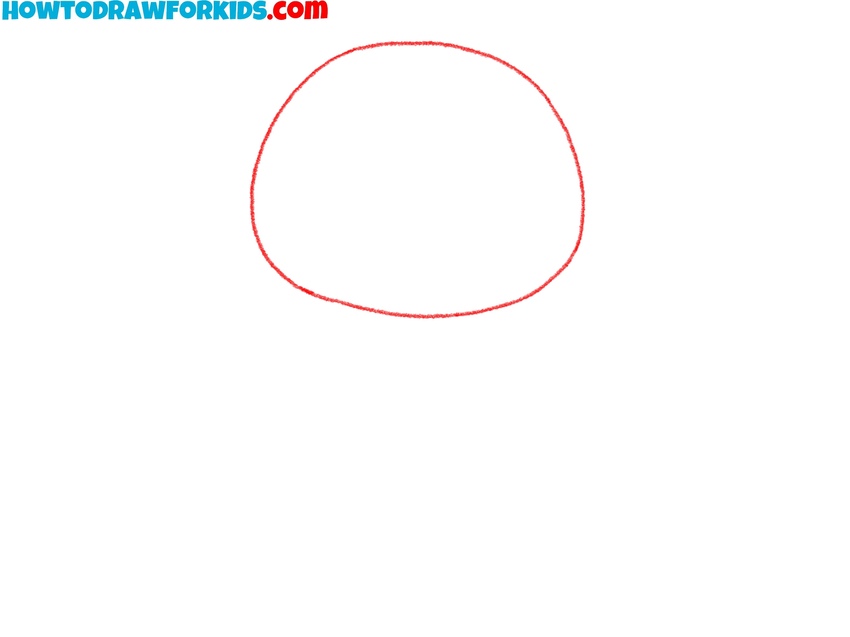
- Draw the Easter chick’s head.
Start by drawing a large oval shape in the center of your paper to form the chick’s head. Keep your lines light and smooth. Make sure the oval is symmetrical, as it will help the Easter chick drawing look more professional. Leave enough space underneath the oval to add the egg and chick’s wings in later steps.
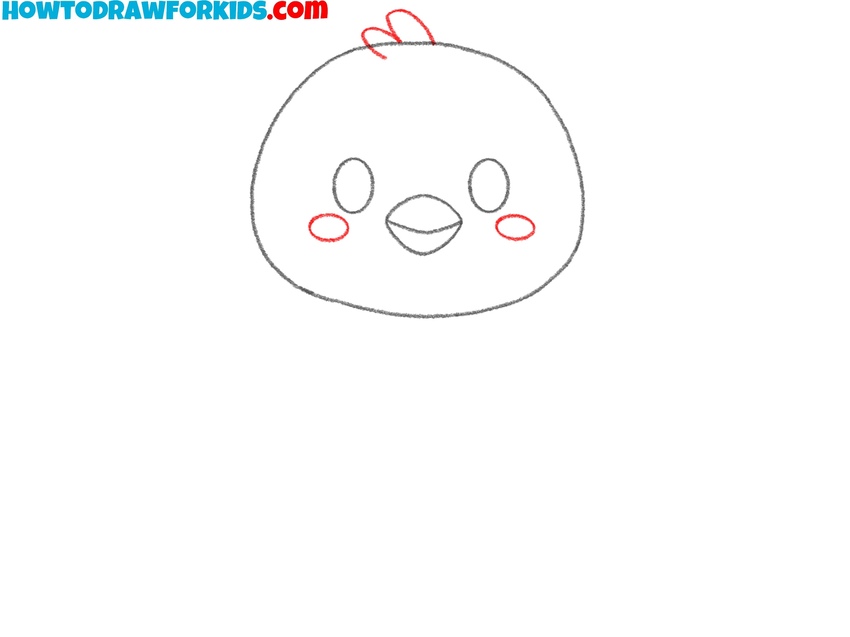
- Add the eyes and beak.
Inside the oval, draw two oval eyes. Place them slightly higher than the center of the shape. Next, add the beak between the eyes. The beak looks like a small pointed oval. Draw a horizontal line inside the beak to show where it opens.

- Add cheeks and feather detail.
Draw two small horizontal ovals on the sides of the beak to represent the chick’s rosy cheeks. Then, at the top of the head, add two small feather shapes that resemble rounded teardrops. These small and simple details make the chick look more stylized and cute.
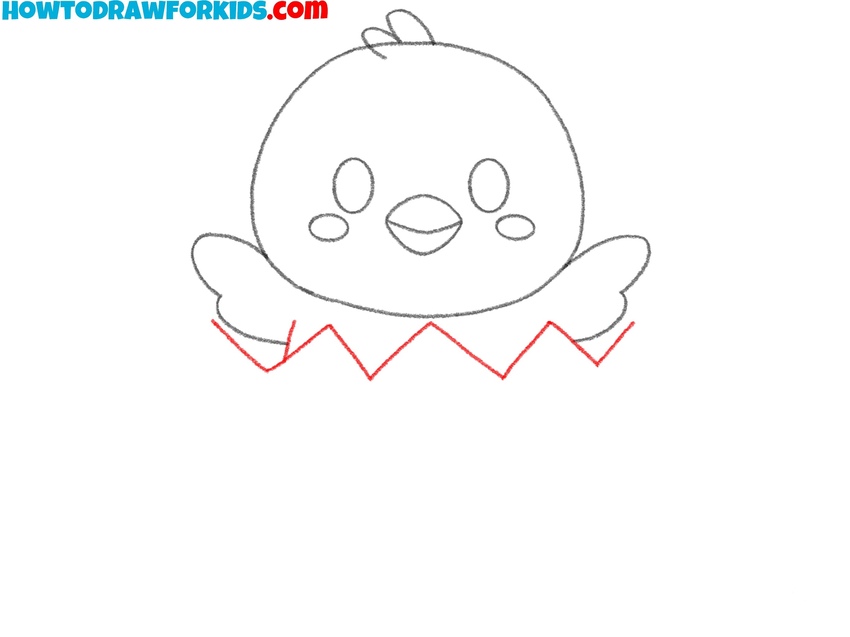
- Draw the Easter chick’s wings.
Now draw the chick’s wings. On each side of the body, add a curved wing that looks like a soft “W” or scalloped shape. Each wing should stick out slightly from the oval and look symmetrical. The wings should start at the lower half of the chick’s body and curve outward gently.

- Add the top edge of the eggshell.
Below the chick, draw the cracked top half of the Easter egg. Use a zigzag line that stretches across the lower part of the body, ending at both wings. The line should look like a series of connected triangles or jagged points. This cracked pattern gives the appearance that the chick just hatched.
- Draw the bottom half of the egg.
From the ends of the cracked shell, draw a smooth arc downward to form the rest of the egg. Connect the lines at the bottom to complete the round lower part of the shell. Try to make the egg as symmetrical as possible, to make the drawing look polished and professional.

- Decorate the Easter egg.
Inside the bottom half of the egg, draw decorative Easter patterns. Start with a wavy line across the top of the shell and another toward the middle. Then, draw three oval shapes between the wavy lines to represent a dotted design. Finally, add one more wavy line near the bottom. Feel free to change the design.

- Trace the final lines.
Carefully trace over your entire Easter chick drawing with a black pen or darker pencil to finalize the lines. Erase any extra construction lines or overlapping parts that you no longer need. Clean up the drawing by smoothing out any rough edges or shaky strokes.
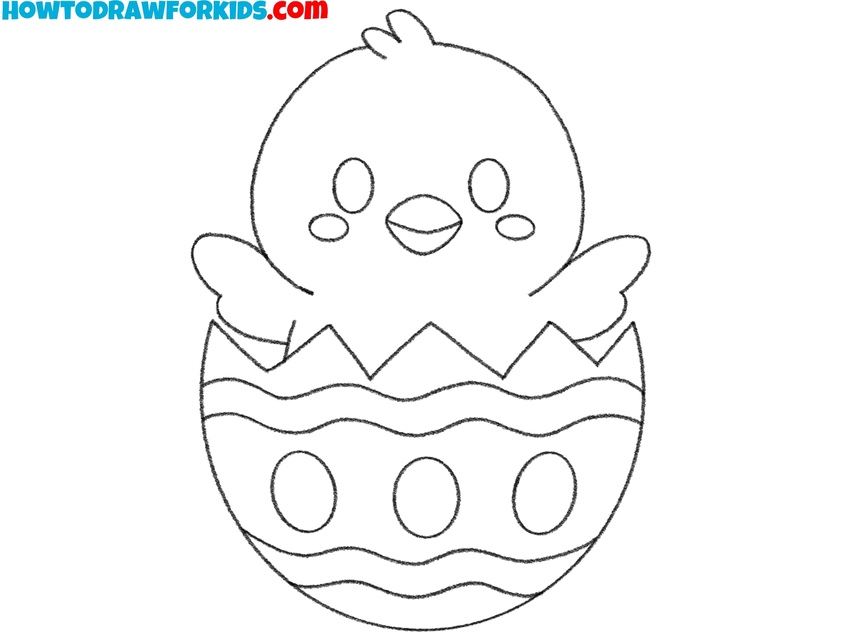
- Color the Easter chick drawing.
Use your favorite coloring supplies to fill in the chick and decorated egg. Make the chick bright yellow, the beak orange, and the cheeks pink. For the egg, use soft spring colors like blue, pink, or green. You can follow the example shown or come up with your own palette.

Conclusion
This Easter chick drawing is finished, and now you can practice creating your own versions by changing the patterns or adding a background. If you’d like to draw more animal-themed lessons, try the chick drawing tutorial or go to the bunny drawing tutorial for another classic Easter image. Don’t forget to share your work and follow along for new step-by-step guides.
If you liked this tutorial, don’t forget to subscribe to my social media pages to stay updated with new drawing lessons. Share this guide with your friends so they can draw along with you. And be sure to check out other step-by-step drawing tutorials and coloring pages on the site – there’s always something new to try.
ok