How to Draw Indiana Jones’s Hat and Whip
Learn how to draw Indiana Jones’s hat and whip in 9 really simple steps with clear instructions, basic details and additional tips.
Prepare to Draw Indiana Jones’ Hat and Whip
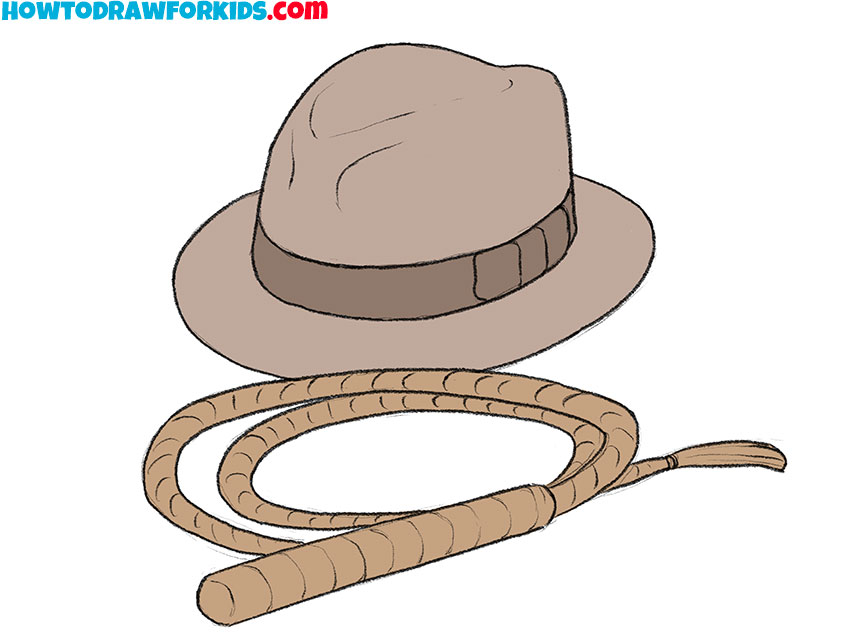
Indiana Jones’ hat and whip are two of the most recognizable movie props ever created. Drawing them is a good way to practice recreating famous objects and giving them a recognizable look.
These two items work best together because they remind people of Indiana Jones. Drawing them in the same picture is also a good exercise in creating simple object compositions.
When drawing a hat and whip of Indiana Jones, artists need to carefully consider the placement of each item to create a believable composition.
And of course, this tutorial will give you a lot of useful skills if you want to draw Indiana Jones in detail.
Indiana Jones’ Hat and Whip Drawing Tutorial
Materials
- Pencil
- Paper
- Eraser
- Coloring supplies
Time needed: 35 minutes
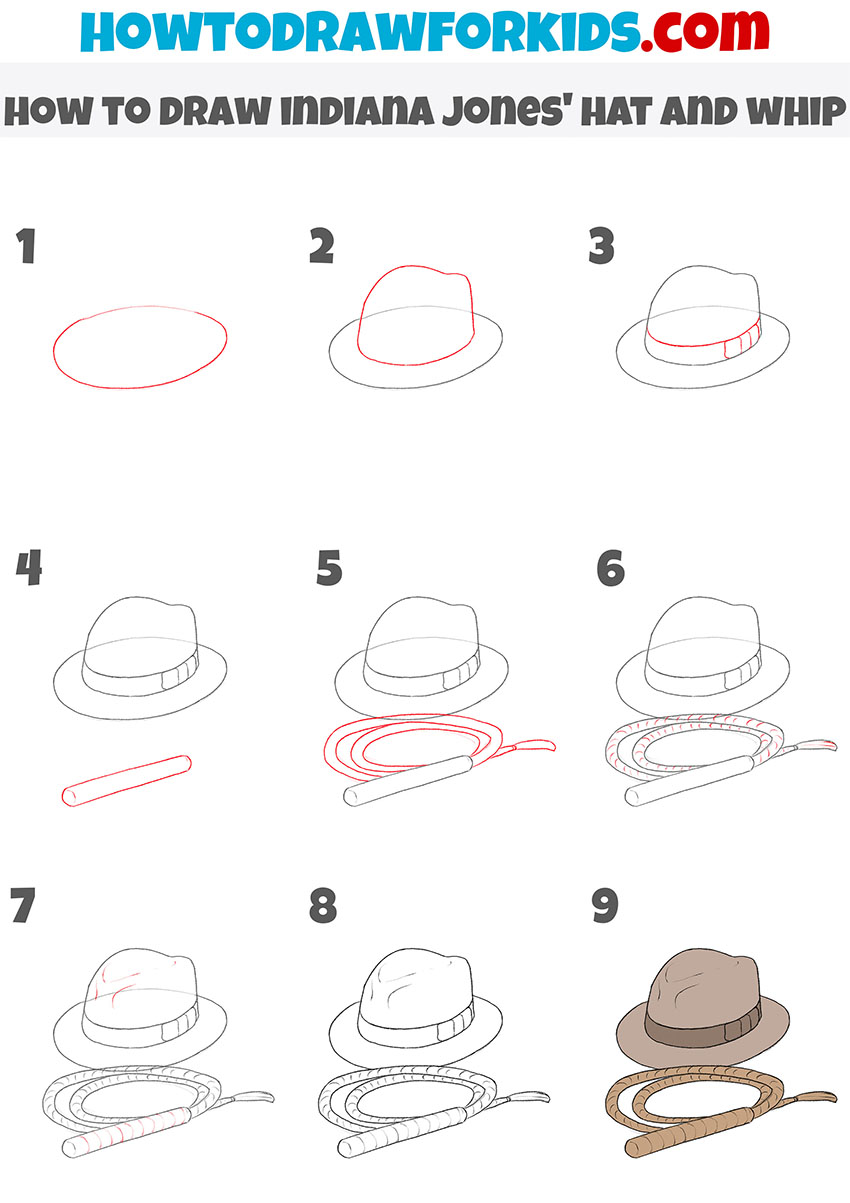
How to draw Indiana Jones’ hat and whip step by step
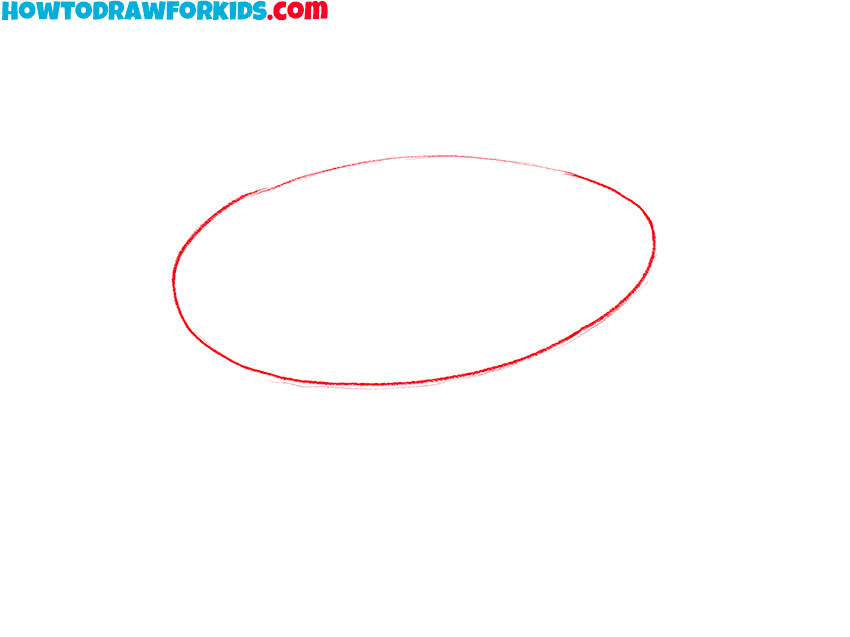
- Sketch the outline of brim.
Begin drawing the Indiana Jones’s hat by sketching a simple oval shape. This oval will serve as the foundation for the brim of Indiana Jones’ iconic fedora hat.
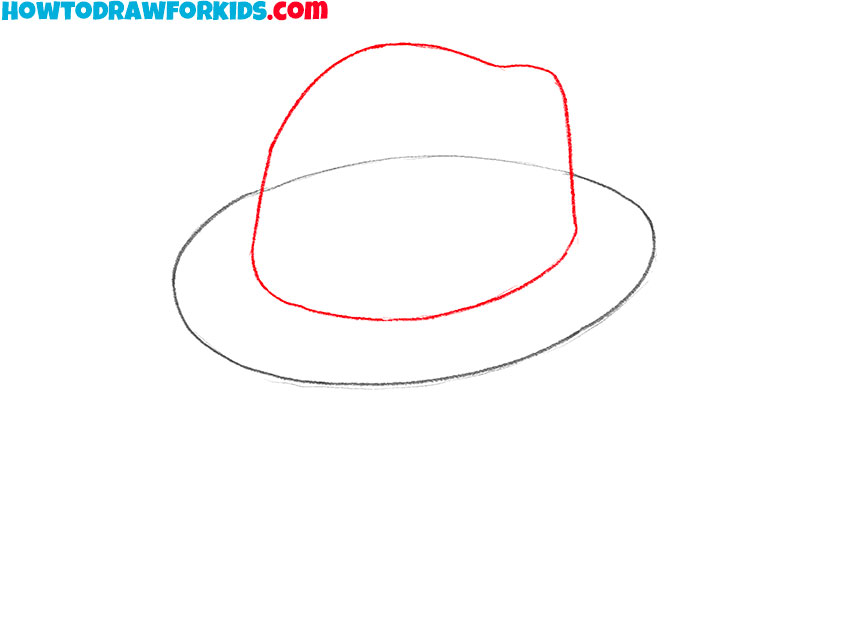
- Add the crown of the hat.
This part of the hat sits above the brim and gives the hat its recognizable shape. Using a curved, almost dome-like line, sketch the crown rising from the inner part of the brim.
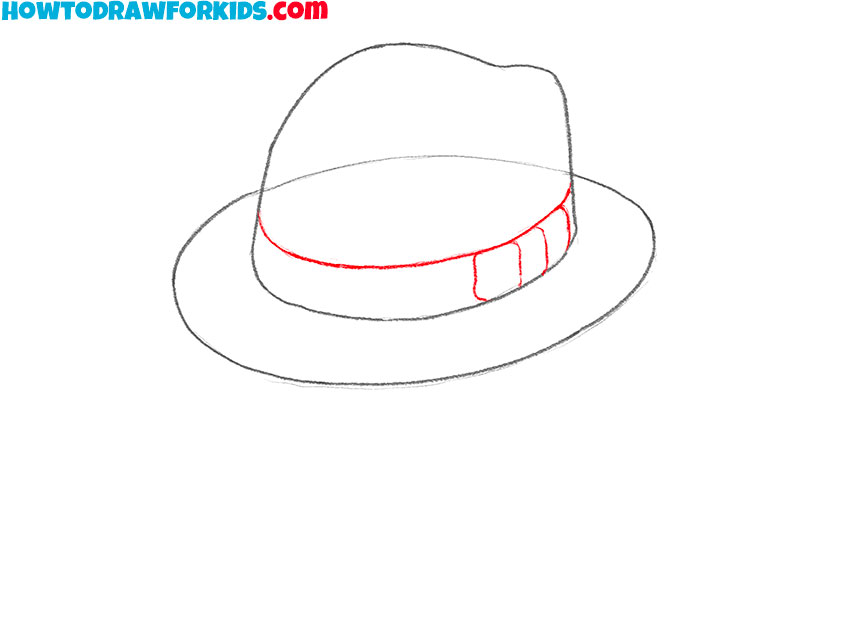
- Add the hatband.
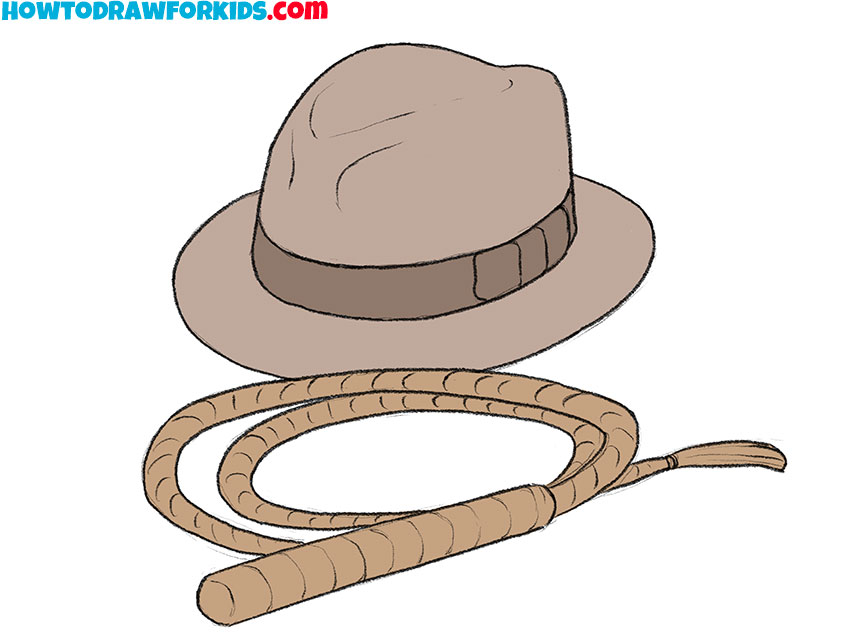
The hatband is the ribbon-like strip that wraps around the base of the crown. Sketch the band close to the bottom of the crown where it meets the brim. Add a buckle or sectioned detail on the side.
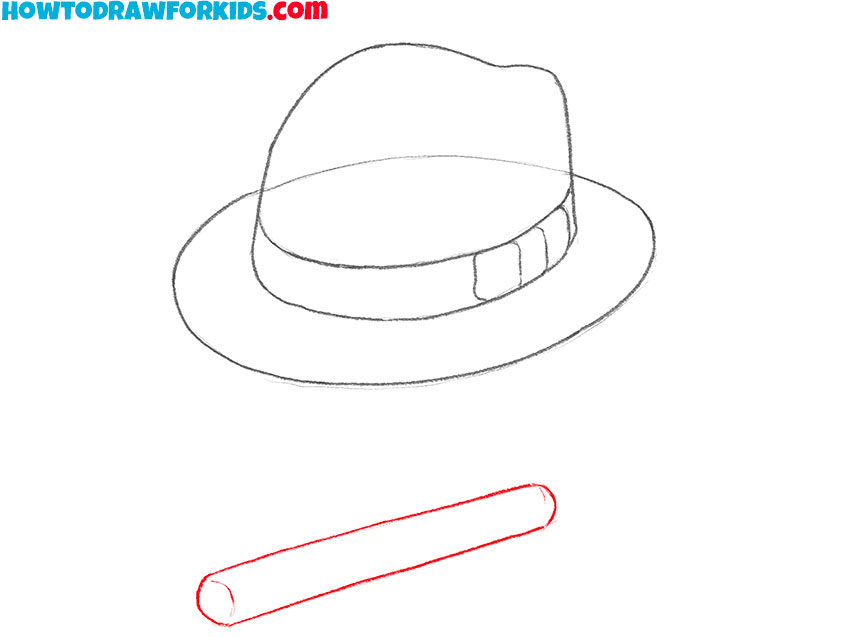
- Illustrate the handle.
In this step, you’ll begin sketching Indiana Jones’ whip, starting with the handle. Just beneath the hat, draw a cylindrical shape horizontally positioned, with rounded edges.
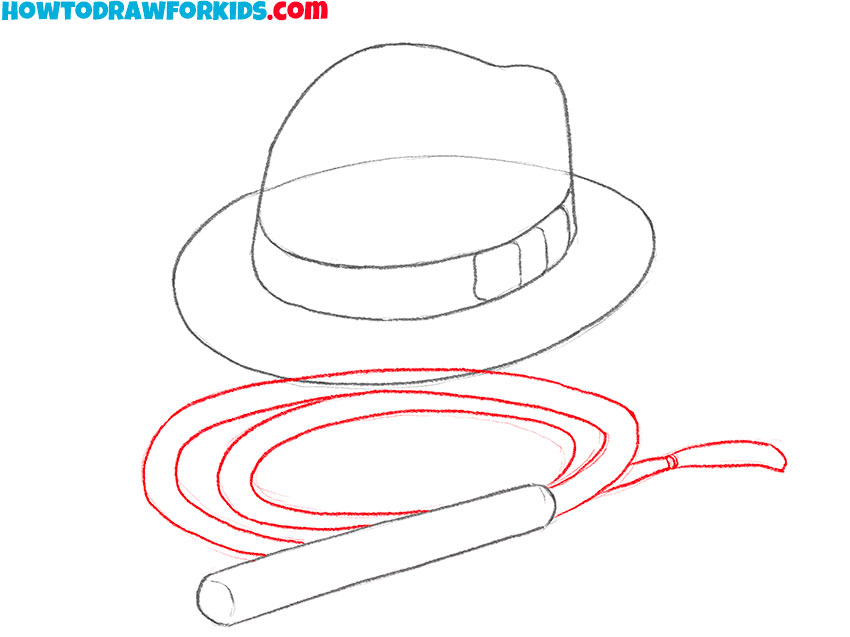
- Draw the coiled whip of Indiana Jones.
Now that the handle is in place, it’s time to add the main length of the whip. Starting from the handle, draw long, spiraling loops to create the effect of the whip being coiled.
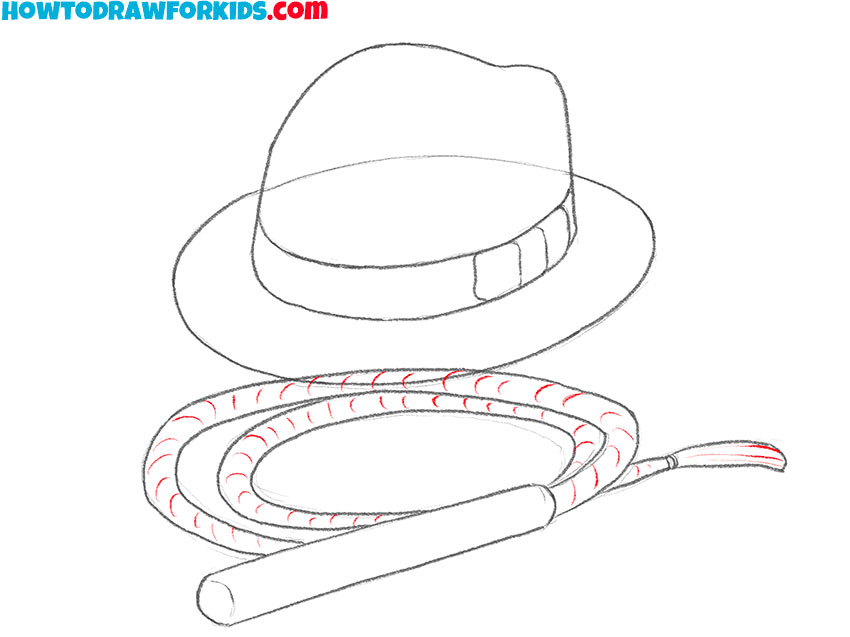
- Illustrate the texture of the whip.
In this step, begin adding more detail to the whip to make it look realistic. Draw smaller lines along the length of the whip to create a pattern resembling braiding or wrapping.
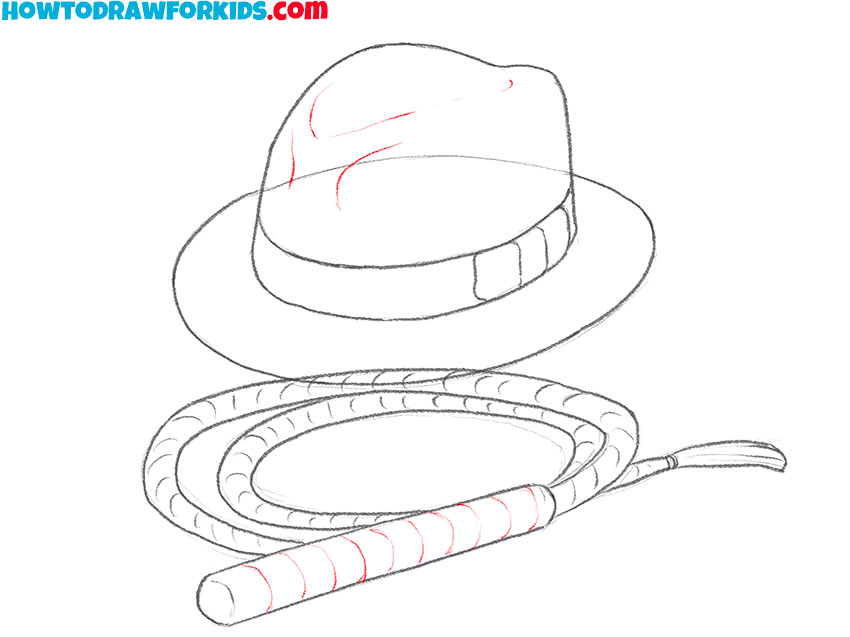
- Add details to the had and whip.
Now, refine the fedora hat by adding more details to the crown and brim. Start by adding a slight crease in the middle of the crown to represent the natural shape of the hat. After that, draw the pattern on the handle with a row of short curves.
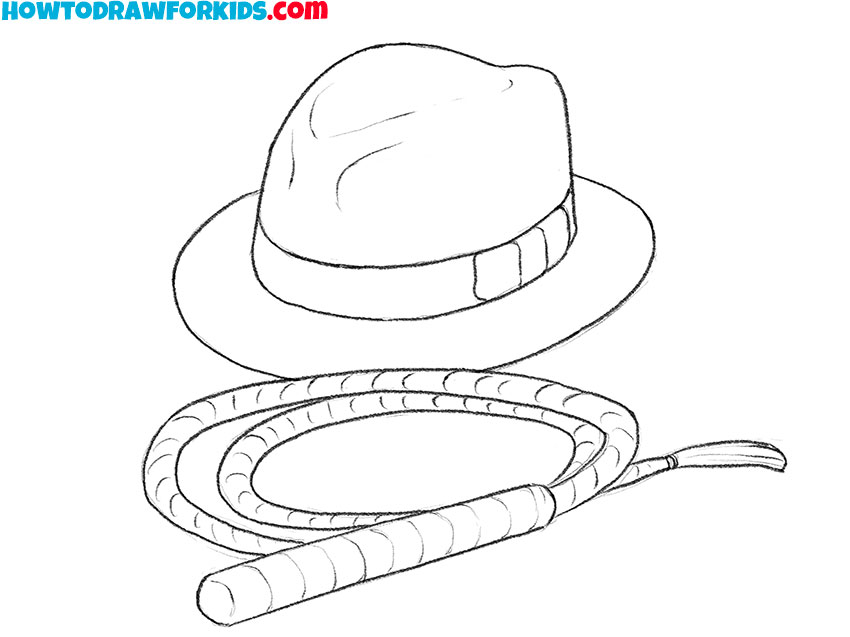
- Refine the drawing and add finishing touches.
For the hat, refine the curves and lines to make them more defined. The hatband should have a clear distinction from the crown. Check the whip for any uneven lines or sections that need to be smoothed out. If any parts of the whip need extra texture or detail, this is the time to include them.
- Add colors to Indiana Jones’s hat and whip.
Start by coloring the fedora of Indiana Jones a classic brown shade. The hatband can be a slightly darker or lighter brown. Next, color Indiana Jones’s whip with a matching brown hue. The details on the whip, such as the braiding or wrapping, can be highlighted with darker or lighter shades.
Additional Content
A free PDF file is available for download, which includes the full steps of this tutorial on how to draw Indiana Jones’s hat and whip. The PDF also contains additional resources such as a coloring page, a tracing worksheet, and a grid drawing worksheet.
These materials are created to assist with improving drawing skills and practicing accuracy in creating the featured objects. The file can be easily downloaded for use offline.
Advanced Drawing Tips
The whip is a great exercise for practicing long, confident strokes. Try drawing it in one smooth motion instead of connecting lots of short lines. The cleaner the curve, the more natural the whip will look.
If you want to make the drawing more detailed, add a few more folds to the hatband or more texture to the whip.
If you’re coloring the drawing, use different shades of brown for the hat and the whip. Even though they’re both made from leather, a slight difference in color helps separate the two objects.
Once you’ve finished this version, try drawing the hat and whip from a different angle. Looking at the same objects from another viewpoint is a great way to improve your overall drawing skills in drawing movie props.
After finishing this guide, try drawing the hat and whip as part of a larger scene instead of as separate objects. Place them on a table, hanging them on a wall, or add them to a backpack.
Before You Go
Now you’ve finished drawing Indiana Jones’ hat and whip. If you enjoyed this guide, be sure to check out my collection of movie character drawing tutorials, where you’ll find many more heroes and memorable characters from your favorite films.
Drawing different movie characters is a great way to practice conveying recognizable features and improve your overall drawing skills.
If you’d like to see more tutorials, follow me on social media to stay up to date with new step-by-step guides.
You can also share this tutorial with your friends, classmates, parents, or art teacher, and let me know in the comments which movie character you’d like to draw next.