How to Draw Lips
To be able to draw beautiful and convincing portraits, you need to know how to draw lips, and in this tutorial I want to teach you this in the easiest way.
How to Draw Lips: Basic Information
Drawing human faces starts with mastering the details, and that’s why today, I’ll be guiding you through how to draw lips. This guide simplifies the process, using basic lines and shapes.
As with drawing any other detail of the human face, it is very important to remember that lips can have completely different shapes. That is, this lesson is a basic guide with which you can draw any lips by slightly changing the necessary lines.
To make the process of learning how to draw lips really simple and comprehensive for you, I have collected several different instructions on this page. First, I will introduce you to the basic steps, then I will show you some additional methods.
In addition, I have compiled for you a PDF file with the steps of this lesson and additional materials that will simplify the learning process and make it more fun.
Lips Drawing Tutorial
Materials
- Pencil
- Paper
- Eraser
- Coloring supplies
Time needed: 20 minutes
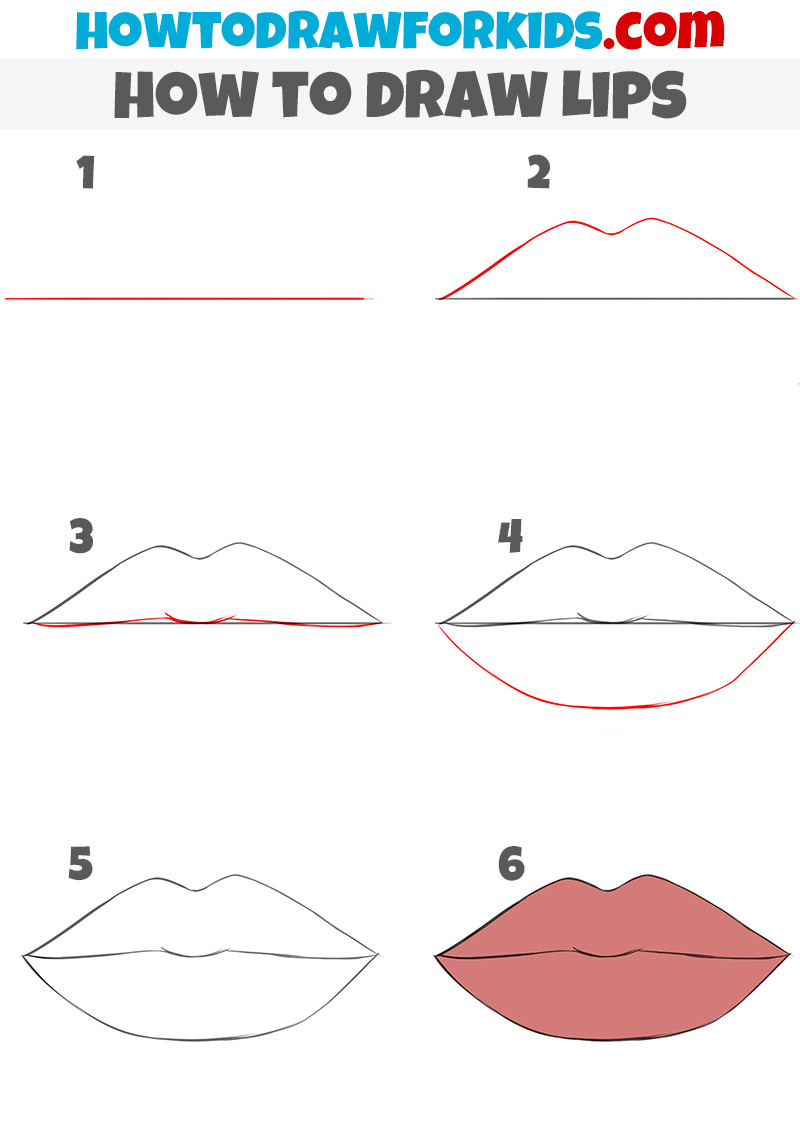
How to Draw Lips Step-by-Step
- Sketch the central guideline.
Begin by drawing a straight horizontal line across your paper. This line will serve as the base and center of your lips, helping to guide their shape and symmetry. Make sure it is light and can be easily erased later, as it’s a foundational guideline rather than a part of the final drawing.

- Draw the upper lip.
Next, from the ends of the horizontal line, draw the shape of the upper lip. Start by creating a soft curve that peaks in the center, representing the Cupid’s bow. The curve should smoothly descend back to meet the horizontal line on both sides.

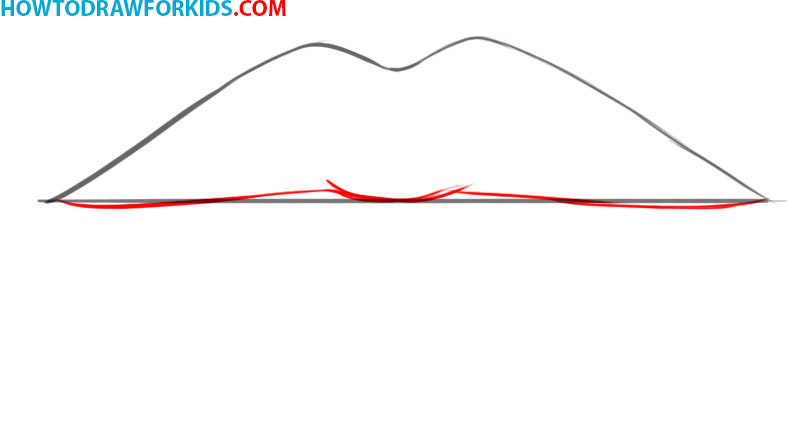
- Draw the bottom edge of the upper lip.
Refine the shape of the upper lip by drawing a line that curves down from the ends of the previous step’s lines, meeting in the center. This line will create the bottom edge of the upper lip. Ensure the curves are smooth and symmetrical, tapering towards the corners of the mouth.
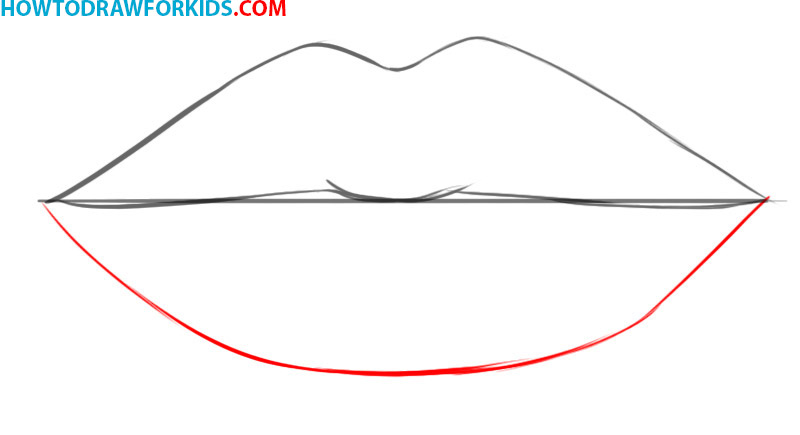
- Draw the lower lip.
Now, draw the lower lip by starting from the edges of the horizontal line and curving downward to form a shallow, rounded shape. The lower lip should be fuller than the upper lip and have a gentle, even curve. This step completes the basic shape of the lips.
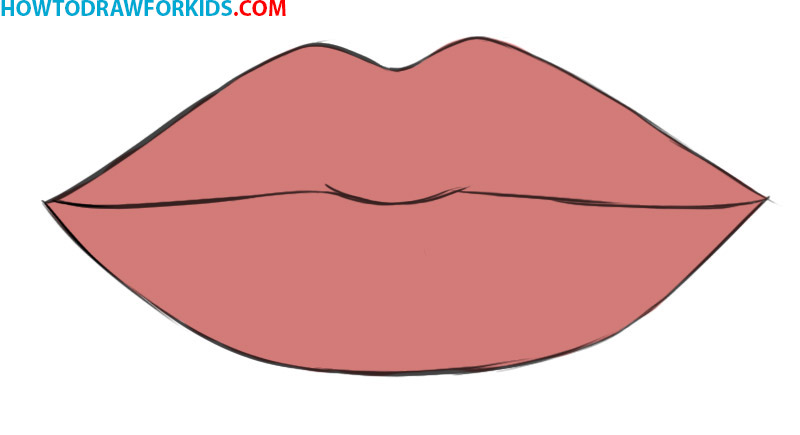
- Make the final touches.
Go over the entire outline of the lips, smoothing out any rough or uneven lines. Erase the horizontal guideline if necessary, ensuring the lips’ edges are clean and defined. Refine the shapes, paying close attention to the curves and symmetry.

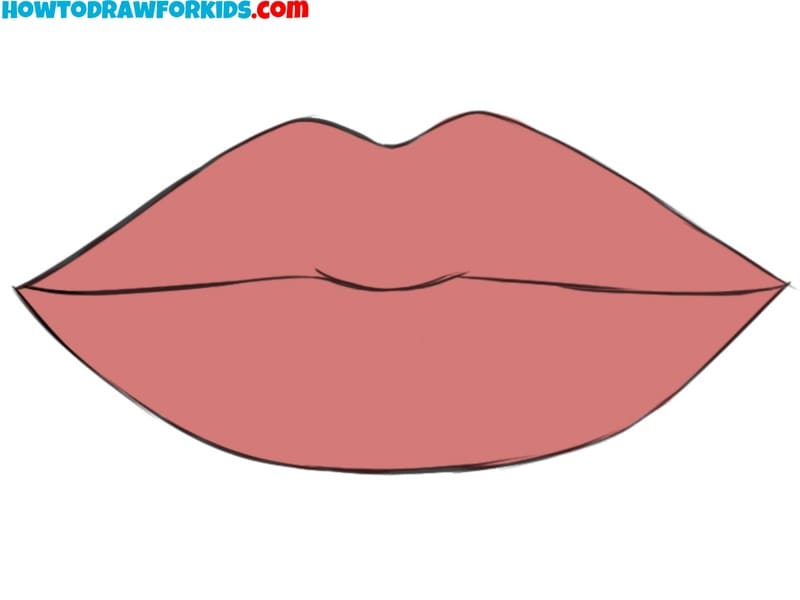
- Add some colors.
Finally, fill in the lips with color, using light and dark shades. You can paint the sketch in some basic color or use a base color and then gradually add darker shades around the edges and lighter shades in the center, mimicking the natural highlights and shadows.
Additional Content
Understanding that art doesn’t just happen in front of a screen, I’ve taken care to create a downloadable PDF file that encapsulates the key points from this lip drawing lesson. It’s a free resource, designed for those times when you prefer to disconnect from the digital world ad learn drawing offline.
The guide is concise, focusing on the core principles and steps that will help you capture the contours and subtle nuances of drawing lips. With the ability to download and print this file, you can have a physical copy that lies flat beside your drawing space, ready to assist you as you practice.
How to Draw Lips: Alternative Techniques
Beyond the primary lesson, I’ve crafted some alternative lip-drawing techniques to enrich your practice sessions. These two methods are tailored to provide you with additional practice, helping to perfect your skills.
By training with this supplementary techniques, you’ll gain a deeper insight into the subtleties of lip drawing and develop a more versatile hand. So, let’s continue learning.
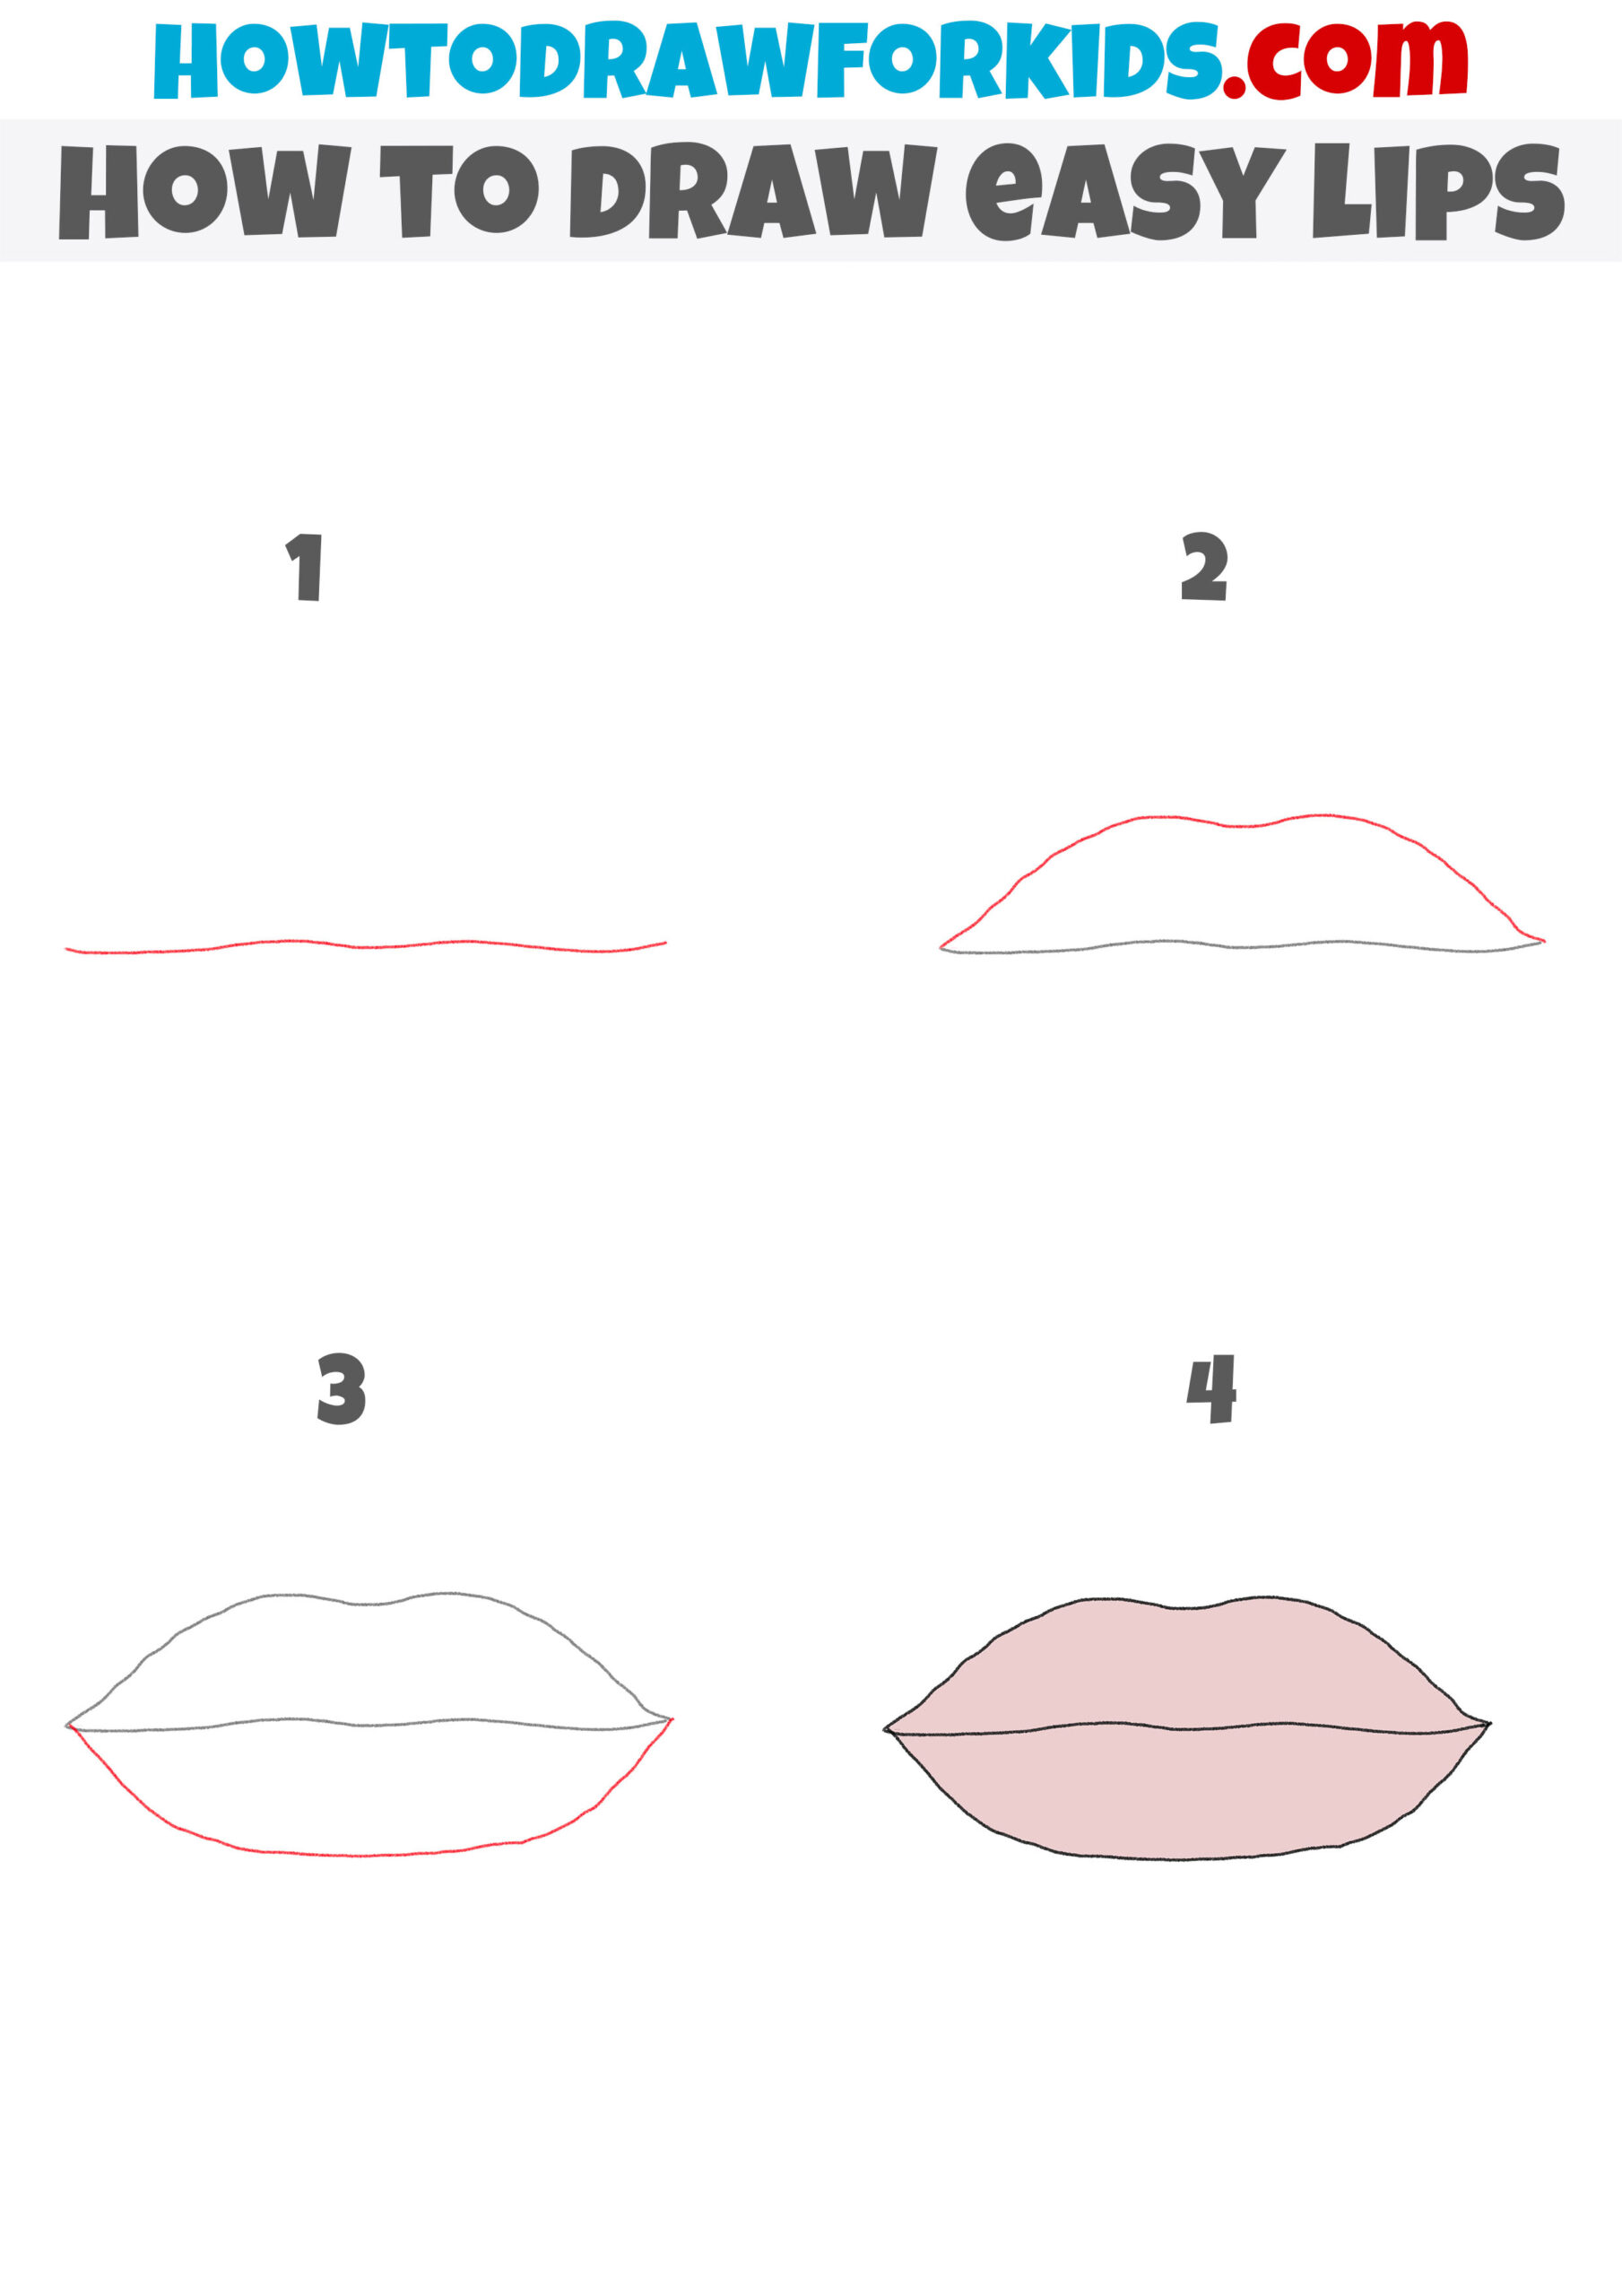
How to Draw Lips: Adding Volume
In this drawing method, the goal is to illustrate lips that have a fuller and more pronounced appearance, often associated with a sense of youthfulness and vitality. The tutorial is structured to guide you through the process of creating such an effect with ease.
Start by drawing a slightly wavy horizontal line to establish the center and shape of the lips. Next, create the outline of the upper lip by drawing a curved line that peaks in the center and slopes downwards towards the edges, mimicking the natural shape of the upper lip.
After that, draw the lower lip by extending a rounded curve below the initial horizontal line, ensuring it is fuller than the upper lip. Finally, refine the shapes and add a light shade of color to give the lips a natural appearance.
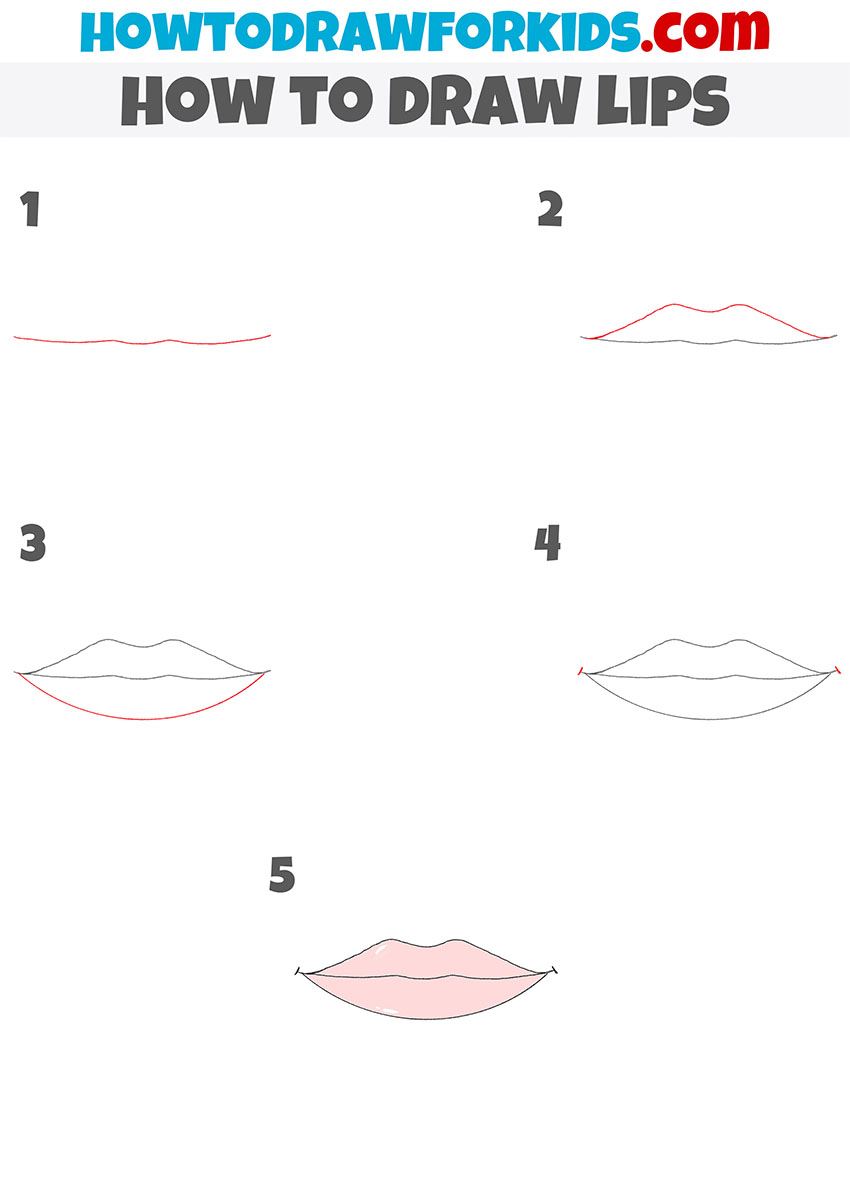
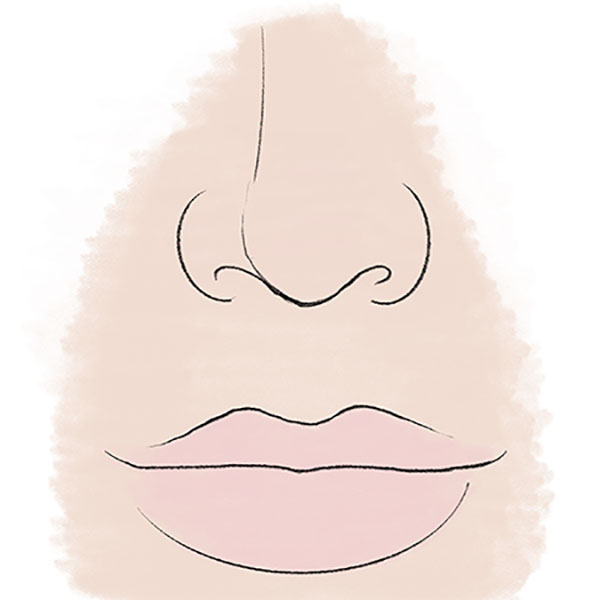
How to Draw Smiling Lips
This is an additional tutorial to complement the first one on drawing lips, offering a more simplified but a bit more three-dimensional approach. The differences between the two tutorials lie in the simplicity and ease of the steps involved. This version focuses on fewer, more straightforward steps, but adding highlights that makes the lips .
Begin by drawing a gently wavy horizontal line to set the center and guide the shape of the lips. Then with another curved line draw the upper edge of the upper lip. Next, create the lower lip by drawing a rounded curve below the initial line. Refine both the upper and lower lip shapes, smoothing out the curves. Finally, add a light shade to the lips for a realistic look. To make the drawing of lips even more three-dimensional add shadows.
Conclusion
I hope you enjoyed this simple tutorial on drawing lips. For more drawing guides on facial features and people, be sure to check out my other tutorials.
To stay connected with the latest tutorials and additional tips from me, be sure to follow my social media profiles. Be sure to share this tutorial with your friends and fa inlay. Also share your sketches and other artworks with me.


i didnt how to do lips when i did the steps it helped me
I’m really glad, that my tutorial helped you.