How to Draw Princess Tiana
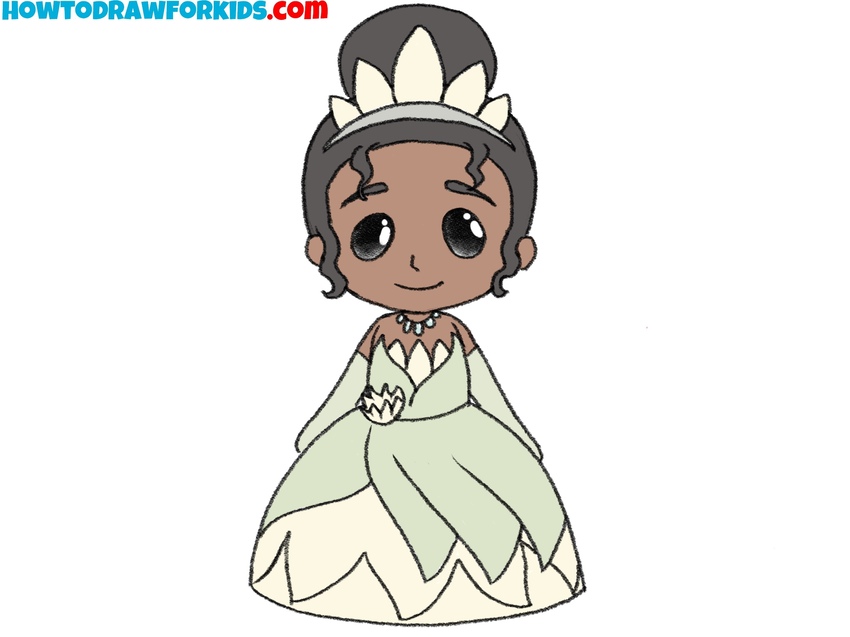
If you’re a fan of Disney cartoons, you’ll surely enjoy this tutorial on how to draw Princess Tiana. Let’s recreate her recognizable appearance step by step!
How to Draw Princess Tiana: Introduction
Drawing Princess Tiana in a simplified style teaches young artists how to distill complex Disney characters into their most recognizable features. This tutorial focuses on simplifying her facial features, hairstyle, and dress while still making her instantly identifiable.
Each Disney princess has specific traits that make them recognizable, even in simplified or cartoon form. For Tiana, her crown, hairstyle, and iconic green dress are key markers. This tutorial demonstrates how to highlight these traits while keeping the drawing simple.
Simplified characters rely on clear, simple shapes, such as rounded heads and smooth lines. By following the steps in this tutorial, artists can refine their ability to create characters with a simplified and cute look. This skill is very important when drawing multiple characters or creating new cartoon characters of their own.
And of course, this tutorial will teach you how to draw princesses in general. By applying the knowledge gained in this lesson and adjusting the necessary details, you can easily draw any other princess from the Disney universe or famous fairy tales.
Princess Tiana Drawing Tutorial
Time needed: 45 minutes
How to Draw Princess Tiana
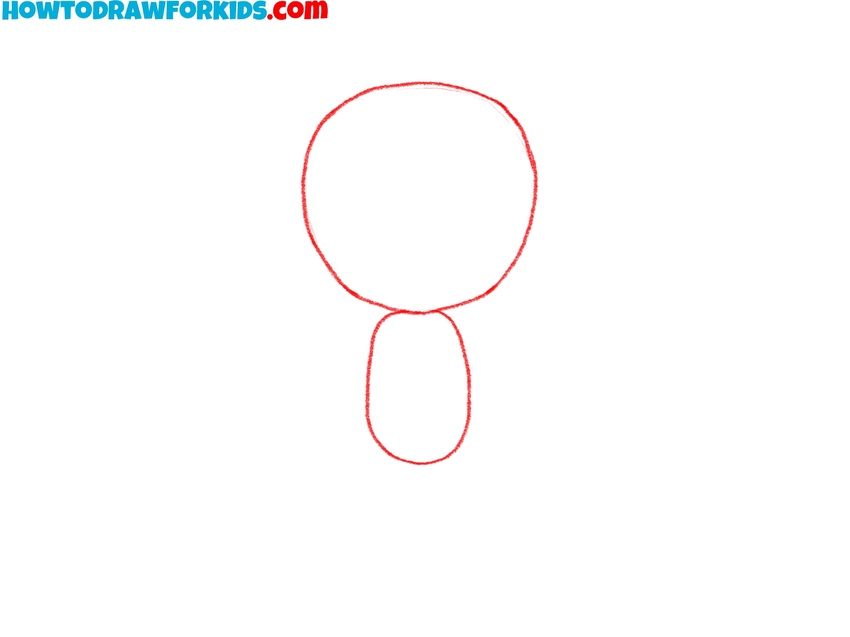
- Draw the head and torso shapes of Tiana.
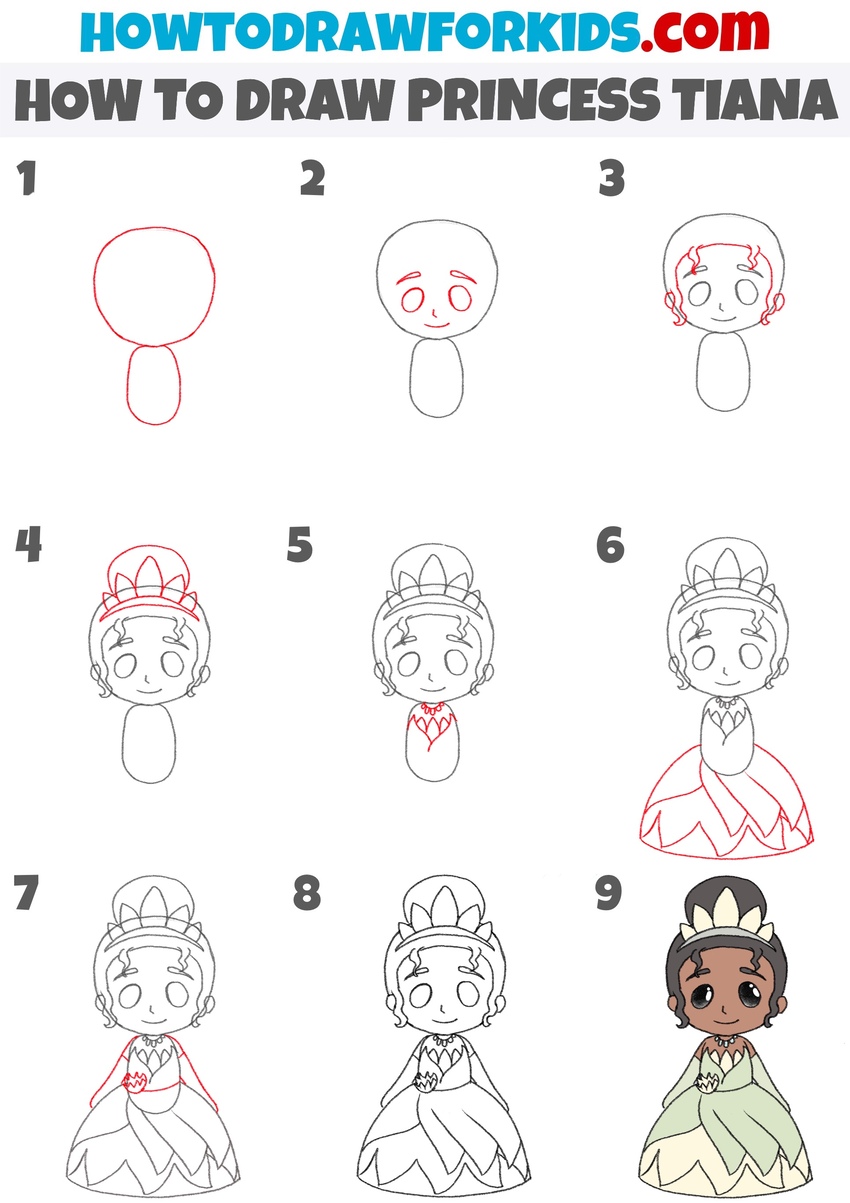
Begin by drawing two simple shapes to create the basic shapes for Princess Tiana. Start with a circle for her head, making it a bit wider at the top. Below the head, draw an oval shape to represent her body. Keep the lines light at this stage as they are just guidelines for the rest of the drawing.
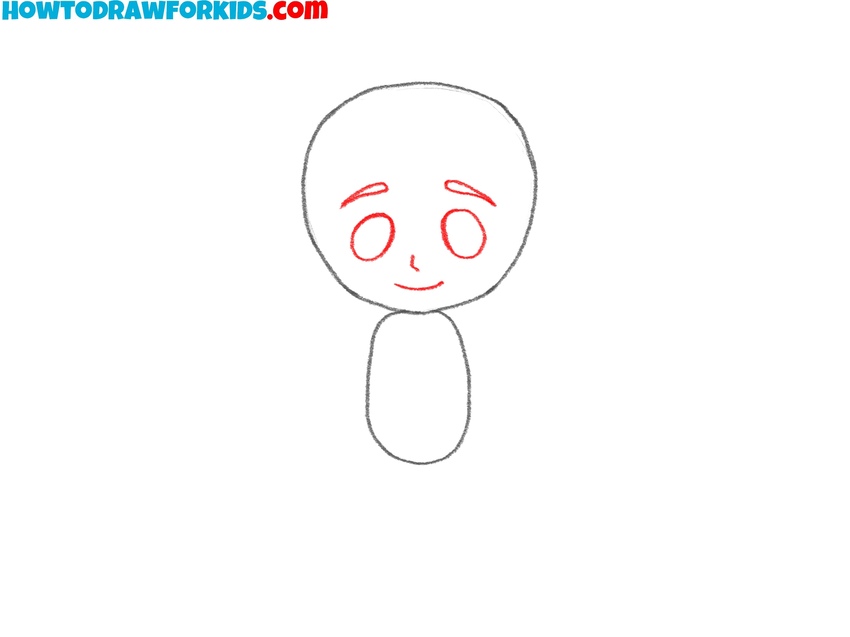
- Add the facial features of the princess.
Now, it’s time to sketch Princess Tiana’s facial features. Draw two large oval eyes near the middle of her head, leaving some space between them. Next, draw a small, curved line between the eyes for her nose. Below the nose, sketch a small, slightly curved line for Tiana’s mouth.
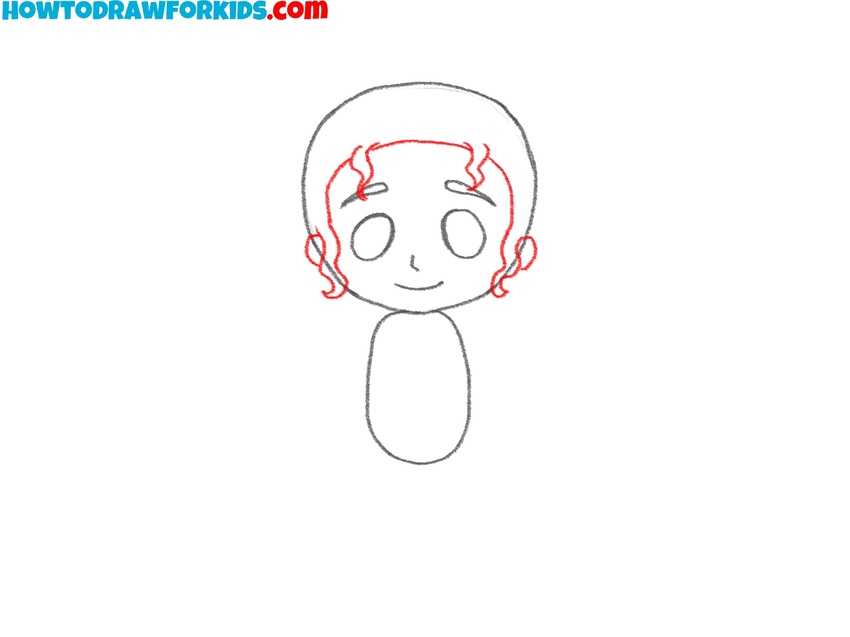
- Draw the hairline and curls.
Draw the outline of princess Tiana’s hair by sketching a curved line. Then, add two small curls framing her face on each side. These curls should be positioned just above her ears and fall gently next to her cheeks. Fast that, draw two more curls above the eyes.
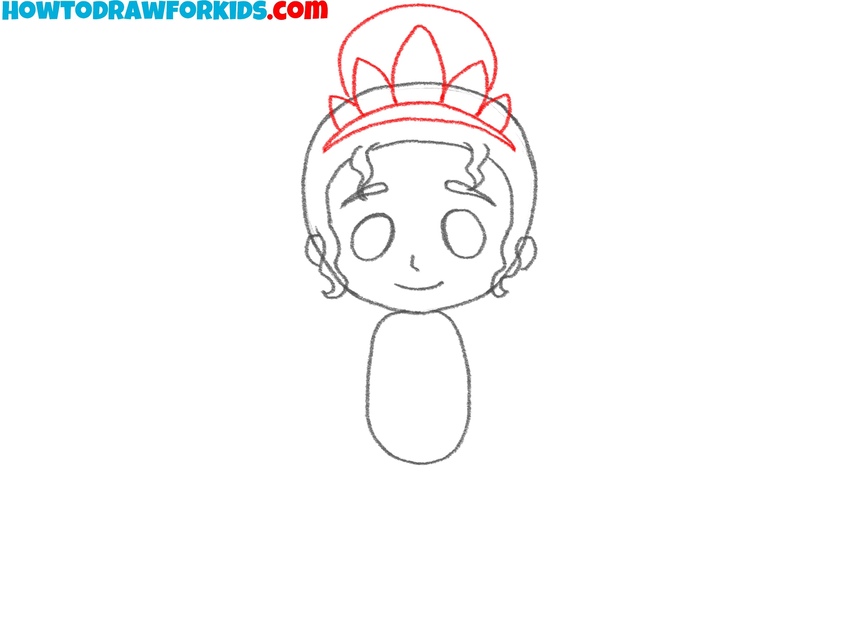
- Sketch the crown and hair bun.
Start by drawing the crown of princess Tiana in the center of her head. It should have a triangular shape at the top, with smaller triangles or petals along the sides. Above the crown, draw the outline of her bun, which should be rounded and sit directly on top of her head.
- Sketch the necklace and top of the dress.
Start by drawing a curved line just below her chin to represent the necklace. Then, sketch decorative elements on this line. Beneath the necklace, add a few more details to indicate the upper part of the dress. Make the details look like floral petal.
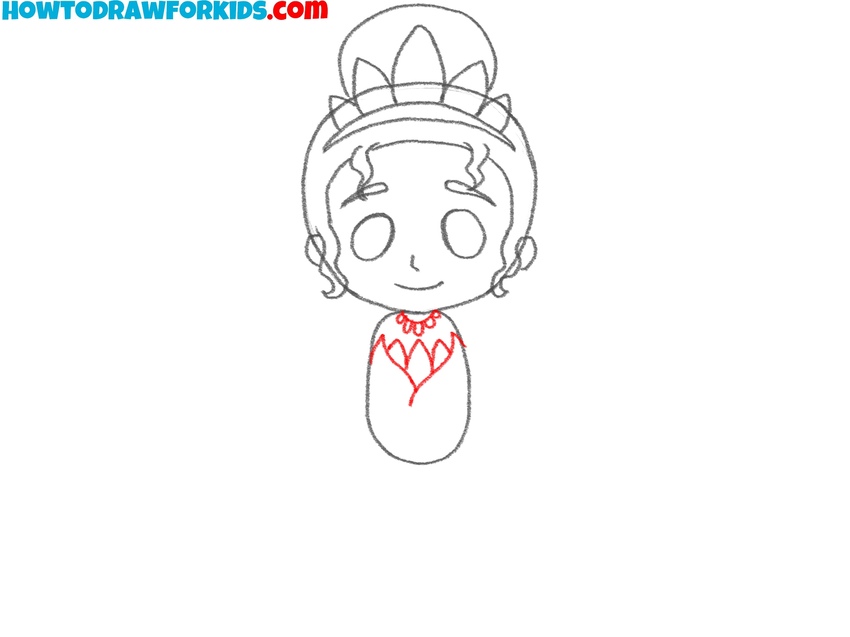
- Draw the skirt of the dress.
Starting from the bottom of the torso shape, sketch a large curved shape for the lower part of her dress. The skirt should be wide at the bottom and slightly narrowed where it meets her torso. Add some zigzagging or wavy lines along the bottom of the skirt to represent the layers and folds in her gown.
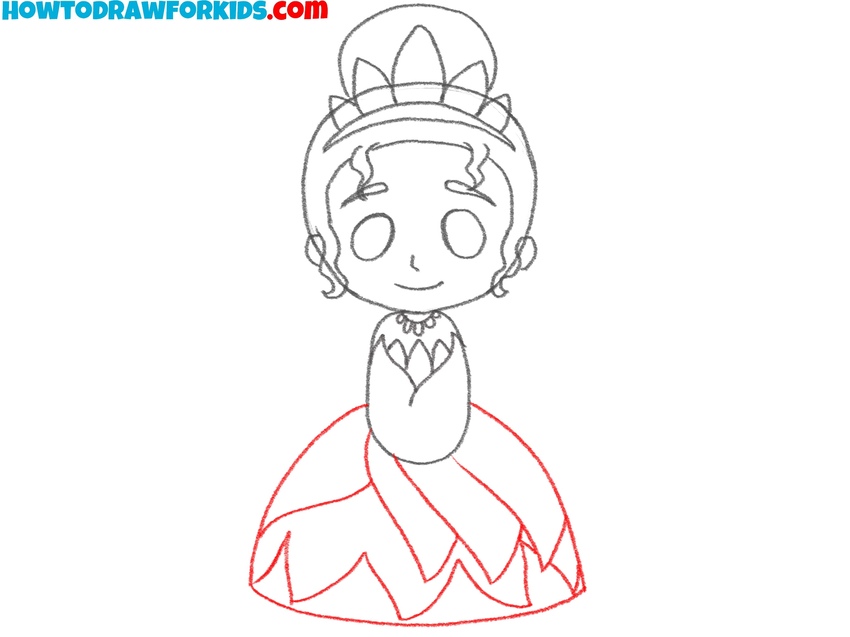
- Draw the arms and complete Tiana’s dress
Starting from her shoulders of the character, draw two slim arms with hands resting gently near the sides of her dress. Then, draw two simple short lines on the arms to create long gloves. Once the arms are in place, draw a flower at the waist.
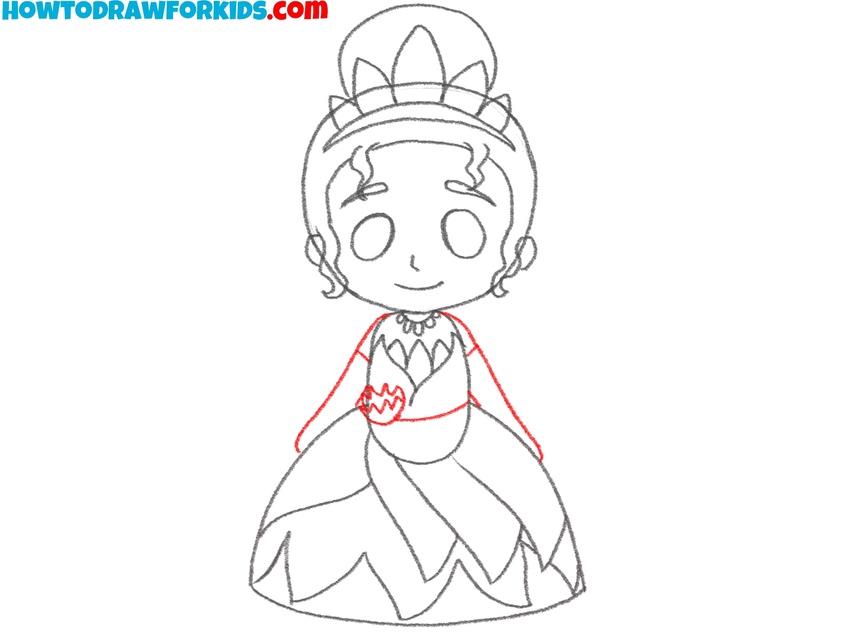
- Finalize the lines of the sketch.
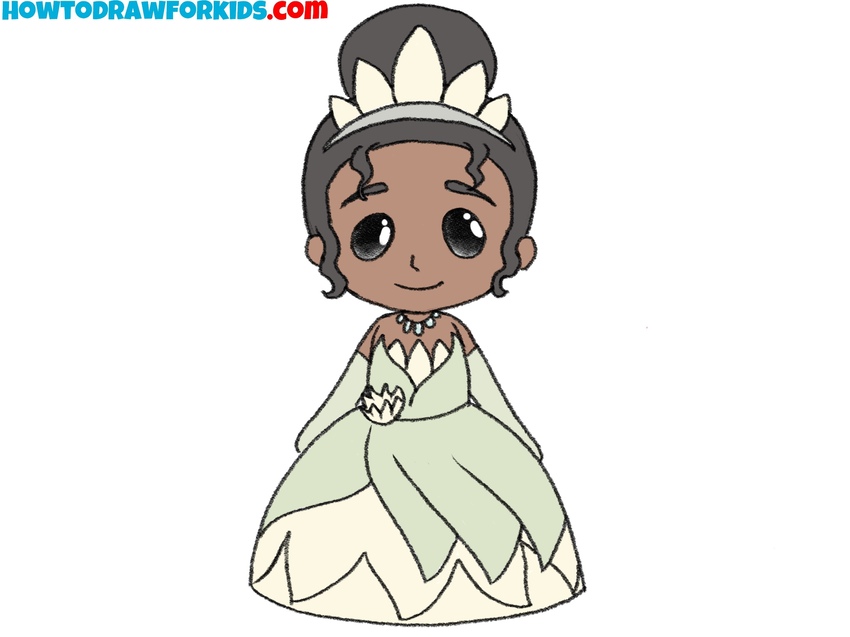
Go over the main outline of the Princess Tiana drawing, making sure all of the details, such as her hair, crown, facial features, and dress, are clear and smooth. Erase the guidelines and trace over the lines for more finished look. This step prepares the drawing for coloring.
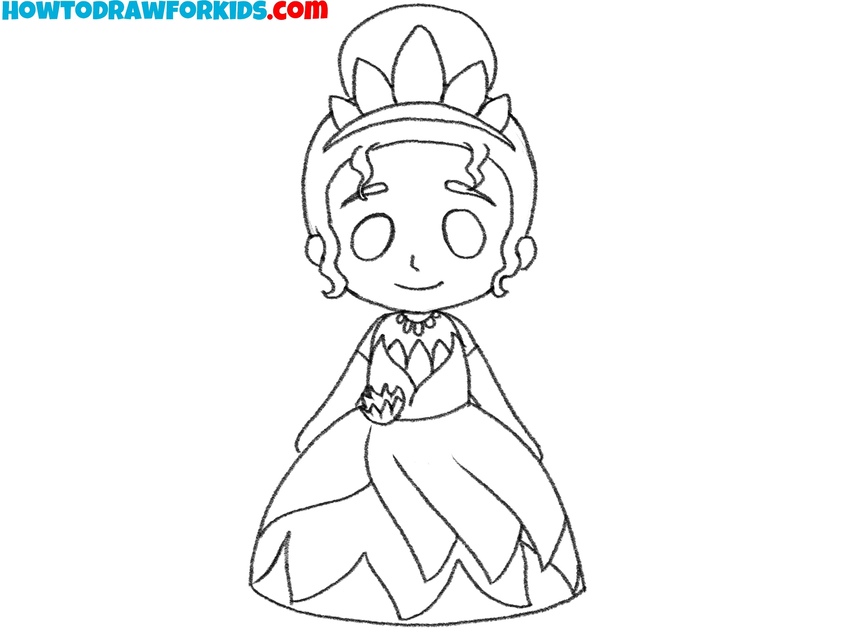
- Color the princess.
Use a range of recognizable tones to fill in her features. Her skin tone should be brown, while her hair is dark brown or black. Color her crown and her dress a light green with soft yellow accents, as this is her iconic outfit. Don’t forget to add some highlights to the eyes.
How to Draw Princess Tiana: Background Ideas
You can draw princess Tiana on a New Orleans street with jazz musicians, tall windows and balconies with wrought-iron railings. Add details like street lamps and musicians playing instruments like trumpets or saxophones.
Also, you can draw Tiana’s restaurant with tables and chairs, using curved lines for round tables or straight lines for square ones. The background could include features of New Orleans style, such as arched windows or hanging light fixtures.
Additionaly, you can draw a magnolia garden at sunset with large, simple trees and flowers, with magnolia trees represented by broad, round leaves and the flowers placed on branches or scattered on the ground. The sunset can be sketched using light horizontal lines to indicate the horizon, with gentle shading to create light of the setting sun.
A kitchen scene for Tiana could be created by sketching a warm space filled with kitchen items like pots on the stove and ingredients on the counter. Start by drawing the counters with simple, straight lines, and add utensils or spices hanging on the walls.
Finally, an elegant garden party could be set by drawing a lush garden with a fountain at the center. Begin by outlining the fountain with simple curved shapes and surround it with trees or neatly arranged flowers. Soft lighting can be illustrated by lightly shading the trees and using small string lights in the background.
Conclusion
So, this was a tutorial on how to draw Princess Tiana for kids and beginners, and I hope you enjoyed it. If you followed all the tips, you now know how to create a recognizable image of Princess Tiana, as well as how to design interesting and varied backgrounds for this character.
To continue practicing your skills in drawing recognizable cartoon and fairy tale images, be sure to check out my lessons on how to draw a knight and my guide on how to draw a king.
If you liked this tutorial, be sure to subscribe to my YouTube channel for video versions of my tutorials, or follow me on Pinterest for announcements and collages, and to share your drawings there.

