How to Draw a Cow
Let’s draw some friendly cows! I’ve put together four simple methods to show you how to draw a cow for kids kids and beginners. We’ll have a great time learning, drawing, and creating.
How to Draw a Cow: Basic Information
All the instructions on this page show the process of drawing a cow from slightly different angles. Each lesson covers a different aspect or part making the process of learning to draw a cow more comprehensive and interesting.
By the end, you’ll have a charming farm friend on your paper. When you draw a cow following this lesson, you’ll learn to create a cute animal and practice essential drawing skills.
Correctly aligning and proportioning different parts of the cow, such as the head and body, enhances your ability to create balanced drawings. Pay close attention to the size and placement of each part relative to others.
Adding the cow’s nose, eyes, and ears requires careful observation and precision. This is crucial for developing an eye for detail, which is fundamental in all forms of art.
Placing the cow in a natural environment, like a field or barn, teaches you how to integrate subjects with their surroundings. This skill is rea;;y important for creating complex and realistic scenes.
Cow Drawing Tutorial
Materials
- Pencil
- Paper
- Eraser
- Coloring supplies
Time needed: 45 minutes
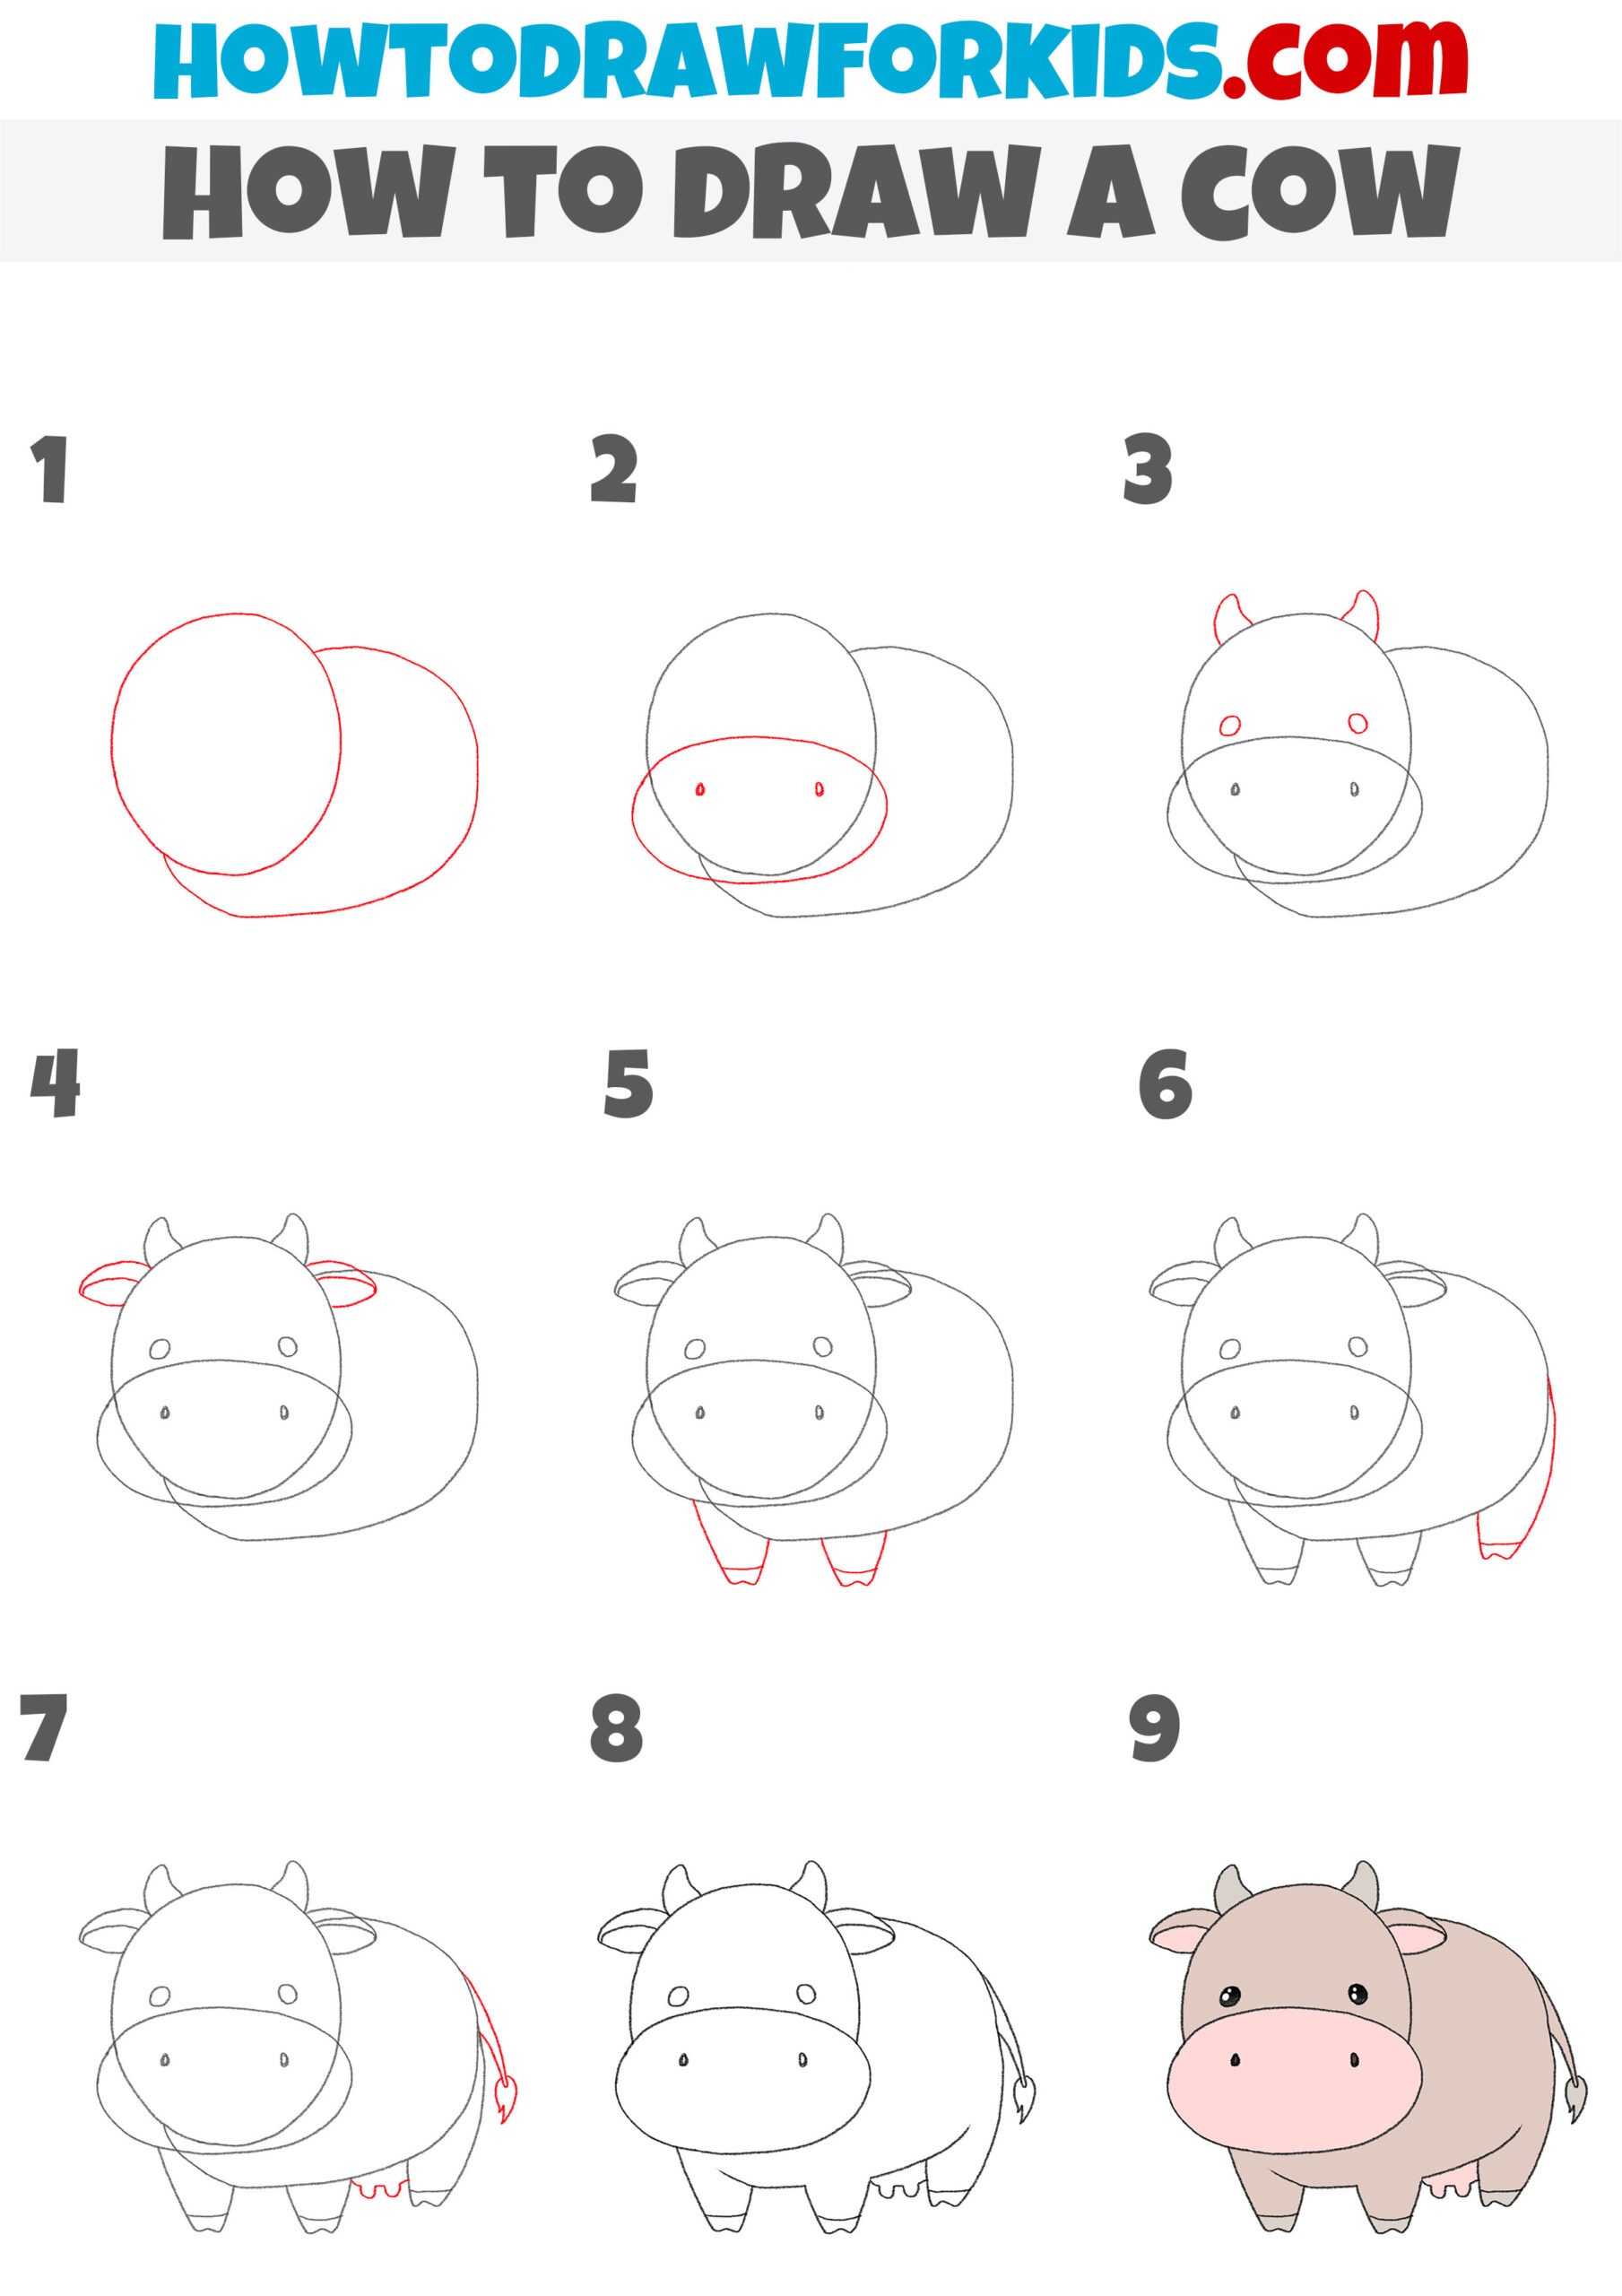
How to Draw a Cow
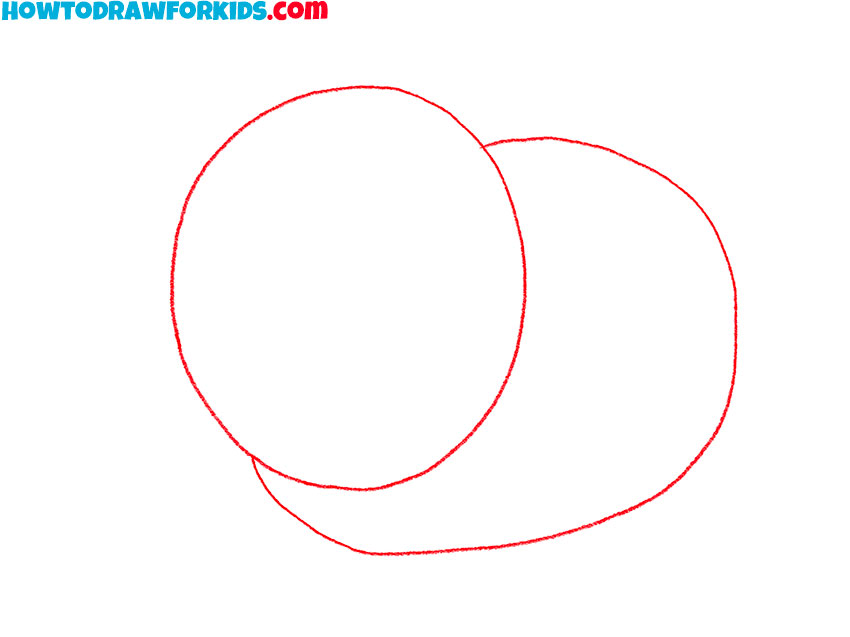
- Draw the head and torso of the cow.
Start by sketching two overlapping ovals. The larger oval will form the cow’s body, while the smaller, slightly overlapping oval will shape the cow’s head. Position the head oval above and to the left of the body oval. Keep the lines light as these are just the basic guidelines for your drawing.
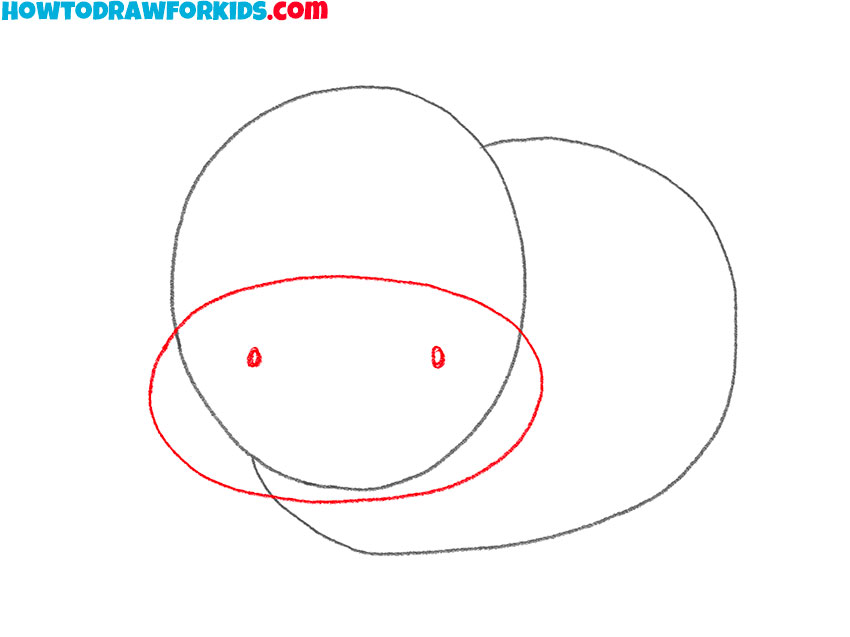
- Illustrate the front of the muzzle.
Next, focus on the cow’s face by drawing an elongated oval within the head oval to represent the muzzle. Position it near the bottom of the head oval. Inside this new oval, sketch two small circles to indicate the cow’s nostrils. This step adds a defining feature to the cow’s face.
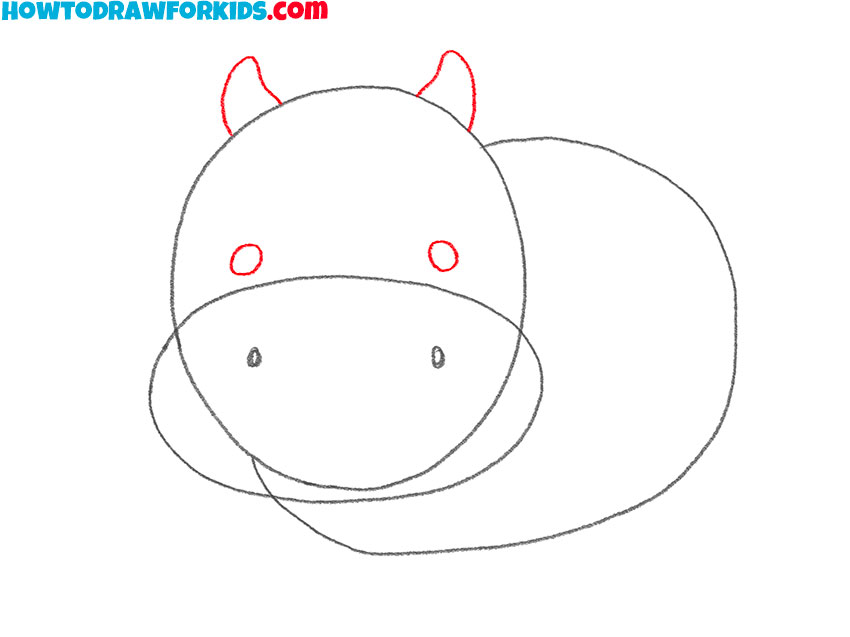
- Add the eyes and horns.
To give the cow its distinctive look, add two small, curved horns at the top of the head oval, placing them symmetrically. Then, draw two small circles above the nose for the eyes. The addition of horns and eyes starts to give the cow its recognizable appearance.
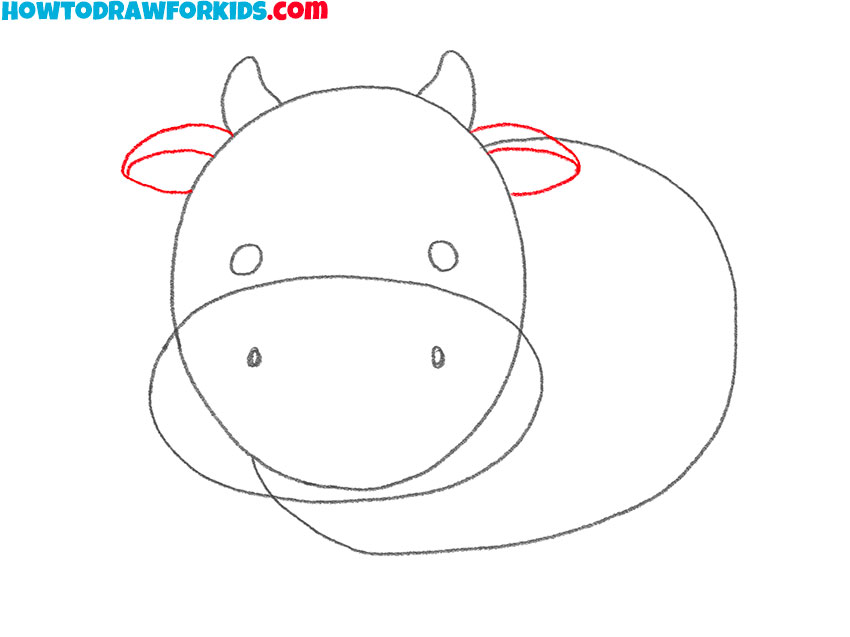
- Draw the ears of the cow.
Draw two large, floppy ears extending from the sides of the head. Position the ears just below the horns and make them curve slightly downward. The ears should be broad and rounded, adding to the cow’s cute and recognisable appearance.
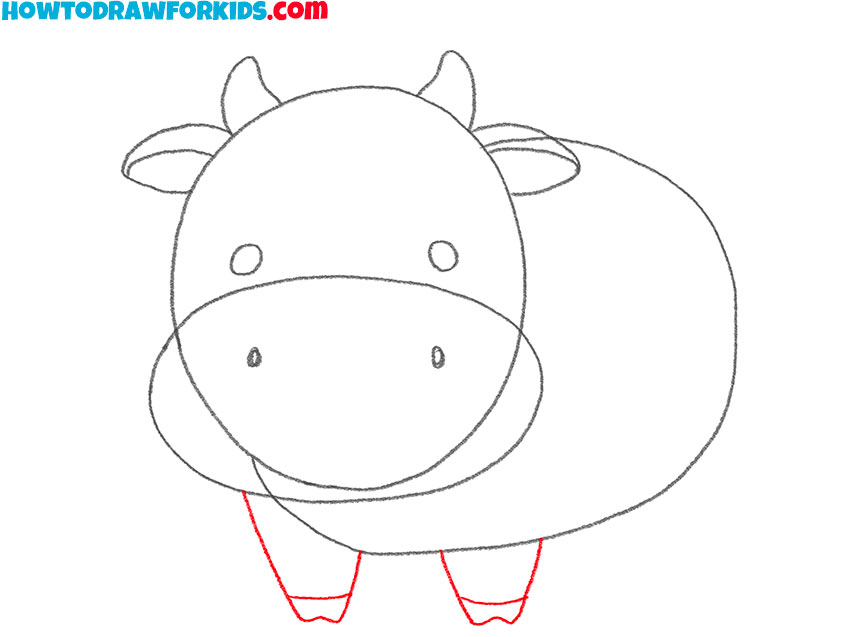
- Draw the front legs.
Move on to the cow’s front limbs by drawing two short, stubby legs extending from the bottom of the body oval. These legs should be cylindrical and slightly tapering toward the ends. Add small, rounded hooves at the ends of the cow’s legs.
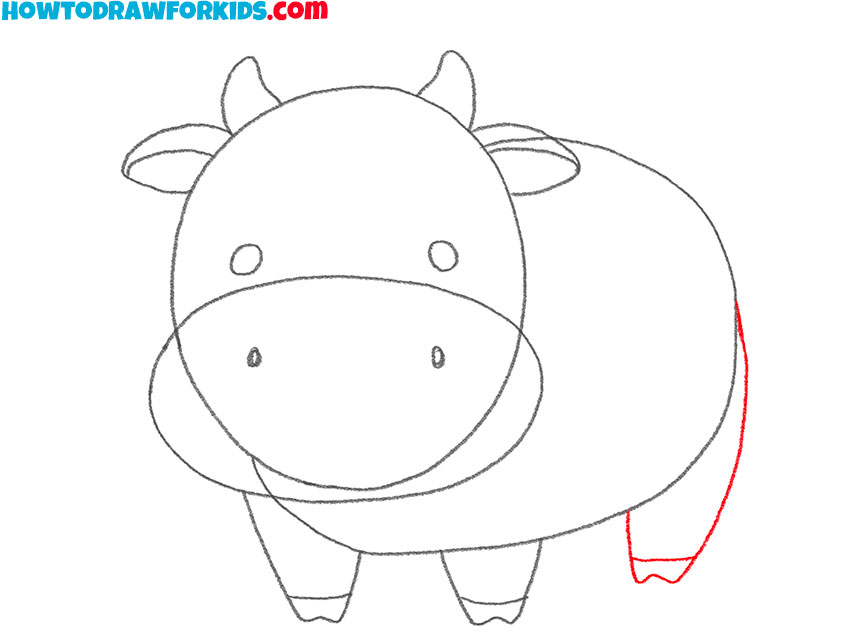
- Illustrate the hind leg.
Now, sketch the hind leg by drawing a similar, slightly larger leg shape extending from the back of the body oval. Add a rounded hoof at the end. The shape and placement of the leg helps give the cow drawing a more voluminous and interesting look.
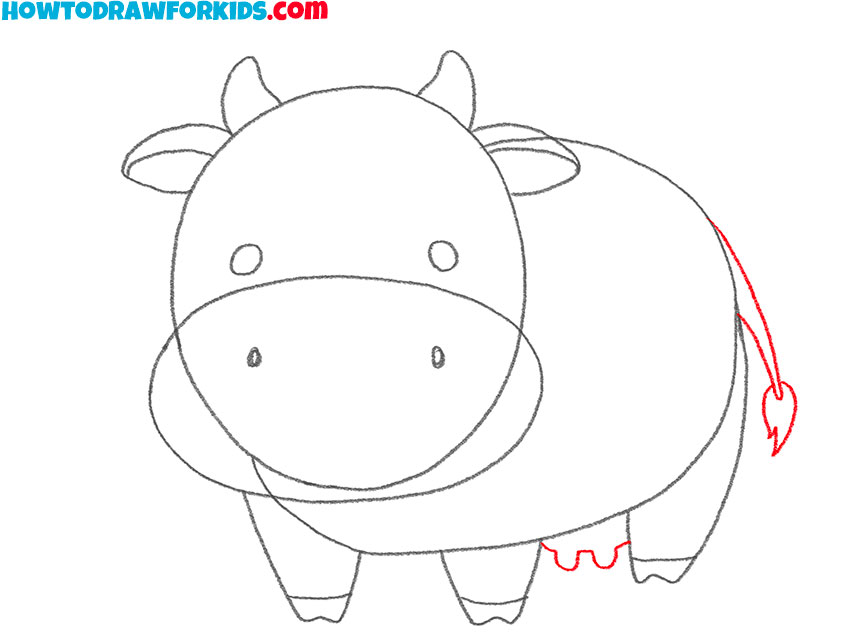
- Add the tail and udder.
Next, draw the cow’s tail by adding a thin, curved line extending from the back of the body oval. Finish the tail with a small tuft of hair at the end. Then, outline the cow’s udder with a slightly curved line below the body. This step will help give your cow drawing an even more recognizable look.
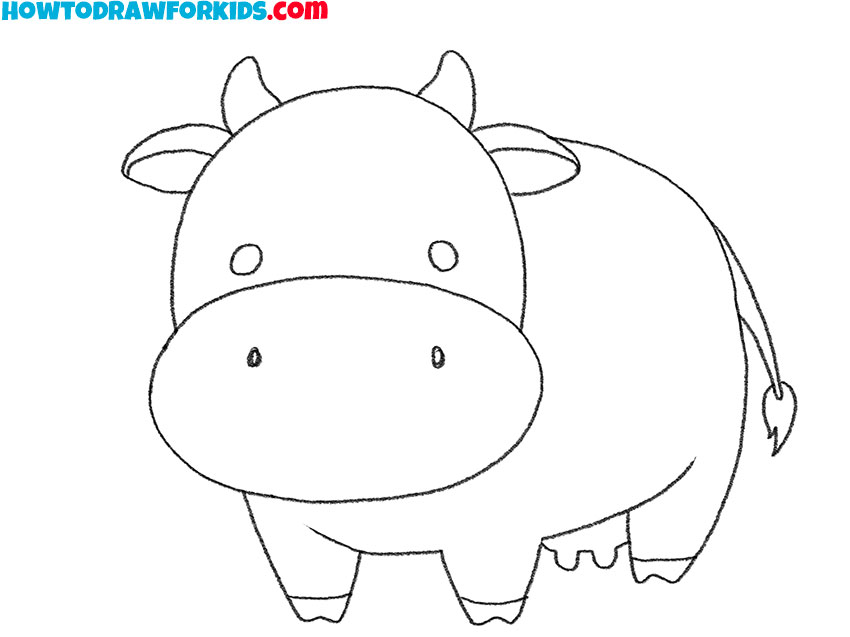
- Correct the inaccuracies and review the drawing.
Refine your drawing by going over the main lines with a darker pencil or pen. Erase any unnecessary guidelines from the initial ovals to clean up your sketch. Ensure all parts of the cow, including the horns, ears, legs, and tail, are clearly defined and neatly outlined.
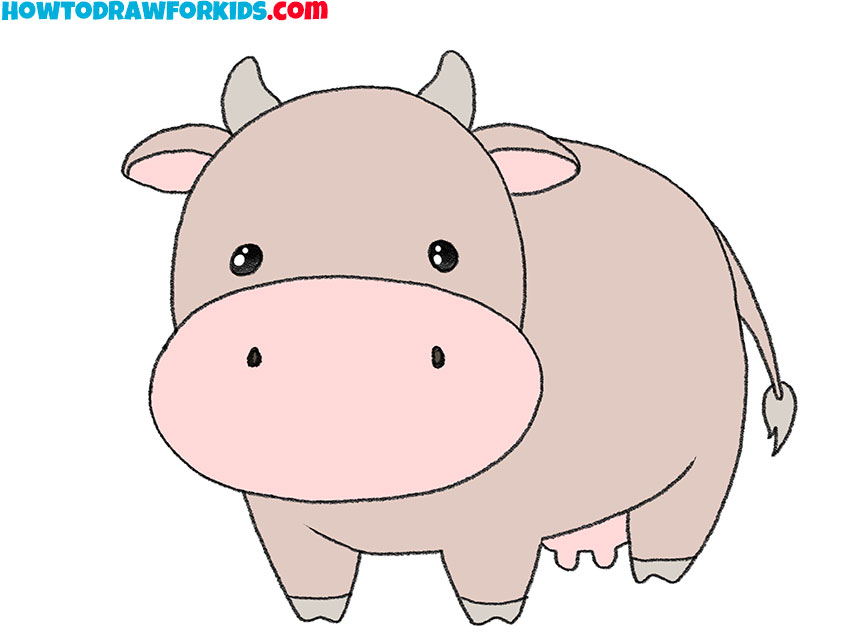
- Color the cow.
Use a light brown or beige for the cow’s body, a darker shade for the hooves, and a pinkish tone for the muzzle. Color the inside of the ears a soft pink. For the horns, use a light gray or beige color. Optionally, add spots or other markings to personalize your cow.

Additional Content
I’m so excited to offer this free PDF file of my cow drawing lesson! This PDS is short and sweet, making it super easy to follow along.
This resource includes step-by-step illustrations, a coloring page, a tracing worksheet, and a grid drawing worksheet. The illustrations guide you through each tutorial step, enhancing accuracy. The coloring page lets you experiment with colors and shading, improving your color theory skills. The tracing worksheet helps build muscle memory and control, essential for beginners. The grid drawing worksheet aids in maintaining proportions and focusing on details.
Download and use this PDF to practice regularly, refining your drawing skills and deepening your understanding of the techniques covered.
How to Draw a Cow: Alternative Methods
Not only do I have this step-by-step guide, but I’ve also put together several alternative cow drawing techniques for you to practice and improve your skills. These additional methods will allow you to look at the process of drawing a cow from different angles and take a more comprehensive approach to the process of learning to draw this animal.
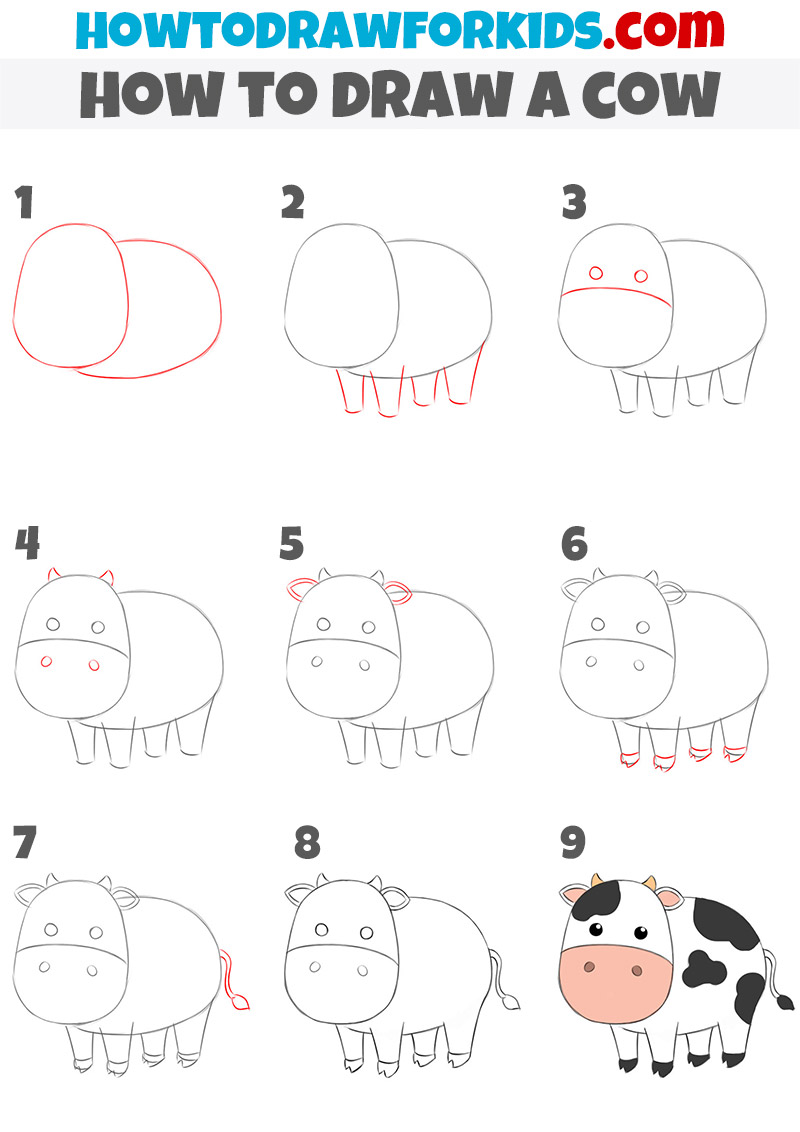
How to Draw a Spotted Cow
In this additional cow drawing tutorial, also begin by sketching two overlapping ovals for the head and body. Next, draw the cow’s muzzle within the head oval, adding small circles for the nostrils and eyes. Attach ears to both sides of the head and then draw the horns above.
Draw the front legs extending from the body oval. Follow by sketching the hind legs and completing the body shape. Draw the tail with a tuft at the end and finalize with spots and patterns. Finally, color your cow to using black, white, beige and pink colors.
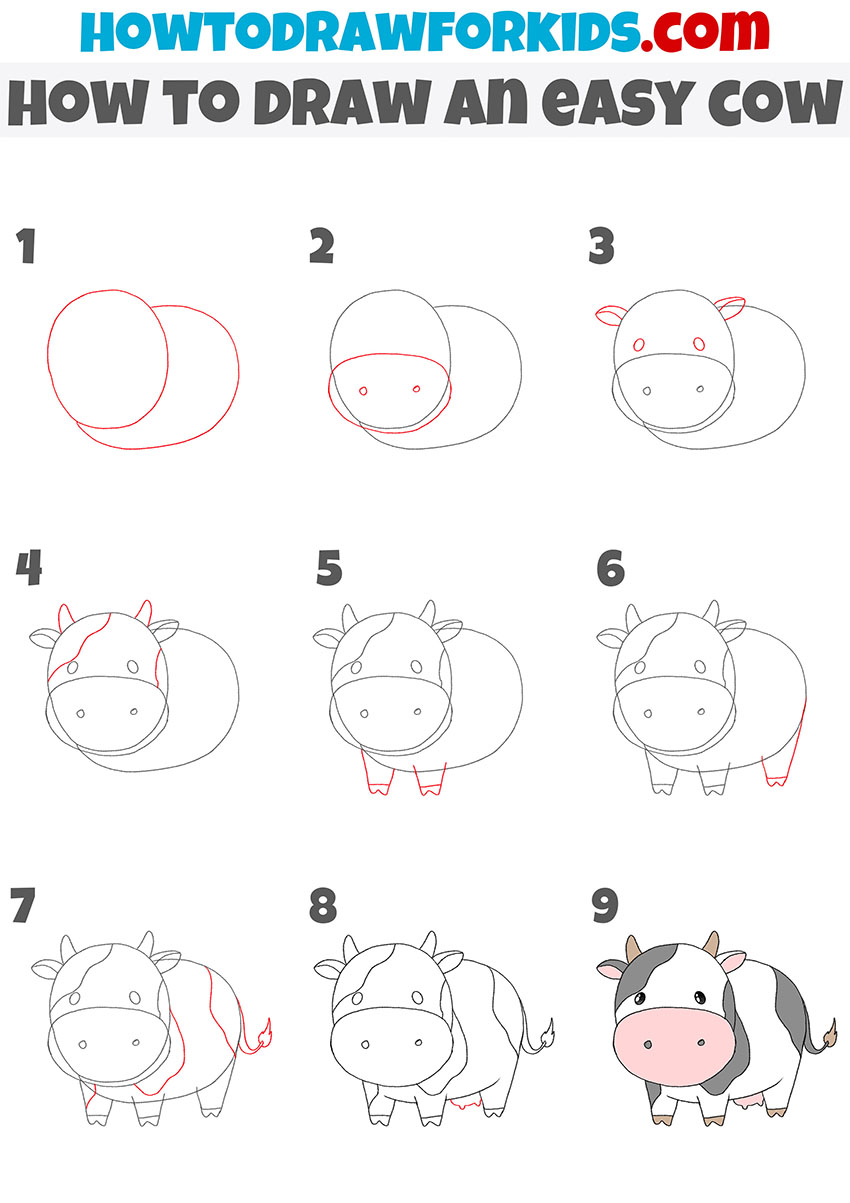
Improving Spotted Cow Drawing Skills
This tutorial will show you how to draw a spotted cow using a slightly different method. After going through this instruction, you can once again train your skills by looking at the process of drawing this cute animal from a slightly different angle.
In this additional cow drawing tutorial, start by sketching two overlapping ovals for the head and body. Next, draw four legs extending from the body oval. Add the cow’s muzzle within the head oval, including two small circles for the nostrils and eyes. Attach small horns on top of the head and draw the ears on each side.
Refine the legs by adding hooves at the ends. Draw the tail with a tuft at the end and finalize the body shape. Lastly, add distinctive cow spots and color your cow.
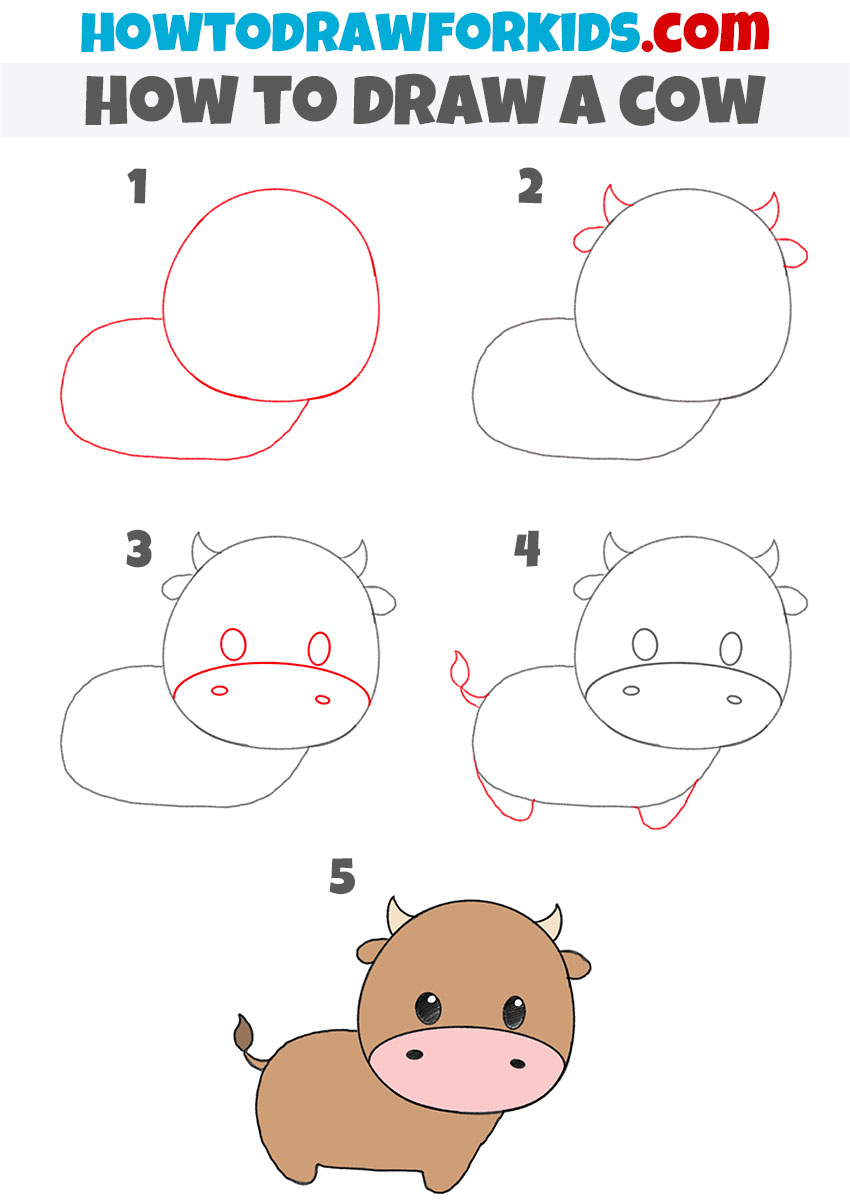
How to Draw a Cow for Kindergarten
This method is the simplest and specifically designed for the youngest children. It consists of only five easy-to-follow steps, making it highly accessible for beginners. This method is perfect for introducing basic cow drawing techniques to children.
Start by sketching two overlapping ovals for the head and body. Add small horns and ears on the head. Next, draw the cow’s muzzle with two nostrils and eyes above it. Then, sketch the tail with a tuft at the end and the legs extending from the body oval.
Ensure the legs are short and slightly curved. Finally, add details like the eyes and nostrils before coloring your cow with brown for the body, pink for the muzzle, and dark accents for the eyes and hooves.
Conclusion
Through this tutorial, you learned how to draw a cow, mastering proportions, and adding details like the nose, eyes, horns, and ears. You practiced creating texture, and using colors in the simplest way. These steps enhanced your understanding of drawing fundamentals and boosted your confidence in creating animal drawings.
If this guide was interesting for you, visit other pages of my website to find step-by-step guides on everything from drawing an adorable puppy to crafting the perfect leaf.
If you enjoyed this tutorial, please share it with your friends and family. Don’t forget to subscribe to my social media channels for more drawing tips and tutorials. I value your feedback, so leave your comments with any wishes, questions, or suggestions.