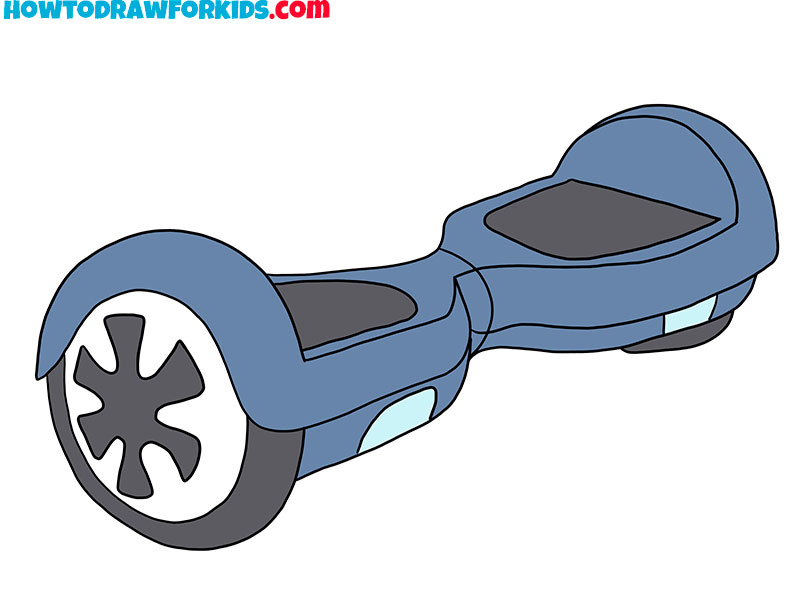
How to Draw a Hoverboard
In this drawing lesson, I will tell you how to draw a hoverboard step by step. This lesson will be very simple and fun for you.
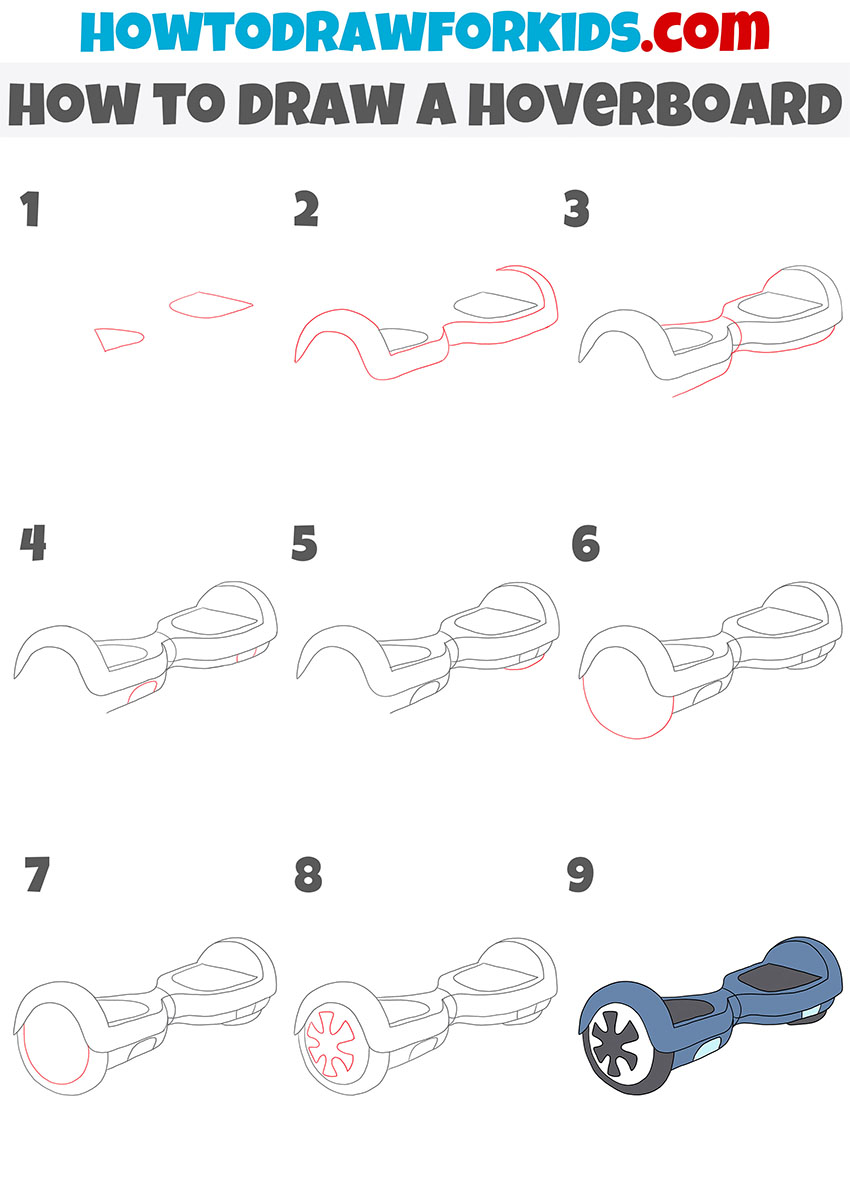
This instruction consists of nine easy steps with which you can learn how to draw a hoverboard step by step. Any novice artist or child can easily cope with the implementation of this lesson, since there are no difficult elements to complete here. Also, with the help of this lesson, you can improve your skills as an artist and learn how to draw more diverse paintings.
The hoverboard is a levitating board used for personal transportation. Since it was first described in science fiction, many attempts have been made to invent a functioning hoverboard, although so far none have proven to be entirely practical. All recently developed hoverboard models have one significant drawback—they can only fly over a metal surface or over water. This greatly limits the possibilities of their use, because each flight is essentially only experimental and demonstrative.
If you are ready to start doing this work, then you can prepare the art supplies you need right now, and then carefully follow my recommendations. Follow this lesson carefully and slowly, and then you will definitely get an excellent result of your work. I wish you to enjoy the creative process, and I am sure that you will complete this lesson easily and with pleasure.
Hoverboard Drawing Tutorial
Materials
- Pencil
- Paper
- Eraser
- Coloring supplies
Time needed: 30 minutes
How to Draw a Hoverboard
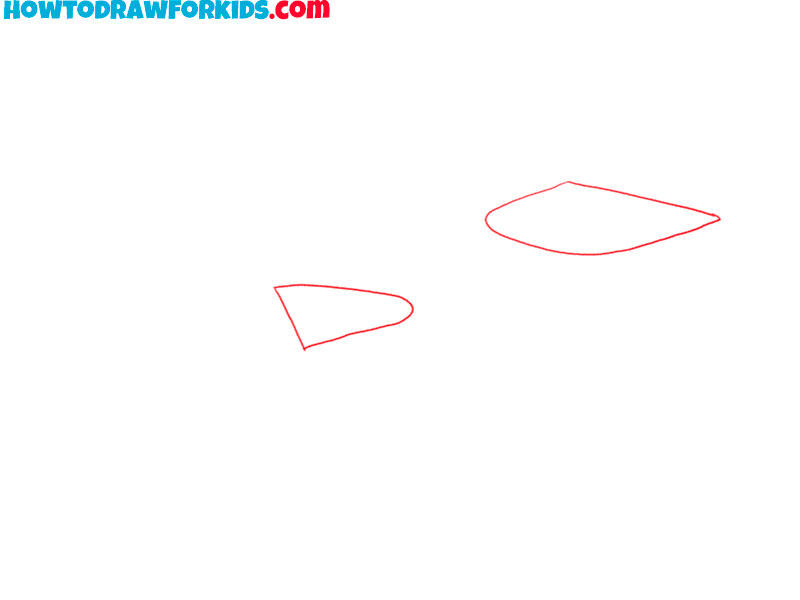
- Draw platforms for the legs on the hoverboard.
To complete this step, you need to draw two shapes using two straight and two curved lines.
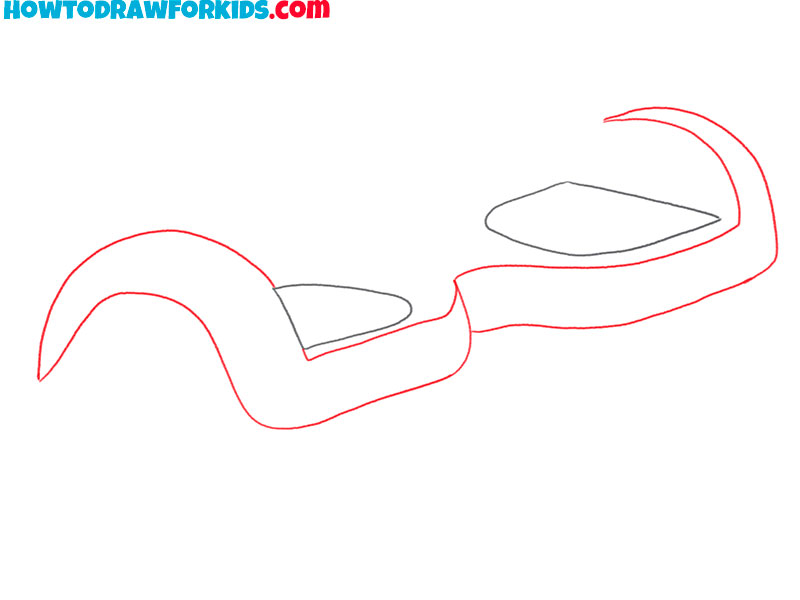
- Start drawing the main body of the hoverboard.
Draw long curved lines near the previously drawn elements, as shown in the figure.
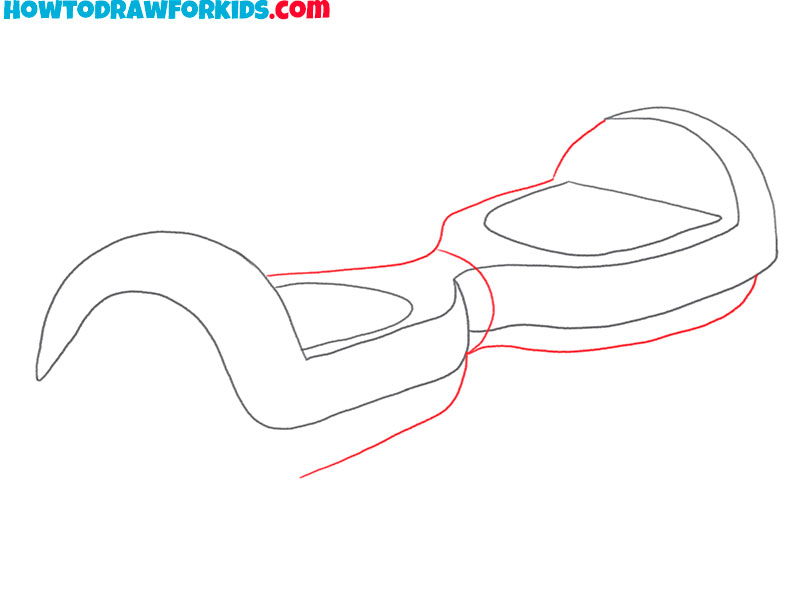
- Add the back and bottom parts of the hoverboard.
Draw an arc, as well as several curved lines of different lengths, as shown in the figure.
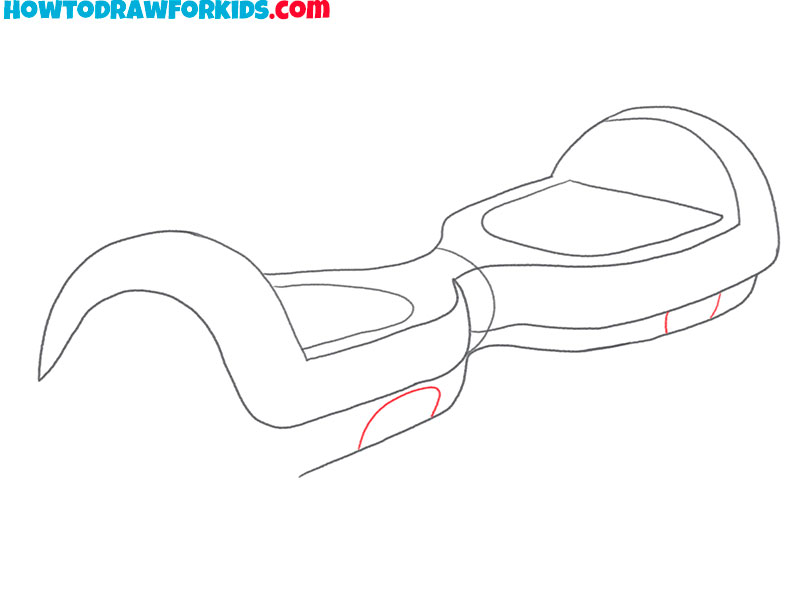
- Depict two elements at the bottom of the hoverboard.
Near the drawn curved lines at the bottom of the hoverboard, draw an arc and two curved lines.
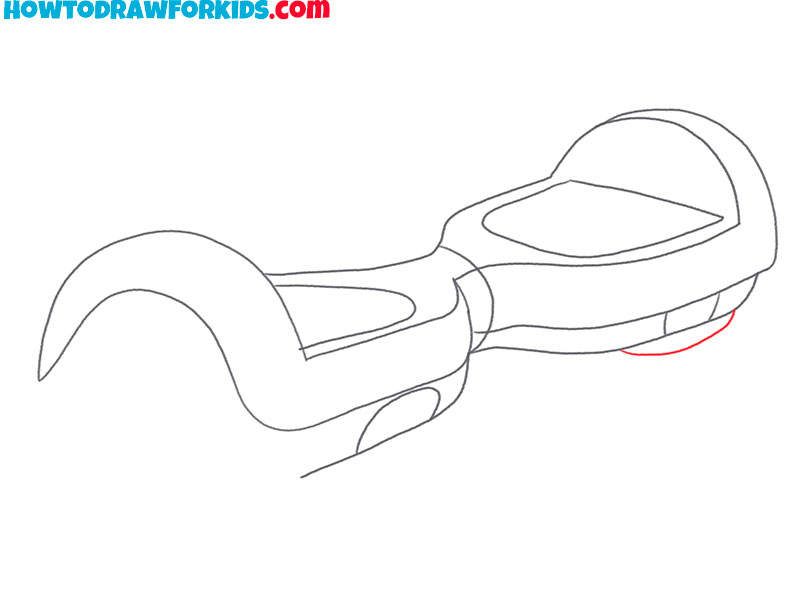
- Sketch out the outlines of one hoverboard wheel.
To draw the wheel that is partially covered by the hoverboard, add an arc in the lower right side.
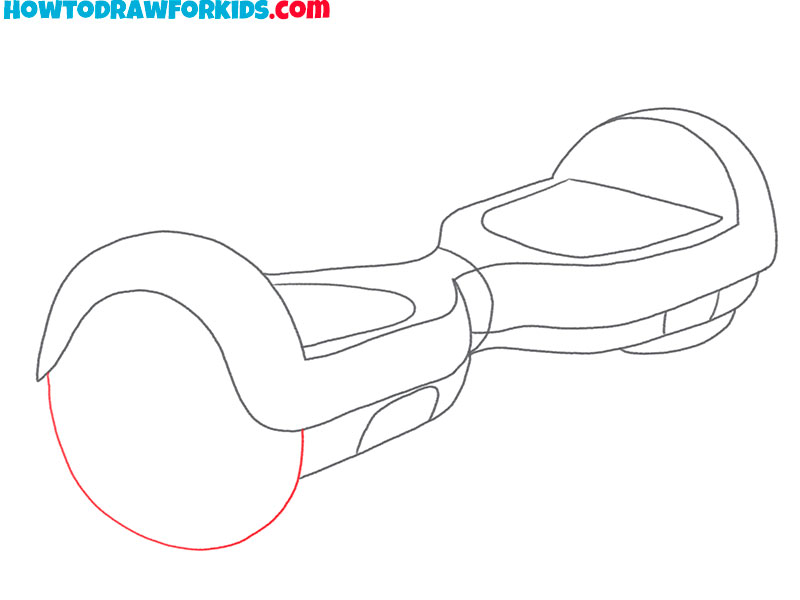
- Draw the outline of another wheel.
Now add the outline of the wheel on the left side of your drawing by making one big arc.
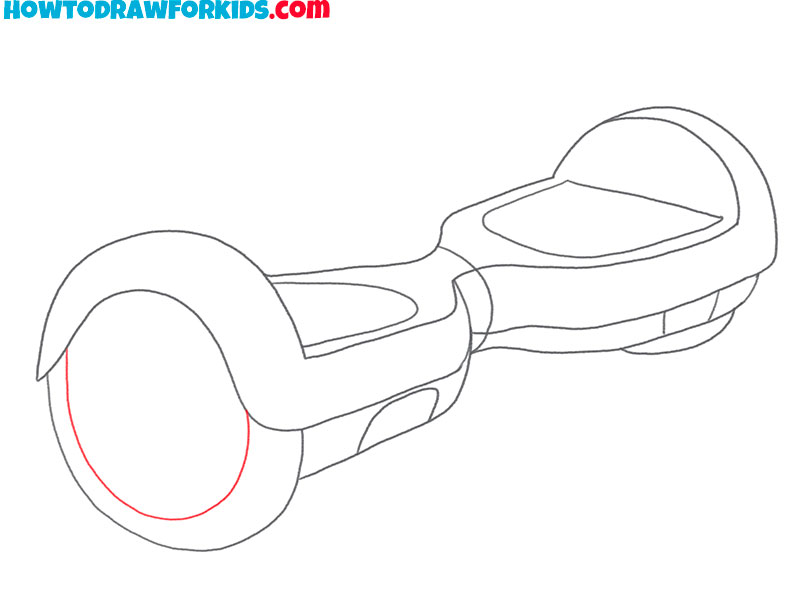
- Add the inside of the wheel.
Near the previously drawn arc, draw another arc of a slightly smaller size, as shown in the figure.
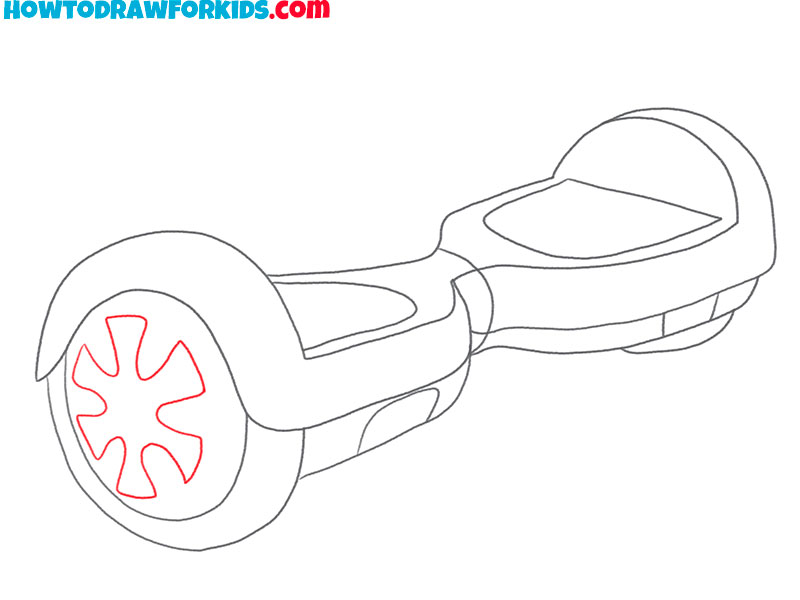
- Depict an element to the hoverboard wheel.
Draw a shape inside the previously drawn wheel using curved lines and arcs.
- Color the drawing.
To color the hoverboard, use different shades of blue as well as gray.
This file contains all the necessary useful materials for this lesson so that you can not lose this lesson in the absence of an Internet connection, and also return to it at any time convenient for you.