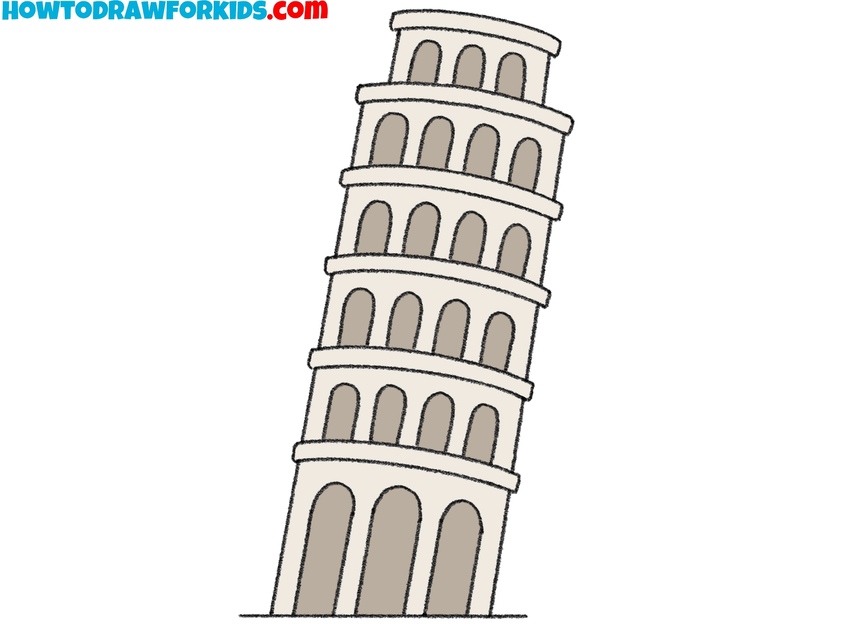
How to Draw the Leaning Tower of Pisa
Let’s create something historic and learn how to draw the Leaning Tower of Pisa, one of the most popular buildings in the world.
How to Draw the Leaning Tower of Pisa: Introduction
The Leaning Tower of Pisa is one of the most famous architectural landmarks in the world, instantly recognizable by its tilt and row of arches. In this tutorial on how to draw the Leaning Tower of Pisa, we will learn how to sketch this building from the Middle Ages.
The first thing to pay attention to is the lean. It’s important to keep all the vertical elements slightly angled to one side but parallel to each other. If the angle of the lines varies or shifts from section to section, the tower will lose its visual balance and appear distorted.
Next, pay attention to the alignment of the arches. Each level should have a clear, repeated rhythm of arches. The size and shape of the arches should also be the same for all rows except the very bottom one. If the arches are drawn too irregularly or without clear spacing, the drawing will lose visual order.
Don’t forget about the horizontal sections of the structure either. When you draw the leaning tower of Pisa, try to keep the horizontal lines perpendicular to the vertical lines and strictly parallel to each other.
Leaning Tower of Pisa Drawing Tutorial
Materials
- Pencil
- Paper
- Eraser
- Coloring supplies
Time needed: 35 minutes
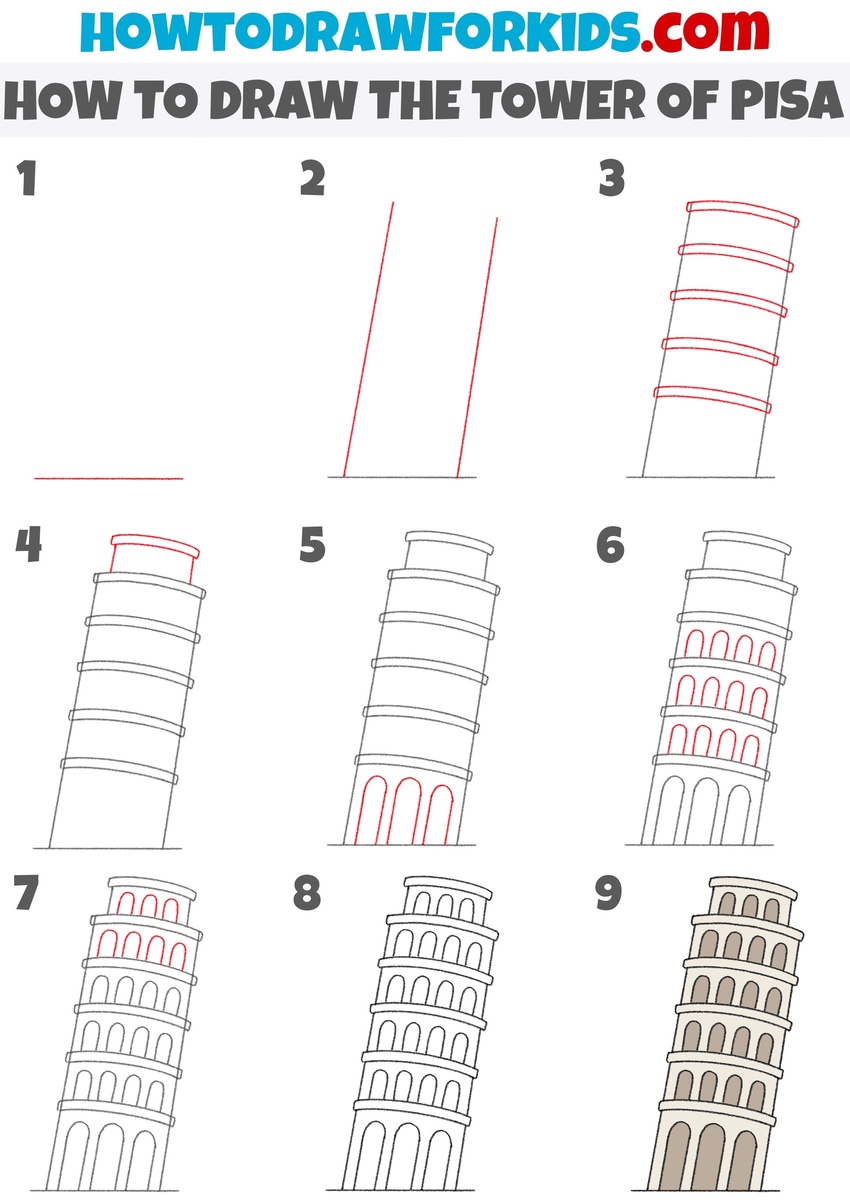
How to Draw the Leaning Tower of Pisa
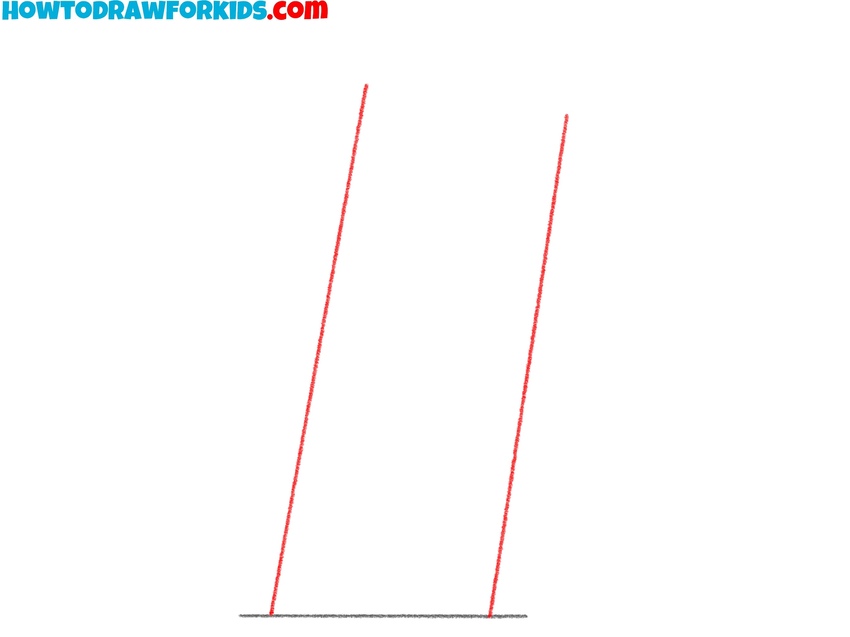
- Sketch the ground level.
To draw the Leaning Tower of Pisa, you should sketch the base of the building. So start by sketching a straight horizontal line near the bottom of your page. This line represents the ground level on which the tower stands and will act as a guide for the rest of the structure.

- Outline the tower’s sides.
Now draw the left and right edges of the Leaning Tower of Pisa by sketching two long lines, tilted slightly to the right to represent its signature lean. These lines will form the outer walls of the tower and should start from the base line you drew in Step 1. Keep the distance between them even all the way up.
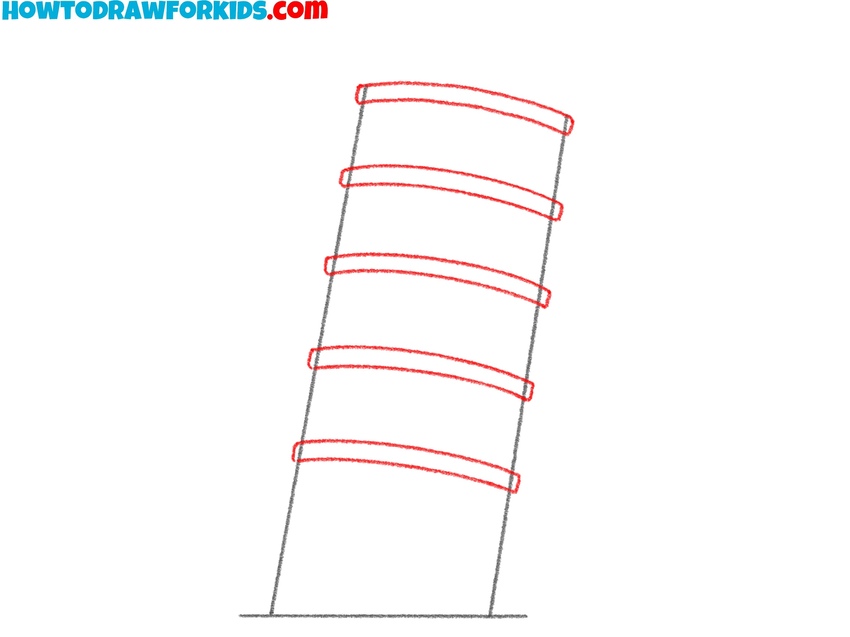
- Draw the Pisa tower’s floor dividers.
To continue to draw the Leaning Tower of Pisa, add the horizontal lines that separate the tower into its multiple levels. These lines should follow the same tilt as the tower itself and sit inside the two vertical lines you sketched in the previous step. Keep each level uniform and consistent.
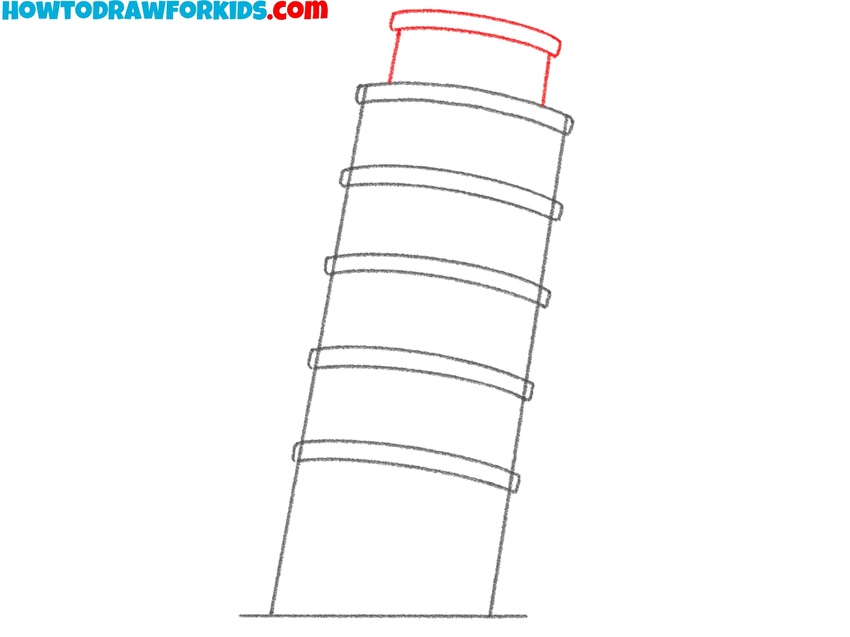
- Draw the top platform of the tower of Pisa.
Next, draw the Leaning Tower of Pisa’s upper platform by adding the section at the very top. This part should follow the same perspective as the rest of the structure. Draw a short rectangle that sits atop the uppermost floor. To give this part a finished look, sketch the roof at the very top.
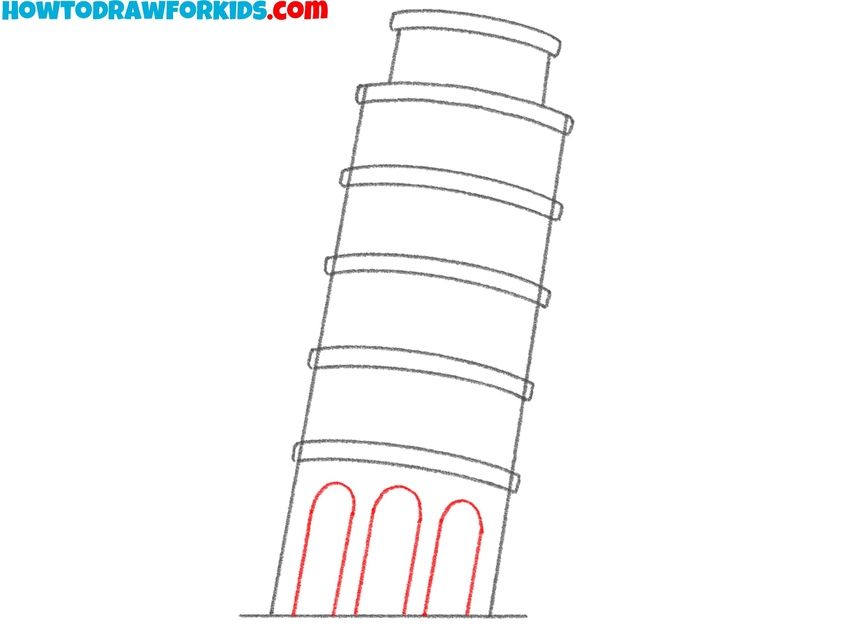
- Sketch the bottom floor arches.
Now detail the bottom floor by adding a series of arches along the lowest section of the structure. These arches should be equal in the shape and follow the slight curve of the tower’s base. Each arch can be drawn using a simple upside-down U shape. Begin with the center arches and work outward to the sides.
- Draw the middle floor arches.
To begin filling in the middle floors with matching arches. Each level of the tower has repeating arched openings that wrap around the structure. For each of the five middle floors, draw a row of similar arches using curved shapes just like you did in the previous step.

- Complete the Pisa tower’s arches.
Next, add the top floor arches on the upper platforms. These should match the style of the arches you already drew. Use smooth, rounded lines and keep the arches equal in the shape and angle. At this stage, the tower should now have a full vertical rhythm from base to top.

- Trace the complete tower.
To give your drawing a finished look, trace the outer edges, floor divisions, and all the arches with a darker pencil or pen. If any spacing looks off, you can make small adjustments now. Erase any leftover guidelines or construction marks once your outline is clean.

- Add stone tones to your sketch.
To complete your leaning tower of Pisa drawing, color the tower using light shades of beige, gray, or stone tones. The real structure is made from light-colored marble, so a soft, natural color palette will work best. Color the openings using a darker tone to represent shadowed areas.

Conclusion
This Leaning Tower of Pisa drawing tutorial demonstrates a step-by-step method to sketching one of the most iconic architectural landmarks in the world. It’s a helpful way to practice drawing vertical architectural structures, curved lines, and consistent repeating elements like arches.
If you’d like to keep working on landmarks and buildings, you can try the Eiffel Tower drawing tutorial or the tutorial on how to draw a pyramid next. These simple step by step tutorials also help build skills in structure, proportion, and working with detailed lines.