How to Draw the Eiffel Tower
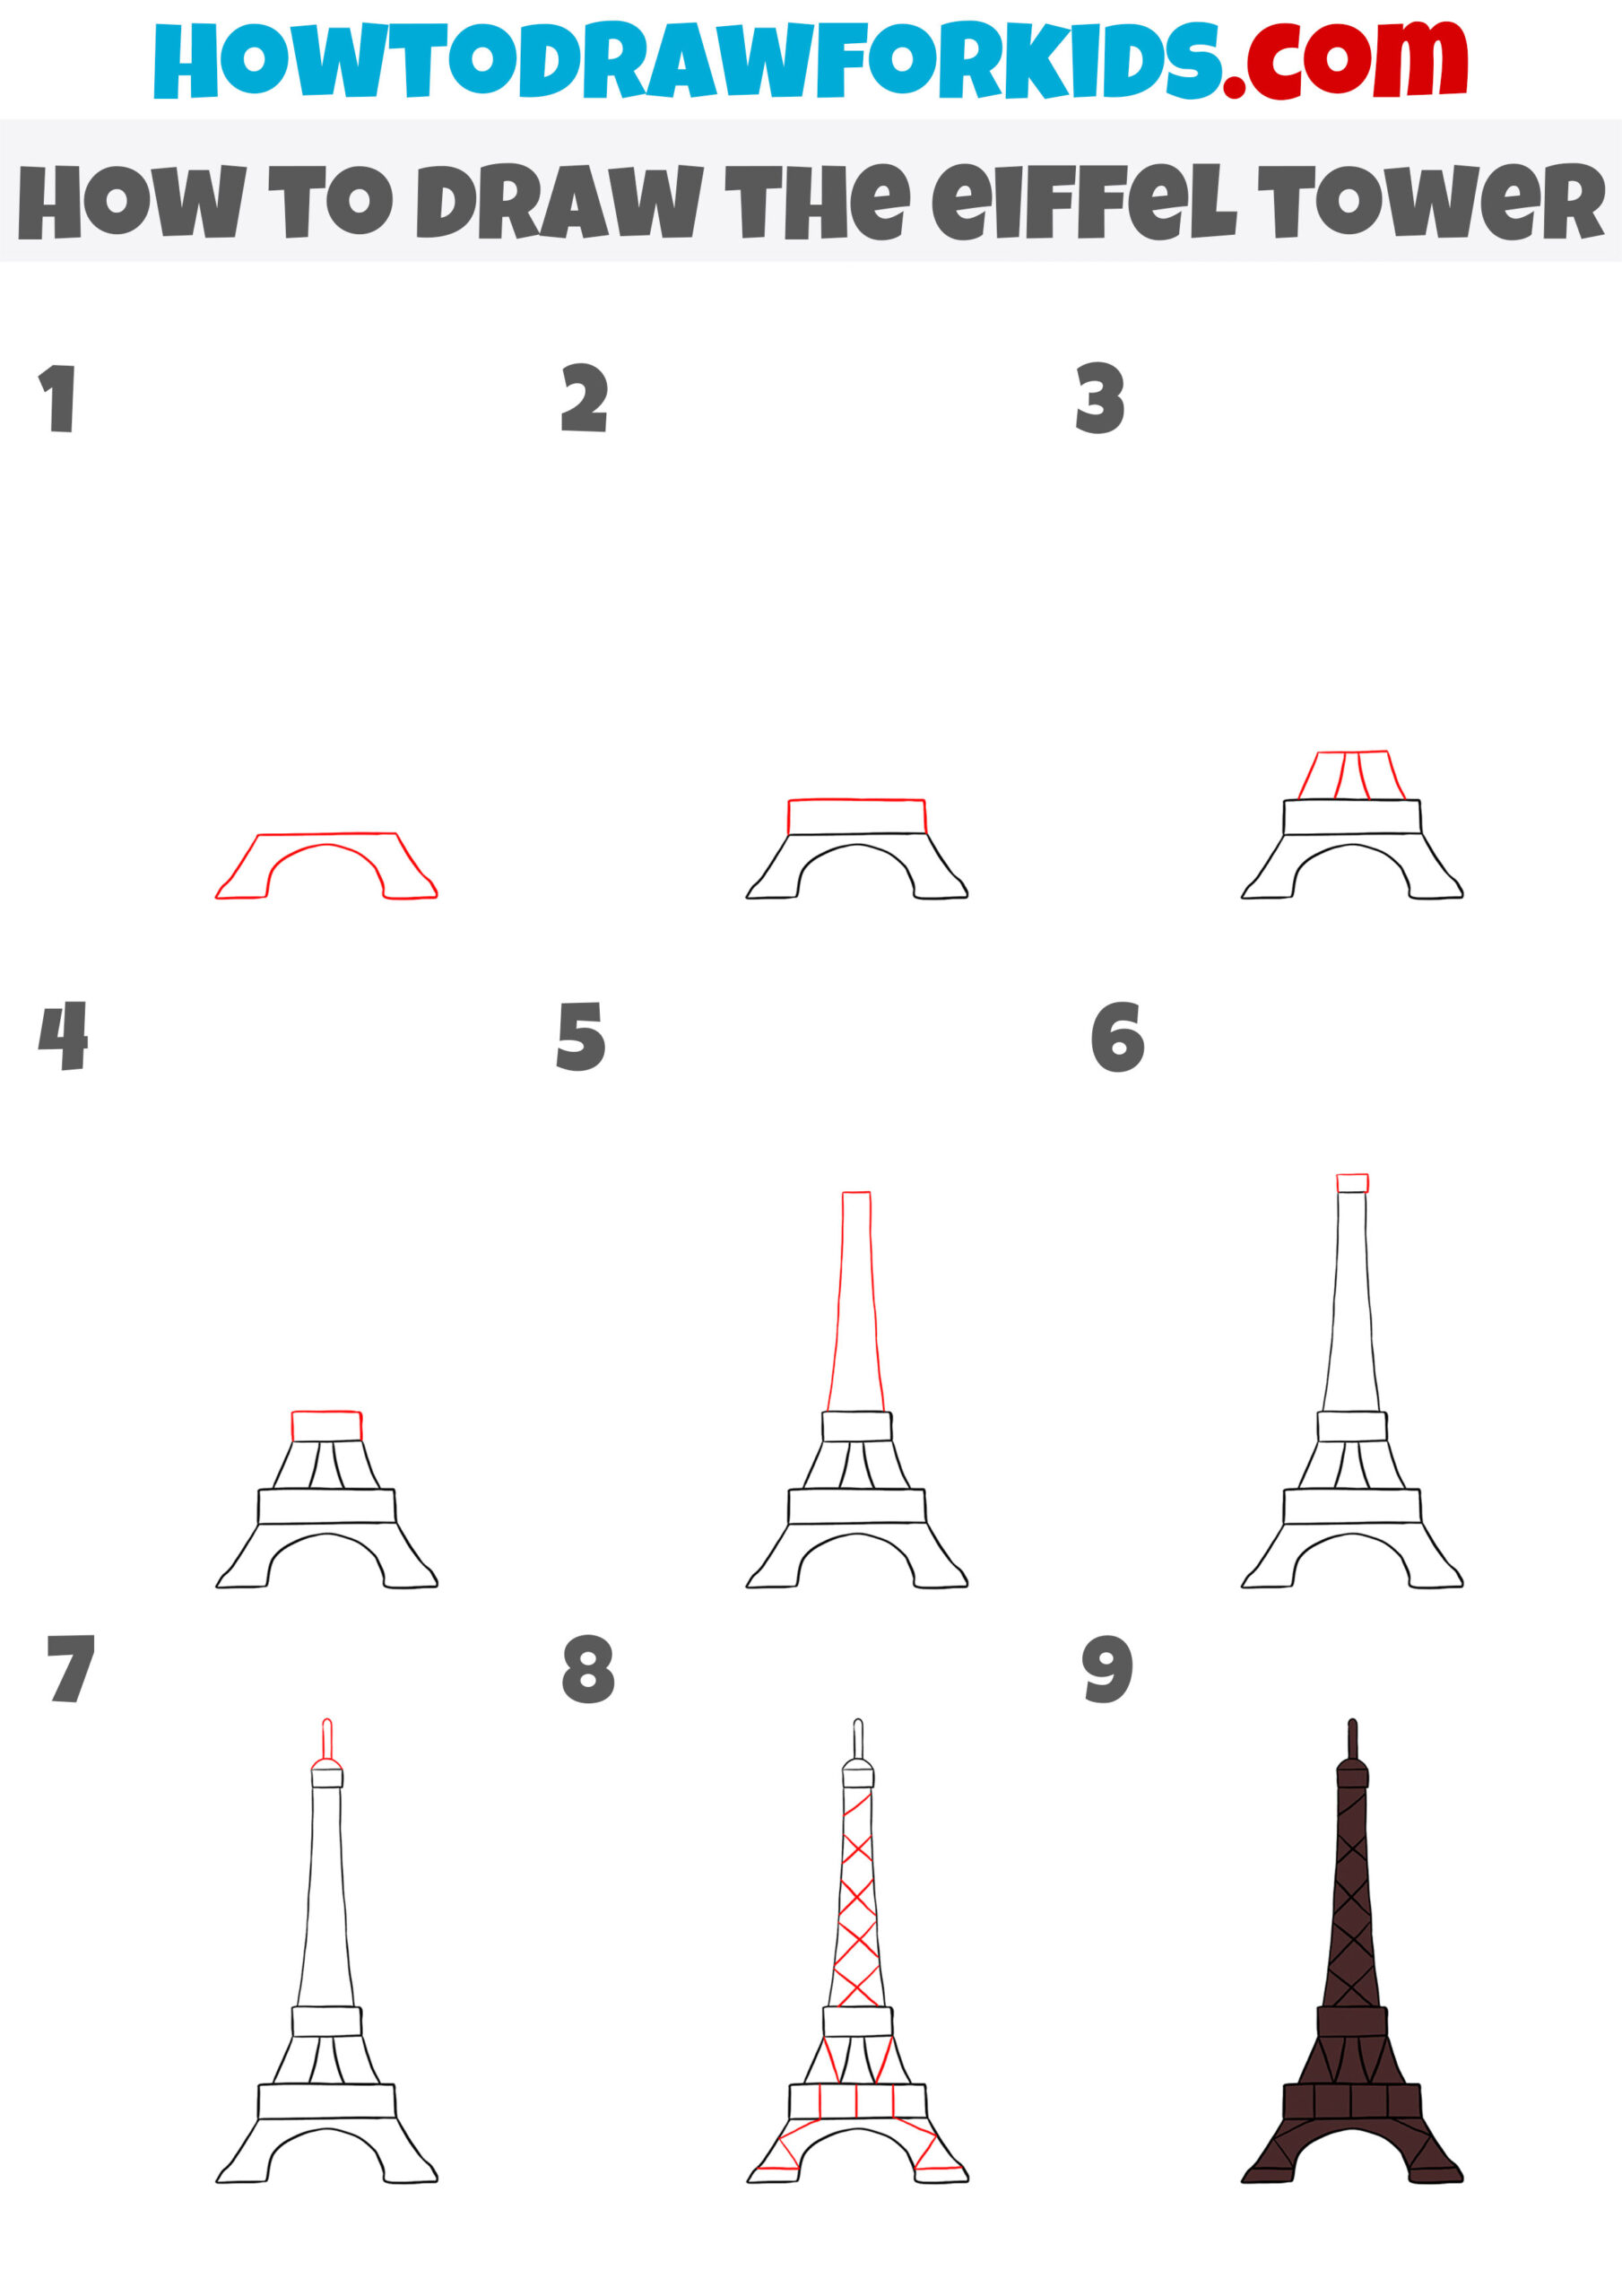
This tutorial explains how to draw the Eiffel Tower in nine clear steps, using simple lines to build its recognizable shape and add the metal framework.
Prepare to Draw the Eiffel Tower
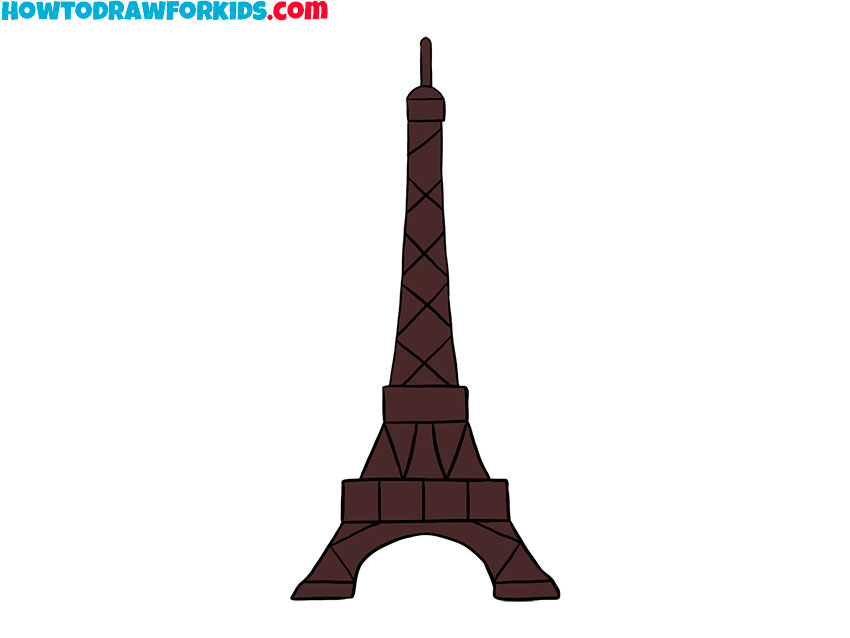
The Eiffel Tower is a famous architectural landmark and a symbol of Paris. Its recognizable silhouette is formed by four metal supports that narrow toward the top.
The structure includes several platforms connected by an open framework. In this simplified drawing, you will create the main sections first and then add horizontal lines to suggest the metal construction.
The Eiffel Tower is one of the most recognizable landmarks in the world, and its distinctive shape appears on many postcards and souvenirs. Its simple outline also makes it a useful subject when you practice drawing a building.
Eiffel Tower Drawing Tutorial
Materials
- Pencil
- Paper
- Eraser
- Coloring supplies
- Ruler
Time needed: 30 minutes
How to draw the Eiffel Tower step by step
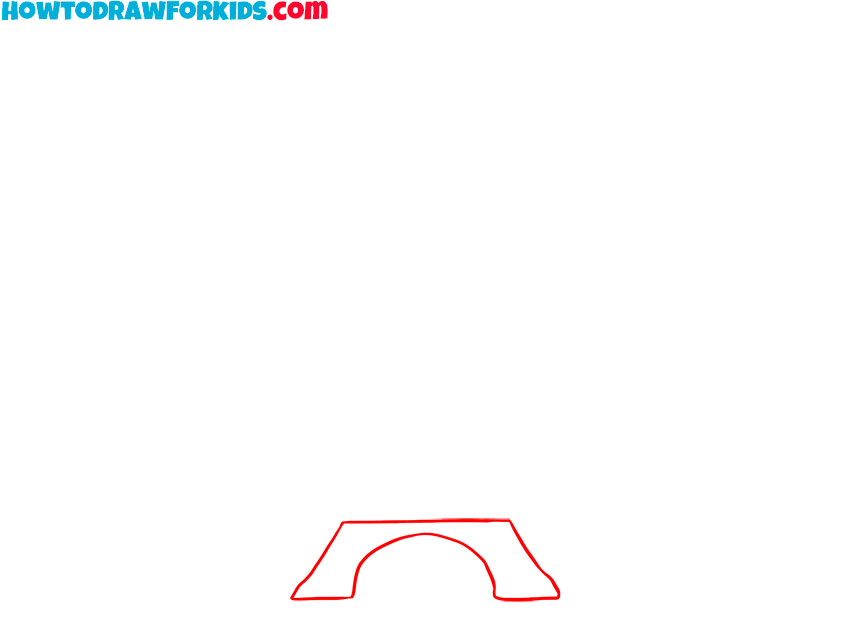
- Draw the Eiffel Tower base.
Draw two tall supports with straight outer edges and curved inner lines. Leave a wide opening between them to form the arched base of the Eiffel Tower.
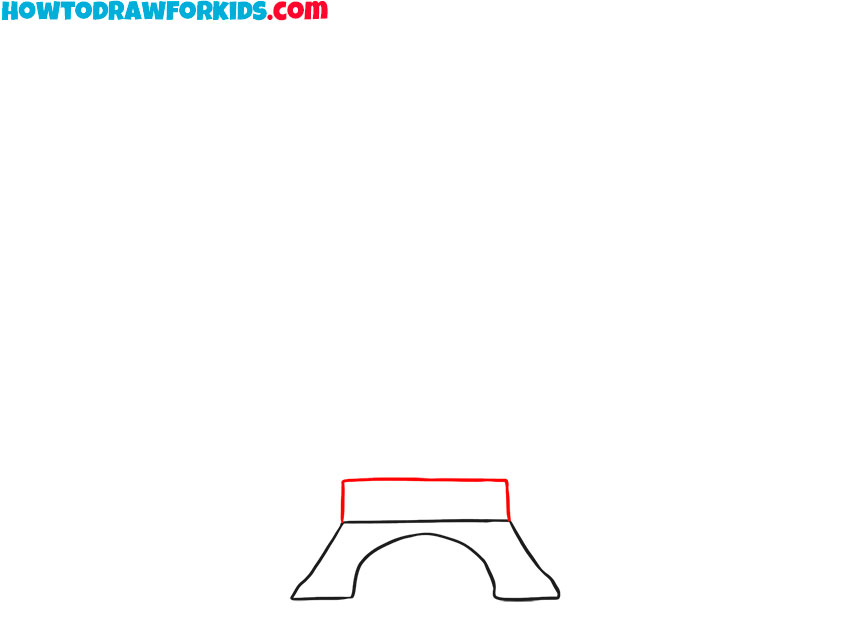
- Add the first platform.
Draw a long, narrow rectangle across the top of the base supports. Make it horizontal and extend its ends slightly beyond the sides of the tower.
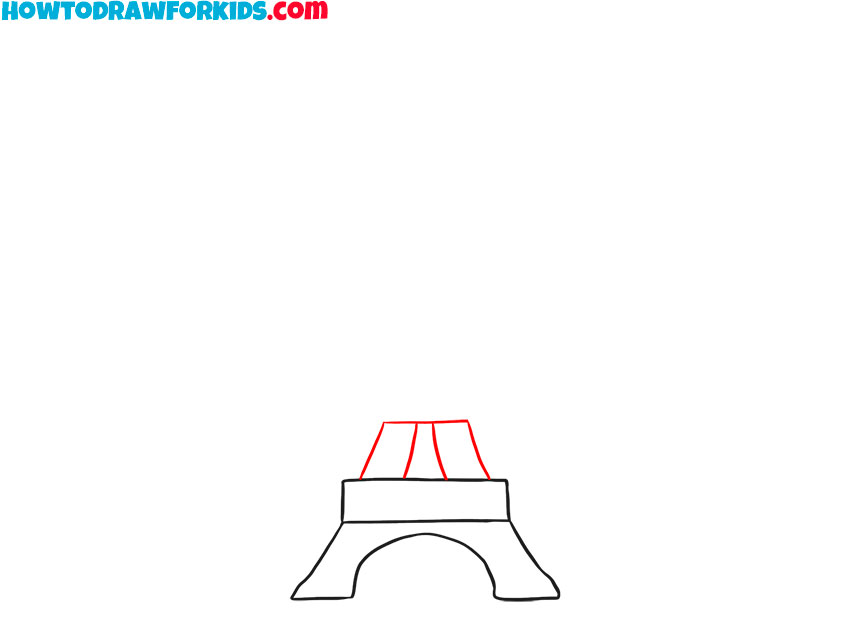
- Outline the middle supports.
Above the first platform, draw two narrow sections that angle inward. Place one on each side and make their outer edges follow the narrowing shape of the tower.
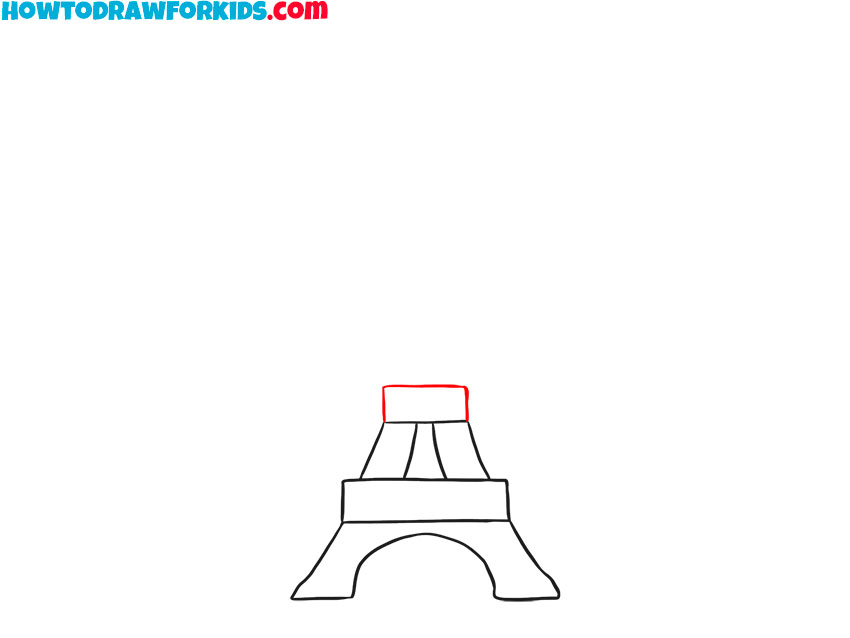
- Draw the second tower platform.
Add another narrow horizontal rectangle above the middle supports. Center it over the first platform and make this upper platform noticeably shorter.
- Sketch the upper Eiffel Tower section.
Draw two long lines upward from the second platform. Curve them slightly inward so the upper part gradually becomes narrower near the top.
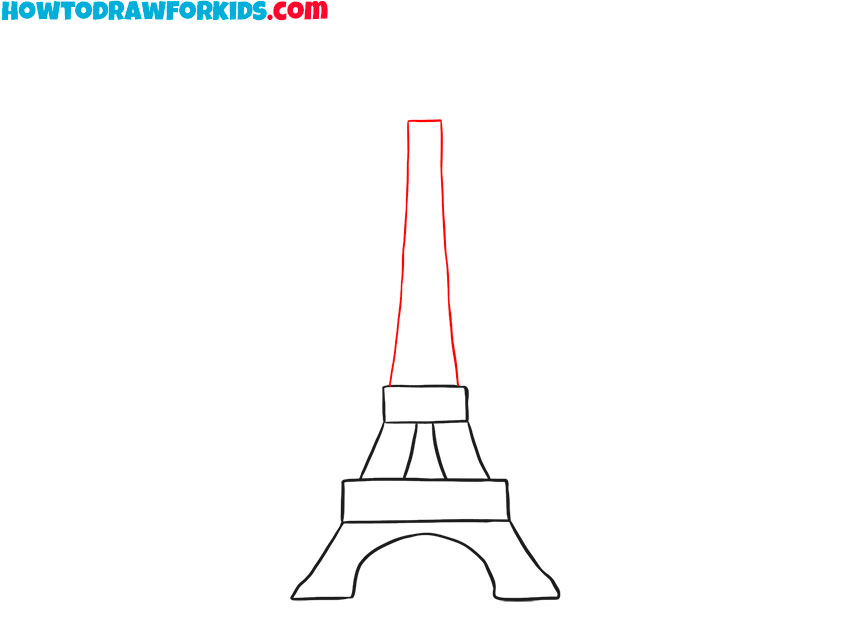
- Add the upper platform.
Draw a small horizontal rectangle at the top of the narrow section. Center this shape between the sides and let its edges extend slightly outward.
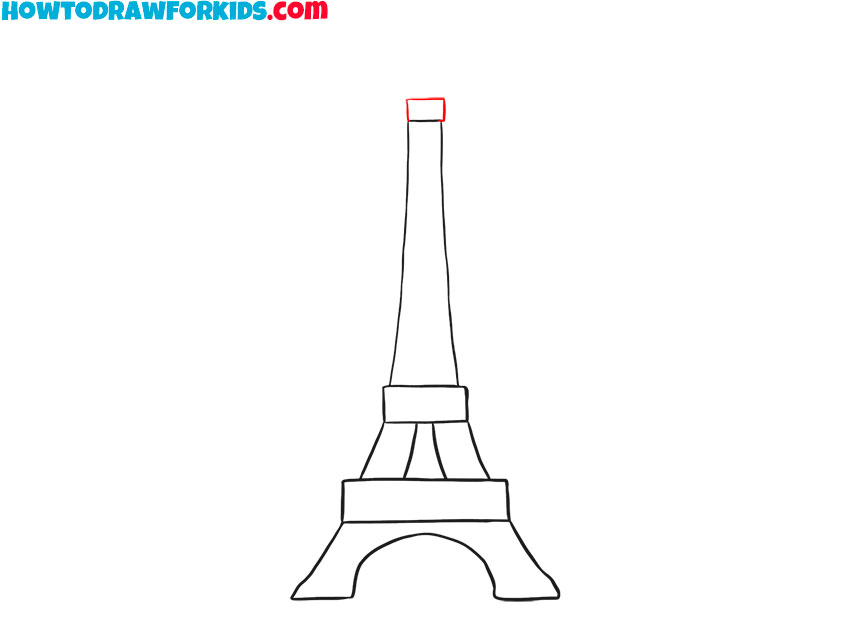
- Complete the top of the tower.
Above the small platform, sketch a short curved cap and add a narrow spire. Place these elements in the center to complete the Eiffel Tower silhouette.
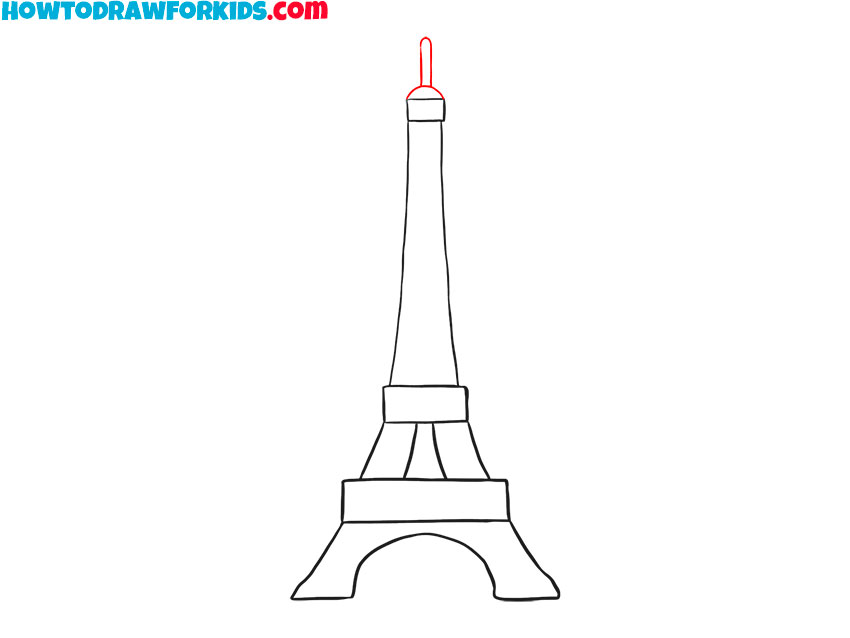
- Draw the metal framework.
Add short horizontal lines across each section of the tower. Space them along the structure to suggest the levels and open metal framework of the landmark.
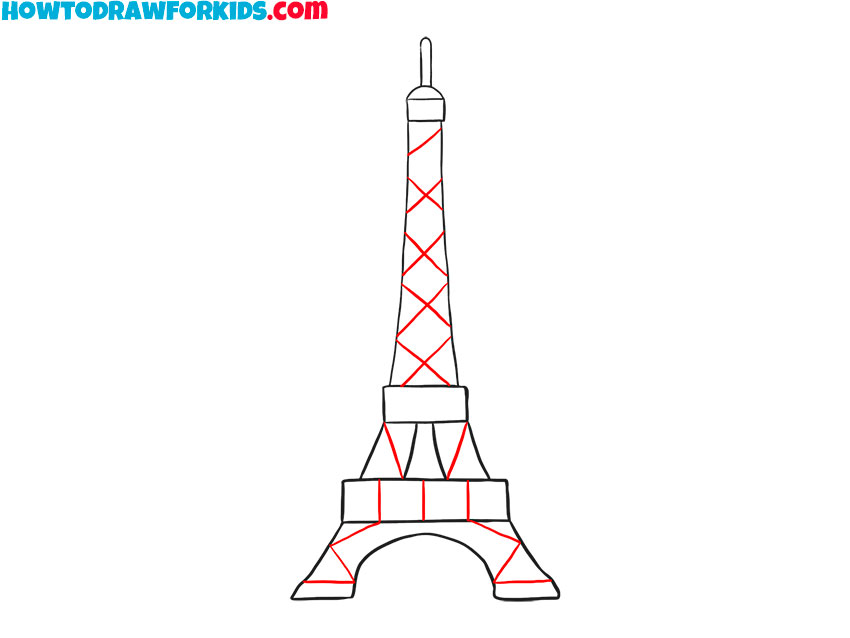
- Color the Eiffel Tower drawing.
Color the entire Eiffel Tower dark brown. Fill each section evenly, including the platforms and spire, without covering the black outline or framework lines.
Eiffel Tower Drawing Printables
Download the PDF file, which contains a shorter version of the tutorial and additional printable materials. Save it so you can use the worksheets whenever you want to draw the Eiffel Tower again.
Conclusion
The simple sections in this tutorial help you build the recognizable Eiffel Tower silhouette without adding too many small details. The horizontal lines give the finished structure the appearance of an open metal framework.
For another famous European landmark, continue by drawing the Leaning Tower of Pisa. Its tilted shape gives you a very different type of tower to practice.
You can place the Eiffel Tower in a larger scene after sketching a cityscape, or try drawing a bridge for another architectural subject made with clear structural lines.