How to Draw X-Men
In this drawing lesson, you will learn how to draw X-men step by step. This lesson will definitely not leave indifferent any of you.
Prepare to Draw X-Men
I bring to your attention an excellent and very useful drawing lesson, in which I will tell and show you how to draw X-Men step by step. This tutorial is great for beginner artists and kids, as it only consists of fairly simple steps with detailed descriptions.
Also, this lesson allows you to practice depicting the emotions and postures of a person. When you learn how to draw X-Men with the help of this lesson, you will be able to complement your drawing of a movie scene, add images of other characters, and also depict this as the main subject of the drawing.
Please note that the X-Men you will draw with this tutorial is in cartoon style. If you are already interested in this lesson and want to get started as soon as possible, then you can now prepare the art supplies that you will use to draw and get to work. I wish you inspiration, and I am sure that you will easily cope with this work and be satisfied with the result of your efforts.
Easy X-Men Drawing Tutorial
Materials
- Pencil
- Paper
- Eraser
- Coloring supplies
Time needed: 30 minutes
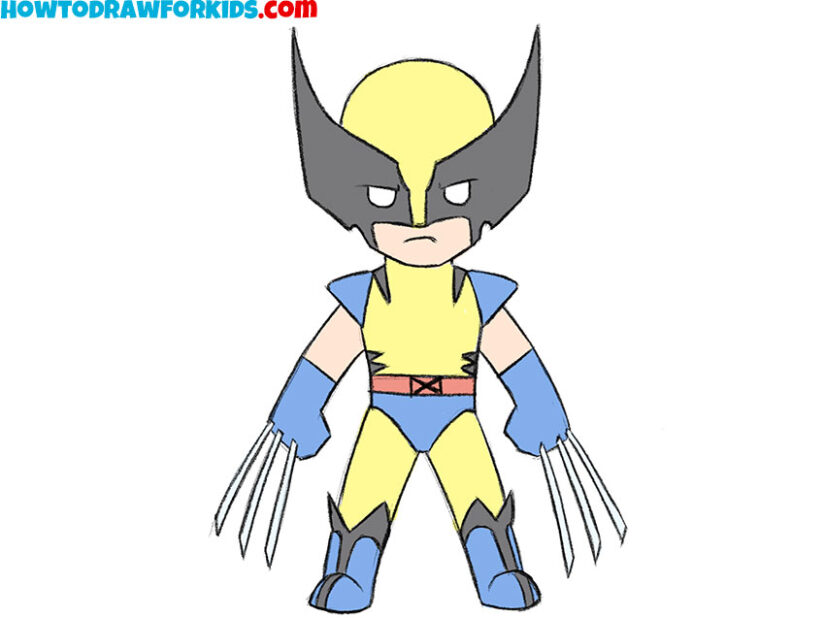
How to Draw X-Men
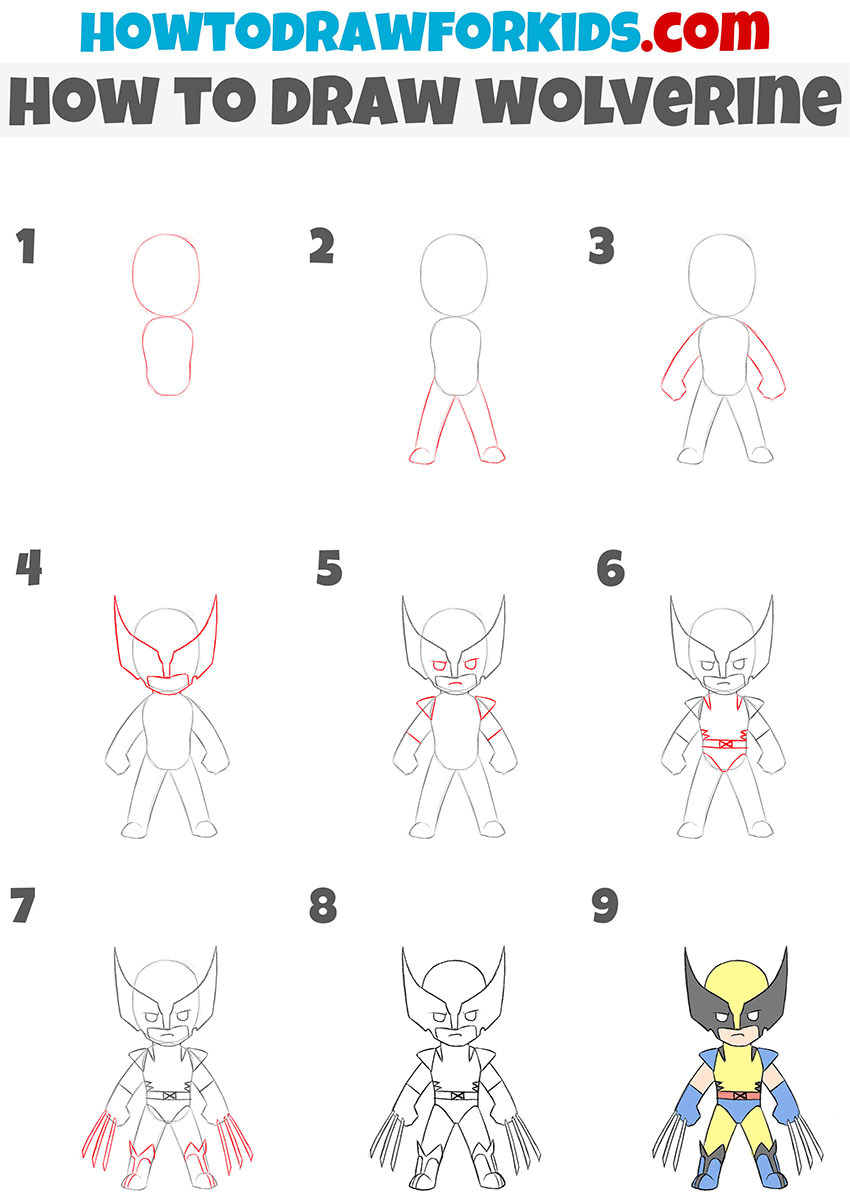
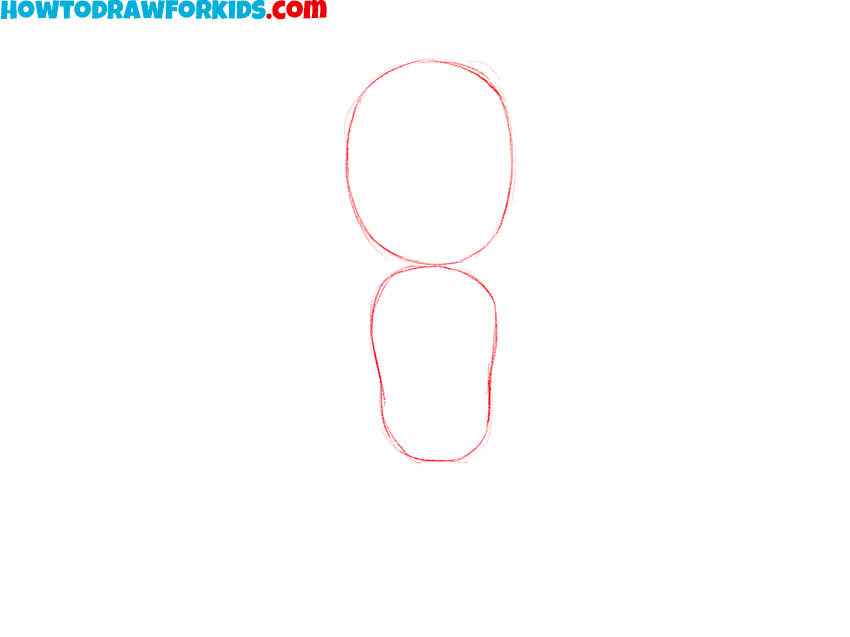
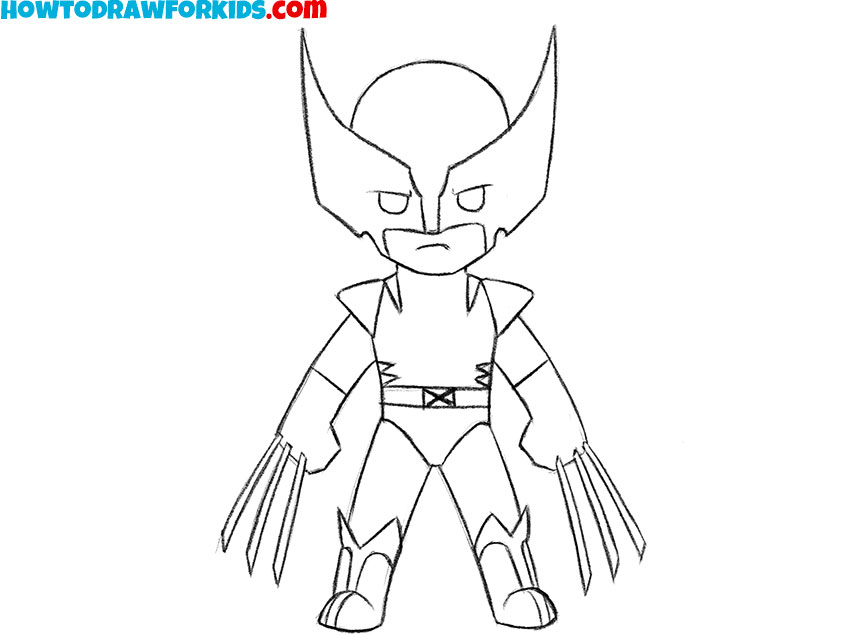
- Outline X-Men’s head and body.
Begin with the head by sketching an oval shape that slightly narrows at the bottom. This will form the foundation for the facial features. Directly below the head, draw a smaller, vertical oval for the torso.
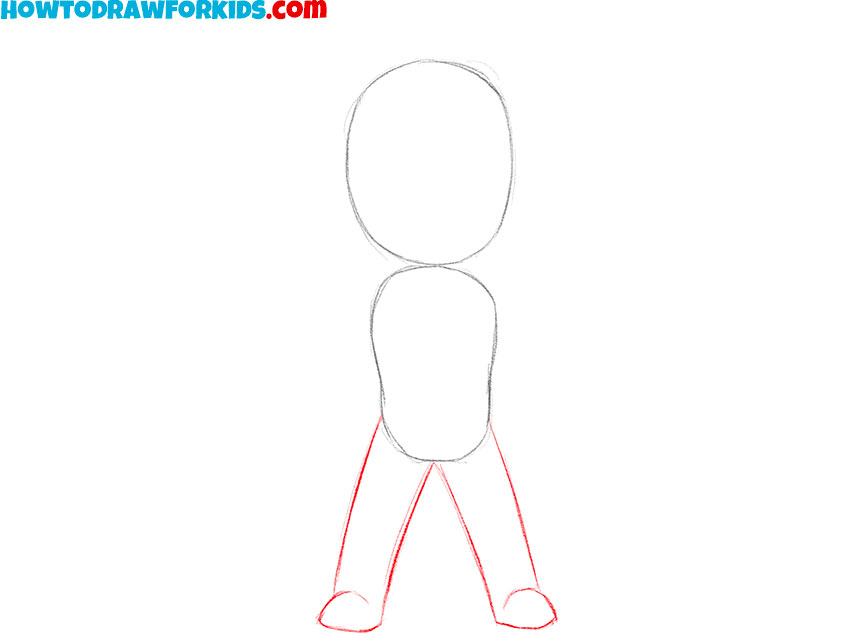
- Sketch the legs.
Draw two elongated ovals for the legs extending from the bottom of the torso oval. Add rounded outlines at the bottom for the feet.
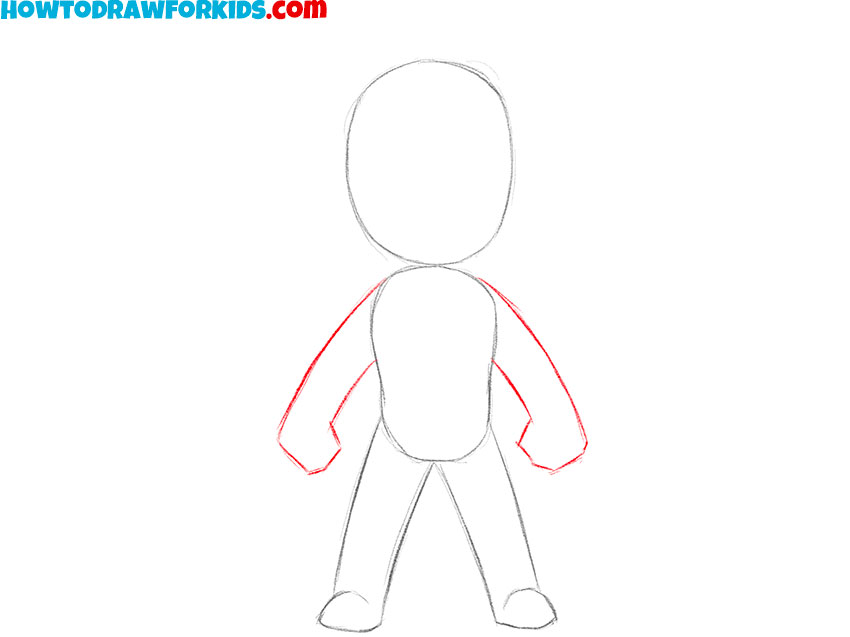
- Draw the arms.
Position the long, outstretched shapes of the arms to create the effect of Wolverine’s determined pose. Then draw large pentagonal fists. We will draw the famous claws a little later.
- Sketch the mask.
Draw the pointed sections that rise above his head, which resemble the ears of his namesake animal. Then, sketch the outline of the mask, ensuring that it follows the contours of the face oval.
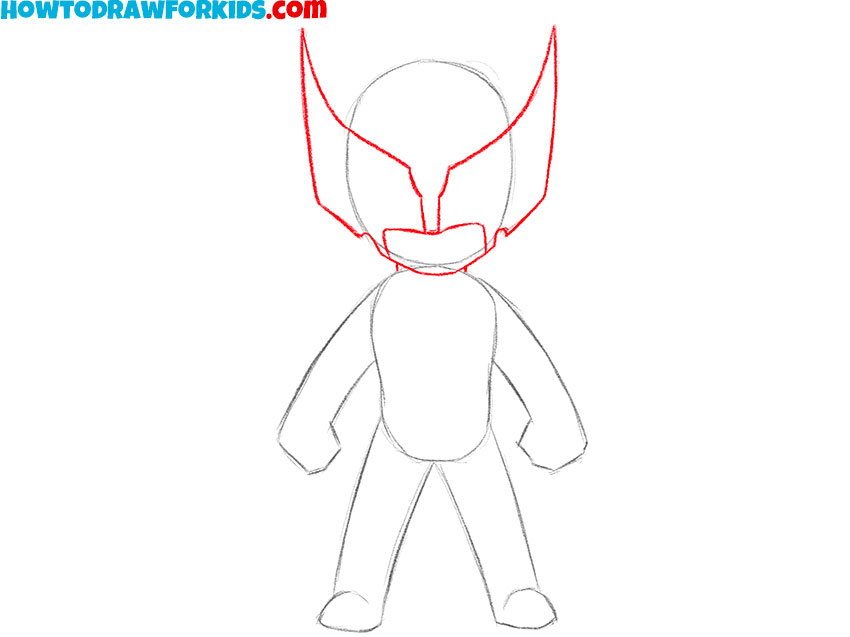
- Add facial features.
Start with the eyes, which should be drawn as two small ovals beneath the mask’s outline. Add a small triangle to indicate the nose and a firm line for the mouth.
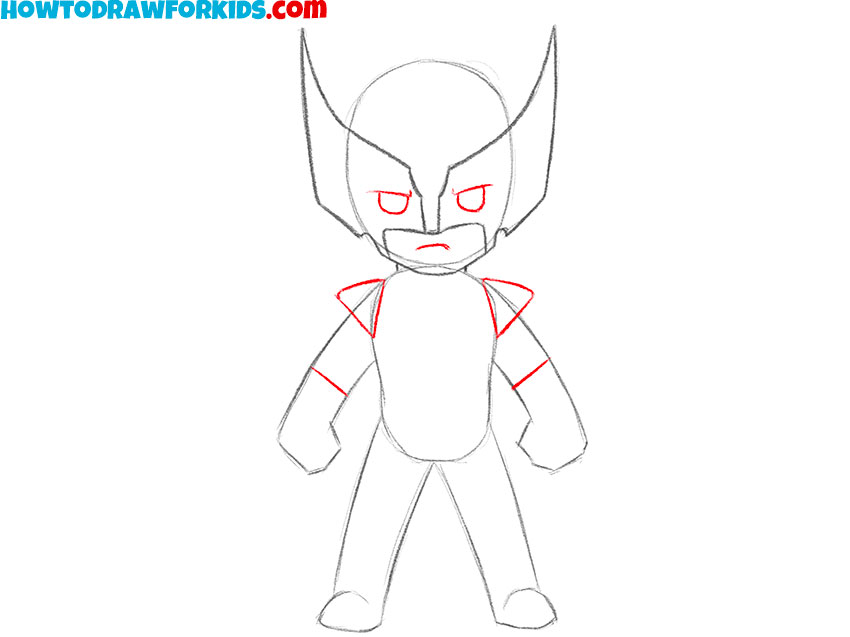
- Sketch the costume.
Begin adding the details of Wolverine’s costume by drawing the outlines of his suit. This includes the triangles on the shoulders and the belt around his waist.
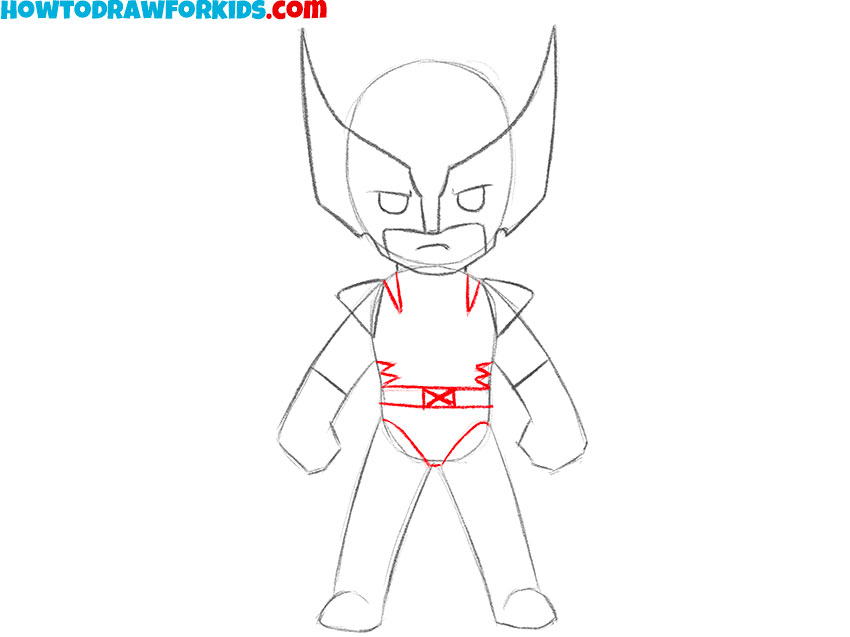
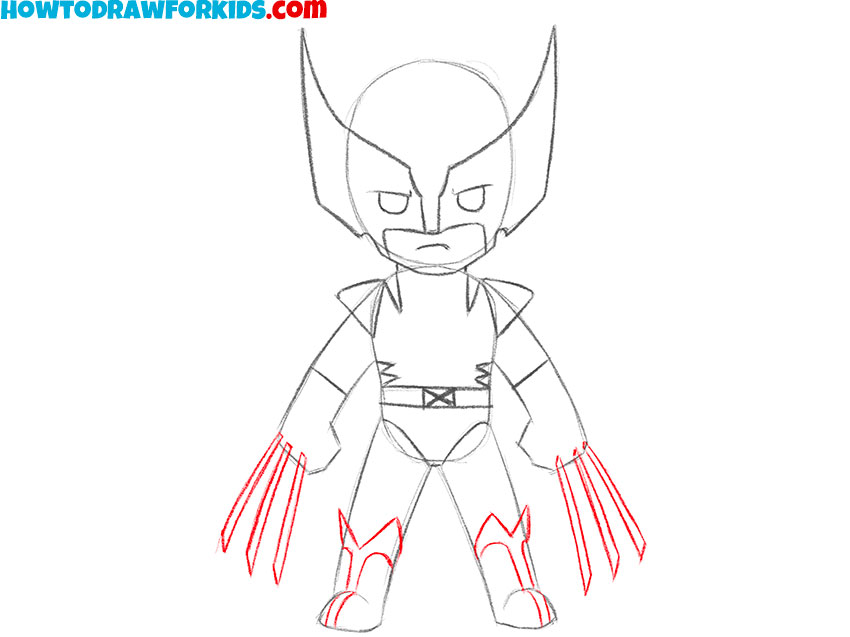
- Finalize the costume and claws.
So, finalize the costume by adding the gloves, boots, and the distinctive detail lines. Sketch the claws extending from the fists. The claws are a signature element of the character and must look formidable.
- Remove the extra-lines.
After you’ve added all the necessary details to Wolverine’s figure and costume, carefully erase any extraneous sketch lines that are no longer needed.
- Color the drawing.
For the costume, use bright yellow for the main suit, which is Wolverine’s signature color. Add blue for the boots, gloves, and briefs to follow the classic color scheme associated with the character.

Watch the Full Video Tutorial
Additional Content
For your convenience, I have prepared a PDF file in which you can find a short version of this tutorial and additional useful materials for completing it. Download this file to return to the lesson at any time.