How to Draw an Axe
Start sketching now and learn how to draw an axe with this really simple step by step drawing tutorial for kids and young artists.
How to Draw an Axe: Introduction
This axe drawing tutorial will serve as a guide for young artists, helping them master the basics of drawing various objects found in everyday life.
With this tutorial, kids can learn how to create a cartoonish, yet recognizable drawing of an axe, and practice their skills in drawing straight and curved lines.
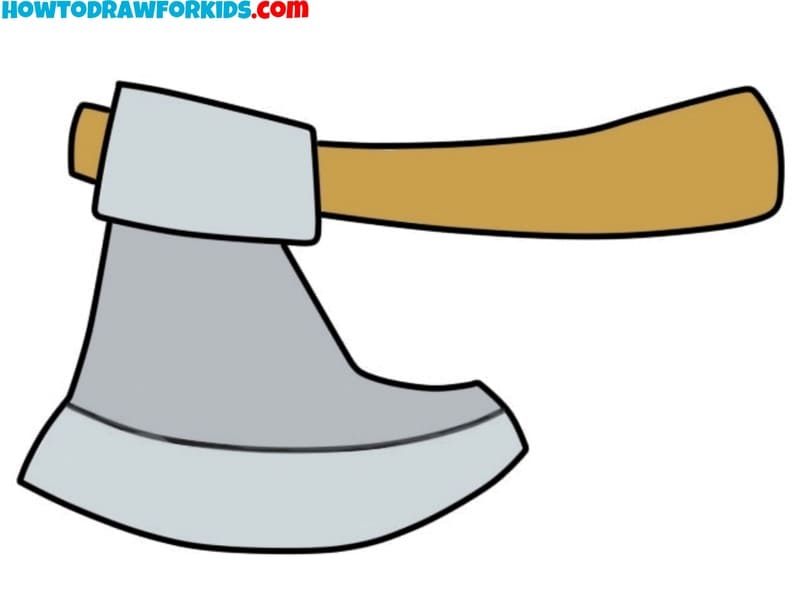
This lesson also teaches how to convey materials using simple colors. For example, the sharpened part of the axe should be painted a different color from the rest of the head to convey the effect of sharpening.
You will learn about this and other tricks in this instruction, so take your pencils and let’s get started with the lesson on how to draw an axe.
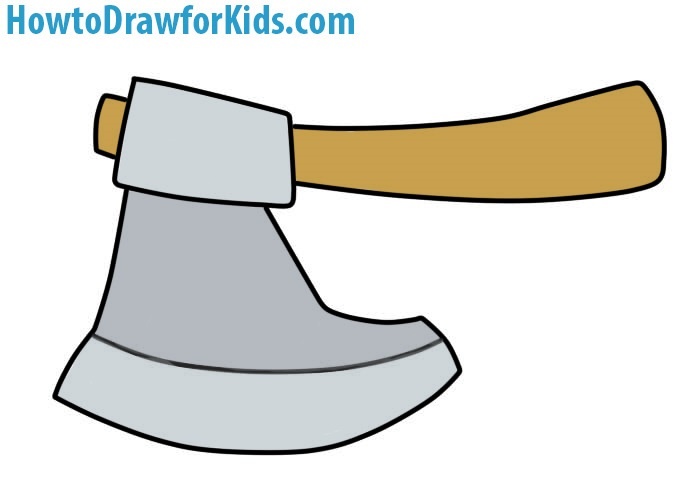
Axe Drawing Tutorial
Time needed: 30 minutes
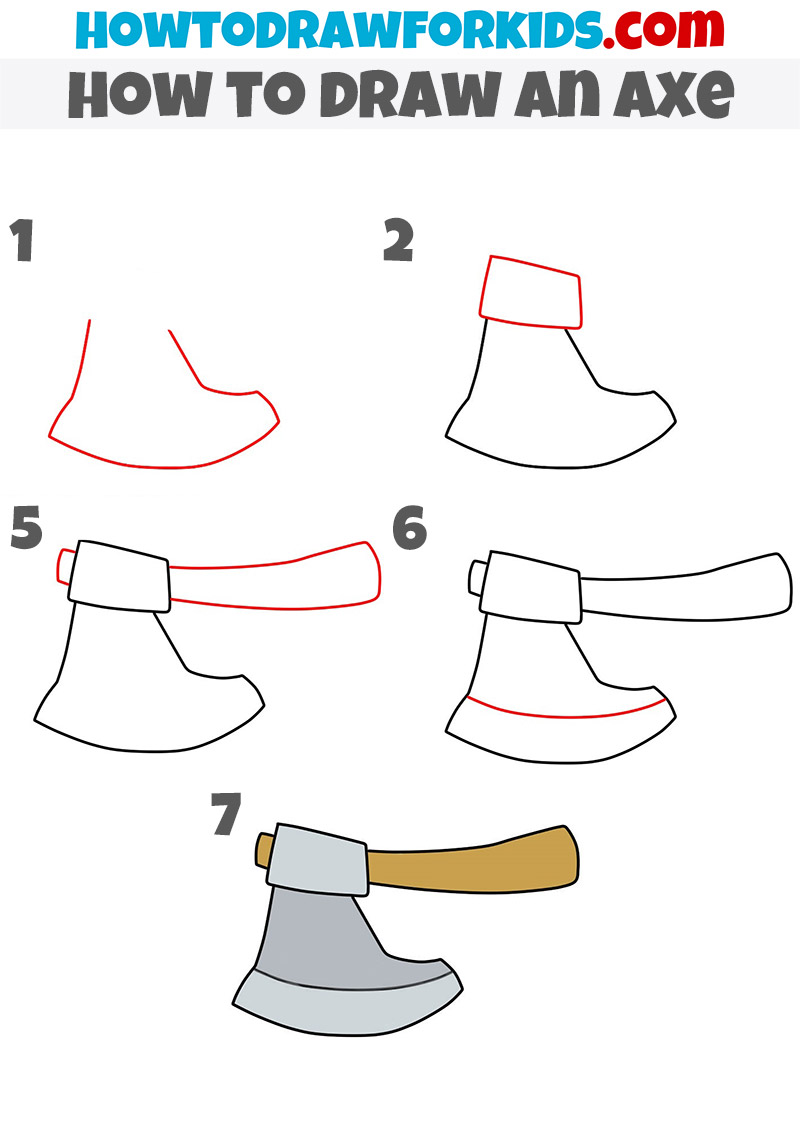
How to Draw an Axe
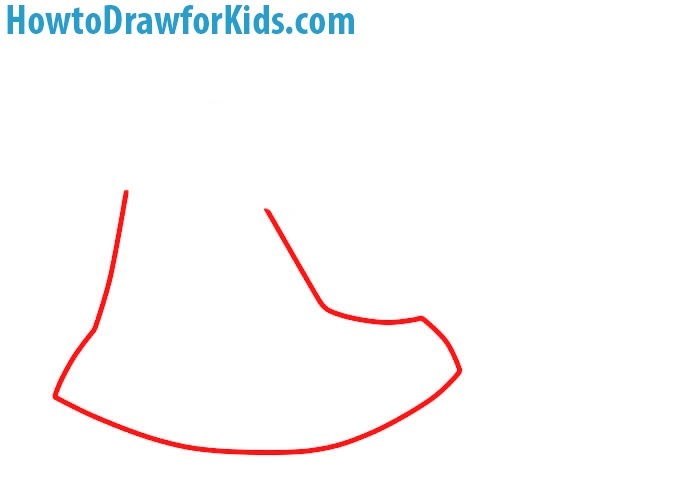
- Start sketching the head of the axe.
Begin by sketching the head of the axe. Draw a smooth, curved line that swoops downwards and then arches up slightly, forming the basic contour of the blade’s edge. The line should have a gentle peak towards the left side to indicate the top of the axe’s head. This shape resembles a side view of a hill with a flattened top.
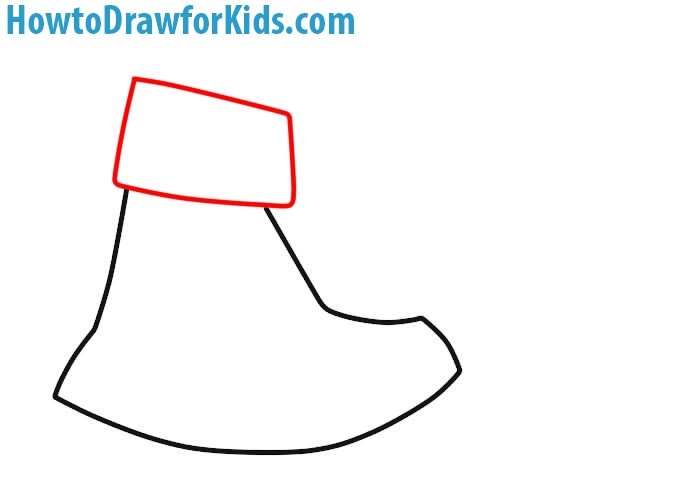
- Detail the head of the axe.
Add the back of the axe head by drawing a rectangle perched on the flat peak of the previous shape. This rectangle will later represent the part of the axe head that attaches to the handle. Ensure the bottom line of the rectangle extends slightly into the curve of the axe head for a seamless look.
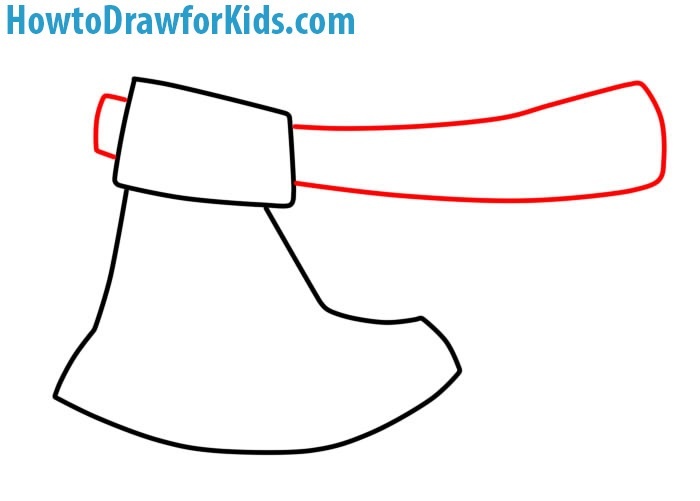
- Sketch the handle.
Start at the right part of the head and draw a long, slightly curved line extending down and to the right. This creates the top portion of the handle. Then, draw a parallel line, mirroring its curve, and connect these two lines at the end with a rounded edge for the handle.
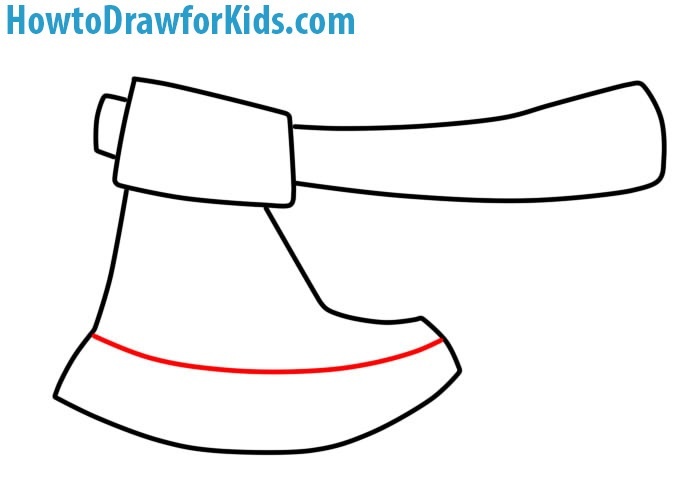
- Refine the blade for a sharper look.
At this phase, let’s introduce finer details to the axe drawing. Add a parallel line slightly above the bottom curve of the blade, which represents the bevel – a subtle angle on the blade’s edge that improves its cutting ability.
- Color your axe.
Fill in the blade with a steel gray, the handle with a warm brown, simulating wood, and the part where the handle and head connect with a lighter gray. You can use light and shadow to give the metal a shiny look, and add more realism to the wooden handle with variations in brown tones.
Conclusion
The axe is one of the most ancient instruments, which appeared in the beginnings of human civilization. From the very start of the homo sapiens, this tool served as a tool and a weapon of war. Foresters went to the forest and Vikings to the war with this instrument.