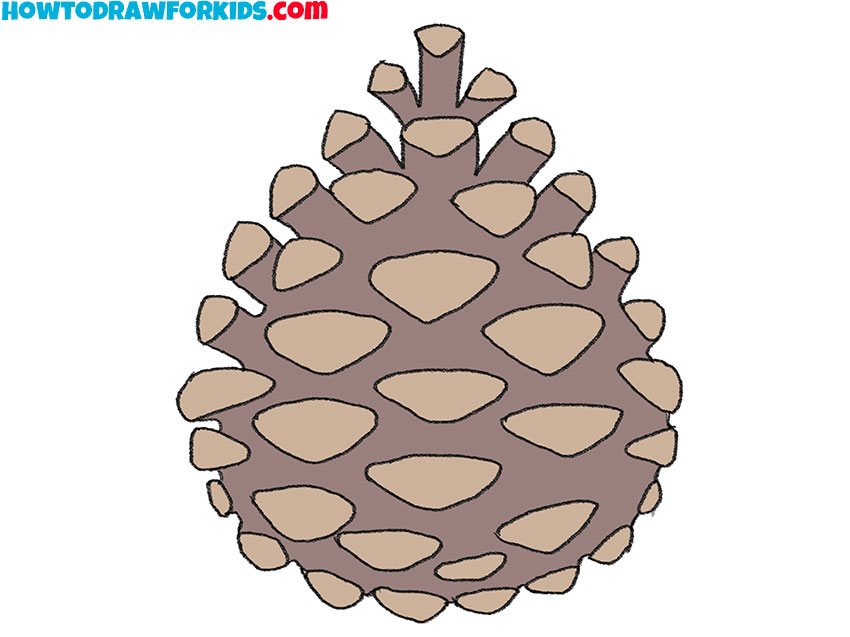
How to Draw a Pinecone
In this lesson, you will learn how to draw a pinecone. This lesson consists of only seven steps, and you will definitely enjoy it.
I have prepared for you an excellent and very useful drawing lesson, in which I will tell and show you how to draw a pinecone in step by step. In the process of completing this lesson, you can practice drawing small details.
This lesson was created specifically for beginner artists, so you will definitely cope with it. Surely you have ever seen pinecones if you walked in the forest.
Pinecones are the fruit of coniferous trees. There are cedar, cypress, fir, spruce, and pinecones. With the help of this drawing lesson, you will be able to learn how to draw a pinecone.
Pinecones are usually short, dark brown with wooden scales. Often, various handmade crafts are made from pinecones. By learning how to draw a pinecone with the help of this instruction, you will be able to depict it in the background of a natural landscape, forest, near a pine tree.
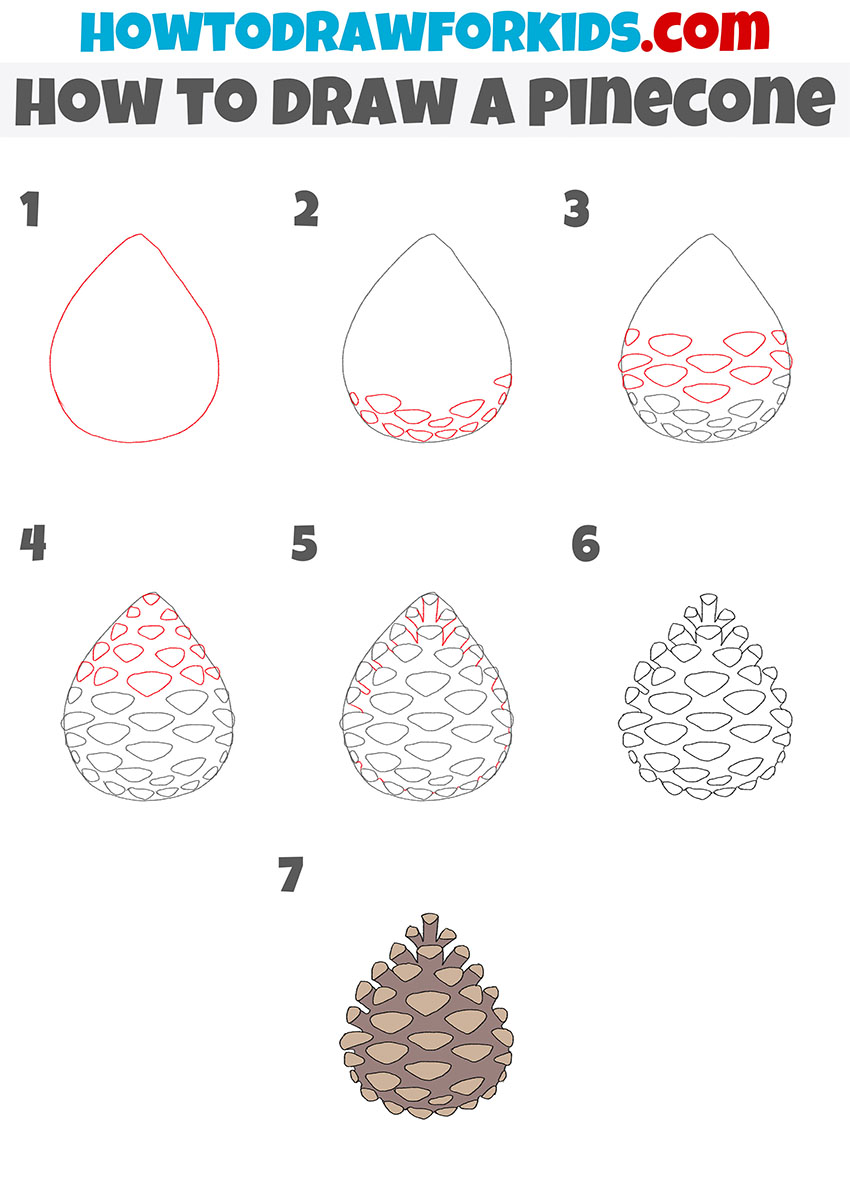
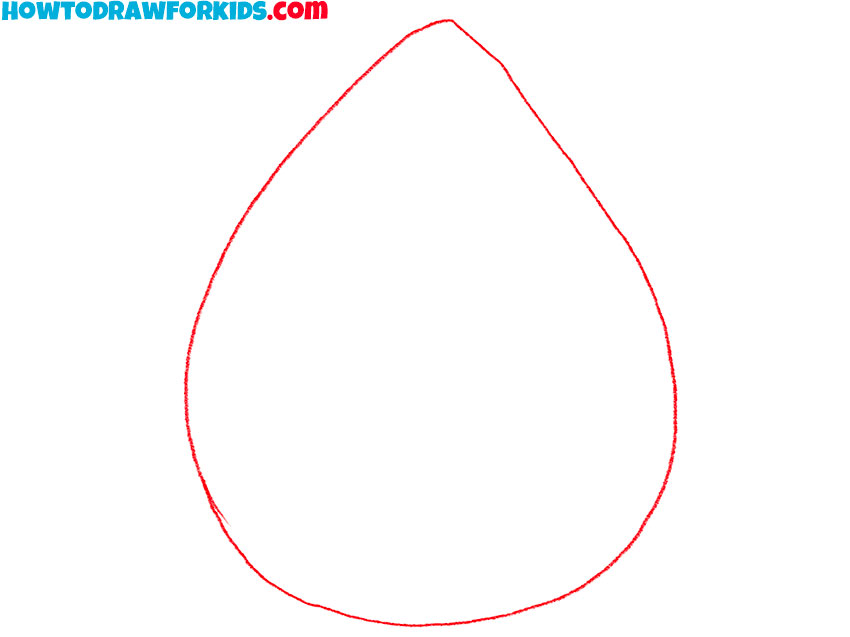
I think you are ready to start doing this work. At the beginning of drawing a pinecone, you will need to draw a figure with a guideline to indicate the size and location of the pinecone, and then draw in smaller details.
Materials
- Pencil
- Paper
- Eraser
- Coloring supplies
Time needed: 30 minutes
How to Draw a Pinecone
- Mark the size and location of the bump.
Depict one large figure with the help of an auxiliary line, as shown in the figure.
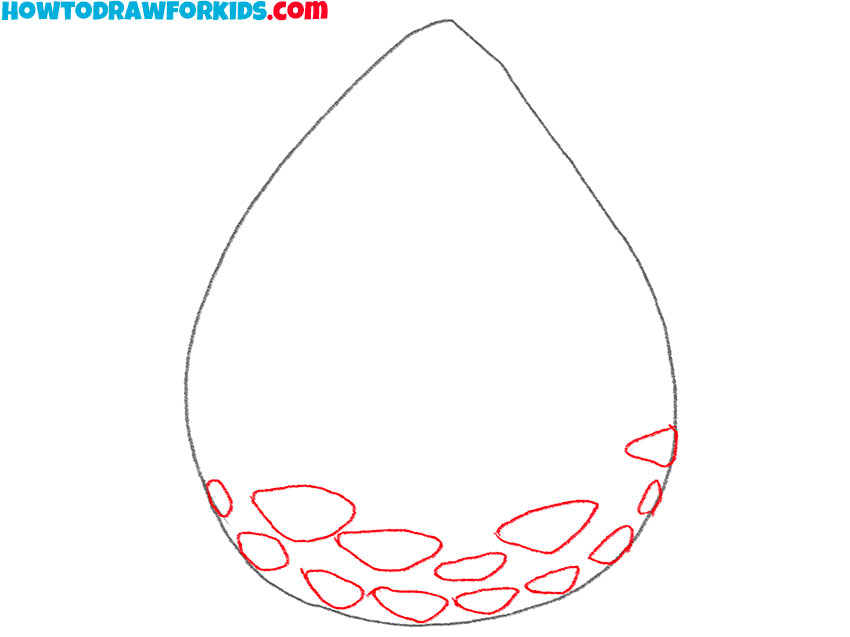
- Start drawing the scales of the pinecone.
At the bottom of the previously drawn shape, add many small shapes using curved lines.
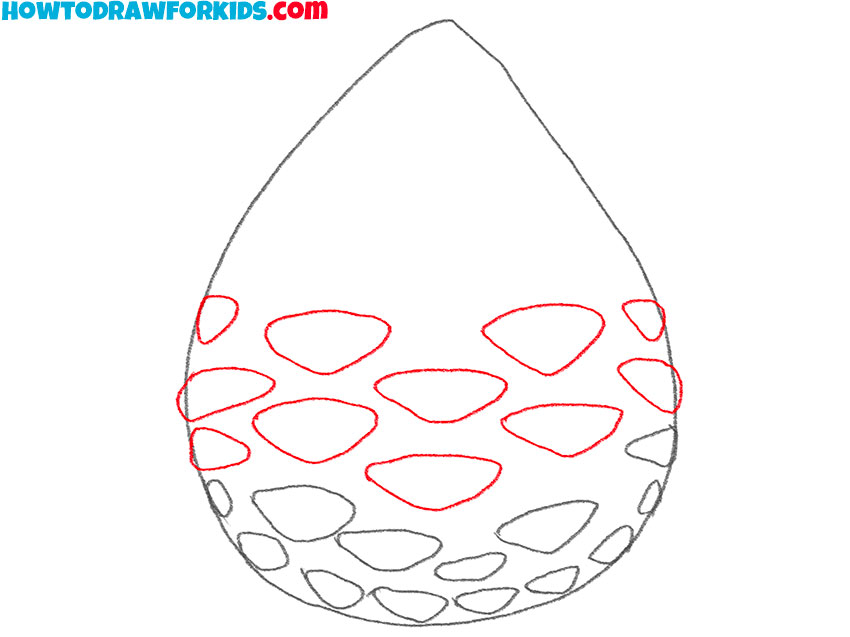
- Depict the scales in the middle part of the pinecone.
Now you need to add some more shapes of different sizes as shown in the picture.
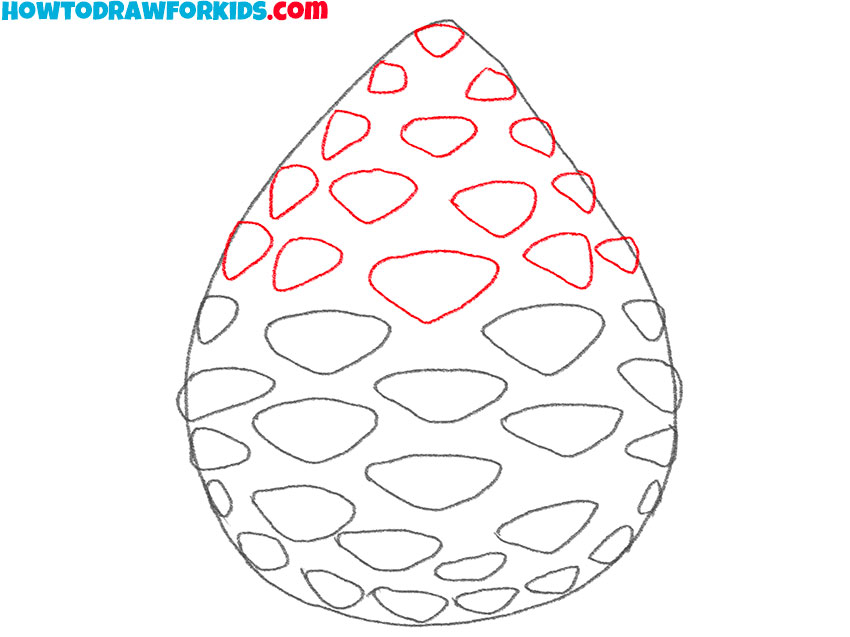
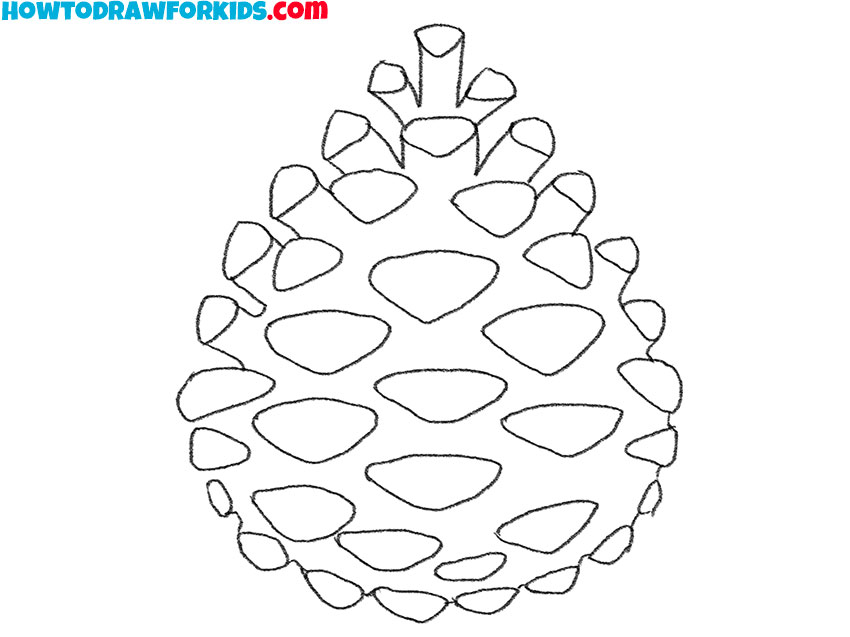
- Finish drawing the edges of the scales of the pinecone.
Now add shapes using curved lines at the top of the pinecone.
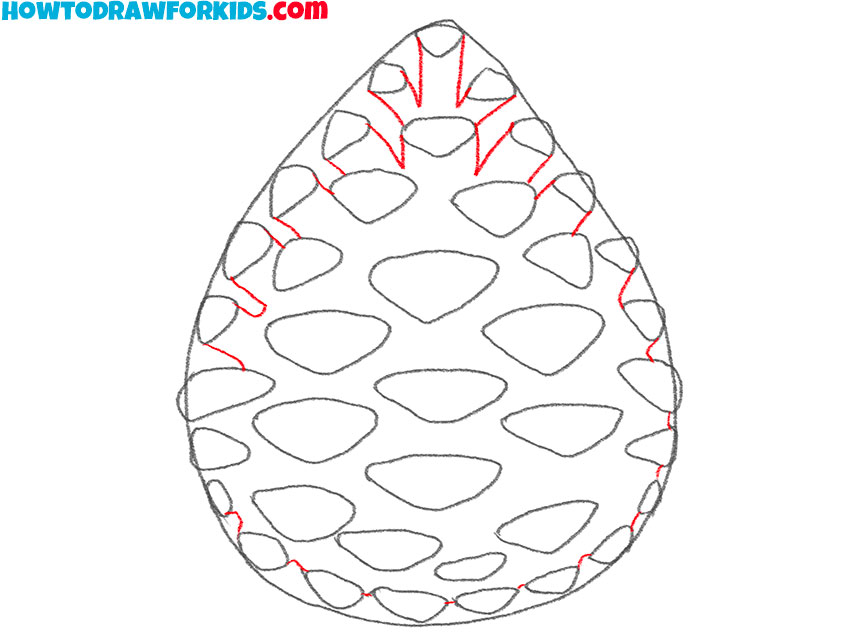
- Finish drawing the scales around the edges of the pinecone.
Add curved lines of various lengths around the edges to connect the scales to the pinecone.
- Correct inaccuracies.
Now you need to use the eraser to remove the guidelines.
- Color the drawing.
To color the pinecone, use different shades of brown.
Traditionally, for your convenience, I have prepared a PDF file that contains a short version of this lesson, as well as training materials that will help you complete this lesson.