How to Draw a Ferris Wheel
Using several circles and rectangular lines, we’ll build a truly detailed structure in this tutorial on how to draw a Ferris wheel.
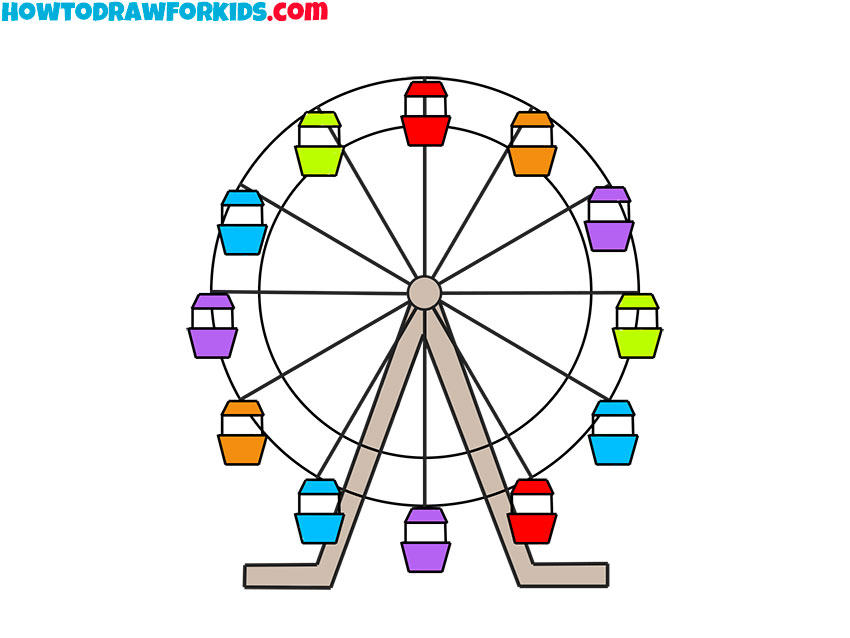
This tutorial is about how to draw a Ferris wheel step by step. You can use the skills acquired in this drawing lesson to draw other drawings.
You will be able to draw a city landscape as well as an amusement park and add an image of a Ferris wheel to your drawings. I think that you have ever seen a ferris wheel or ride on this attraction.
This is a mechanical attraction in the form of a large vertically mounted wheel, to the rim of which cabins for passengers are attached. Ride on this attraction, you can perfectly view the city landscape.
The drawing that you get will be very beautiful, bright and colorful. If you want to quickly learn how to sketch a ferris wheel step by step, then I suggest you prepare the materials you need for drawing and proceed with this tutorial.
Materials
- Pencil
- Paper
- Eraser
- Coloring supplies
Time needed: 25 minutes
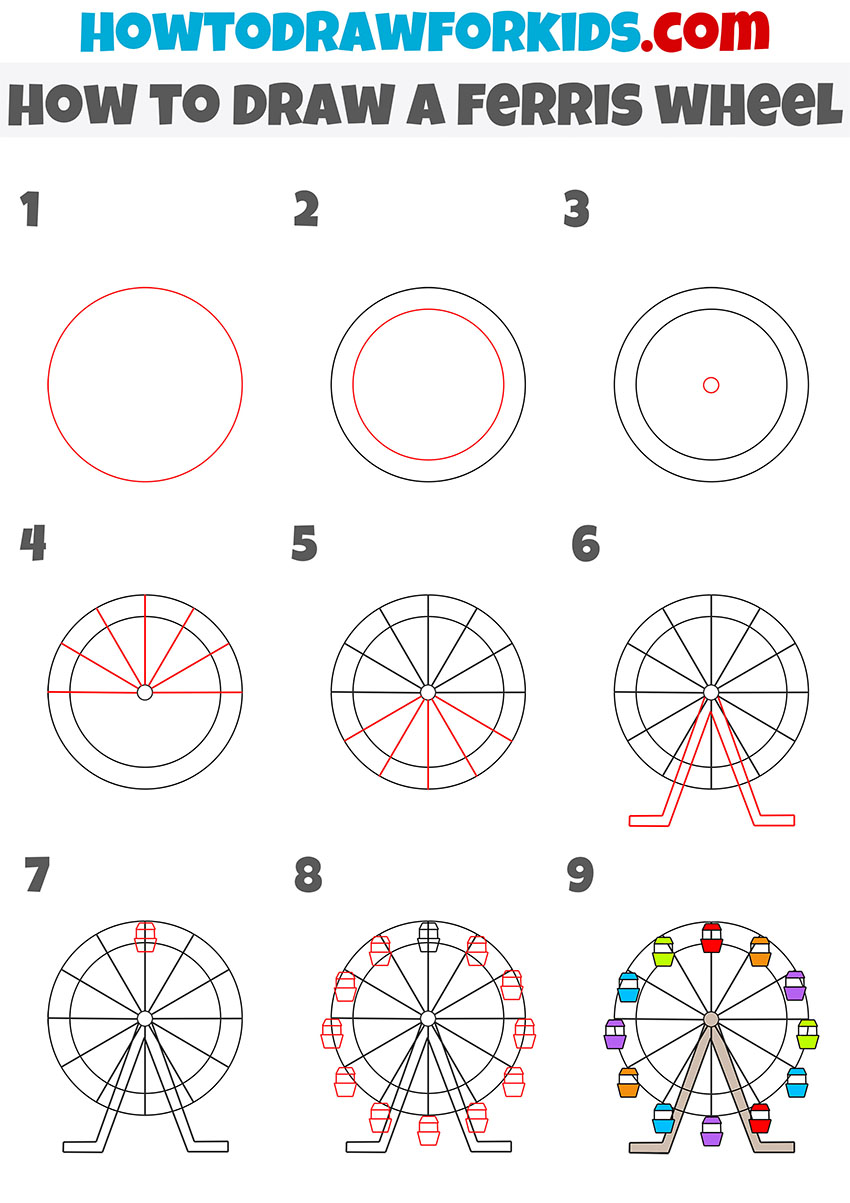
How to draw a Ferris wheel step by step
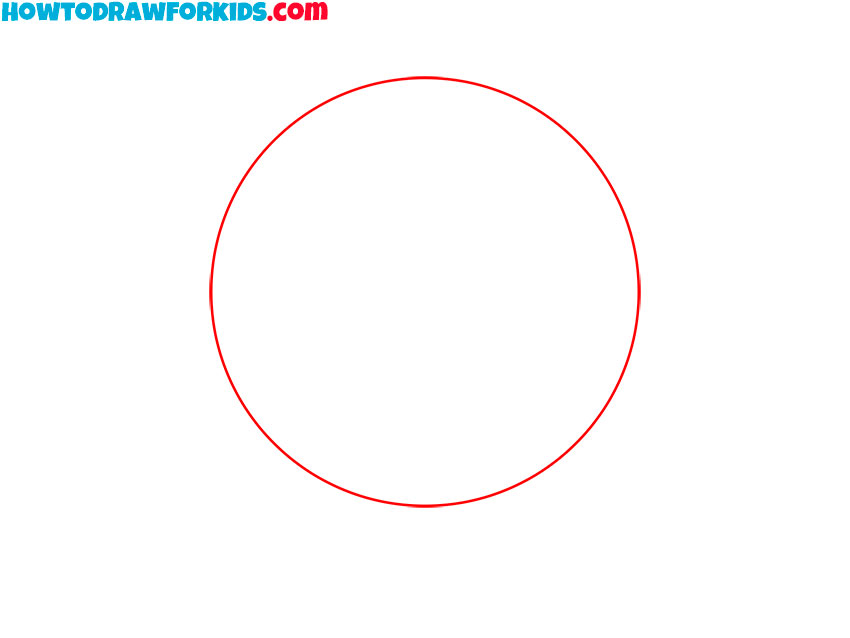
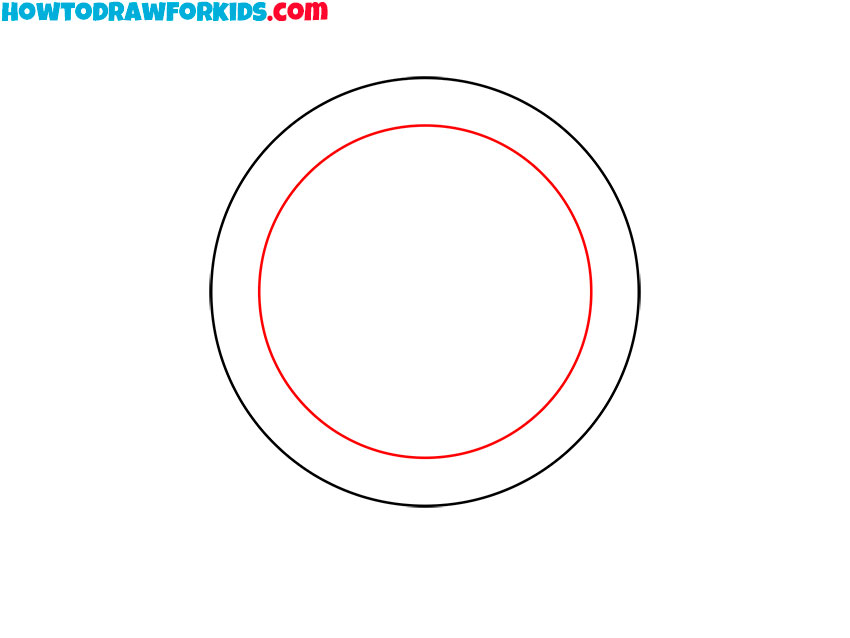
- Sketch the large main circle.
To start, sketch a circle near the center of the page. Keep the curve even because every spoke, cabin, and support will reference this rim. Use your wrist to rotate smoothly or a round guide if you have one. Leave space below for the A-frame legs and base.
- Sketch the smaller circle inside the main one.
The wheel needs a second ring to show structure and provide points for cabins. Inside the first circle, draw another circle that follows the same center, leaving a narrow, even gap between the two rims. The band should look like a donut. Keep the spacing consistent.
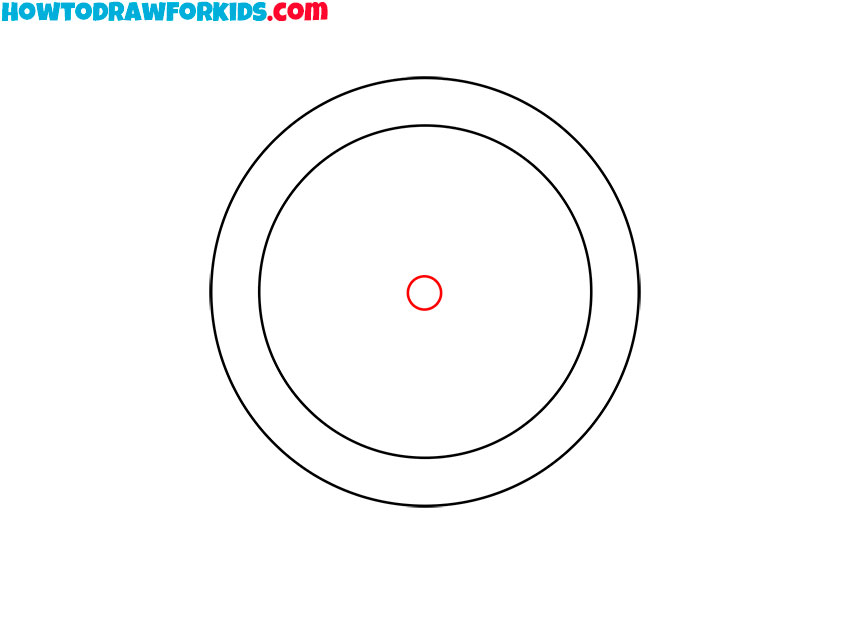
- Draw the hub of the Ferris wheel.
Spokes must converge at a precise center. Find the middle of the wheel and sketch a small circle for the hub. It should be clearly smaller than the inner rim and perfectly centered. Check with your eye that the hub sits equidistant from all sides; adjust if needed.
- Sketch the first set of straight spokes.
From the hub, draw several straight lines out to the inner rim: one horizontal, then a set of evenly spaced diagonals in the upper half. Let each spoke stop at the outer rim. Keep all lines thin and try to make them equal in length.
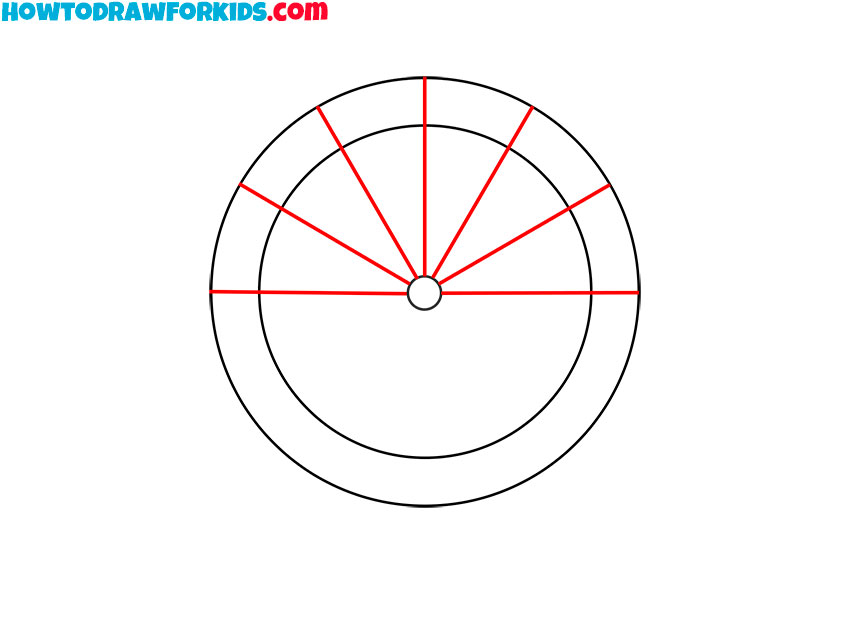
- Draw the remaining spokes of the Ferris wheel.
Continue drawing straight spokes from the hub to the outer rim, matching the angles already placed until you have a full radial pattern. Confirm that opposite spokes align across the hub. Check proportions and fix the sketch if needed.

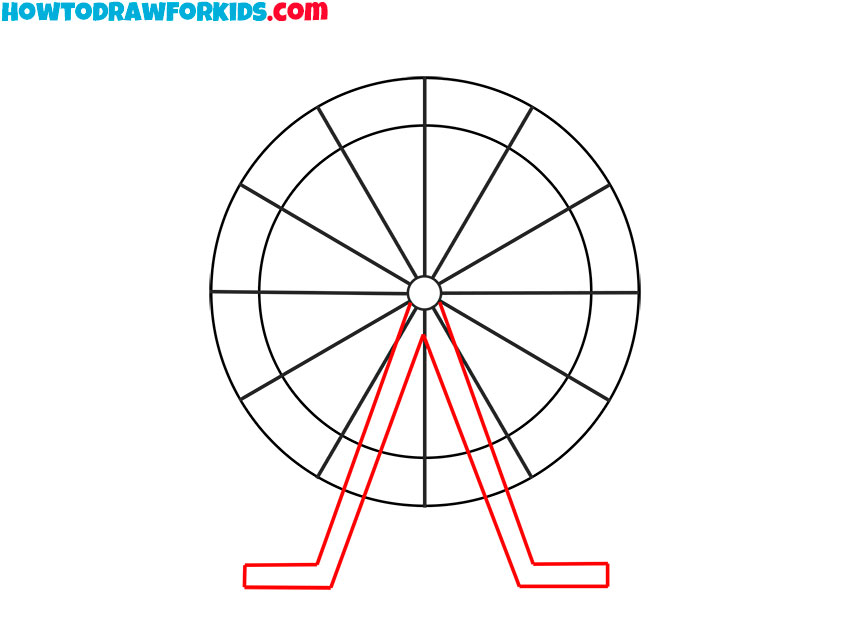
- Draw the supporting legs for the base.
From the hub area, outline two long legs that slope outward to the left and right, creating a wide A-frame. Use two parallel segments for each leg. At the bottom, draw short, rectangular feet that sit flat on the ground, extending forward. Let each leg connect to the wheel at the hub level.
- Draw the first cabin of the Ferris wheel.
Trace over each spoke with a clean, single pass so line weight is even. Reinforce the hub. Check the A-frame any tiny gaps. Using clear, dark lines, carefully draw the cabin at the very top of the structure. The cabin consists of a small trapezoidal roof, a rectangular window and a trapezoidal lower part.
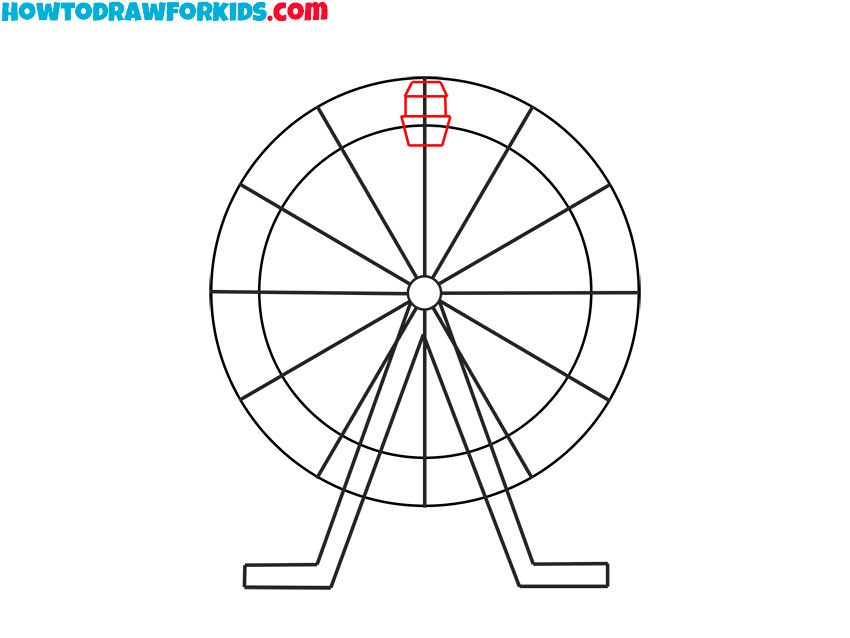
- Add the remaining passenger cabins around the rim.
Around the inner rim, continue drawing small, boxy cabins at regular intervals. Just continue clockwise and counterclockwise to fill the circle. Each gondola is a short rectangle. Keep their sizes consistent and oriented so they remain upright.

- Add color to the cabins and base.
Use color to separate parts and add an amusement-park feel. Fill each cabin with a bright, distinct hue, alternating as you move around the rim. Keep windows a light neutral. Paint the A-frame legs a warm beige or steel tone. You can also add a soft shadow under the feet.

I have prepared a PDF file for you that contains a short version of this drawing lesson