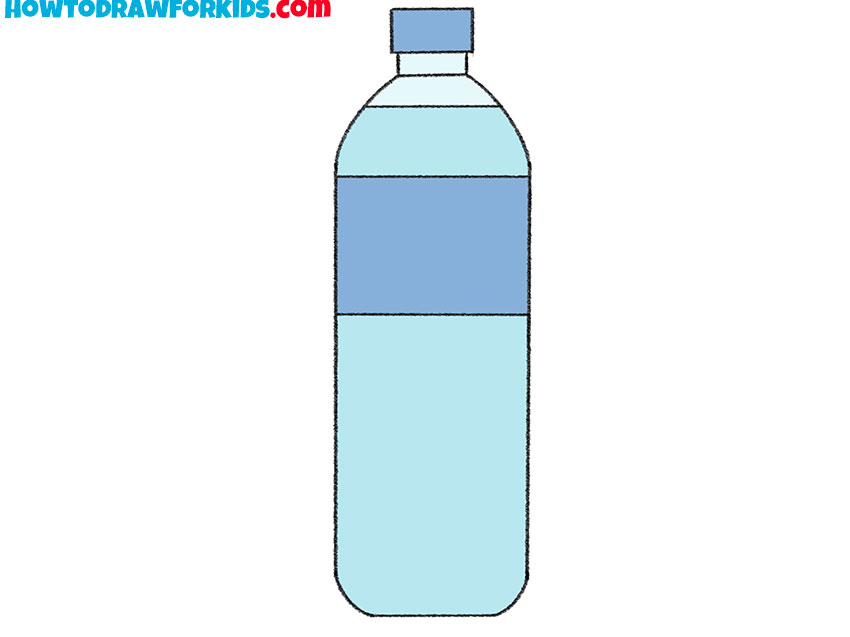
How to Draw a Bottle of Water
Welcome to this lesson, where you’ll learn the art of illustrating everyday objects, starting with how to draw a bottle of water. I’ve designed this tutorial to be straightforward and easy to follow, ensuring that each of you can achieve great results. We’ll tackle the challenge of transforming simple lines and shapes into a realistic depiction.
How to Draw a Bottle of Water: Basic Information
It’s with great excitement that I present to you my simple guide on how to draw a bottle of water. My unique method aims to demystify the artistic process, ensuring that anyone can follow along and create something wonderful. This lesson is more than just a set of instructions; it’s a gateway to mastering form and dimension on paper.
As we delve into the drawing, we’ll concentrate on capturing the essence of the bottle’s shape – its slender form and subtle curves. Each step is carefully crafted, allowing you to gradually build up your drawing without feeling overwhelmed. Pay close attention to the gentle contours and the precise proportions that I’ve laid out.
In our final steps, when we draw a bottle of water, the addition of shadows and highlights will bring your artwork to life. This method I’ve developed is meant to empower you to not just replicate a bottle, but to infuse your work with a sense of realism and vitality. Let’s grab our pencils and begin this creative adventure together.
Bottle of Water Drawing Tutorial
Materials
- Pencil
- Paper
- Eraser
- Coloring supplies
Time needed: 25 minutes
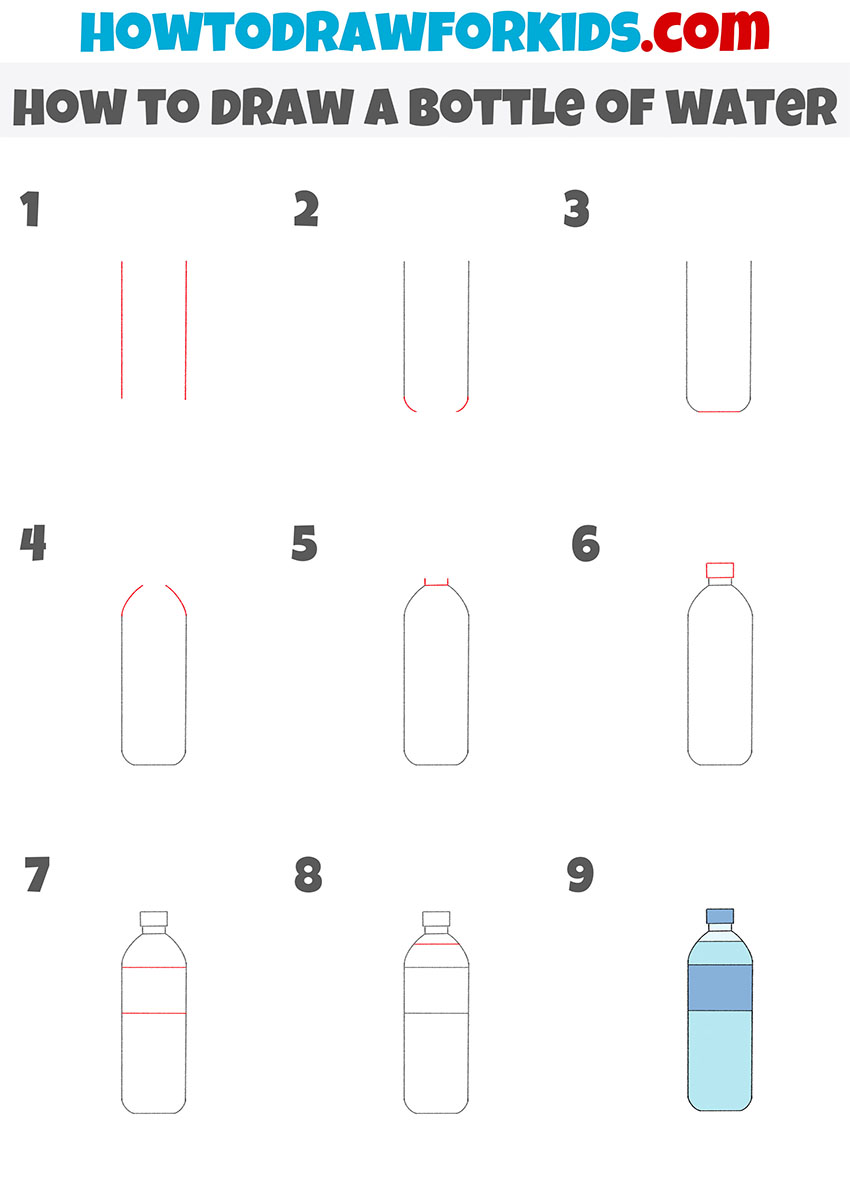
How to Draw a Bottle of Water
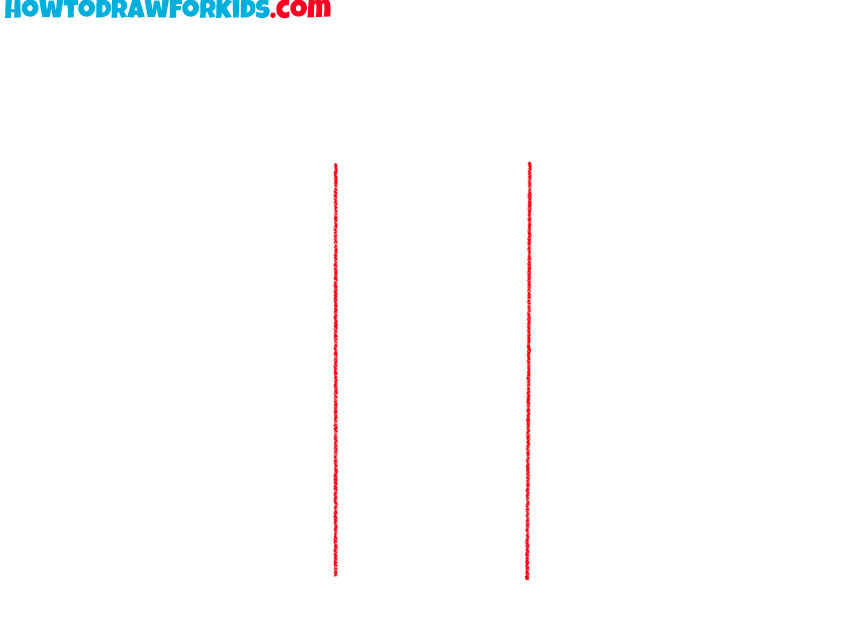
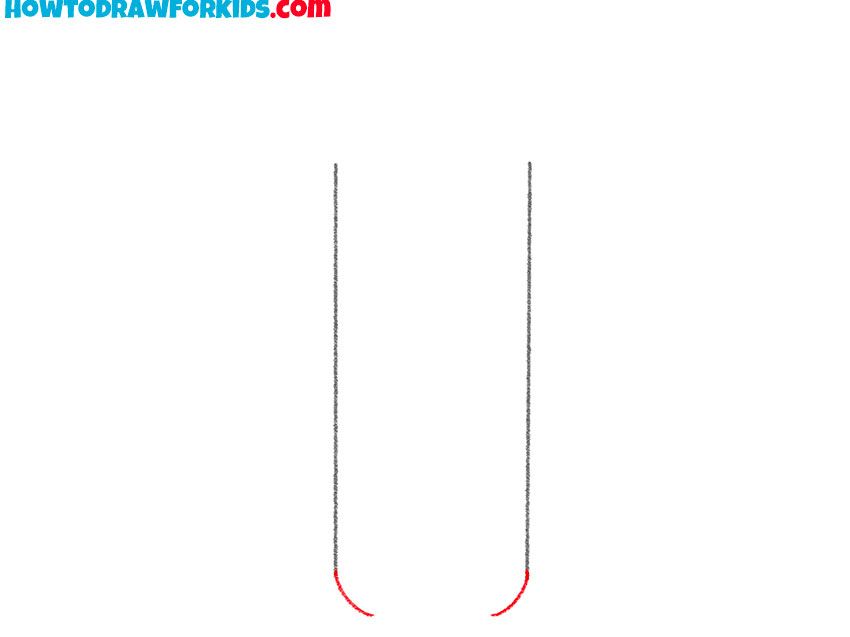
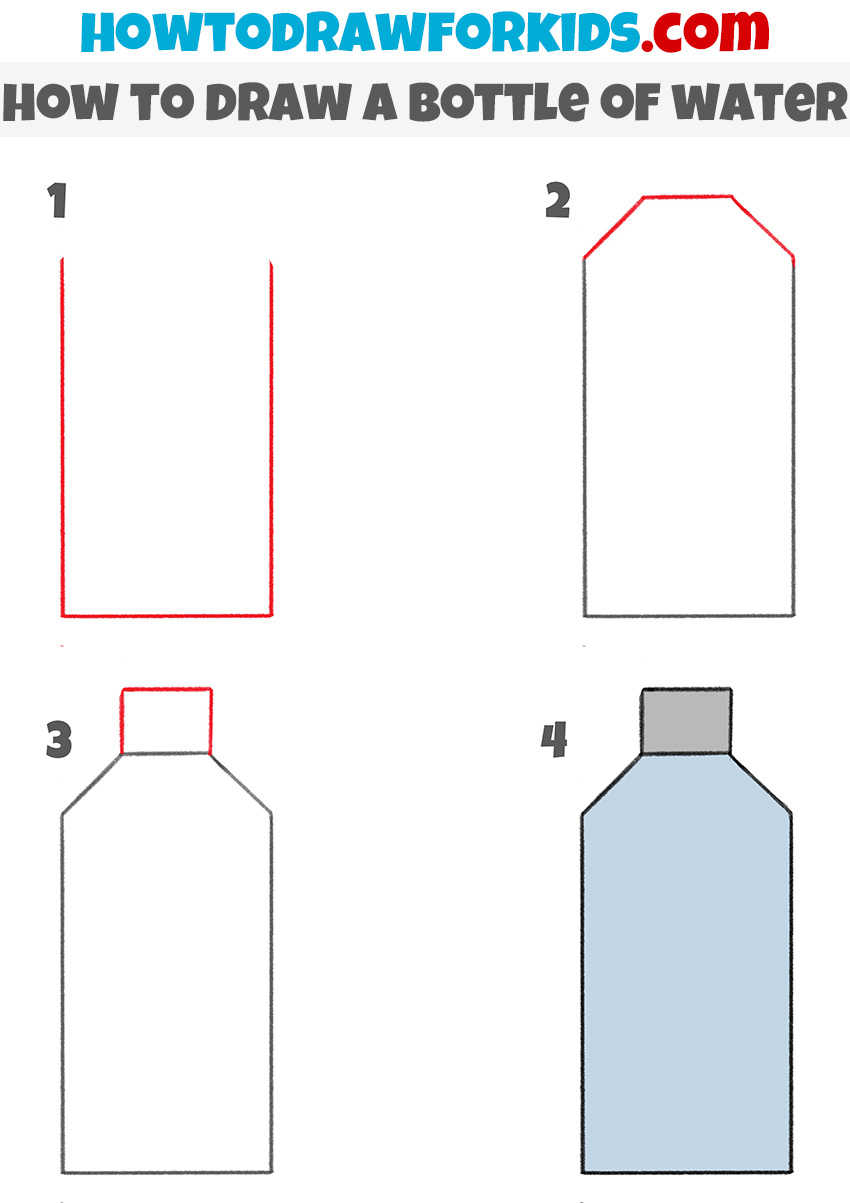
- Draw the sides.
Determine the height and width of the bottle and draw two straight vertical lines.
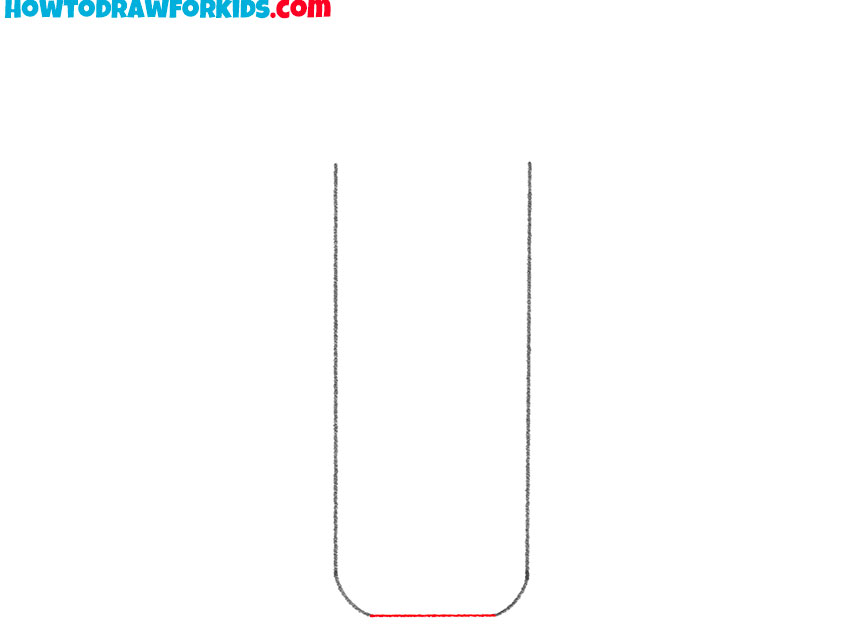
- Start drawing the bottom of the bottle.
On each side, depict small, rounded lines to draw a smooth transition to the bottom.
- Add the bottom of the bottle.
Draw a horizontal connecting line at the bottom.
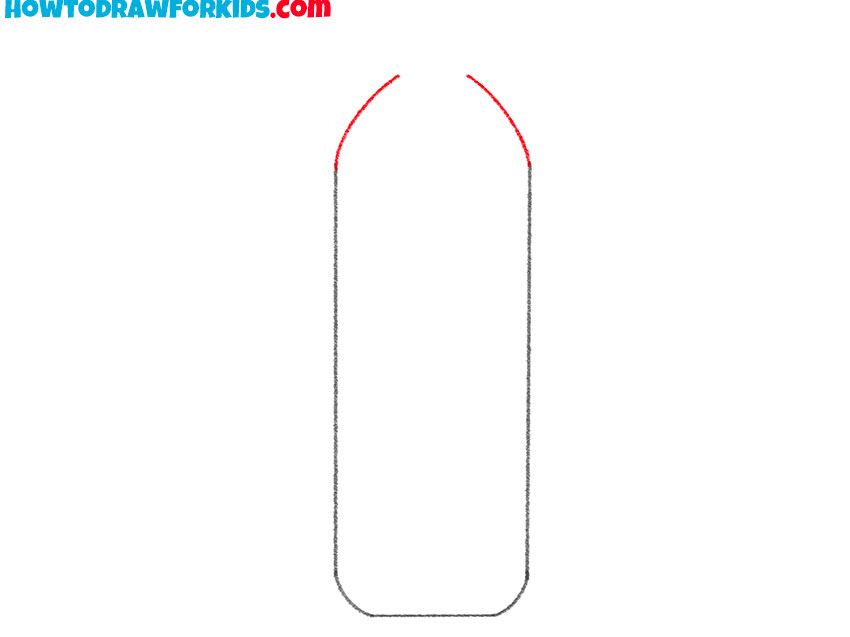
- Start drawing the top of the bottle.
At this stage, sketch out smooth lines on each side.
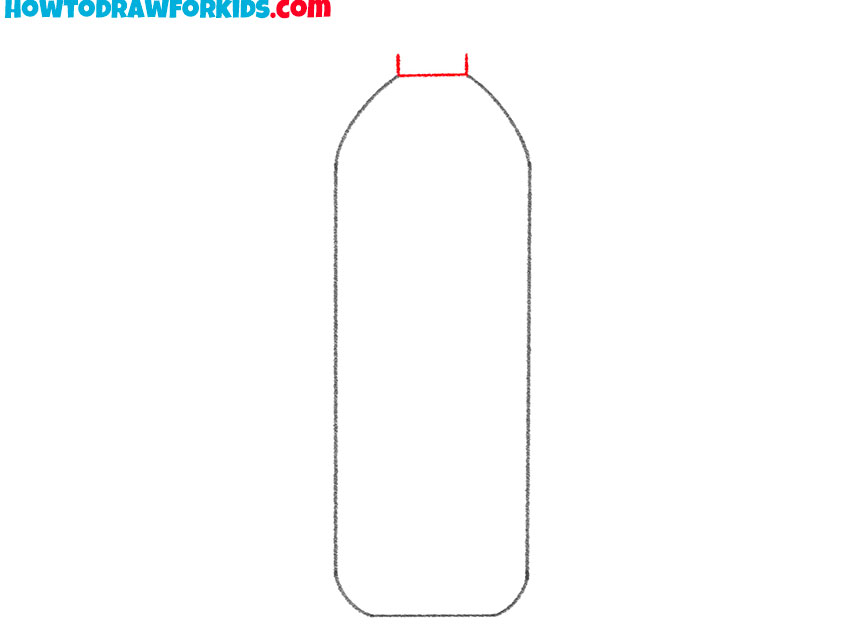
- Depict the neck of the bottle.
Use several even, straight lines to depict the neck.
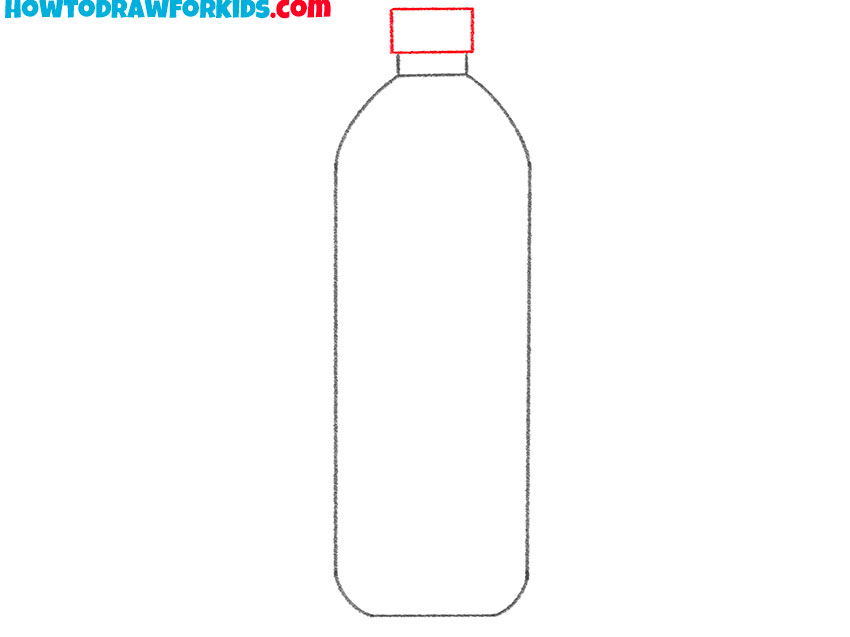
- Sketch out the cap.
At the top, draw the cap in the shape of a small rectangle.
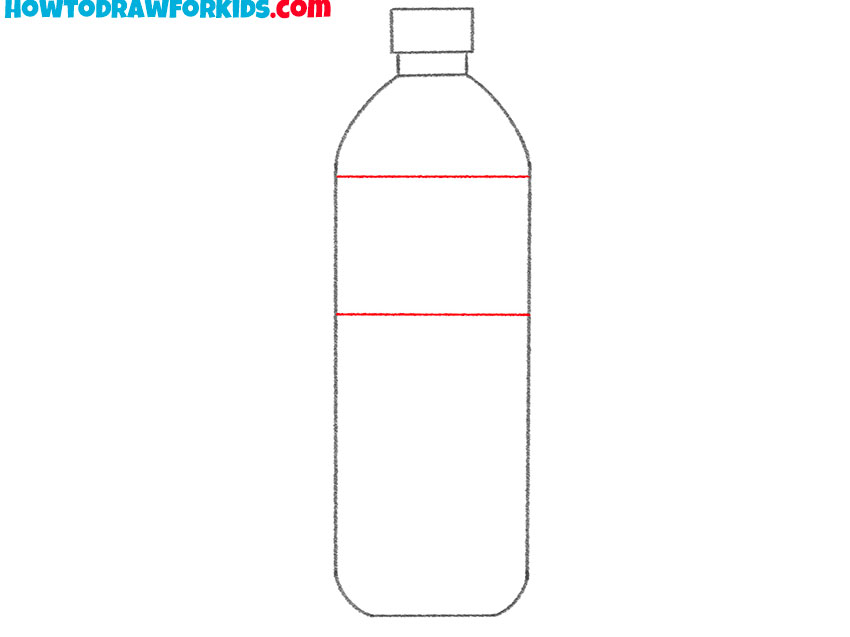
- Draw the outline of the label.
Depict two straight horizontal lines.
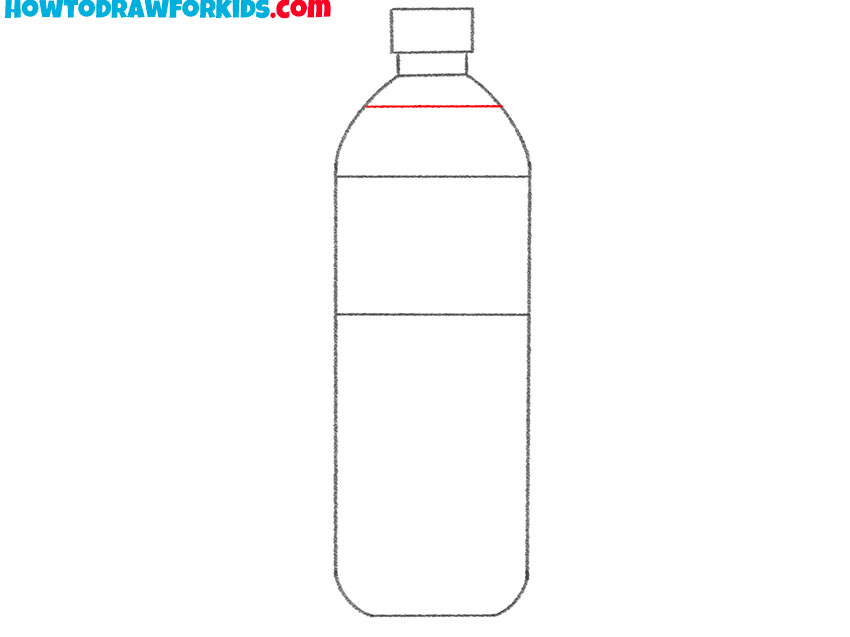
- Add the water level in the bottle.
Draw a horizontal line across the top of the bottle.
- Color the bottle of water.
You will need shades of blue.
Additional Content
I’ve taken the extra step to ensure your learning experience is seamless by crafting a free, downloadable PDF version of this lesson. This abridged guide retains all the essentials of how to draw a bottle of water, formatted for ease of use wherever you may be. It’s a resource you can count on, with or without internet connectivity.
The PDF is designed for convenience, allowing you to focus on mastering each stage of the drawing process at your leisure. It’s a distilled version of the full lesson, providing you with a quick reference that supports your practice sessions, even in the most remote locations or when you simply prefer to disconnect.
By providing this downloadable resource, I aim to support your artistic journey every step of the way. Whether you’re out on a nature trip or sitting cozy at home, you can draw a bottle of water using this guide. It’s my gift to you, to ensure that learning to draw is as accessible and enjoyable as possible.
Alternative Drawing Technique
In addition to our main lesson, I’ve also developed an alternative, simpler technique for drawing a bottle of water. This variant is crafted to encourage further practice and enhance your artistic skills. It’s streamlined to focus on the fundamentals, making it ideal for beginners or for those seeking a quick sketch approach.
This secondary method is about breaking down the drawing into even more basic shapes and lines, enabling you to grasp the concept with greater ease. It’s a stepping stone, one that I hope will build your confidence and inspire you to experiment with different styles and complexities in your art.
How to Draw a Bottle of Water for Kindergarten
This alternative method, tailored for kindergarteners, focuses on simplicity and the joy of creating with just four easy steps. We start with two straight vertical lines to establish the sides of the bottle, ensuring it’s an exercise in symmetry and control. Even the youngest artists can feel accomplished as they draw these foundational lines.
Next, we add the top and bottom of the bottle with a touch of curve, practicing the soft control needed to round off the edges. This step introduces the concept of shapes coming together to form a whole. It’s not just about the lines but understanding how they connect, which is a fundamental skill in drawing.
Finally, we cap off our bottle with a simple rectangle for the lid and color in the body, teaching children about the parts of the bottle while also giving them the freedom to choose their colors. This four-step process is quick, fun, and perfect for little hands eager to learn and create with minimal details and maximum enjoyment.
Polishing Your Bottle Drawing Skills
As we wrap up our lesson on how to draw a simple bottle of water, I want to leave you with some valuable tips and tricks. These nuggets of wisdom will help you refine your drawing and add a spark of creativity to your art. Every artist finds their style through practice and exploration, so let these tips be your guideposts on that journey.
- Steady Your Lines: Practice drawing your lines with a steady hand to enhance the symmetry of your bottle.
- Light Touch: Start with a light pencil stroke; it’s easier to correct and build upon.
- Color Inside the Lines: When coloring, keep within the lines for a clean, professional look.
- Shading: Experiment with shading to give your bottle a three-dimensional feel. Read about light and shadow in detail in my article.
- Symmetry Shortcuts: Use a folded paper to trace one side of the bottle and replicate it on the other for perfect symmetry.
- Personal Touch: Add unique details, like a label or pattern, to make your bottle one-of-a-kind.
These tips and tricks are stepping stones to advancing your artistic abilities. They are meant to inspire you to experiment and discover what works best for you. Carry them into your next artistic endeavor and watch as your skills blossom. Keep practicing, stay curious, and most importantly, enjoy every stroke of your creation.
Conclusion
Congratulations on completing our water bottle drawing! I invite you to delve deeper into the world of drawing with the myriad of lessons on my website, whether you’re looking to capture your essence in a self-portrait or recreate the exotic patterns of a zebra.
Make sure to subscribe to my social channels so you won’t miss out on any announcements of new, inspiring content. And if there’s a drawing challenge you’re eager to tackle, let me know in the comments section. Your ideas for future lessons are the guiding stars that help me create content that resonates with your artistic spirit.