How to Draw a Paintbrush
A paintbrush is one of the main tools used by an artist, and its long, narrow shape is useful for practicing straight lines. In this tutorial on how to draw a paintbrush, you will sketch one of the main artist’s tool using simple lines.
Prepare to Draw a Paintbrush
A paintbrush may look simple, but its long shape can look unnatural if the sides of the handle do not follow the same direction. Check the angle of the first two lines before adding the smaller parts.
This subject gives you useful practice in drawing straight lines close together. The space between them should remain nearly equal along the handle.
The bristles narrow toward one point, so their outer edges should meet smoothly rather than ending at different heights. Small differences will not spoil the drawing, since real brush bristles are rarely perfectly even.
Paintbrush Drawing Tutorial
Materials
- Pencil
- Paper
- Eraser
- Coloring supplies (brown, blue, and beige)
Time needed: 25 minutes
How to draw a paintbrush step by step
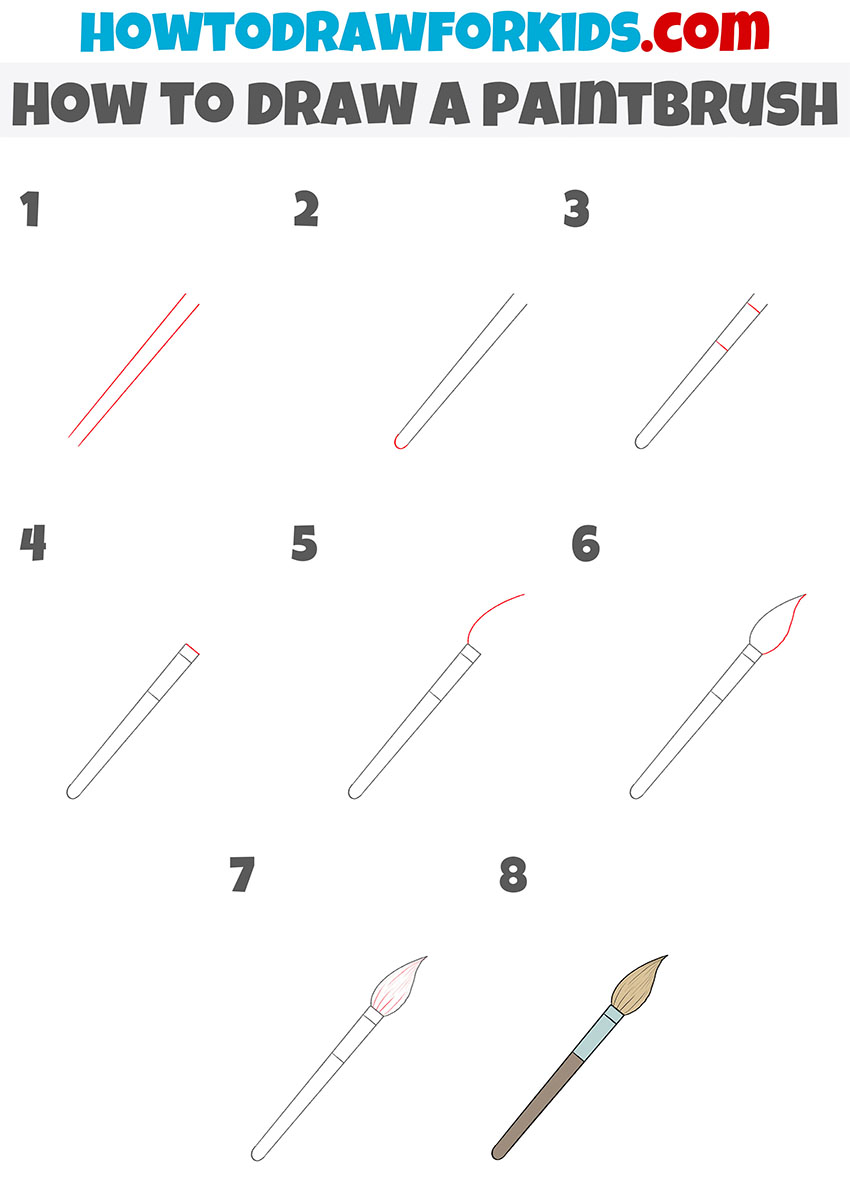
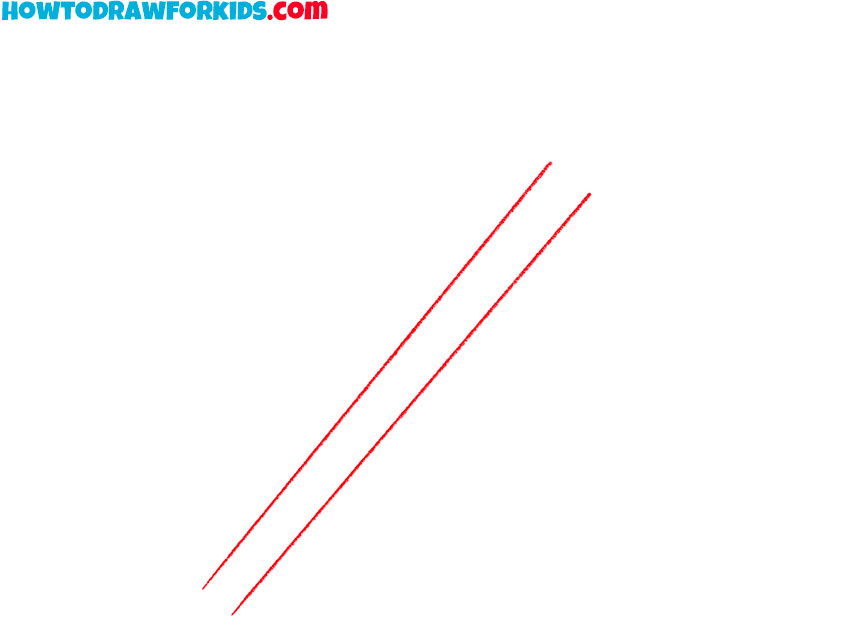
- Outline the paintbrush handle.
Mark the length and angle of the paintbrush with two straight, parallel lines. Leave a nearly equal distance between them so that the handle doesn’t become noticeably wider at both ends.
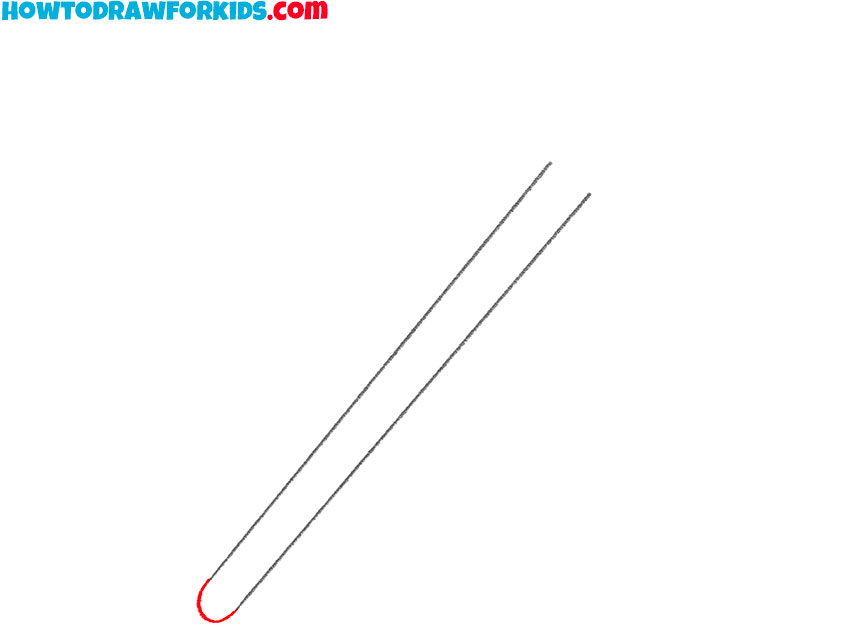
- Close the end of the handle.
Connect the lower ends of the handle with a short curved line. Let the curve follow the width of the handle.
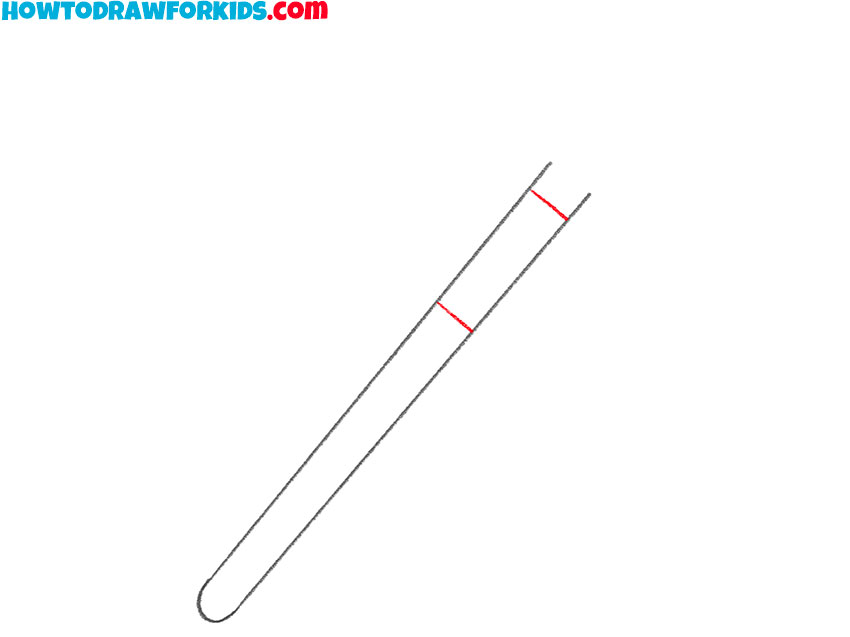
- Mark the paintbrush ferrule.
Add two short lines across the upper part of the handle. Place them at the same angle to mark the section of the metal ferrule.
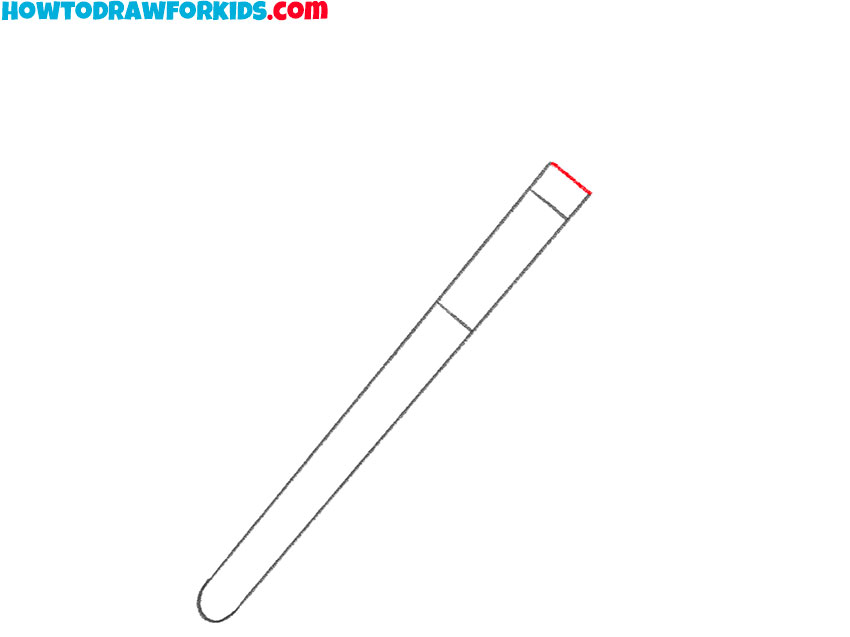
- Add the upper edge of the ferrule.
Draw another short line across the paintbrush above the first pair. This line separates the metal ferrule from the bristles and should follow the same angle as the others.
- Draw one side of the bristles.
Extend a smooth line upward from one side of the ferrule. Curve it gradually toward the center to begin the pointed outline of the paintbrush bristles.
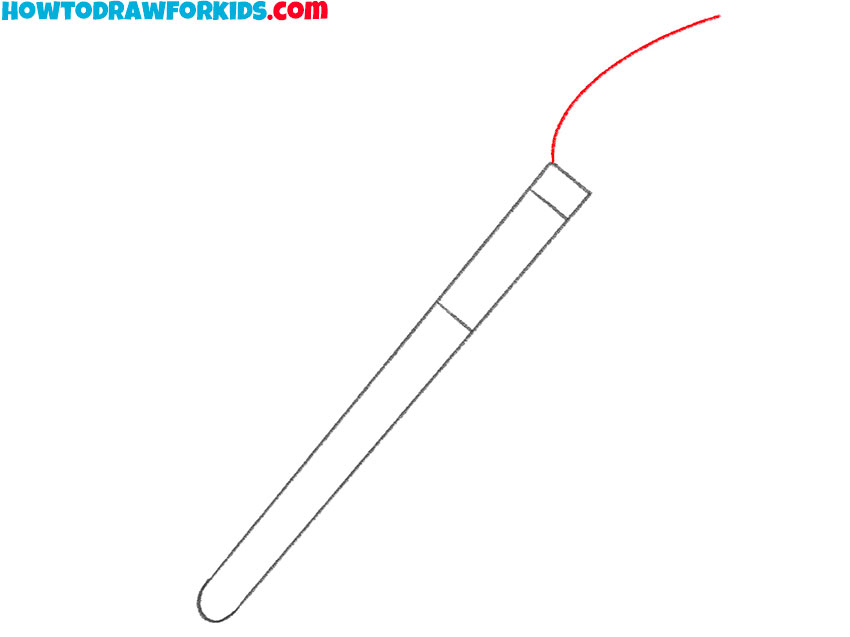
- Complete the pointed bristles.
Outline the other side of the bristles with a similar curved line. Bring the two sides together at the tip making the point look narrow.
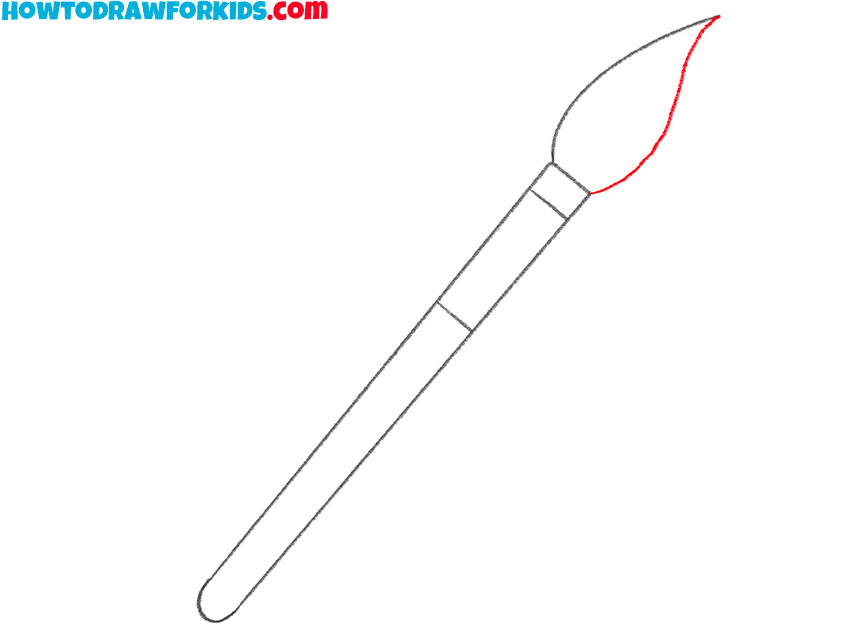
- Add lines inside the bristles.
Sketch several thin lines inside the pointed section to separate a few groups of hairs. Start each line near the ferrule and direct it toward the tip of the brush.
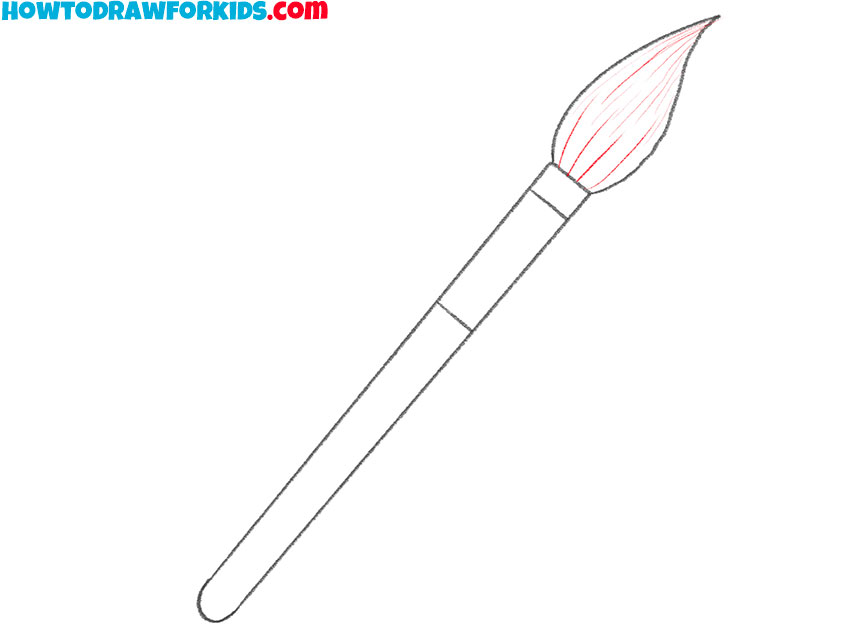
- Color the paintbrush drawing.
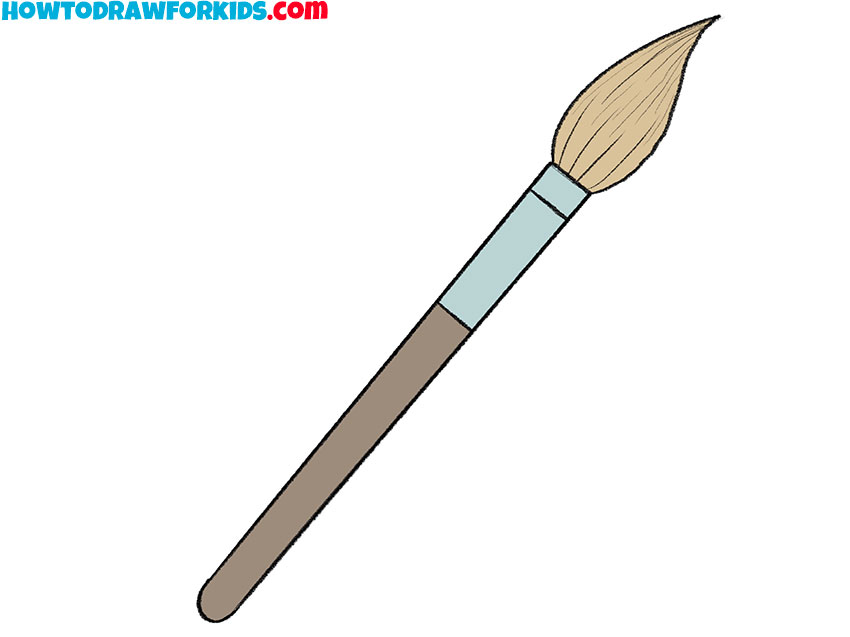
Use brown for the wooden handle, blue for the metal ferrule, and beige for the bristles. You can add a slightly darker shade near the edges if you want to separate the parts more clearly.
Paintbrush Drawing Printables
Download the PDF to use the paintbrush steps away from the screen. The printable pack also includes a coloring page, a tracing worksheet, and a grid drawing worksheet.
Simple Paintbrush Tutorial for Preschoolers
The main tutorial uses a long handle and pointed bristles. The next version shortens these parts and removes most of the small details, so younger children can work with larger shapes.
Begin with a narrow rectangle for the ferrule. Add a long handle, then close the end with a curved line.
Besides the ferrule, outline the bristles with two sloping sides. Join them with a wide zigzag line to suggest separate groups of hairs.
Color the handle brown, the ferrule gray, and the bristles blue. You can choose another bristle color to make the brush look as though it has just been dipped in paint.
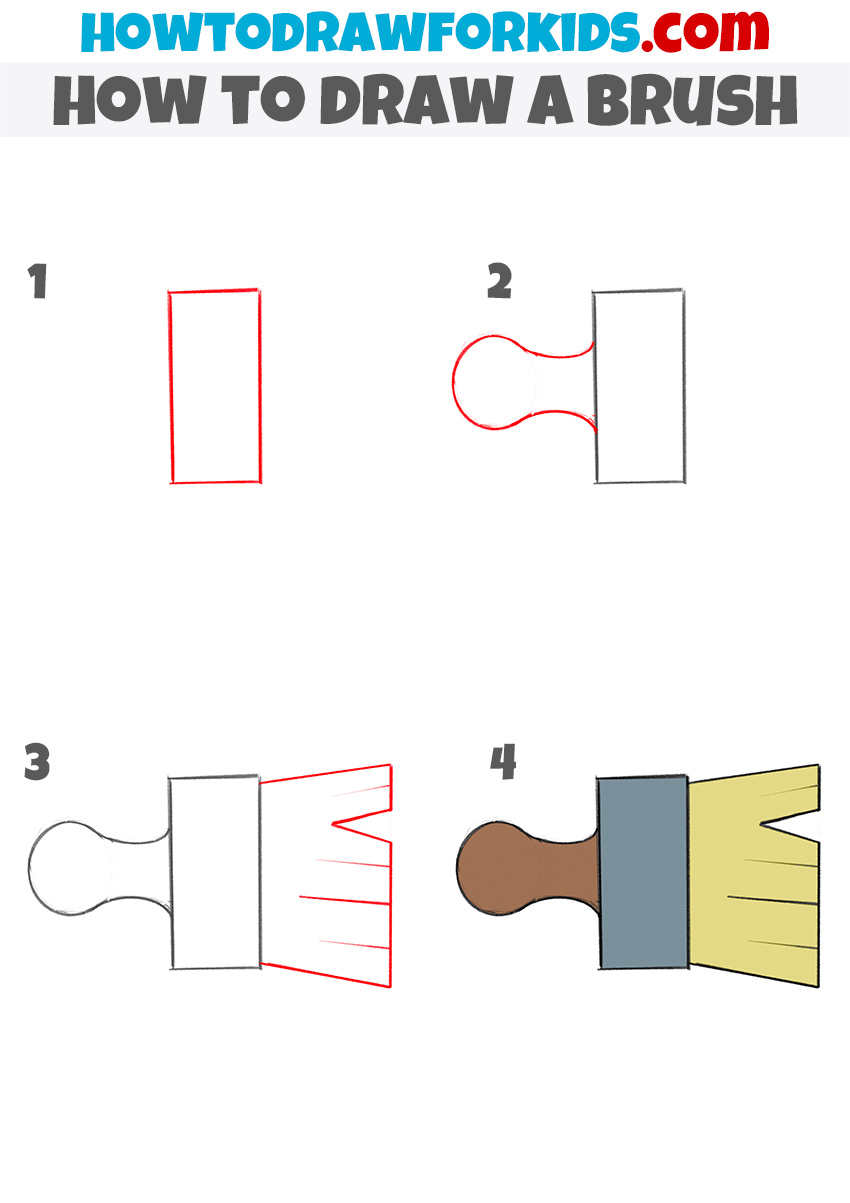
Tips for Drawing a Paintbrush
A few small adjustments can make the paintbrush look straighter and more natural. Use these points when checking your drawing.
- Check the handle: The two sides should follow the same direction. If they spread apart too much, the handle will look wider at one end.
- Place the ferrule: Draw its crosswise edges at the same angle. This makes the metal section look firmly attached to the handle.
- Shape the bristles: Let the outer lines narrow gradually toward the tip. A sudden change in direction can make the bristles look bent.
- Separate a few hairs: Use only several thin lines inside the bristles. Too many lines can make this small area look dark and crowded.
- Add a wooden surface: A few light strokes can suggest grain after you draw the wood texture on the handle.
- Use light and shade: Place a darker tone along one side of the handle and ferrule. The basic principles are explained in my article about drawing light and shadow.
These changes are easiest to make before coloring. Look over the direction of the handle first, then check where the bristles meet at the tip.
Conclusion
The long handle is the part that usually needs the most attention. When its sides remain mainly parallel, the ferrule and bristles are much easier to place.
You can now use this paintbrush in a larger picture of someone working at an easel. My tutorial on how to draw an artist gives you a suitable character for that scene.
A brush also works well beside a palette, paint tubes, or a sheet of paper. Changing the color at the tip is enough to represent that it has just been used.
Share your result in the comments in Pinterest and write which art tool you would like to draw next. You can also follow my social media pages to see new tutorials as they are published.