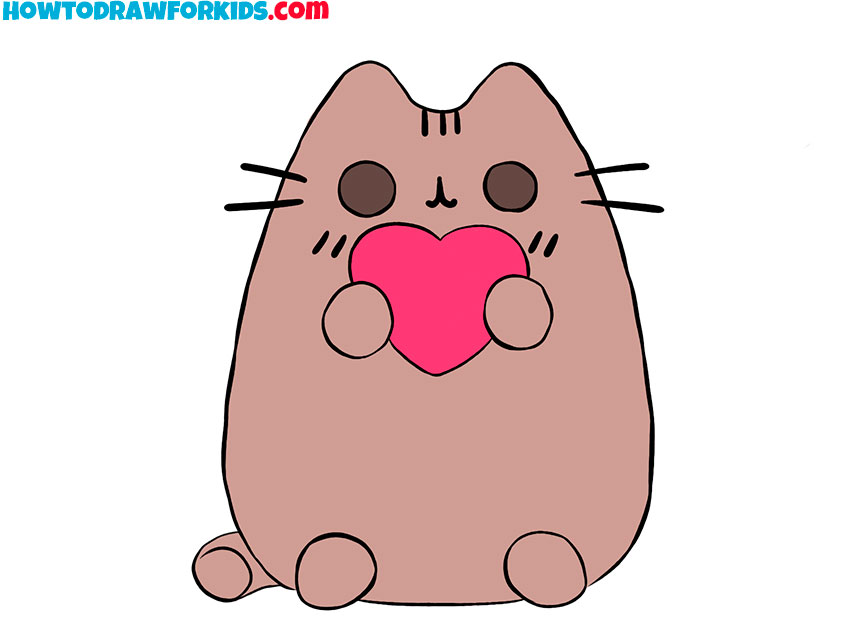
How to Draw Pusheen
Let’s turn simple lines and shapes into the adorable Pusheen with this engaging tutorial on how to draw Pusheen. Designed specifically for young artists, this guide will walk you through each step, ensuring a fun and successful drawing experience that captures Pusheen’s playful spirit.
How to Draw Pusheen: Basic Information
Gather round, young visionaries, for today we embark on a delightful quest to learn how to draw Pusheen, the internet’s cherished whiskered wonder. This tutorial is not just a set of instructions but a canvas for your imagination, where each line weaves the story of Pusheen’s playful life.
Within this lesson lies the heart of Pusheen’s charm — her soft, rounded form, the gentle sweep of her tail, and the twinkle in her joyful eyes. As your guide, I will reveal how these features come together in a symphony of simple strokes, creating a masterpiece that dances off the page.
And as our artistic journey concludes, not only will you have learned to draw Pusheen, but you’ll have also woven a bit of her soul into your artwork. This tutorial is designed to ignite the spark of creativity nestled within you, transforming blank pages into spaces where Pusheen’s playful presence can frolic forevermore.
Pusheen Drawing Tutorial
Materials
- Pencil
- Paper
- Eraser
- Coloring supplies
Time needed: 25 minutes
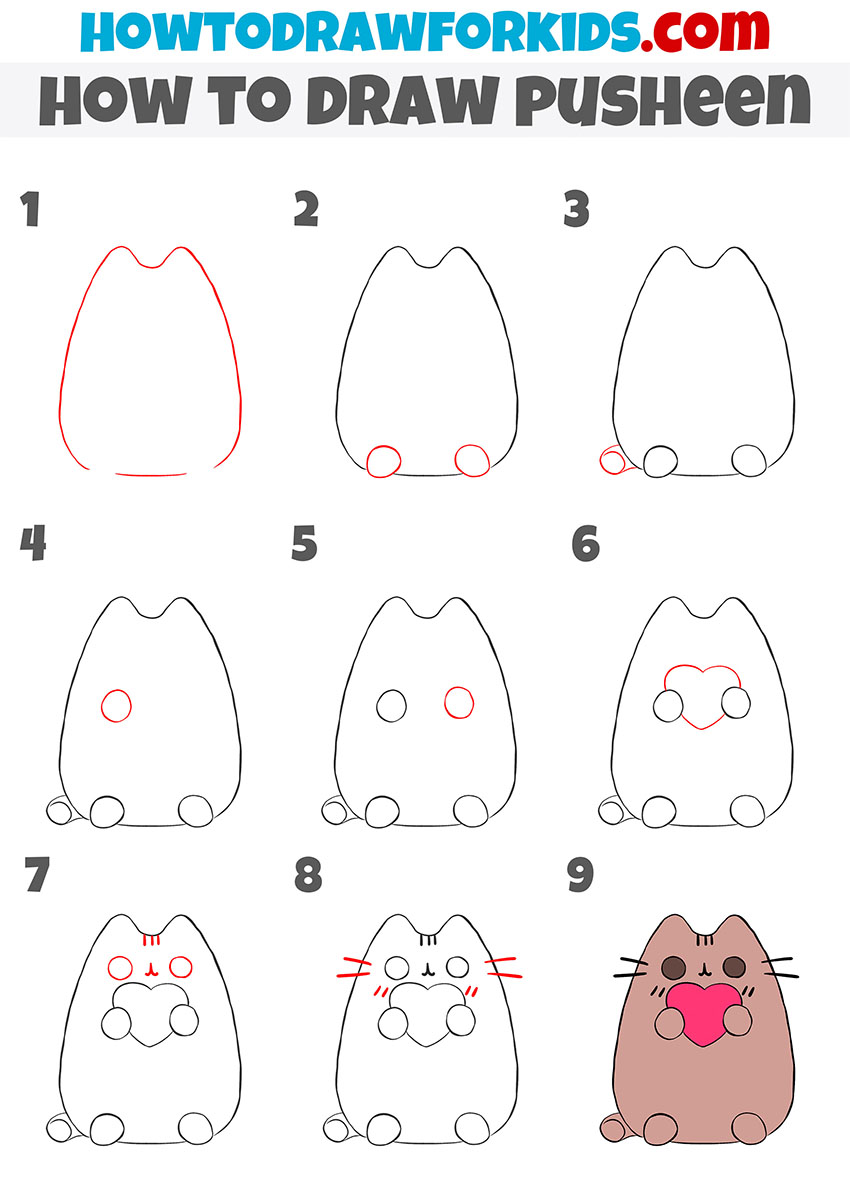
How to Draw Pusheen
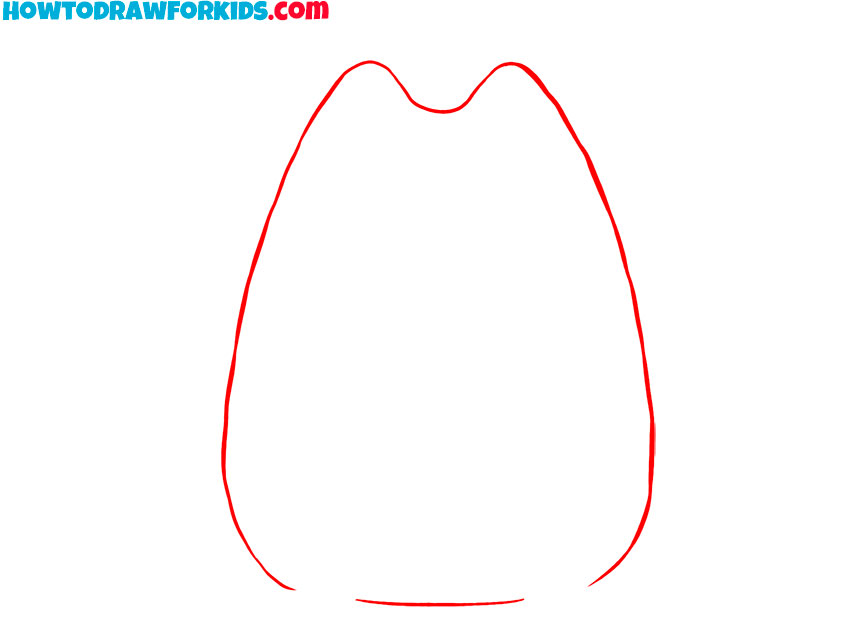
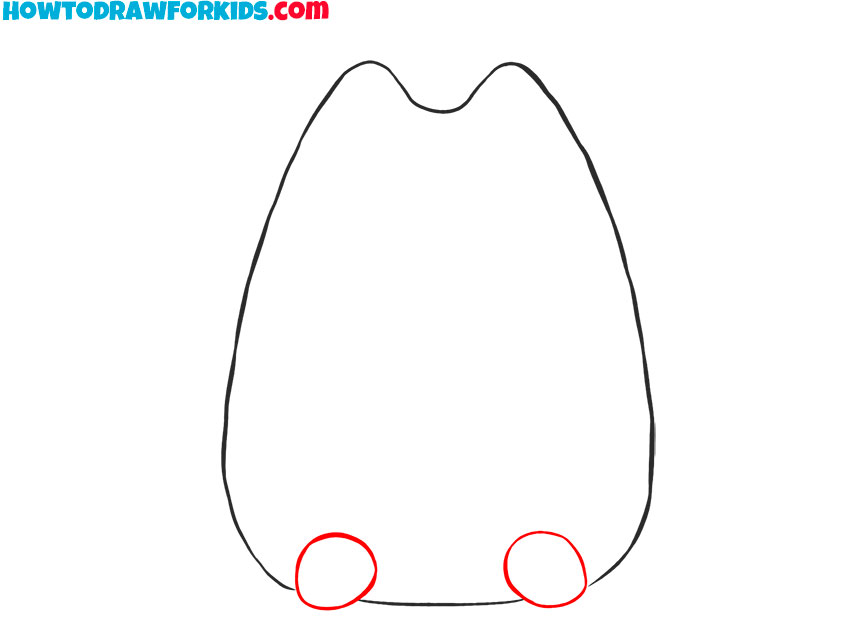
- Draw the outline of the Pusheen’s torso.
So, begin by drawing a rounded, potato-like shape for Pusheen’s body, with a flat bottom and a slightly pointed top, laying the foundation of the character’s form.
- Draw the hind legs.
Secondly, add two round shapes at the bottom of the body for Pusheen’s feet, ensuring they are positioned symmetrically. The lower edges of the legs intersect the lower edge of the torso.
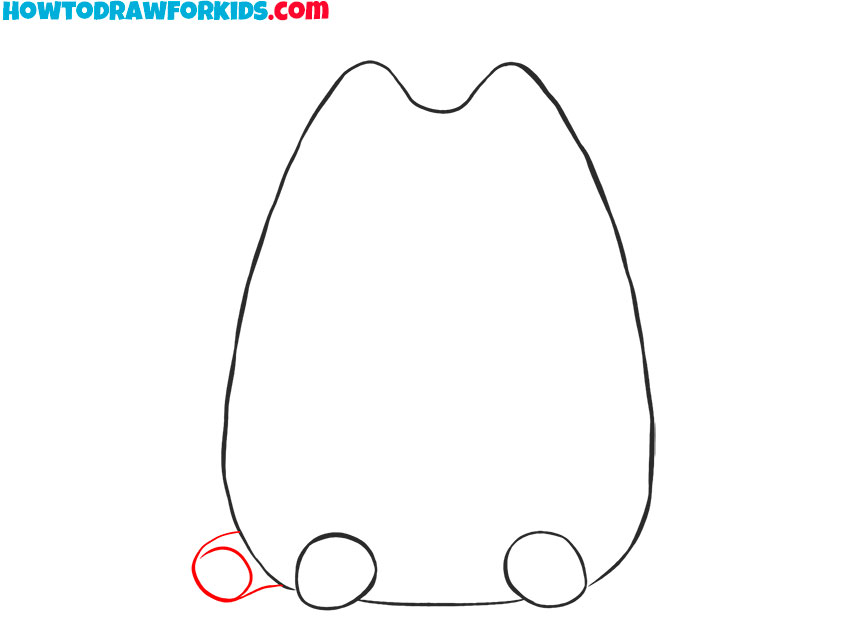
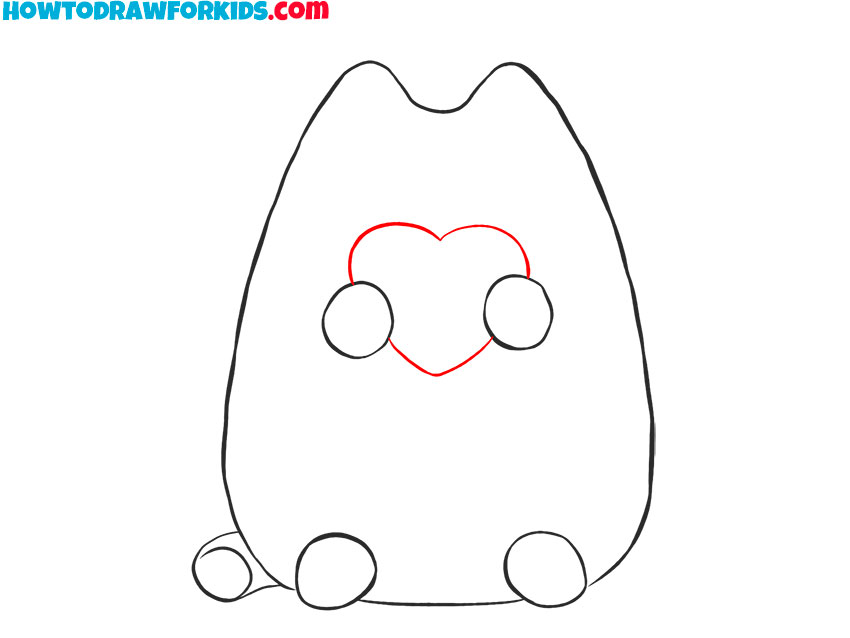
- Sketch out the tail.
Carefully draw Pusheen’s tail with two outward curves converging at a point, starting from the top right of the body shape. Than, draw a circle at the very end of the tail.
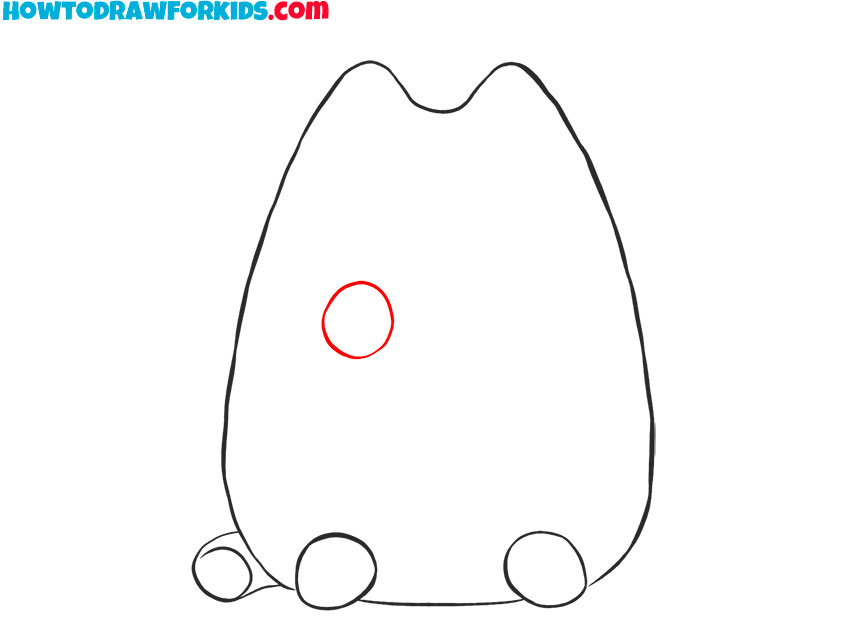
- Add one front paw.
Place a small circle on the upper middle part of the body to indicate Pusheen’s right paw. So, How do you like such minimalism in Pusheen’s drawing lesson?
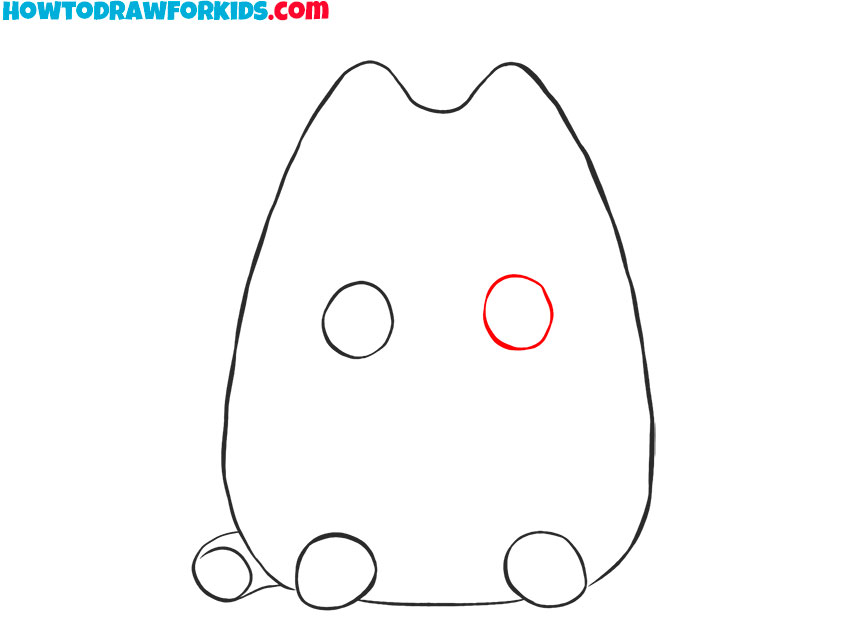
- Depict the second front paw.
The main thing is not to make a mistake with the size and location of this figure. A perfect circle is not required here.
- Sketch out the heart.
The heart in Pusheen’s hands is a very important part of the drawing. It looks a lot like a Valentine’s heart and is drawn exactly the same way.
- Add the elements of the muzzle.
So, draw three small, vertical lines on the upper part of the face for the whiskers and draw the iconic Pusheen mouth with a “W” shape below the eyes.
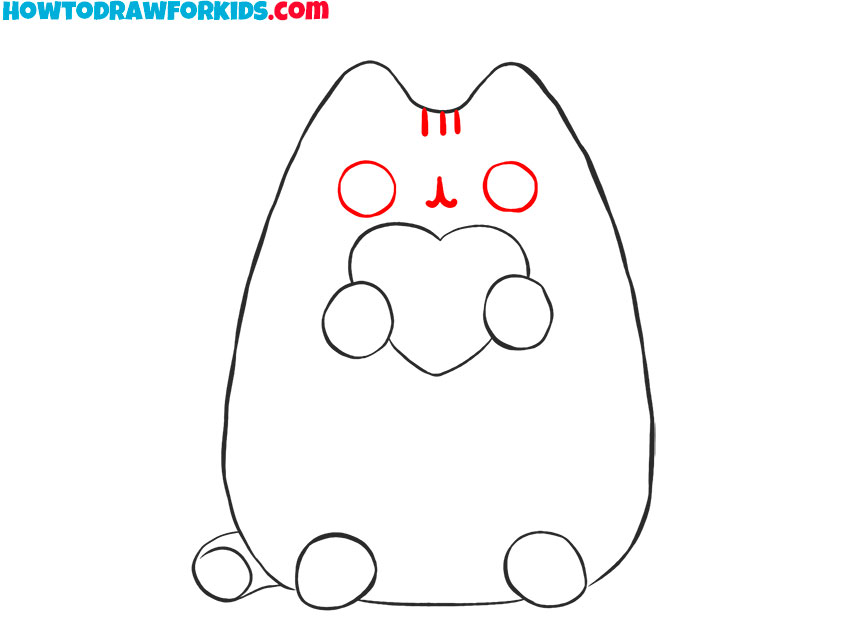
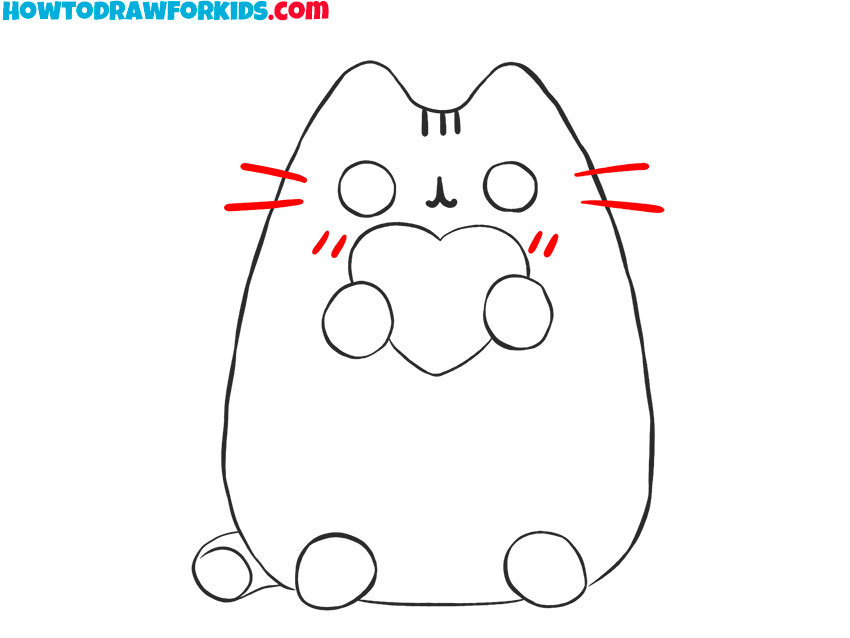
- Add details.
In this step, draw small, straight lines on top of the head for the ears, and add two more whiskers on each side, bringing Pusheen’s facial features together.
- Color the Pusheen.
Finally, color Pusheen in a rich, brown shade, fill in the facial features with black, and add a cute blush with a rosy color on the cheeks and the heart-shaped mouth, completing the adorable illustration.
Additional Content
Understanding the importance of flexible learning tools, I’ve created a free PDF file to accompany our how to sketch Pusheen lesson. This concise version captures all the key steps in a format that’s perfect for offline use. Download it once, and it’s yours to keep, ready to assist in your artistic endeavors wherever you may be.
This PDF is particularly useful for young learners, enabling them to revisit the tutorial’s highlights and practice drawing Pusheen without an internet connection. It’s a convenient way to encourage drawing practice, ensuring Pusheen’s charm can inspire you at any time.
Avoid These Oopsies When Drawing Pusheen
As we wrap up our adventure on drawing Pusheen, I want to share some common mistakes that can happen when you’re learning. But don’t worry, making mistakes is just another step in becoming a great artist! Let’s take a look at these little oopsies, so you can learn how to avoid them:
- Making Her Too Thin or Too Plump: Pusheen is known for her adorable chubby form. If she looks too skinny or too round, she might not look like her cuddly self.
- Overlooking the Details in Her Face: Pusheen’s facial expression is super important. Missing the details like her whiskers, smile, or the placement of her eyes can change her expression.
- Using Hard Lines Right Away: Starting with hard lines can make it tricky to correct mistakes. Try sketching lightly first, then go over the lines you want to keep.
- Not Practicing Enough: Like any skill, drawing gets better the more you do it. If Pusheen doesn’t look perfect the first time, that’s totally okay!
Remember, every artist makes mistakes, but it’s all part of learning and growing. The most important thing is to have fun and keep practicing.
Conclusion
You’ve just taken the first step by drawing Pusheen, but the path of creativity stretches infinitely beyond. My website is a treasure trove of knowledge, brimming with tutorials that cater to every whim and fancy, from the thunderous roar of a dinosaur T-Rex to the silent wink of a cunning leprechaun.
And to keep abreast of the wonders that await, following me on social media is the key. Together, let’s paint our dreams with the vibrant colors of our imagination.