How to Draw a Bike
Let’s learn how to draw a bike, an object that might seem daunting with its many parts but is quite simple with my techniques.
How to Draw a Bike: Introduction
A bicycle, which at first glance seems very simple and made up of basic parts, can actually be quite difficult to draw. Even if a young artist manages to sketch a bicycle, its overall shape may not always look as convincing as they would like.
That’s why today I will show you how to draw a bicycle using very simple and accessible elements such as basic lines, circles, and ovals.
We will start by drawing a bicycle in the easiest way possible, a method that will most likely appeal to most of you. After that, we’ll go over several additional approaches to give you more variety in your skills and to answer more specific questions related to drawing a bicycle.
Bike Drawing Tutorial
Materials
- Pencil
- Paper
- Eraser
- Coloring supplies
- Compass (optional)
- Ruler (optional)
Time needed: 30 minutes
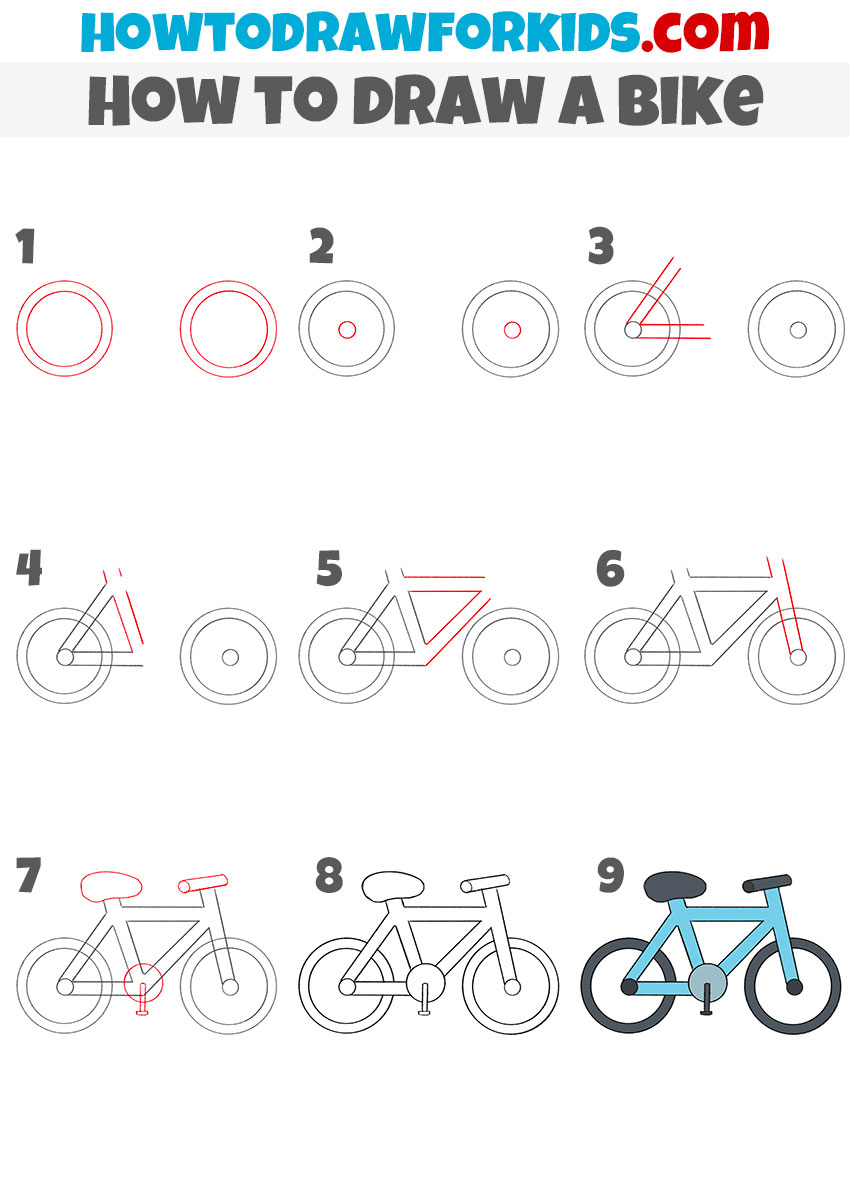
How to Draw a Bike
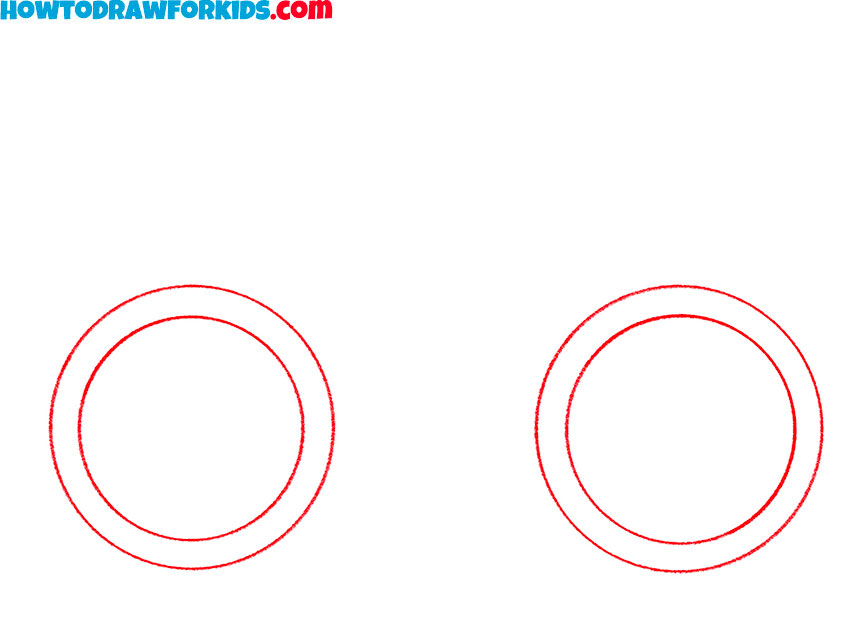
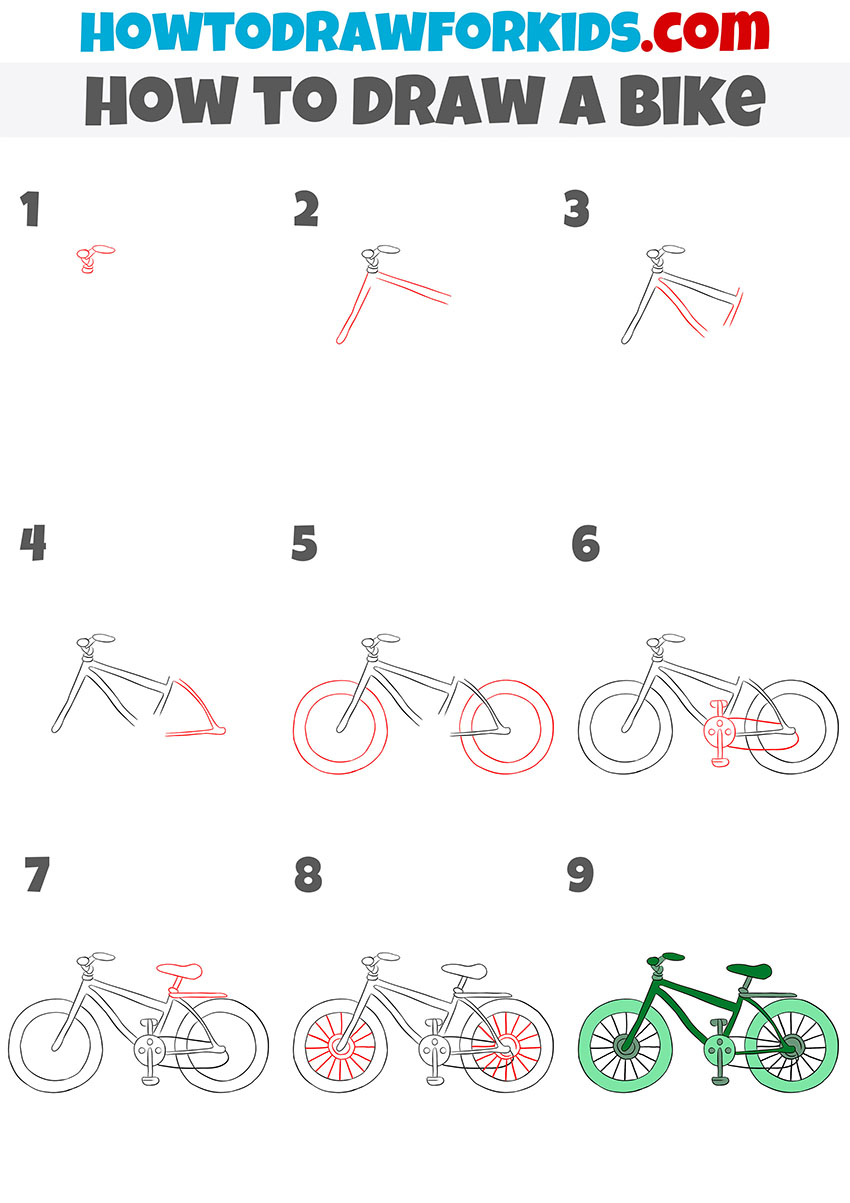
- Sketch the front and rear wheels.
Use two circles, one inside the other, to show the tire and the inner rim. A bike’s wheels should look even and symmetrical, so if your circles come out wobbly, don’t worry, just lightly sketch them and go over them again until you’re happy with the roundness.
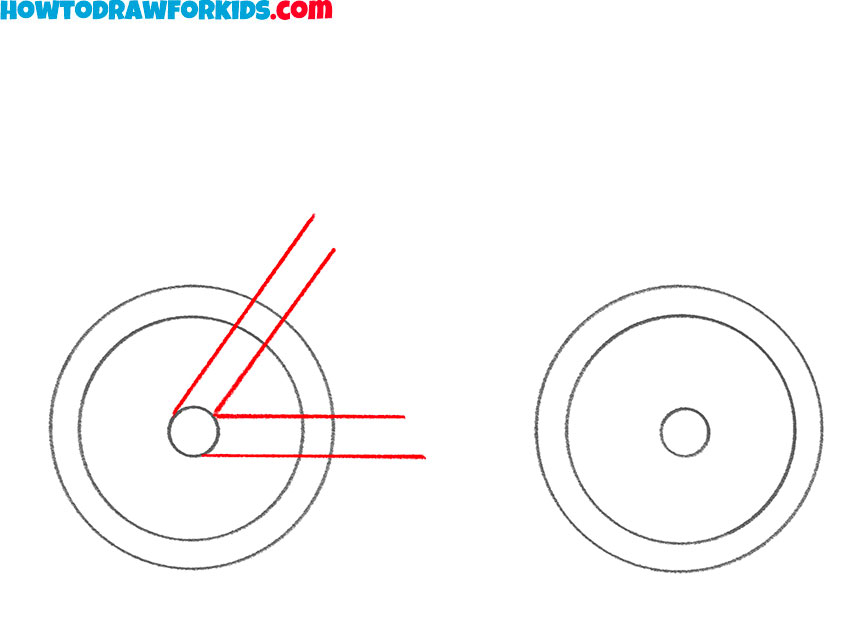
- Draw the bike wheel hubs.
Inside each wheel, sketch a small circle in the middle. These are the hubs, the parts that connect the spokes to the wheel and keep everything centered. Without hubs, a bike wheel couldn’t spin properly, so even though it’s just a little circle on your page, it’s an important part of the bicycle drawing.

- Sketch the rear frame lines.
From the hub of the back wheel, draw two angled lines reaching toward where the pedals will sit. These lines represent the chainstay and the seat stay, which together form the rear triangle of the frame. The lower line, or chainstay, runs almost horizontally and will eventually connect to the crank area.
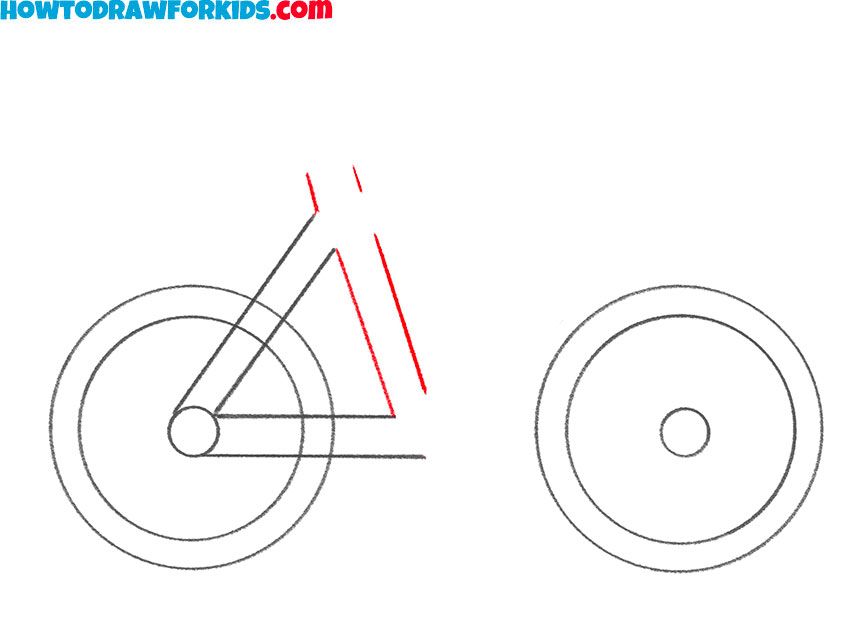
- Draw the bicycle seat tube.
Now sketch a couple of vertical lines from the middle of the frame toward where the seat will go. This is called the seat tube, and it connects the crank area to the saddle. By the way, you can adjust the thickness of these tubes, to make your version look more unique.
- Sketch the front triangle.
Continue building the frame by adding another triangle connecting the front and back parts of the bike. Together with the bottom bar, this gives your drawing the strong geometric look that all bicycles have. You can adjust the angles and curves of this part to make your bike look more unique.

- Illustrate the front fork.
Add the fork that connects the front wheel to the frame, drawing two parallel lines extending from the frame down to the hub of the front wheel. These lines should be straight and simple. Fork almost acts like the bike’s arms, reaching down to hold the wheel.

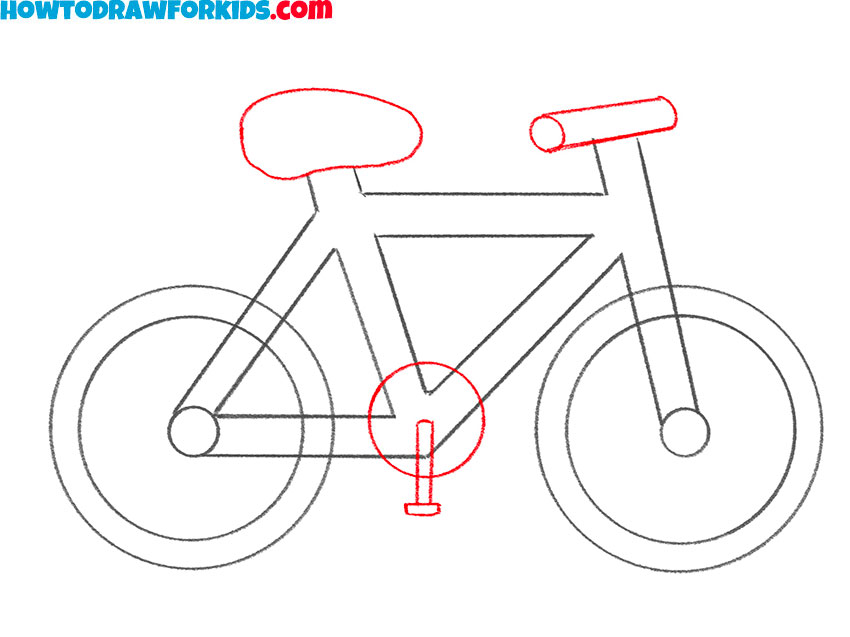
- Add the seat, pedals, and handlebars.
Next, sketch the seat at the top of the back frame, shaped like a small oval or rounded rectangle. Then add the handlebars by drawing a short vertical line from the front frame and attaching a horizontal bar on top. At the bottom center of the frame, add the pedal crank with pedals.
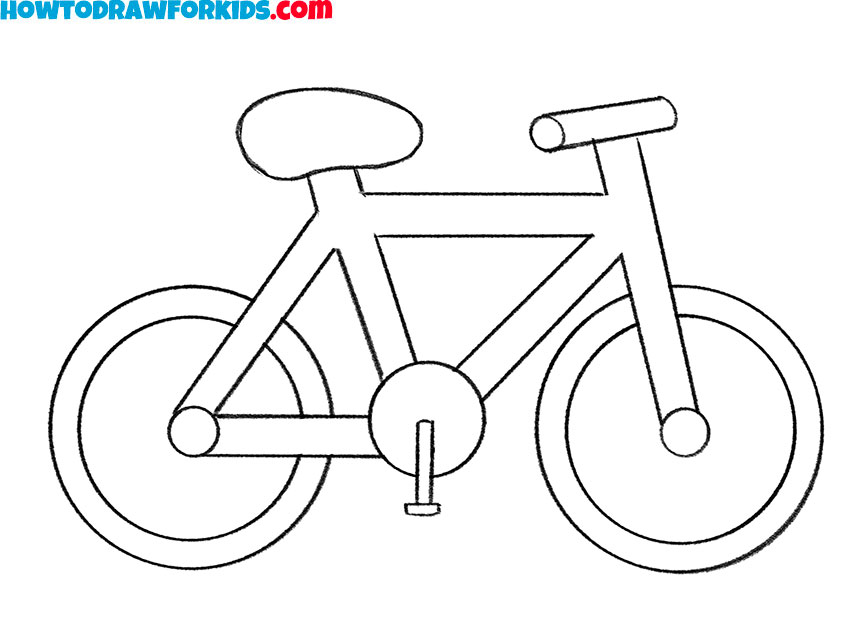
- Trace the main outline.
Clean up unnecessary guidelines to make your bike drawing look more polished before the last step. Trace the sketch, using darker lines. If the earlier steps felt messy or uncertain, now’s the time to polish. This step is also a good opportunity to add small details if you like.
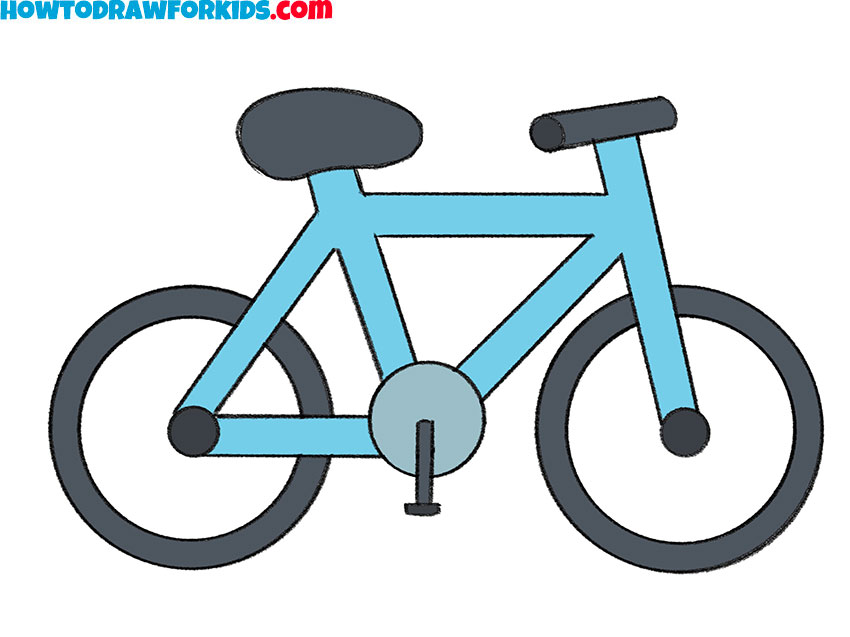
- Paint your bike.
To paint your bike you can choose any shades you prefer. Use simple colors for the frame, like blue, red, or green, keeping the tires and seat darker, for example black or brown. You don’t need to add shading unless you want to; even flat colors will make the sketch look finished.

Additional Content
For those who prefer to have a guide right at their fingertips, I’ve created a free PDF file for this bike drawing lesson. This concise version is perfect for quick reference, allowing you to practice anywhere, anytime, even when you’re offline. Just download it, print it out, and you’ve got a portable art class.
It’s designed for ease of use, with clear, step-by-step instructions that break down the process of drawing a bike into simple, actionable stages. Whether you’re at the park, on a train, or cozied up at home, this PDF is your personal sketchbook companion, ready to help you refine your drawing skills at your own pace.
How to Draw a Bike: Alternative Methods
To ensure a well-rounded artistic development, I’ve prepared a series of alternative bike drawing techniques for you to explore. These methods range from quick gestural sketches that capture the bike’s motion, to detailed studies focusing on the mechanics and design of different types of bicycles.
By working through these techniques, you will develop a deeper understanding of form and function, which is essential for any aspiring artist. Moreover, you’ll learn to appreciate the subtle nuances that make each bike unique, enhancing your drawings and giving them a more authentic feel.
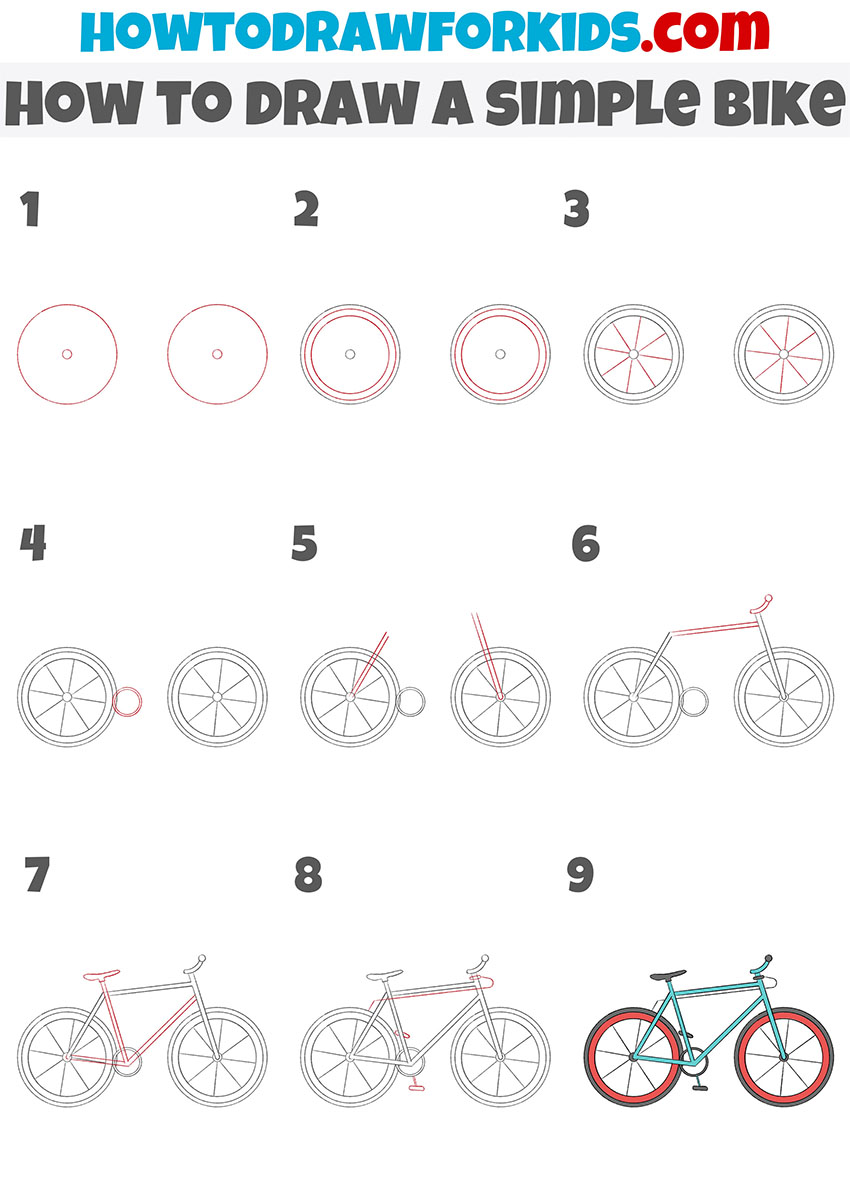
Detailed Bike Drawing Tutorial
Moving forward, here is a tutorial that shows how to draw a detailed bike. This version adds more small details, and make the final result look more authentic. The added elements create more realism but still follow a simple technique.
Draw two wheels with inner rims. Connect them with a carefully constructed triangular frame. Add smaller components such as spokes. Add the front fork to hold the front wheel and sketch the rear frame to support the back wheel. Sketch the crankset and pedals in the center, adding circular forms for gears.
Place the seat above the rear frame and the handlebars at the front. Work lightly at first, then darken the lines once you are confident in the structure. Erase guidelines as needed and refine the proportions and finish coloring the artwork.
Advanced Bike Drawing Tutorial
Here we have another detailed bike, this time shown in a different direction to challenge your skills and help you practice. This version looks closer to a professional bicycle, including gear details, thicker tires, and a modern frame. It is more complex than the previous guides but provides a chance to train accuracy.
Sketch the two wheels, adding hubs and rims. Construct the frame with angled lines, paying attention to how each section supports the wheels. Add the fork in the front and the rear supports that connect to the chain mechanism.
Sketch the pedals, crankset, and gear system in the middle, then place the seat and handlebars in correct proportion above the frame. Include details like spokes, chain links, and tire thickness to complete the drawing. To make this sketch look even more realistic, add shadows and highlights.

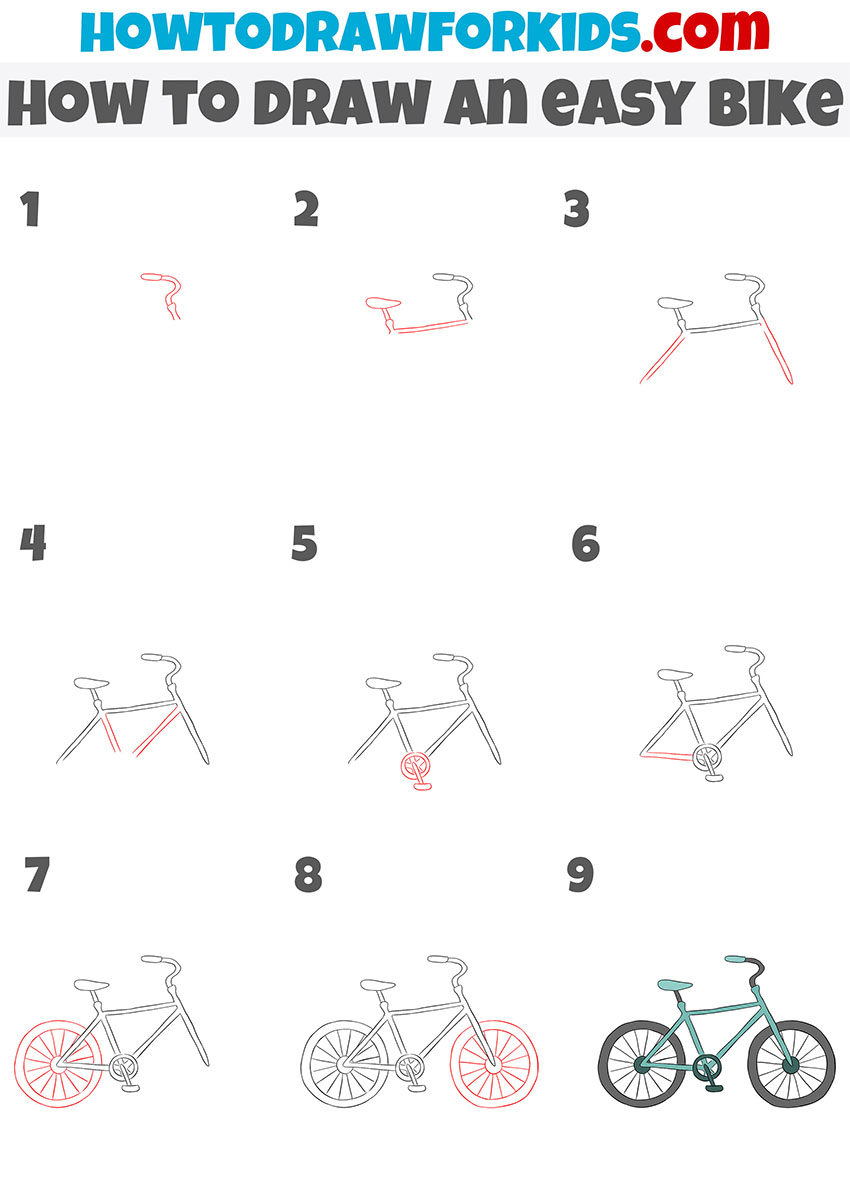
Alternative Technique
The following tutorial demonstrates how to draw a bike starting with the handles and seat. Compared to earlier guides, this tutorial uses a different set of steps and a slightly different frame style. The drawing keeps the steps simple but introduces variety in how a bicycle can be constructed and represented.
Sketch the seat, handlebars, and main frame lines to create the base. Connect the front and rear sections with simple lines. Place the crank and pedals in the center. Add the wheels on both sides, keeping them round and symmetrical.
Once the main frame and wheels are in place, draw the spikes and check proportions. Erase guidelines gradually to clean the drawing. Outline the entire shape clearly to give it a finished appearance and color in any desired color.
Simple Technique
The next example shows the process of drawing a bike with slightly more simplified steps than in previous tutorials, but more detailed than in the main lesson. The style provides a good balance between simplicity and technical detail.
First, sketch the handles and the fork. Draw the connecting frame with straight and diagonal lines that form a triangle. Place the seat post and handlebars above the frame. Make two equal circles for the wheels and add smaller circles inside for the hubs. Sketch spokes radiating outward. Add the pedals and chain mechanism in the center of the frame, using small circular shapes. Erase construction lines gradually and add simple colors.
Easy Technique for Preschoolers
To complete the set, I’ll show you the simplest bicycle tutorial. This tutorials uses the most simple sequence and reduces the amount of details to minimum.
Create two identical circles for the wheels. Sketch the seat and handlebars in their proper positions. Add the pedals and crank at the center of the frame. Keep the lines light so that you can easily correct proportions before outlining.
After the main construction is set, refine the shape by tracing the shapes and erasing the guidelines. Use clean and confident strokes for the final outline. Color the vehicle using any color you choose.

Conclusion
Congratulations on completing your bike drawing! I’m so proud of what you’ve achieved today. To continue learning, visit my car drawing tutorial and try to replicate this type of vehicle on your paper.
Also, don’t forget to subscribe to my social media, where I post my new tutorials and show some very interesting and unique techniques and artworks.