How to Draw a Perfect Circle
Join me on a circular journey and learn how to draw a perfect circle through a playful, easy process. With my tutorial, you’ll understand the art of drawing a smooth, round circle without any tricky gadgets. By the end of our lesson, you’ll be able to create circles that look like they were drawn with a compass, all freehand!

How to Draw a Perfect Circle: Basic Information
Gather ’round, friends, because today we’re going to crack the code on how to draw a perfect circle. It’s a skill that may seem daunting, but with my easy approach, you’ll be spinning circles in no time. Our goal is to create a circle so smooth and round, it’ll be the envy of every pizza in town.
As we progress through the steps, you’ll see how starting with a cross and then an ‘X’ makes a guide that’s like a compass for your circle. It’s all about connecting the dots, slowly turning your lines into a curve that’s as round as a freshly blown bubble.
So, with a few well-placed lines and the spin of your pencil, you’ll be able to draw a perfect circle. This technique is simple, effective, and something you can carry in your artist’s toolbox forever. Keep practicing, and soon, drawing a perfect circle will be as easy as pie—or should I say, as easy as drawing one!
Perfect Circle Drawing Tutorial
Materials
- Pencil
- Paper
- Eraser
- Coloring supplies
Time needed: 20 minutes
How to Draw a Perfect Circle
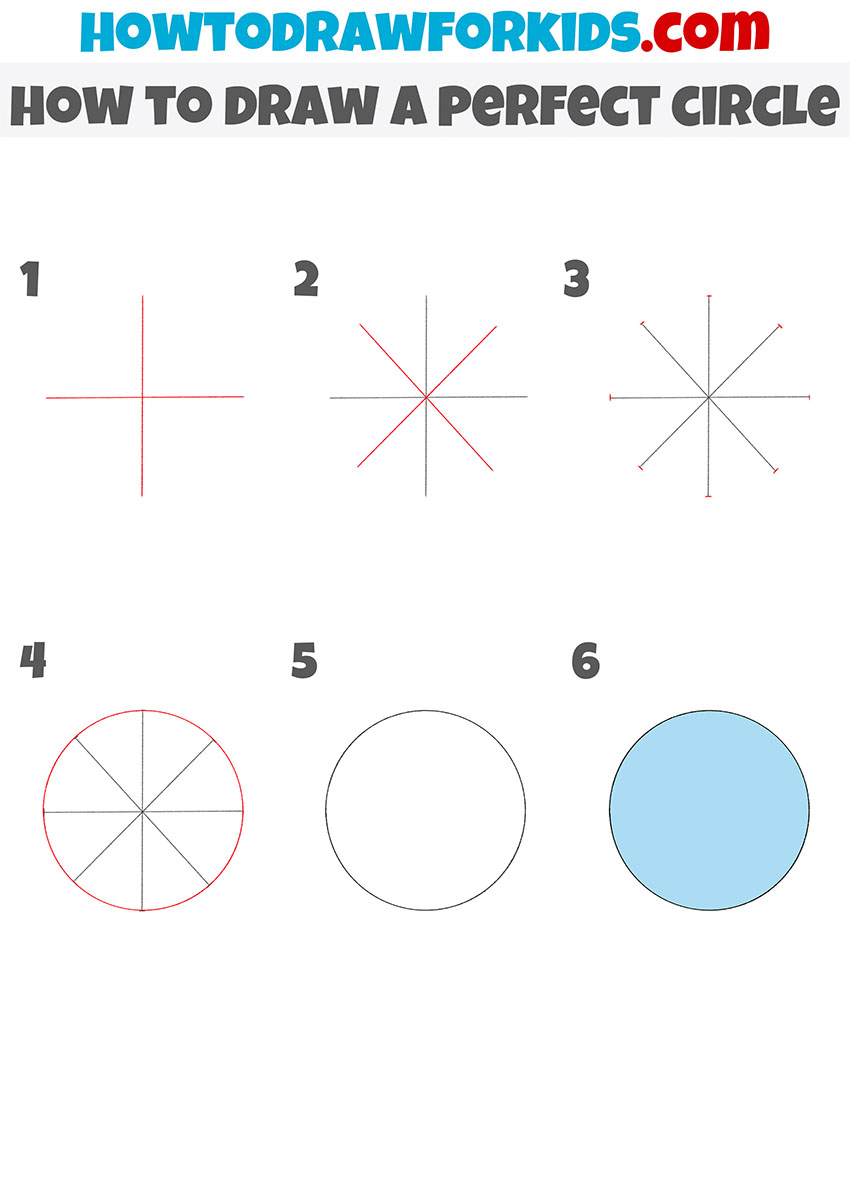
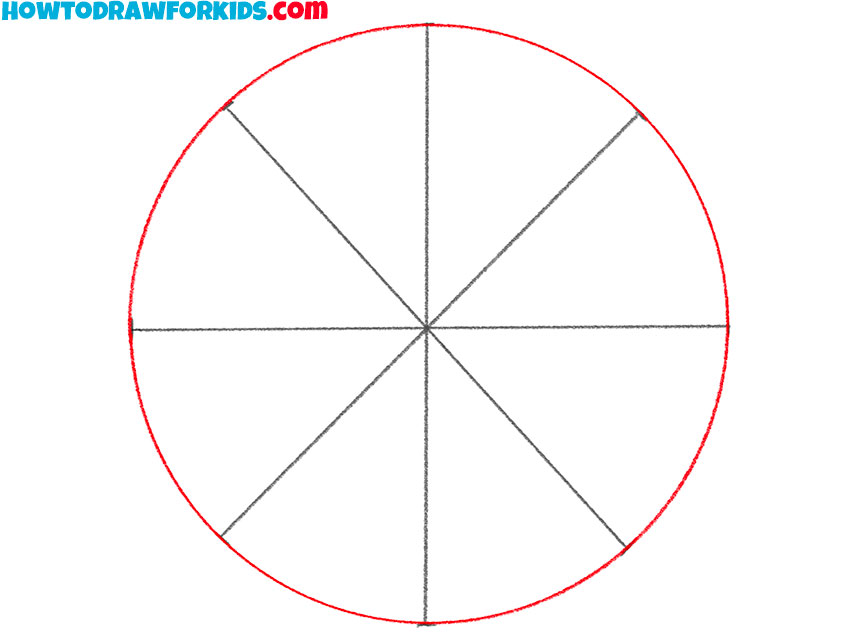
- Draw two lines of symmetry.
Depict two straight perpendicular lines as shown in the figure.
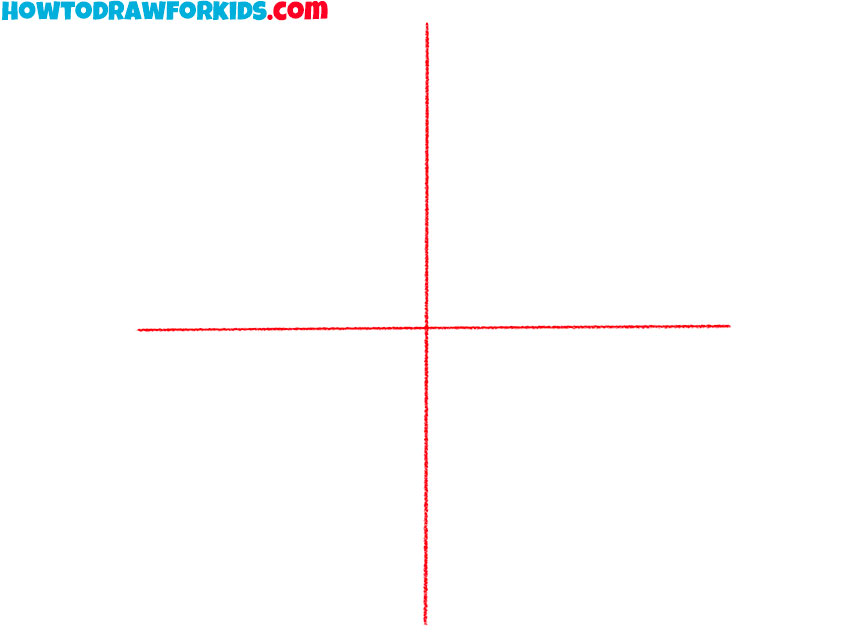
- Add two more symmetry lines.
You need to depict two of the same lines as previously drawn, but located diagonally.
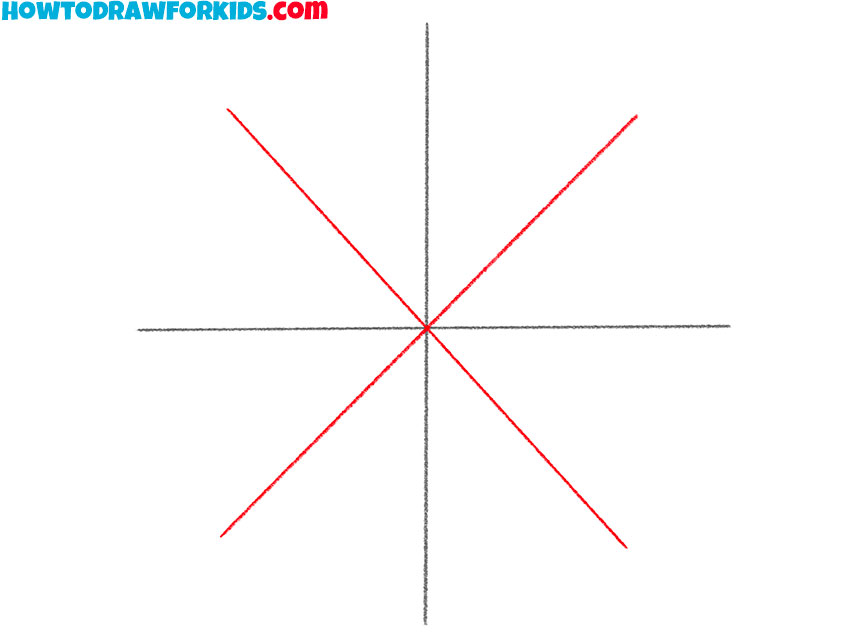
- Add circle points.
At the ends of the drawn lines, add short lines that will form the basis of the outline of the circle.
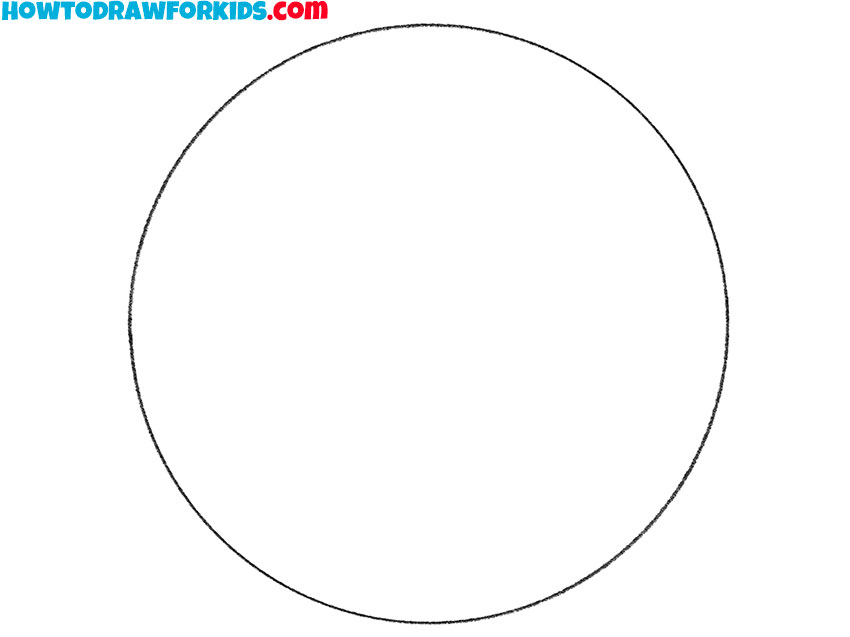
- Sketch out the circle.
Now you need to connect the drawn short lines at the ends of the lines of symmetry.
- Correct inaccuracies.
Use the eraser to remove any unnecessary guidelines.
- Color the perfect circle.
To color this circle, I recommend you use blue.
Additional Content
To support your journey in mastering the art of perfect circles, a complimentary PDF file of this lesson is now available for download. This abbreviated version distills the essence of the lesson into a portable format that can be accessed anywhere, anytime, without the need for an internet connection.
It’s an invaluable resource for practice sessions at home, school, or even on the go, providing a constant reference to help refine those perfectly round shapes. This PDF is designed to encourage repeated practice, reinforcing the techniques learned and promoting muscle memory.
Key Technical Tips for Perfect Circles
For all the young artists who’ve joined me in drawing perfect circles, you’ve learned it’s not just about tracing a shape; it’s about mastering a skill. Here are some technical nuances that will sharpen your craft even further:
- Steady Hand, Steady Line: Keep your hand steady as you depict; any shake can turn your perfect circle into a wobbly adventure.
- Equal Pressure: Apply consistent pressure as you draw. Too light, and your circle will be hard to see; too heavy, and it may not erase cleanly.
- Guiding Lines: Use your guiding lines as a map, not a path. They’re there to steer your pencil, not confine it.
- Rotation Technique: Rotate your paper as you go, letting your hand flow naturally to create a smoother line.
- Practice Makes Perfect: Draw circles over and over. Like playing an instrument, the more you practice, the better you’ll play.
Now, take these tips and look back at your work; you’ll see just how far you’ve come. Every circle you draw is a wheel of progress, rolling you closer to becoming the skilled artist I know you can be. Remember, the beauty of drawing is in the details. Keep practicing, keep enjoying, and watch as your circles go from good to great!
Conclusion
What a round of applause you deserve for creating such perfect circles! Ready for more drawing fun? There are lots more lessons waiting for you on my website, like how to draw a beautiful cardinal bird or a stylish graduation cap. And there’s always something new on the horizon!
Don’t forget to follow me on social media to catch all the latest updates and tutorials. Got a special drawing request? Let me hear it in the comments section below. Your feedback is the paint to my canvas, and it could inspire our next art adventure. Keep those pencils sharp and your ideas flowing!


i like it
very nice but i like drawing a cayote more
Hey!!!!!!!
Hey=!!
I really like were it shows were or how you do a perfect circle and that helped me a lot for a art project.
Thanks!!!!!
Britney Baten