How to Draw a City
Welcome to this artistic urban journey where I’ll show you how to draw a city that’s both simple and striking. My simple step-by-step method will guide you through creating a city’s outline to adding the final touches that bring a cityscape to life. We’ll start with the foundation- basic geometric shapes – and build up to a detailed skyline.

How to Draw a City: Basic Information
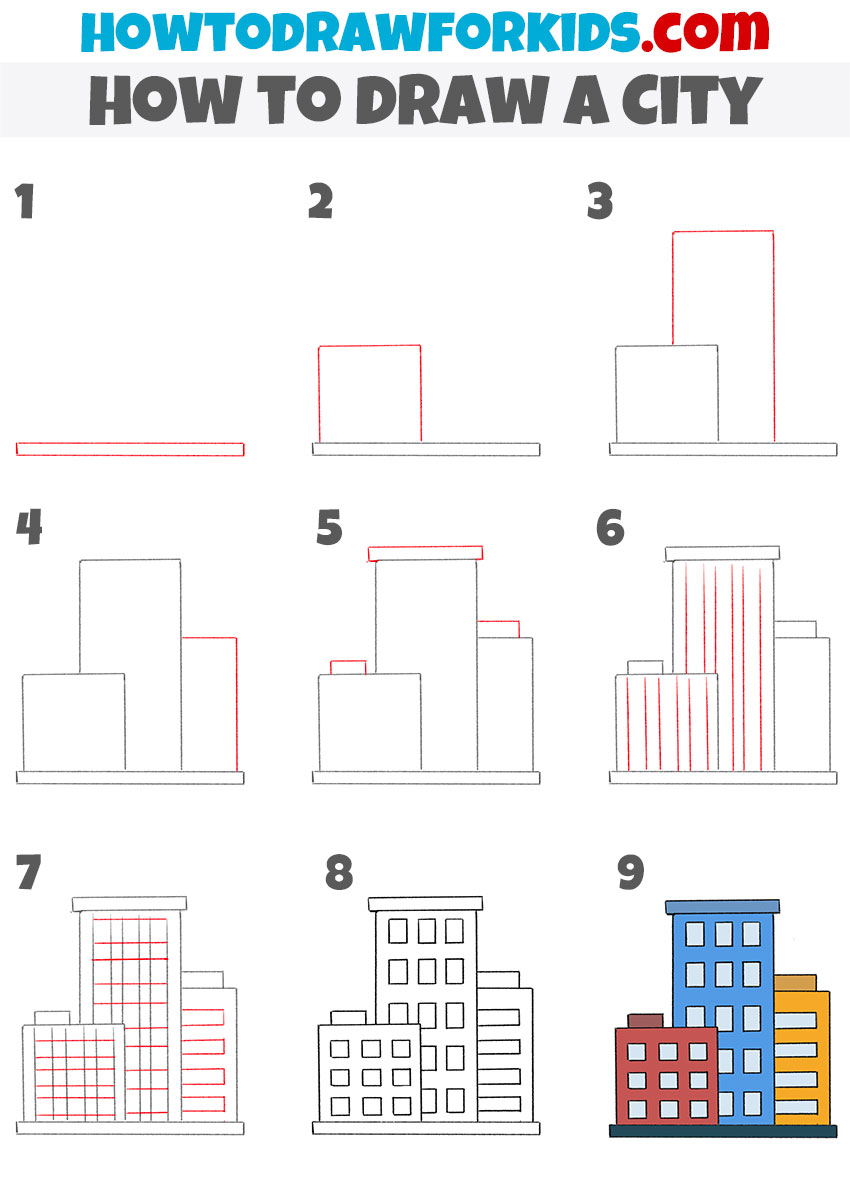
In this lesson, I’ll guide you on how to draw a city, simplifying the bustling urban landscape into easy-to-follow steps. We’ll start with the horizon line and work our way up to the towering skyscrapers. Drawing a city skyline can be overwhelming, but with my method, it’s accessible to artists of all levels.
As we progress, you’ll learn to layer shapes to create the illusion of depth and height. The city on this page was designed to help you understand perspective and scale, using rectangles and lines to represent diverse buildings. This foundational approach will give you the tools to sketch any cityscape.
By the end of this tutorial, you’ll be able to draw a city with confidence. Whether it’s a fictional metropolis or the skyline of your hometown, my straightforward techniques will help you capture the essence of an urban scene. So let’s grab our pencils and start building our city, one line at a time.
City Drawing Tutorial
Materials
- Pencil
- Paper
- Eraser
- Coloring supplies
Time needed: 20 minutes
How to Draw a City
- Depict the ground line.
You can depict this part as a rectangle with long bases.

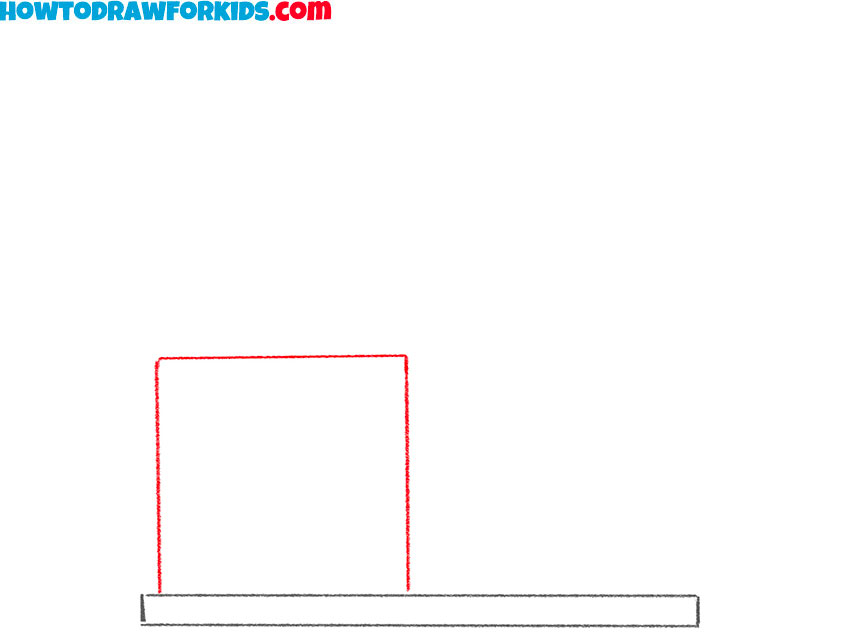
- Draw the outline of the building.
Depict it on the left side as a rectangle without a bottom base.
- Add another building outline.
This building is taller than the one you drew earlier and is placed behind it.
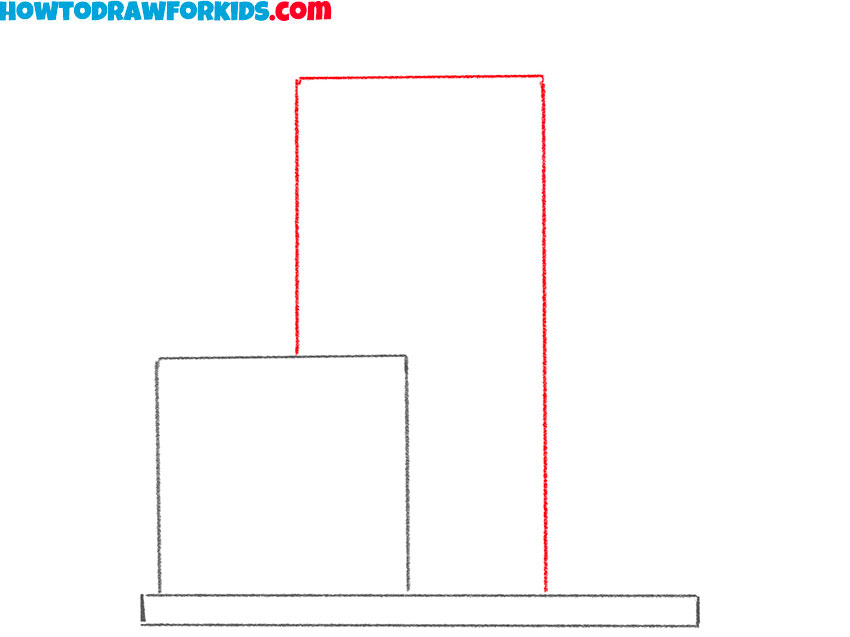
- Draw the outline of the third building.
Use straight lines. This building is half-covered by the previously drawn building.
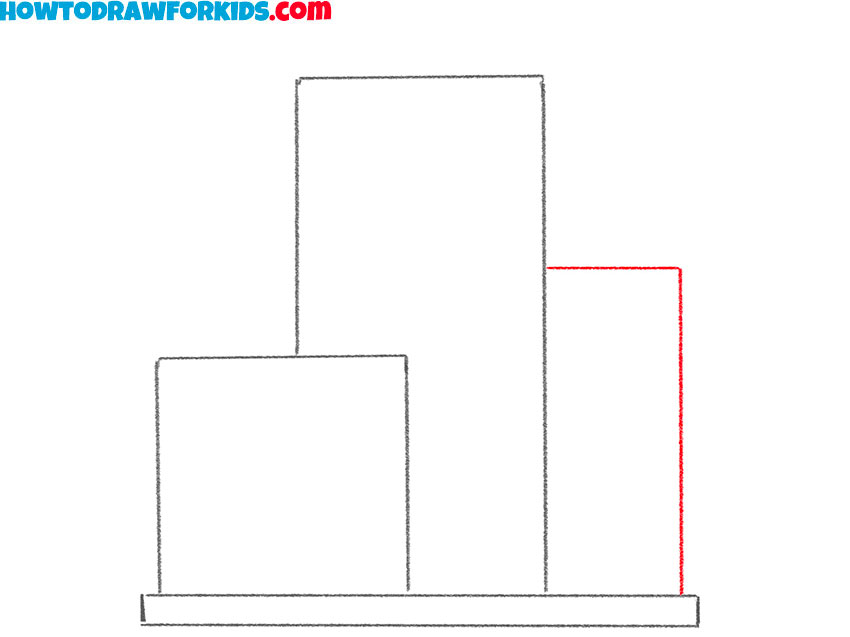
- Add details on the roofs of buildings.
Draw rectangles of different sizes on the roofs of the buildings you have drawn.
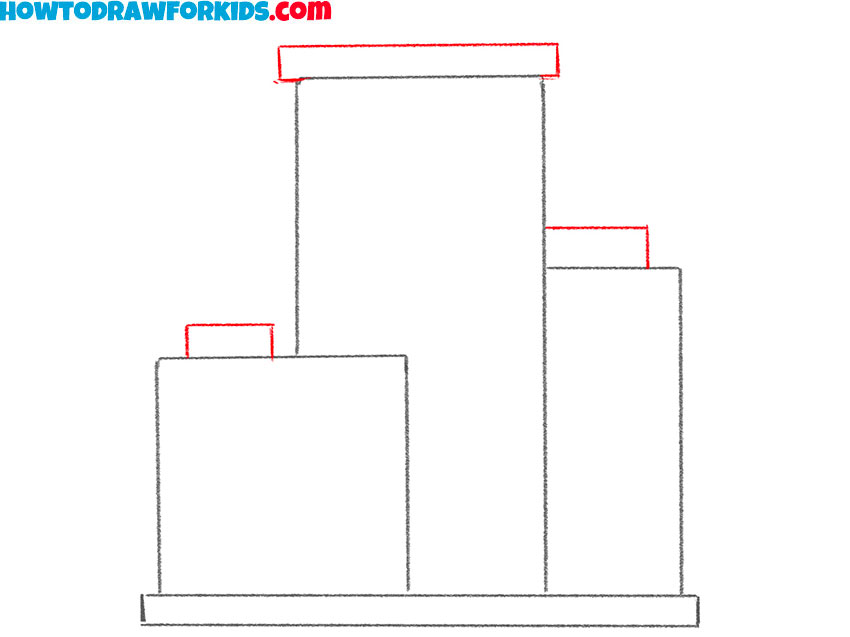
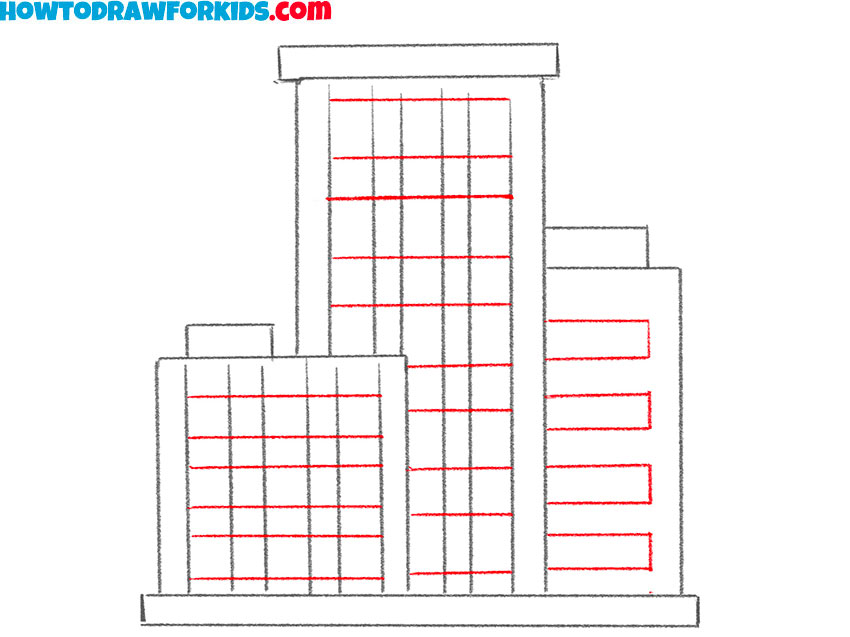
- Draw the auxiliary lines.
Depict many vertical lines on the building in the middle and on the building on the left.
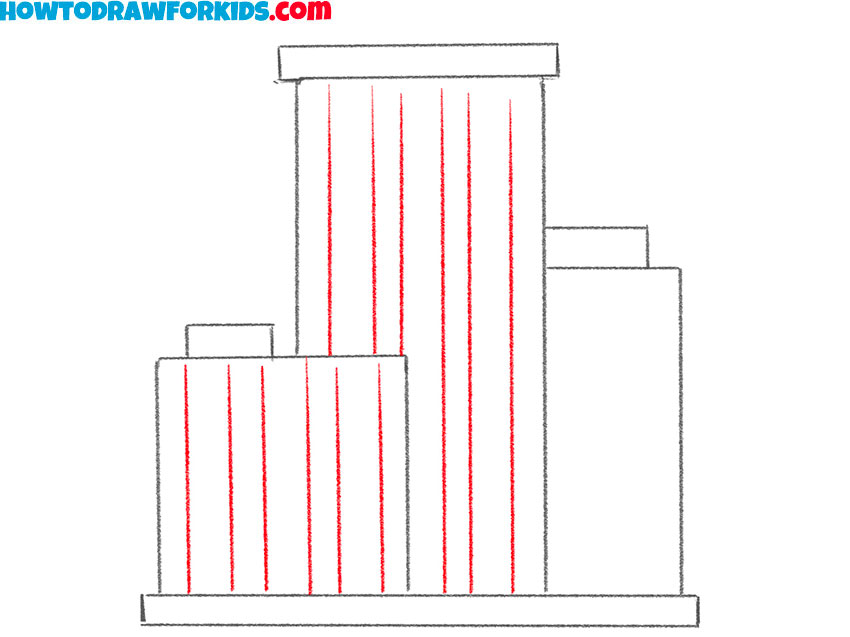
- Add the other lines.
Draw horizontal lines on the two buildings and lines on the building on the right.
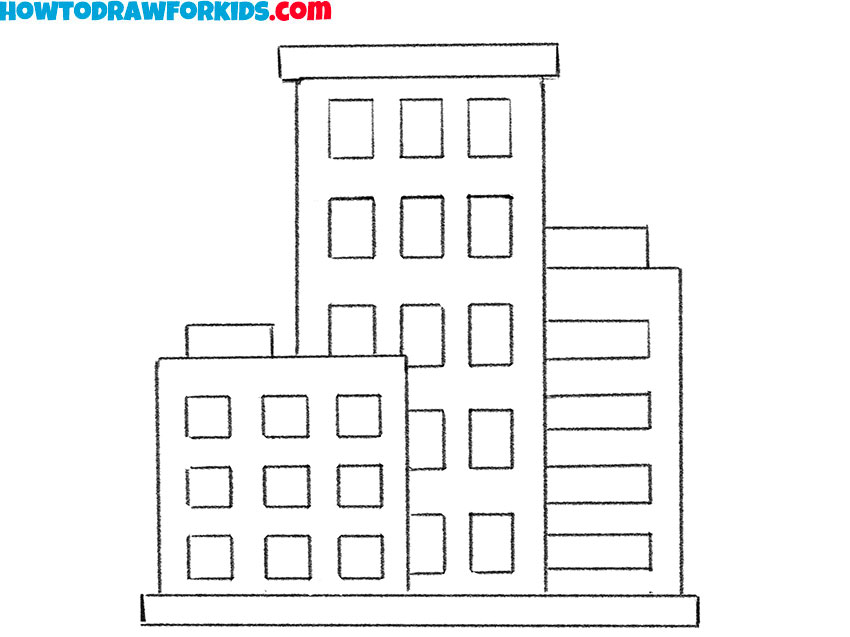
- Erase the auxiliary lines.
Use an eraser to remove unnecessary lines from the drawing.
- Colour in the drawing.
To colour the city, you should use red, brown, shades of blue and orange.

Additional Content
To complement the online lesson, I’ve also created a downloadable PDF guide that offers a succinct version of the city drawing tutorial. This document is available at no cost and is perfect for artists who prefer to have a physical reference at hand. You can download it directly, print it out, and use it anytime, internet connection or not.
This PDF guide is packed with all the essential information and steps from the online tutorial, providing you with an easily accessible, on-the-go drawing companion. It’s a great resource to keep practicing and improving your drawing skills, ensuring that you can continue to create wherever inspiration strikes.
Alternative Drawing Technique
Also, in addition to the primary tutorial, I’ve also developed an alternative technique for drawing cities, providing you with a fresh perspective and approach to urban sketching. This new method introduces different stylistic elements, helping you expand your repertoire and practice more complex aspects of city illustrations.
By experimenting with this alternative technique, you will be able to enhance your observational skills, improve your precision with lines and shapes, and gain a better understanding of how light interacts with buildings to bring a cityscape to life.
How to Draw a City in Detail
In this alternative drawing method, I’ve showcased a detailed city, guiding you through the nuances and intricacies of an urban landscape. We started with the basic outlines, gradually built up the complexity of the skyline, and infused life into our cityscape with architectural details and embellishments.
I’ve emphasized adding elements like windows, doors, and textured rooftops to give a sense of realism and depth. Trees and other urban features were also included to create a lively, believable city environment. The final touches of color bring vibrancy and energy, resulting in a richly detailed city scene.

Common Missteps to Avoid in City Drawing
As we conclude our cityscape drawing session, it’s beneficial to reflect on some common pitfalls that learners may encounter. Here’s a curated list to help you identify and avoid these in future sketches:
- Overlooking Proportions: Buildings can end up disproportionate, dwarfing nearby structures or lacking in height.
- Ignoring Perspective: Forgetting to apply the rules of perspective can lead to a flat-looking city without depth.
- Inconsistent Lighting: Shadows and highlights must be consistent with your light source to ensure realism.
- Overcomplicating Details: Adding too many details too soon can overwhelm the drawing, leading to a cluttered appearance.
- Neglecting Composition: The overall layout of the cityscape is crucial, and failing to plan can result in an unbalanced artwork.
Every artist has a unique journey, and mistakes are stepping stones to mastery. As you continue to sketch and learn, keep these pointers in mind. They’re not just warnings but guides to help refine your technique. Reflect on each piece you create, celebrate your progress, and always look forward to how much more you can achieve.
Conclusion
I hope you had a blast with today’s lesson. But wait, the fun doesn’t stop here! Hop over to my website to discover a world of creativity waiting for you. Ever wondered how to draw a perfect circle or bring a peacock to life with your pencils? I’ve got you covered with lessons on just about anything you can imagine!
And hey, don’t miss out on the cool stuff we’ve got coming up. Follow me on social media to stay in the loop with all the latest announcements and sneak peeks. Got ideas or wishes for future lessons? Drop a comment below; I’d love to hear what you think and maybe make your wish come true in our next adventure.


