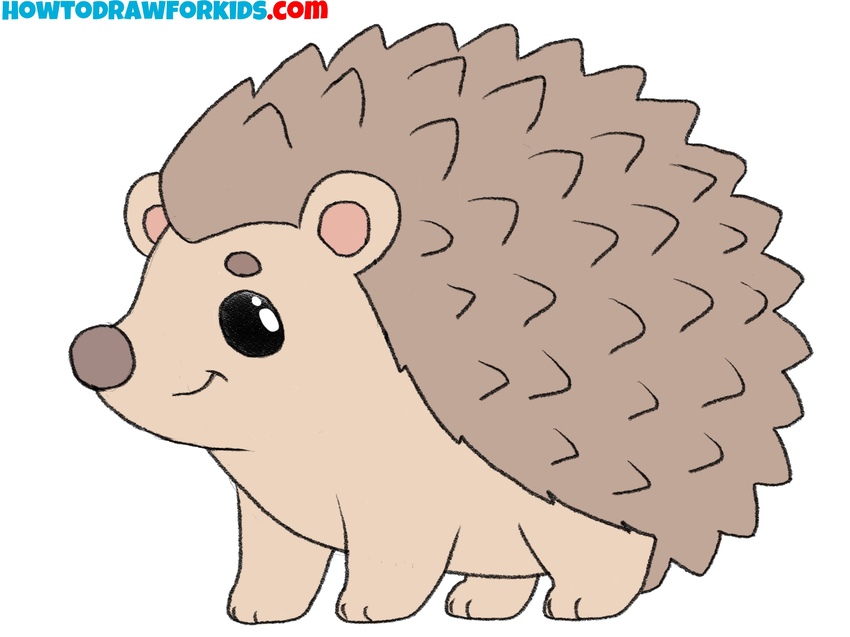
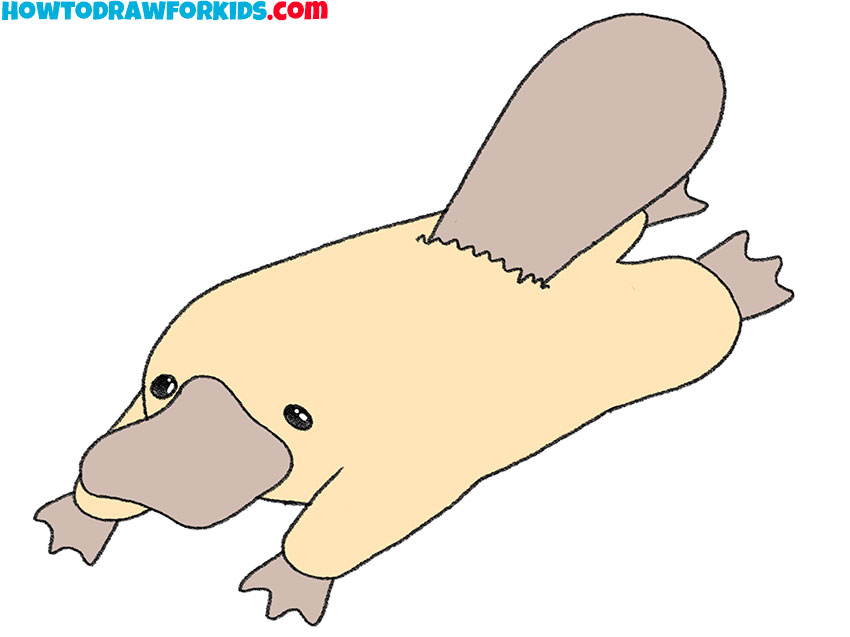
How to Draw a Platypus
In today’s tutorial, we will draw one of nature’s most unusual creatures: the platypus. Known for its distinct body structure that combines features of both mammals and birds, the platypus presents an interesting challenge for any artist. So, we will focus on capturing its intriguing characteristics in a simplified drawing style.
How to Draw a Platypus: Basic Information
Before we begin our lesson on drawing a platypus, let’s examine this illustration closely. Notice the features?
First, as mentioned, our platypus is shown in a static, relaxed pose. Its limbs extend in various directions, with its head facing forward, reminiscent of a person lounging casually on the beach.
Next, consider the body structure. Have you often encountered creatures that possess a tail, fur, claws, and a bird-like beak all in one? Capturing such an eclectic mix of features in a single drawing presents a unique challenge.
Third, observe the angle. The platypus is positioned slightly sideways, necessitating the application of perspective rules in our drawing. Body parts closer to us appear larger and more rounded, while those farther away seem smaller and more elongated.
Lastly, take a closer look at the beak. The platypus’s beak is smooth and rounded, yet not symmetrical. The eyes, positioned on the sides, vary in shape and size due to the perspective. Notably, each eye includes a highlight – a crucial detail to remember when adding color.
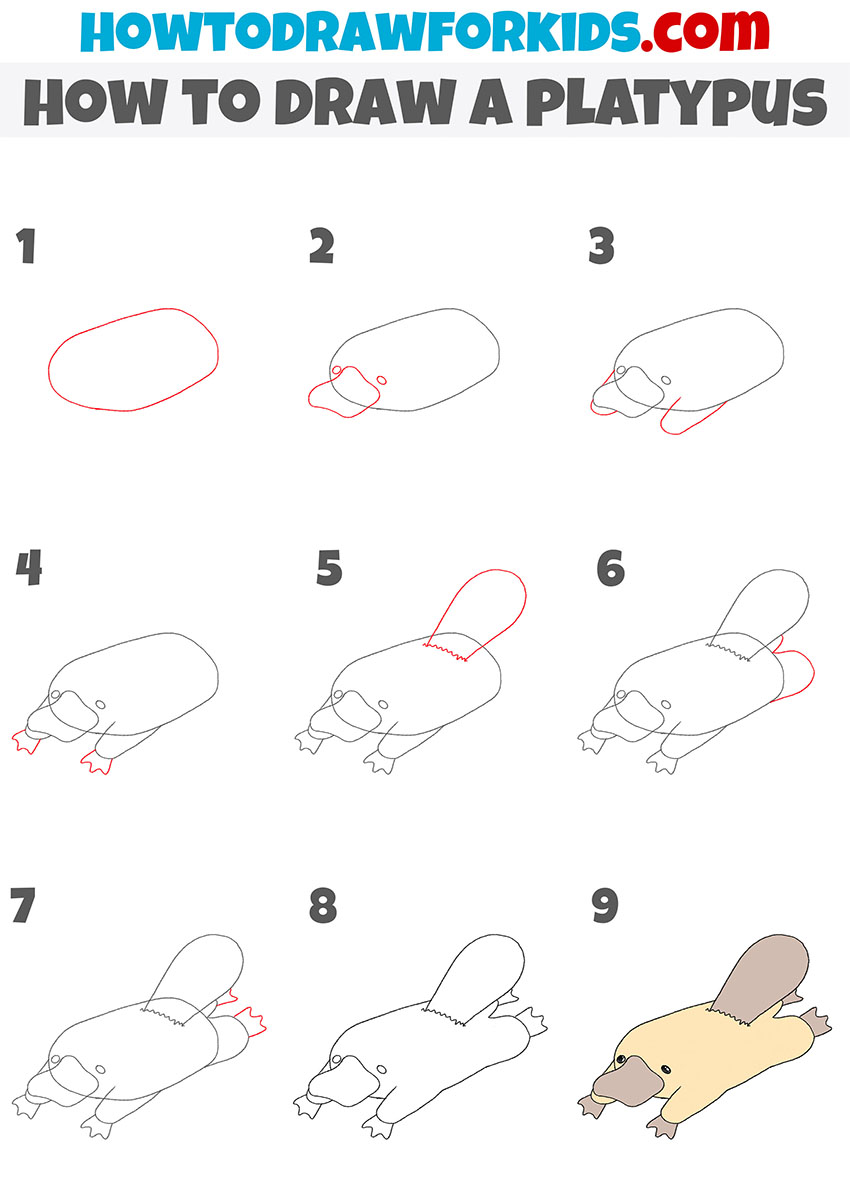
Platypus Drawing Tutorial
Materials
- Pencil
- Paper
- Eraser
- Coloring supplies
Time needed: 30 minutes
How to Draw a Platypus
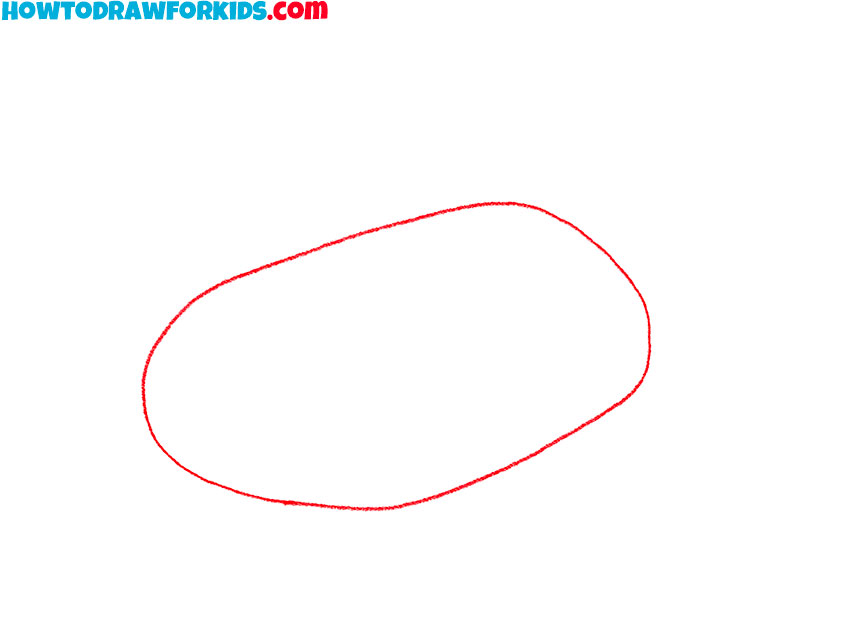
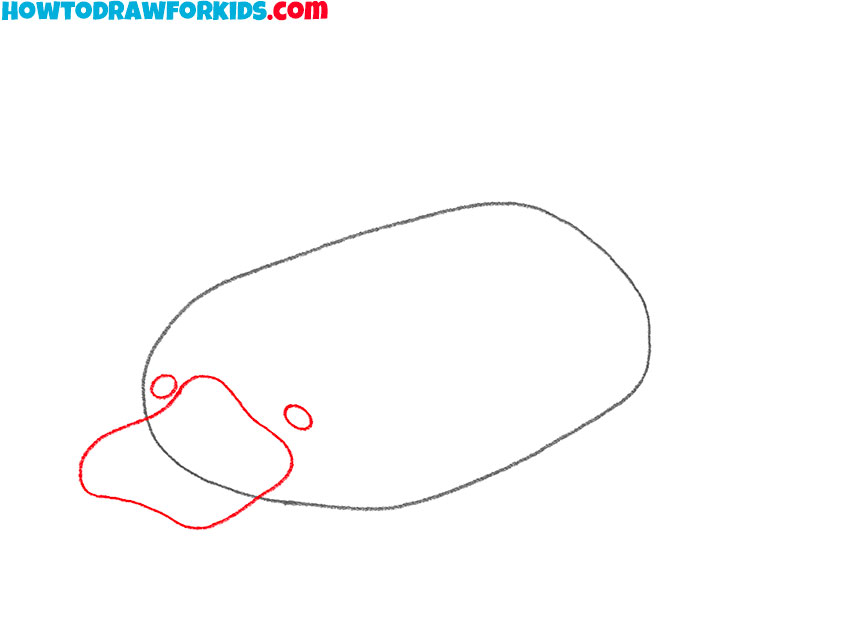
- Sketch the outline of the body.
Begin your platypus drawing with an oval shape to form the body. This initial shape sets the foundation for the proportions of your drawing. Keep the lines light, as this is just a guide that will help you map out the placement of other features. To show perspective features, draw an oval that is asymmetrical.
- Add the elements of the face.
Add the distinctive platypus beak by sketching a rounded shape protruding from the head. Due to the slight turn, the beak also has an asymmetrical shape. The protruding mound is strongly shifted to the left. The eyes are located at different distances from this protrusion and have different shapes.
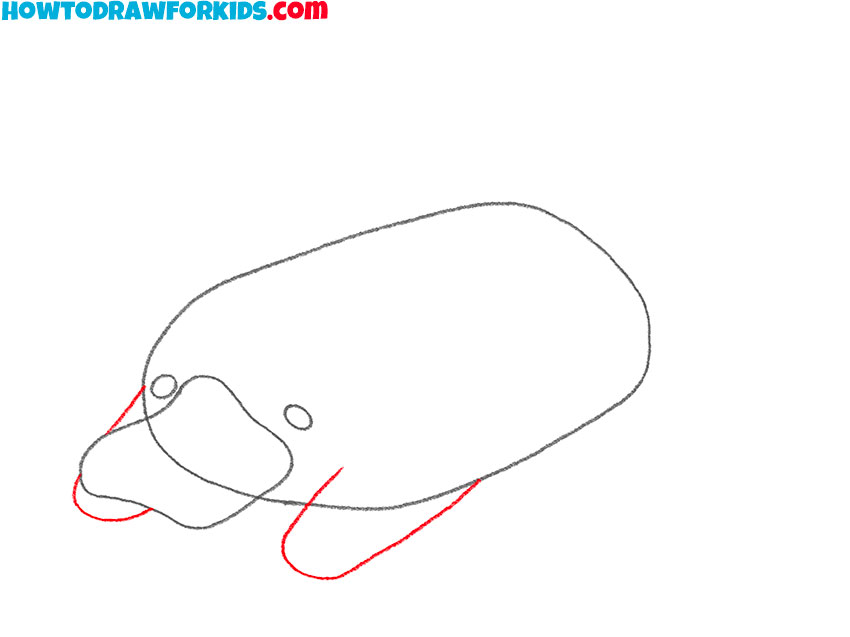
- Draw the platypus front limbs.
Draw the front limbs by adding two rounded shapes on either side of the front of the body. The direction and position of the limbs suggest the relaxed, static posture of the platypus. Match the placement of each paw to the platypus beak for maximum accuracy of the drawing.
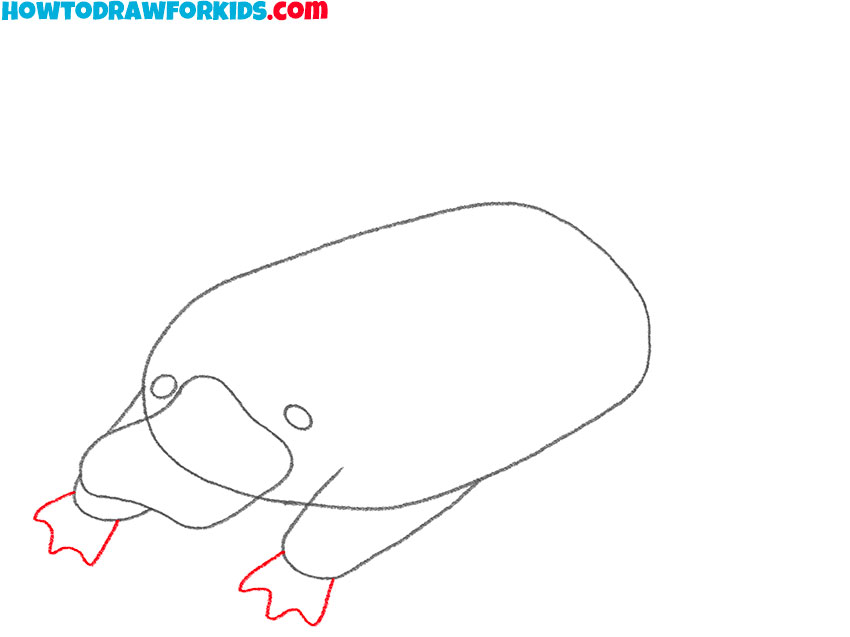
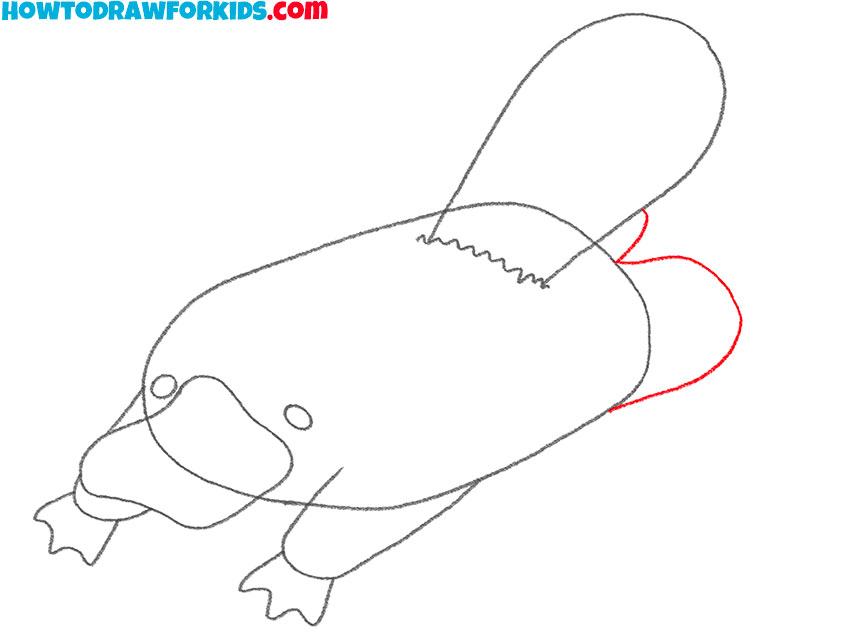
- Sketch the webbed front toes.
The platypus’s webbed feet are superbly adapted for swimming. When drawing these paws, create three smooth protrusions to represent the toes. Ensure you include a delicate membrane stretching between each protrusion, capturing the essence of their aquatic functionality.
- Draw the platypus tail.
Extend the back of the body into a broad, flat tail. This tail should expand slightly but maintain a robust appearance, indicative of its use in swimming. The junction of the tail and body looks like a jagged line. This perfectly shows that the body is covered with fur and the tail has a smooth texture.
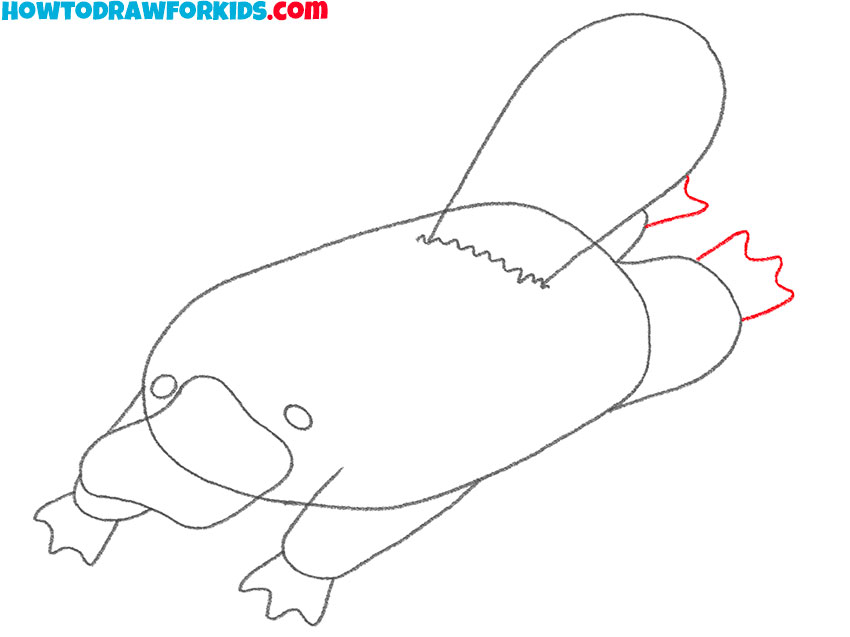
- Add the hind limbs.
Add the hind limbs using a similar technique to the front limbs, ensuring they are proportional and correctly aligned with the body. The positioning should reflect the natural stance of a platypus. Unlike drawing the platypus’ front legs entirely, the hind legs are partially overlapped by the outline of the tail.
- Draw the webbed toes on the hind feet.
The hind limbs of the platypus, much like the front legs, are designed for aquatic mobility. As such, they bear a striking resemblance to each other in shape and function. A subtle yet important detail to note is that the far leg is partially obscured by the platypus’s large tail.
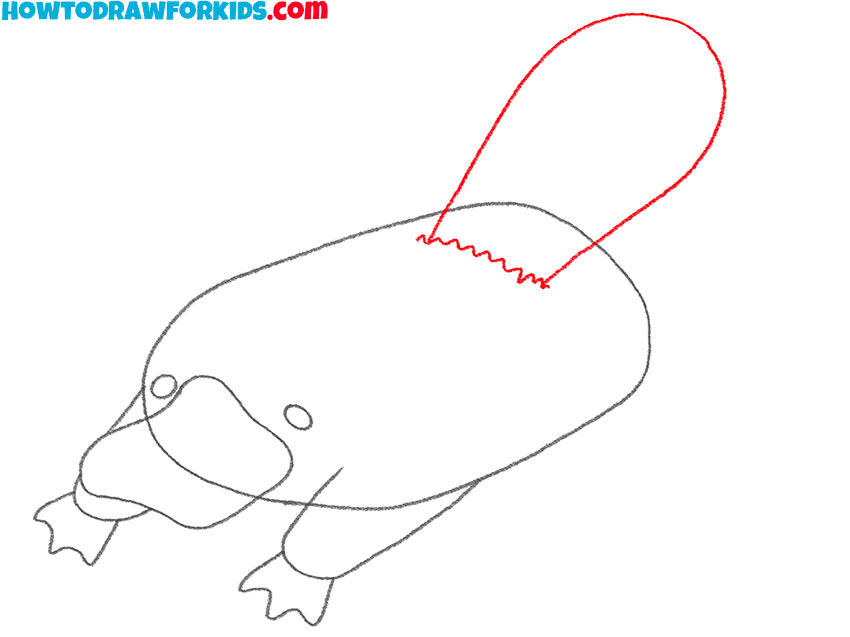
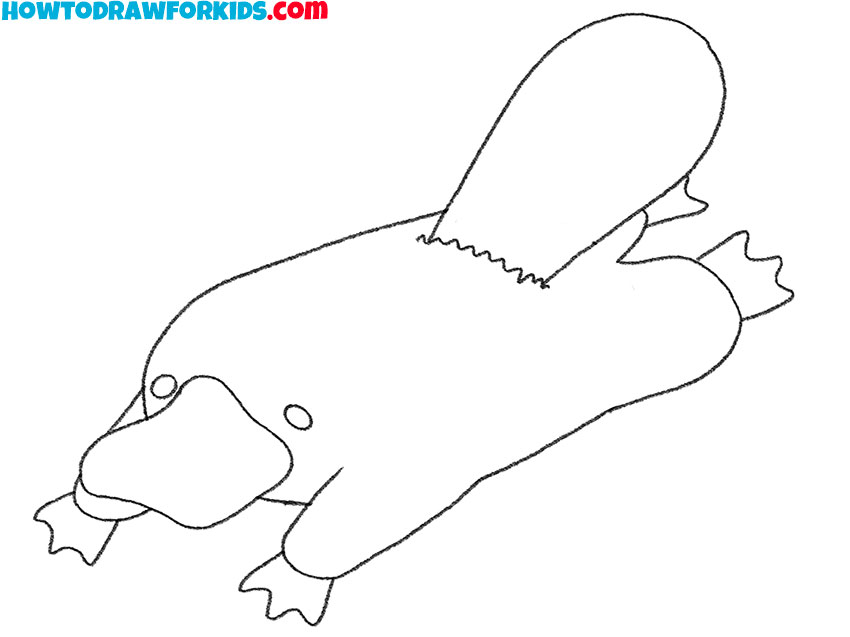
- Check your artwork.
Review and adjust the overall body outline to smooth out any discrepancies and enhance the platypus’s shape. This involves perfecting curves and making sure all parts are proportionally balanced. Also check the pose and proportions, remove inaccuracies and unnecessary lines.
- Color the platypus drawing.
Finish your drawing by adding colors typical of a platypus, such as light browns or yellow for the body, with darker shades on the limbs, beak and tail. There is no texture or complex shadows in my version. But with such minimalism, the highlights in the eyes look especially impressive.

How to Draw a Platypus: Additional Content
So, I’ve put together a special PDF just for you, and guess what? It’s your new drawing buddy, and it’s coming to you absolutely free – no hidden costs, no strings attached! This isn’t just any ordinary PDF; it’s your all-access pass to mastering that adorable platypus drawing.
Now, let’s talk about what makes this PDF super cool. First off, it’s designed to be super user-friendly, so you can zoom right into learning without any fuss. Plus, it’s a resource that sticks with you, no matter where you are.
Moreover, the flexibility this file brings to your artistic journey is like having a magic wand in your hand. You could be lounging in your backyard, snuggled up in your favorite nook at home, or soaking up some sun at the park – wherever you are, your drawing adventure doesn’t have to pause.
What’s more, this handy PDF is not just about drawing; it’s about growing your skills at your own pace and in your own space. It’s about turning those spare moments into bursts of creativity. So, ready to take your drawing to the next level with zero constraints? Click that download button!
How to Draw a Platypus: Adding Details
Adding a background can place your platypus in a natural setting, improving the overall composition. Consider including elements like water, rocks, and vegetation. This provides context and challenges you to integrate your main subject seamlessly with its environment, creating an interesting scene.
Platypuses have dense, waterproof fur. Use short, quick strokes to mimic the texture of the fur. Vary the direction and length of the strokes to create a more natural look. Pay special attention to areas where the fur is denser, such as around the neck and body.
Focus on creating smooth transitions between different parts of the platypus’s body. For example, ensure the connection between the bill and head, and the body and tail, is seamless. Blending these areas well will make your platypus drawing look more natural.
The platypus’s tail is broad and flat, used for storage of fat and steering while swimming. Pay attention to its unique shape and texture. Add fine lines to depict the tail’s surface and use shading to show its volume and flatness.
Conclusion
On this platypus drawing tutorial you’ve taken some simple steps and turned them into a splendid piece of art.
This tutorial has guided you through the process of drawing a platypus, emphasizing the unique features of this extraordinary creature. We explored techniques to add details to illustrate its unusual body accurately. Furthermore, we discussed ways to improve imporove the drawing’s complexity, training your composition skills.
To support your continuous improvement, a free PDF is included, offering additional exercises and tips to further develop your drawing abilities.