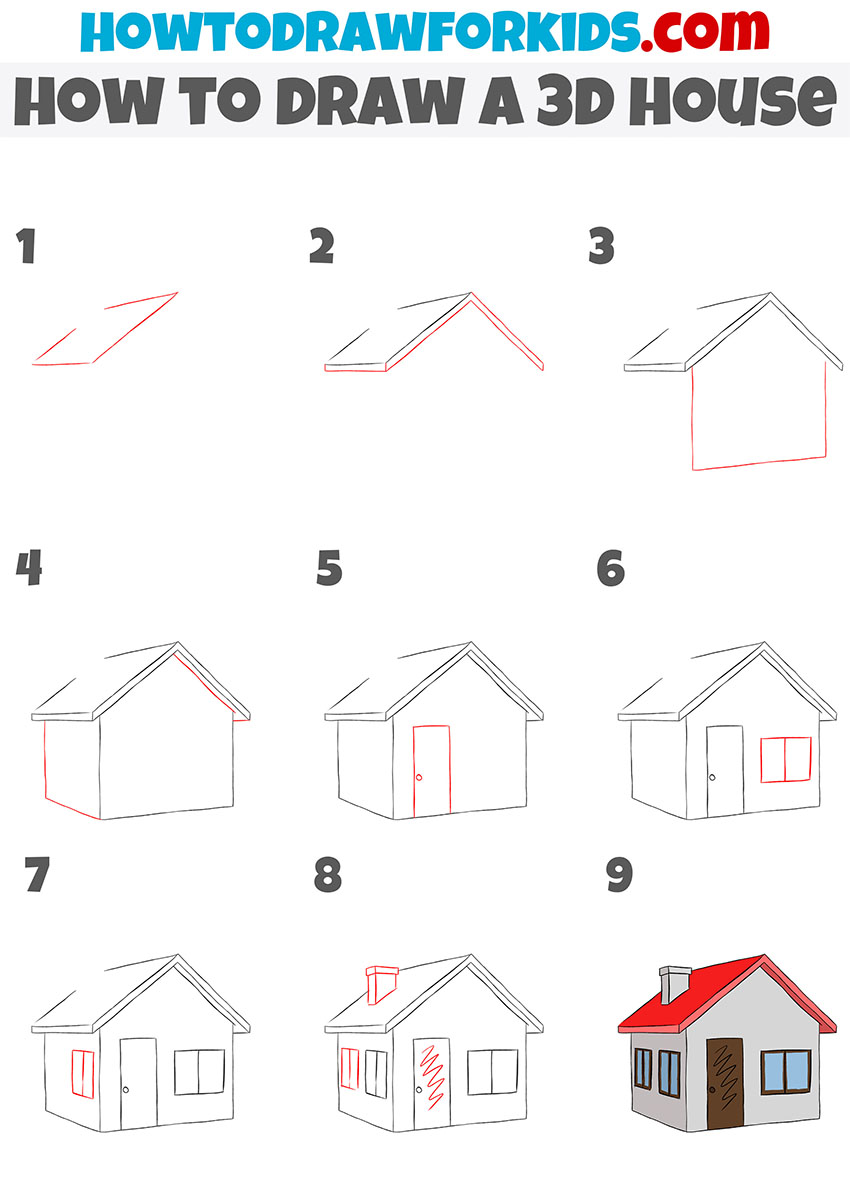
How to Draw a 3D House
This tutorial will show you how to draw a 3d house using perspective and other artistic techniques to give it a highly three-dimensional look.

How to Draw a 3D House: Introduction
In one of my previous lessons, I showed you how to draw a house that appeared quite three-dimensional and realistic, despite its simplicity and even cartoonish style. However, today I want to show you how to draw a 3D house, giving it maximum depth using very simple techniques. This may seem challenging at first, but I’ll demonstrate just how easy it can be once you know the right artistic methods.
In this tutorial on drawing a 3D house, I will teach you how to use perspective lines, even in their simplest form, to create the illusion of depth on paper. By applying these techniques, you’ll be able to make your drawing look more dynamic and lifelike. The use of perspective will be key to creating the 3D effect, making it look like the house is actually popping out of the page.
Additionally, I’ll show you how to use various shades to create light and shadows, further enhancing the three-dimensional appearance. The proper use of shading will help define the shapes and add volume, making the house appear more solid and tangible.
While this process may sound complicated, I’ll guide you step by step, showing how these easy techniques can transform a simple drawing into a 3D-looking masterpiece. By the end of this lesson, you’ll have a much clearer understanding of how to bring depth to your drawings.
3D House Drawing Tutorial
Materials
- Pencil
- Paper
- Eraser
- Coloring supplies
Time needed: 30 minutes
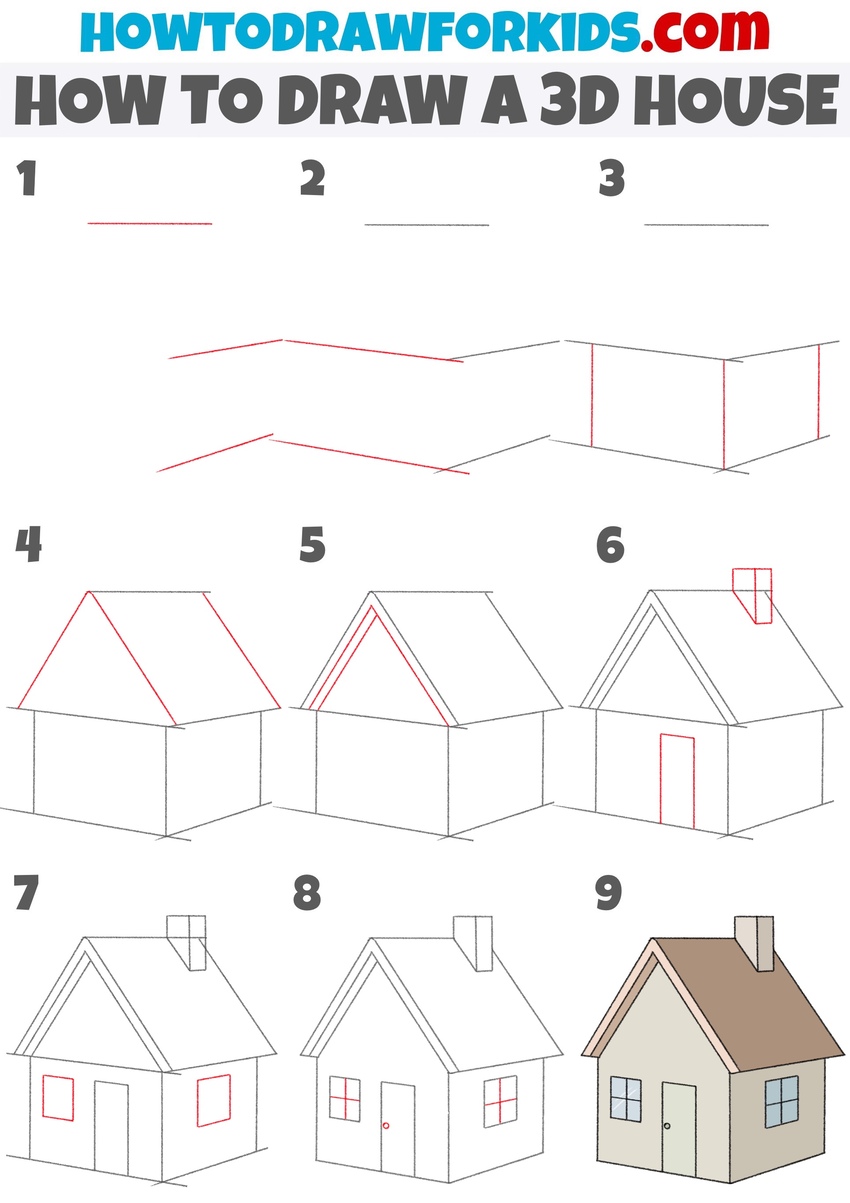
How to Draw a 3D House
- Start sketching the perspective lines.
To draw a 3D house, start by sketching the perspective lines. First, draw the upper line of the roof. Then, draw the line that separates the roof from the main body of the house. Finally, draw the bottom edge of the house. These three lines should slightly converge as they recede to indicate linear perspective.

- Sketch the perspective lines on the other side.
Now, draw two more lines on the other side. These lines will indicate the linear perspective from the opposite side of the house. If the lines from the previous step created one surface of the house, these lines will establish another surface.

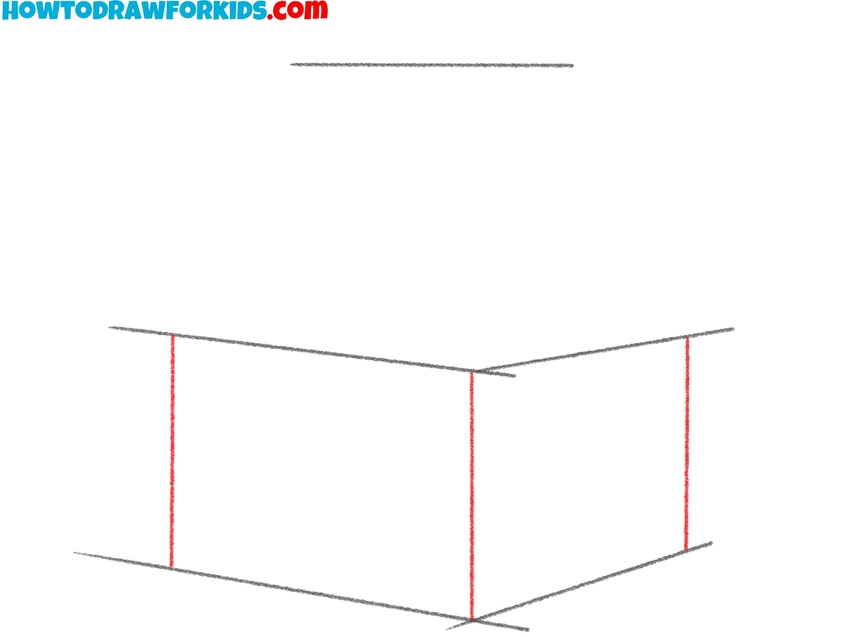
- Draw the corners of the 3d house.
Now, connect the ends of the lines from the previous steps to form two rectangular shapes. These shapes will create the sides of the house in perspective. The rectangles should appear slightly tilted, following the angle of the diagonal lines you previously drew.
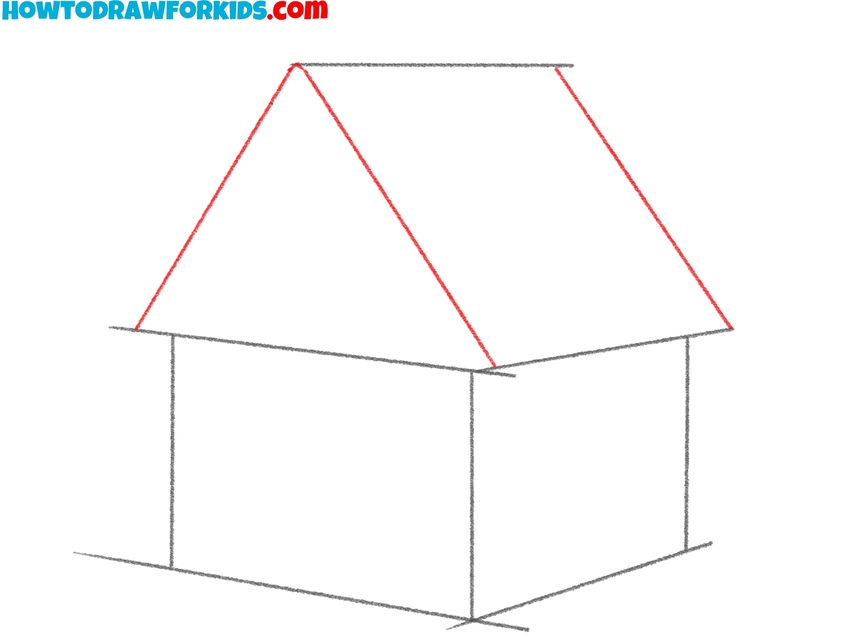
- Start drawing the roof of the 3d house.
Start by drawing two lines from the top corners of the rectangular shape you just created. These lines should meet at a point above the rectangle, forming the peak of the roof. Then, draw another tilted line to finish the shape of the roof.
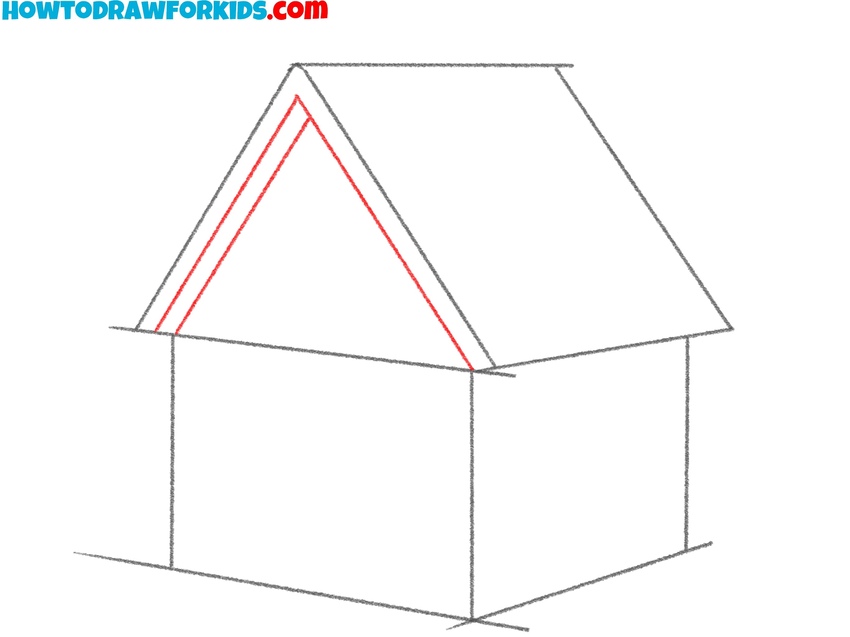
- Detail the roof of the 3d house.
To make the roof of the 3D house look more detailed and dimensional, draw two additional lines that follow the lines from the previous step. These lines will form the front brim of the roof. To give this part extra dimension, add another line to indicate the inner edge of the front brim.
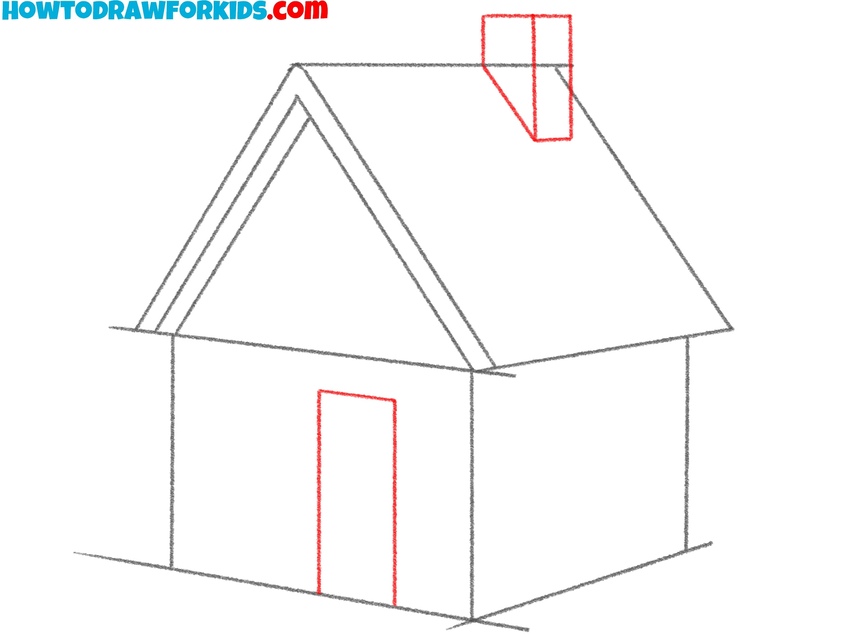
- Add the door and chimney.
Next, add small details to the 3d house. Draw a chimney on top of the roof by creating a small rectangular shape that extends from the roof. It should be positioned closer to one side of the roof to add variety. At the front surface of the 3d house, draw a small rectangle to form the door.
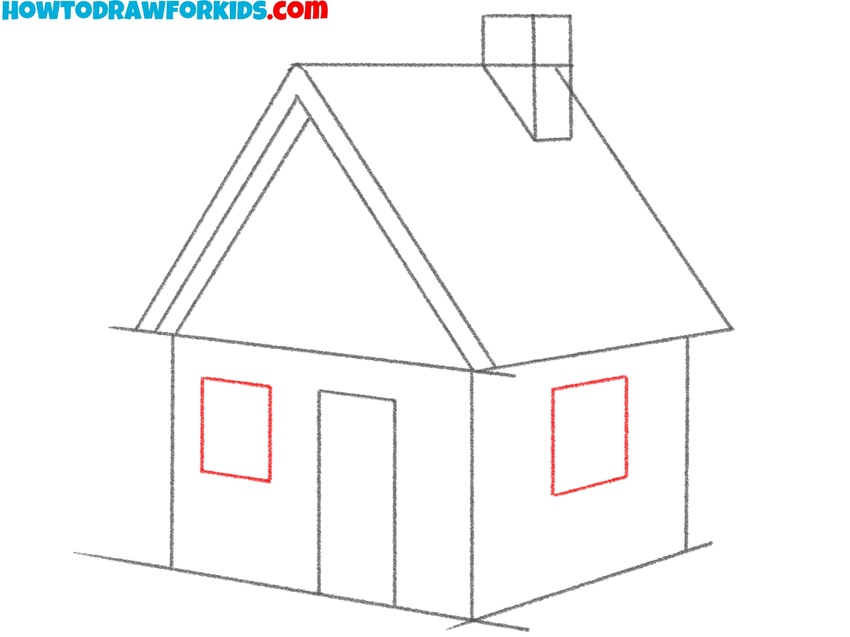
- Draw the windows of the 3d house.
Add two square shapes on the main part of the house to represent the windows. The windows should have straight lines. The lines of the windows should follow the angles of the house to give the drawing a more natural look and create a realistic perspective.
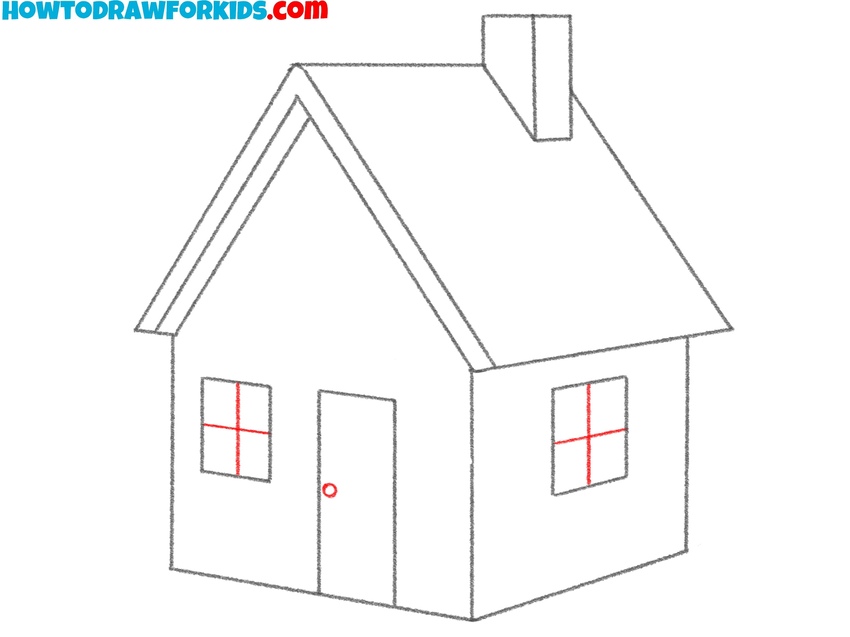
- Detail the door and windows.
To make the windows of the house look more detailed, draw crossing lines to indicate the windows. After that, draw the hands as a simple circle. After that, erase the guidelines to give your 3d house drawing more polished look. Take care to avoid erasing important details, such as the windows, door, and chimney.
- Color the 3d house.
Use brown or tan for the roof, and color the walls with a light color like beige or yellow. Color the windows with light blue. To give your 3D house drawing a more dimensional look, color one side in darker tones than the other. This technique creates light and shadow on the sides of the house for added dimension.

Simple 3D House Drawing Tutorial
This tutorial on drawing a 3D house demonstrates more simplified process. Unlike the first, which shows more detailed methods, this version uses simple steps to draw a 3D house. Also, this version uses more saturated colors and different sequence of steps.
To begin this tutorial on how to draw a 3D house, start by sketching the roof’s slanted edges, using diagonal lines. Once the roof is in place, add the house’s walls by extending vertical lines down from the roof. This will create the house’s main structure.
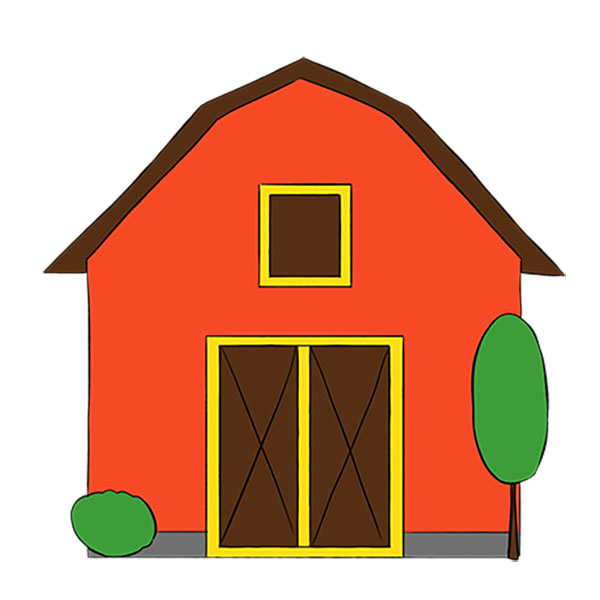
After forming the basic shape, draw the door and windows, keeping their lines straight and simple. Be sure to follow the house’s perspective to maintain a three-dimensional look. Add details like a chimney, making sure the lines match the perspective for a realistic appearance. Once you’ve completed the outline, start coloring the house. Use gray for the walls, red for the roof, and brown for the door to give the house a realistic look. For the windows, use blue to represent glass.
Conclusion
I worked hard to make this tutorial on how to draw a 3D house as simple and informative as possible for you. I’m really excited to see your work and how your house drawings look in three dimensions.
Feel free to share your drawings in the comments on my Pinterest page. I look at all your work because I’m really interested in how you approach the tasks. Also, make sure to follow me on Pinterest so you don’t miss out on new and equally interesting and informative lessons.
Don’t forget to subscribe to my YouTube channel, where you’ll find a ton of video versions of my drawing tutorials, as well as behind-the-scenes videos showing how I create my drawing lessons and coloring pages.