How to Draw a Basketball
In this tutorial I will use two methods to show you how to draw a basketball, the ball used to play the game of the same name.
How to Draw a Basketball: Introduction
For those interested in drawing, learning how to draw a basketball can be a useful skill to make the ball appear as though it could bounce right off the page.
In this tutorial, you will move from a simple circle to a detailed basketball with a realistic textured look and familiar line patterns. To further deepen your knowledge, at the end of the lesson I will show you another way to draw a ball, but in a slightly different technique.
And of course, among other things, this lesson will show you how to draw spherical objects. By positioning the stripes on the ball correctly, you will achieve the desired volumetric appearance and be able to apply this knowledge to other objects in the future.
By the end of this lesson on how to draw a basketball, you will be able to create a completed drawing and apply the techniques to sketch other types of balls for different sports. This tutorial provides a really simple approach to improve your drawing skills with a sports theme.
Basketball Drawing Tutorial
Materials
- Pencil
- Paper
- Eraser
- Coloring supplies
Time needed: 25 minutes
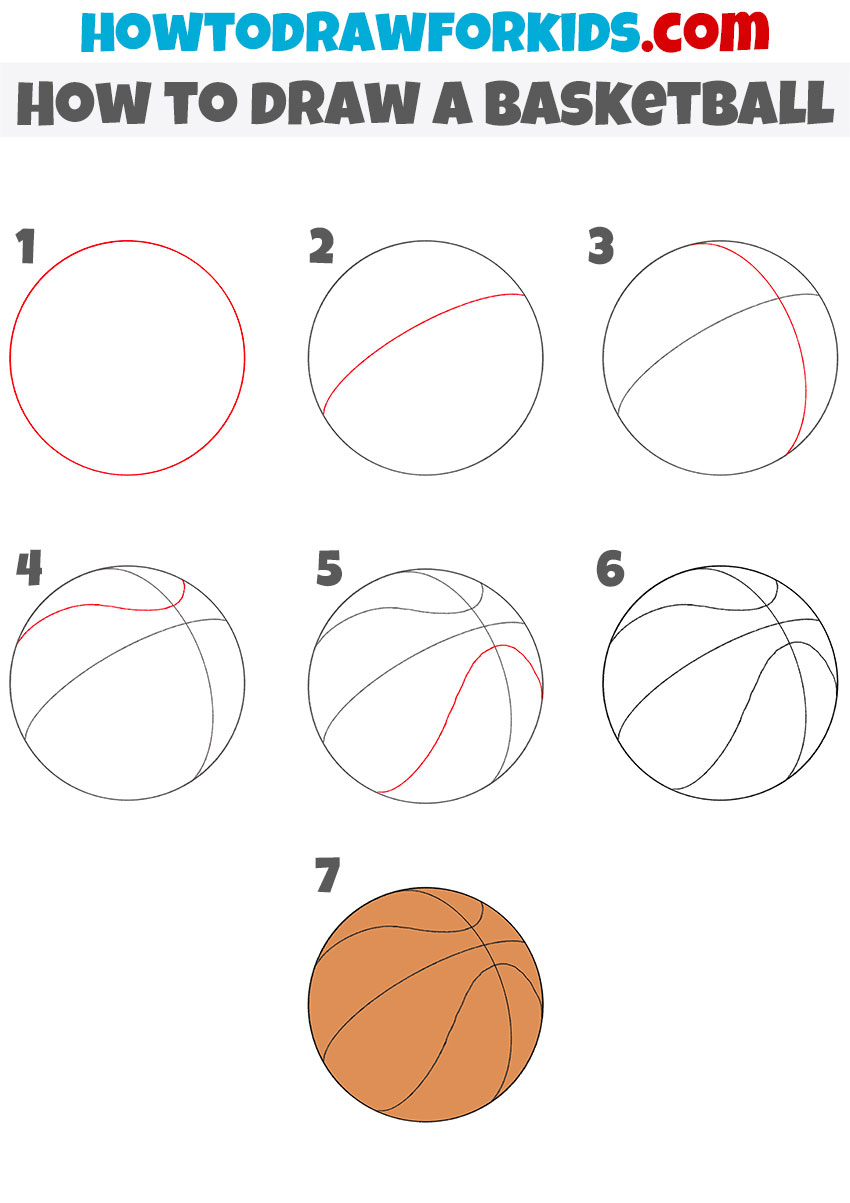
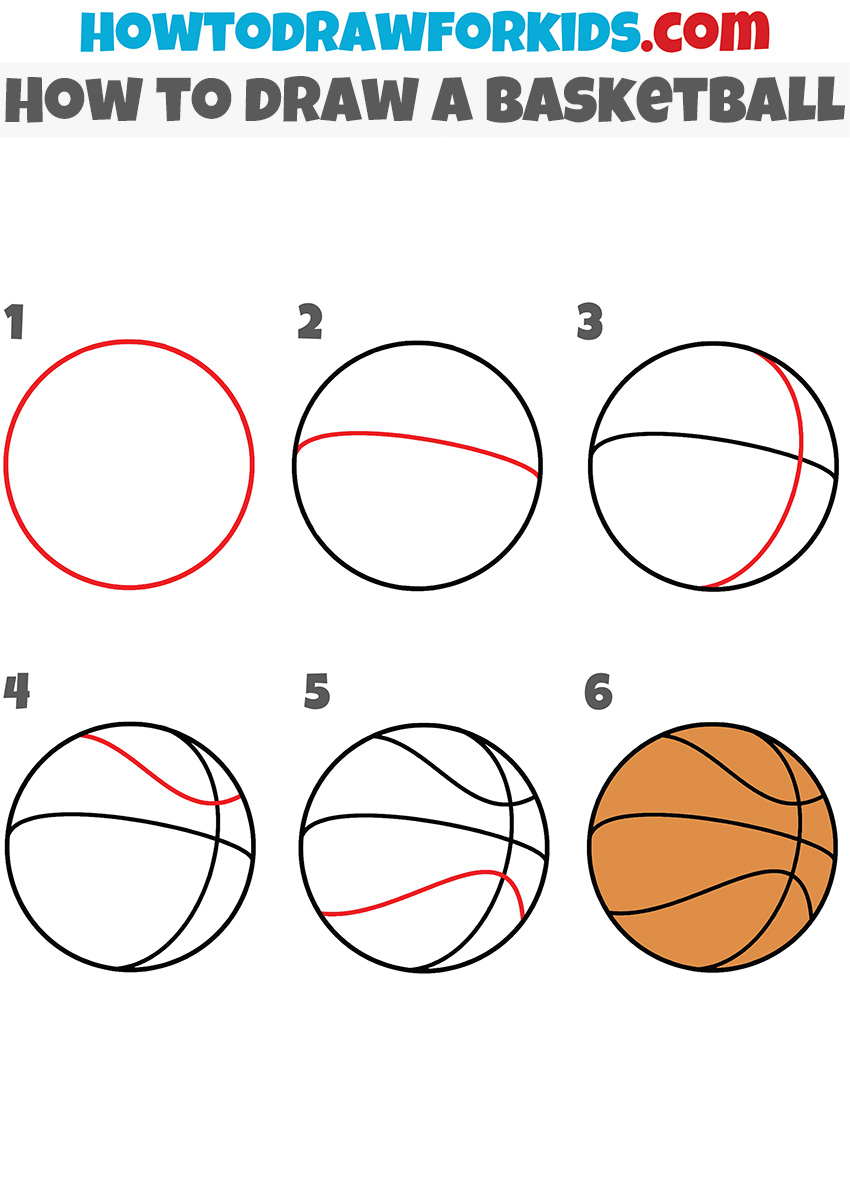
How to Draw a Basketball
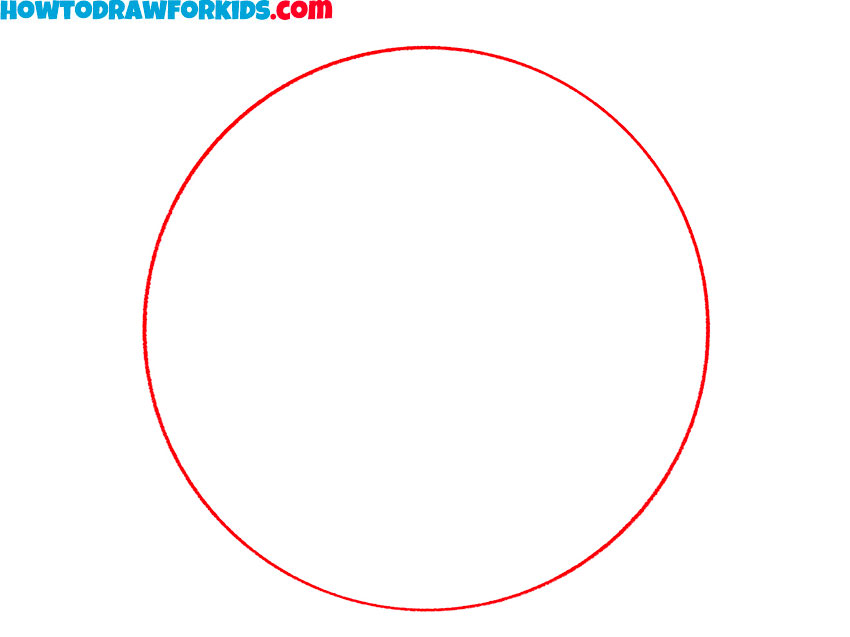
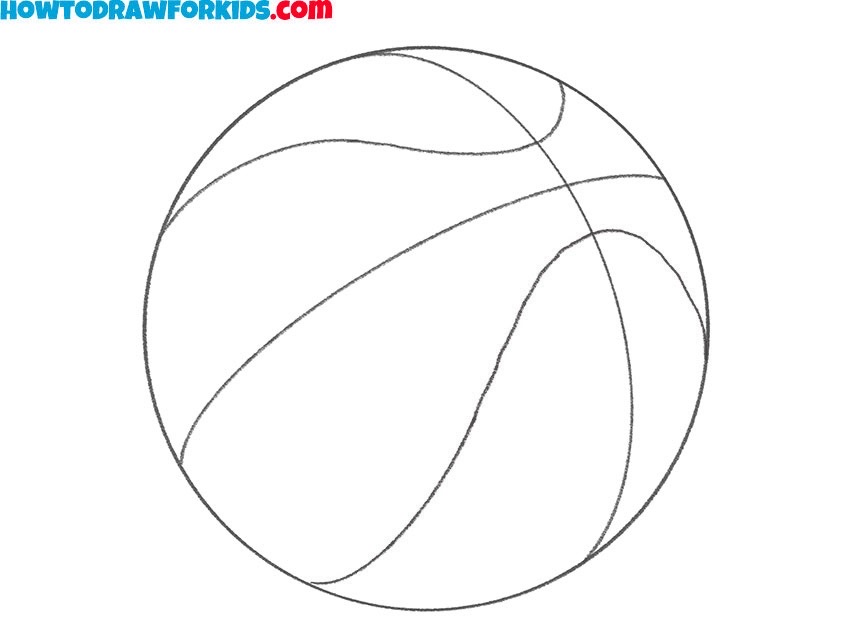
- Draw the outline of the basketball.
To start drawing a basketball, begin with a simple circle that represents the ball’s outer shape. Use light lines so you can easily make adjustments if needed. Take your time to draw a perfect circle. A well-proportioned circle here will help make the basketball look realistic in the later steps.
- Add the first curved line.
Next, draw a slightly curved line that extends across the circle diagonally. This line represents the main seam on the basketball, which gives it a realistic look. Try to convey the shape of this line so that you can use it to draw a three-dimensional sphere, which is essentially what a basketball is.

- Sketch the second seam.
Now, add another curved line that intersects the first line you drew. This line should curve in the opposite direction, creating a cross pattern on the basketball. Ensure the curves are smooth and natural, as these seams will define the sections of the basketball, adding to its authentic appearance.

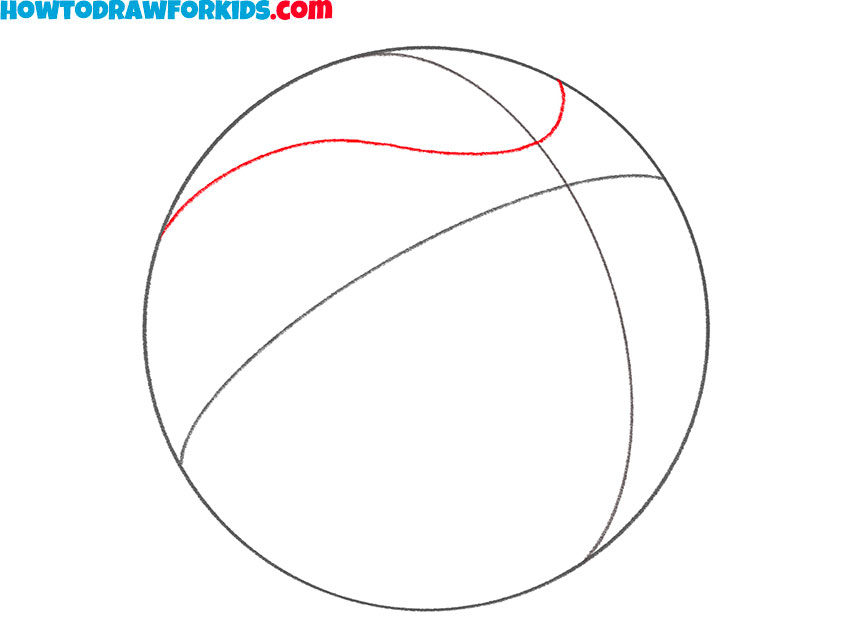
- Add the curve of the third seam.
In this step, draw a curved line that arcs near the top of the basketball. This seam line should connect smoothly with the other lines, further increasing the realistic appearance of the ball. The top curve represents the recognizable paneling seen on a basketball.
- Add the curve of the final seam.
Next, illustrate the second curved seam of the basketball, following the same flow as the previous step. This line should curve gently from one side to the other, completing the panel structure on the basketball. This part of the sketch creates the recognizable segmented look that defines a basketball’s surface.

- Finish the basketball sketch.
Now, go over the outline of the ball and all the seams you’ve drawn, refining and connecting them smoothly, if it is needed. This step prepares your basketball drawing for the coloring and gives it mote professional and finished appearance.
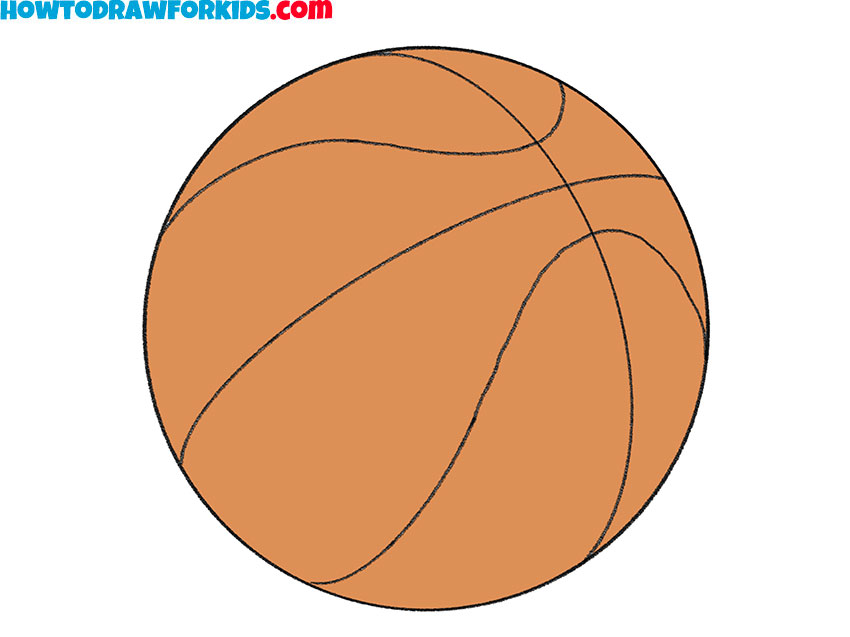
- Color your basketball.
Typically, basketballs are orange with black seams, so choose an appropriate shade to make it look realistic. Carefully color within the outline. To give your basketball drawing a more realistic and dimensional look, you can add shadows and highlights.

Additional Content
A PDF file has been created for you. This file includes all the steps covered in the tutorial, making it convenient for practice when internet access is unavailable. Simply download it, and it’s available for you to keep and use as needed.
Whether at home, on a road trip, or just taking a break from screen time, this PDF serves as a guide for drawing basketballs. Take advantage of this tool to continue practicing and developing your drawing skills.
How to Draw a Basketball: Additional Tutorial
The basics of drawing a basketball are now covered, but there is an additional method available for further practice. The second method closely resembles the first, with only minor differences in technique.
To draw a basketball in this technique, begin by sketching a large circle to represent the outline of the ball. Next, draw a horizontal curved line across the circle, slightly below the center, to represent the first seam on the basketball. Then, add a vertical curved line intersecting the previous line, forming a cross pattern that outlines the ball’s panels.
Draw an additional curved line near the top to add the third seam, connecting smoothly with the previous lines. Continue by drawing the final curved line near the bottom of the circle, completing the panel structure that gives the basketball its segmented appearance.
Refine the lines as needed to ensure they follow the ball’s contour. Finally, fill in the basketball drawing with an orange color, and add black for the seam lines to achieve a realistic look.
Tips and Tricks for Basketball Drawing
For both beginners and experienced artists, a few techniques can improve the process of drawing a realistic basketball.
For example, using circular objects like a bowl or compass helps trace an accurate initial circle, creating a smooth and clean base shape.
When drawing the curved lines, keep your wrist steady and rotate the paper as needed to achieve a smooth arc, which maintains the natural flow.
Pay attention to the symmetry of the lines around the center of the ball, as any imbalance in curve length or positioning can distort the perspective.
Keep an eraser nearby to correct any guidelines or mistakes, using light pressure to avoid paper damage.
Decide on a light source and apply shading and highlights, improving the drawing’s realism.
Conclusion
You have completed a lesson on how to draw a basketball, equipping you with the skills to proceed with your pencils and paper. For further practice, additional drawing lessons are available on this website, particularly suited to sports fans.
For a greater challenge, consider drawing a golf ball with detailed dimples or a soccer ball featuring its characteristic pentagons. Lessons on these and various other topics are available, covering a wide range of interests beyond sports.
To stay informed about new drawing lessons, follow me on social media. New tutorials are released ver often, offering various topics.


i want to leran