How to Draw a Camel
I think that you will learn with interest how to draw a camel – one of the most amazing animals on our planet
This lesson will teach you how to draw a camel quickly and easily, because each step in this instruction is one simple action that you can easily complete, even if you have little experience in drawing.
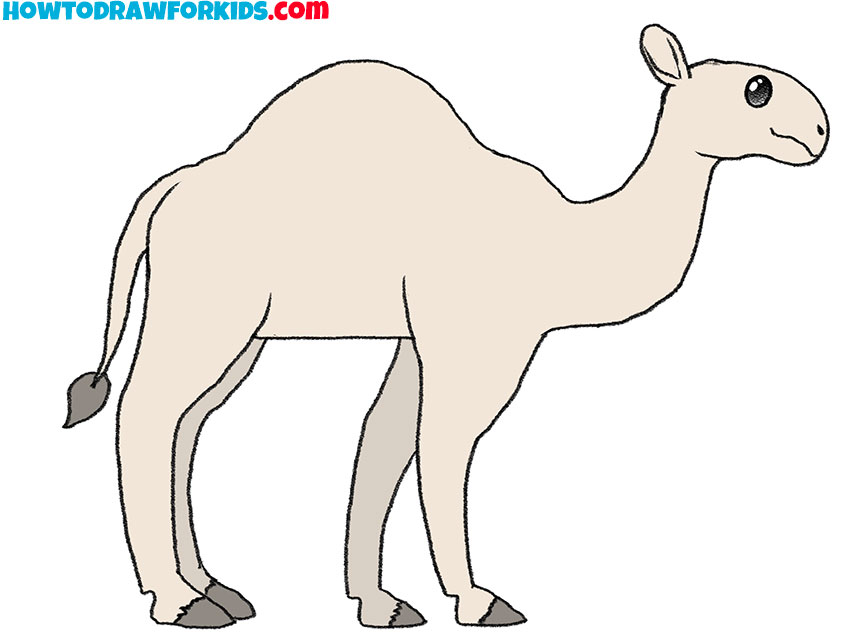

Table of Contents
- Basic information
- Steps on how to draw a camel
- Additional content
- Alternative camel drawing way
- Improve your drawing
- Conclusion
Basic Information on How to Draw a Camel
Once you learn how to draw a camel, you will be able to create beautiful drawings of this animal. The figure shows a camel in a simplified form, however, it shows the main structural features of a camel that you need to know.
Camels are either one-humped or two-humped. In this lesson you will draw a dromedary camel, and you can use the skills you learn to draw a Bactrian camel. All you have to do is change the upper body and add a second hump.
To successfully draw a camel, you will use the basic rules for drawing any animal. First you need to determine the aspect ratio of the body and the position of the camel on a piece of paper. Then you should make a small sketch and determine the position of the camel body parts.
Materials
- Pencil
- Paper
- Eraser
- Coloring supplies
Steps on How to Draw a Camel
Time needed: 20 minutes
How to Draw a Camel
- Draw the outline of the camel’s head and torso.
Draw a large horizontal oval for the camel’s body and a smaller circle to the left and above the oval for the head. Compare the sizes and locations of the shapes before moving on to the next step.
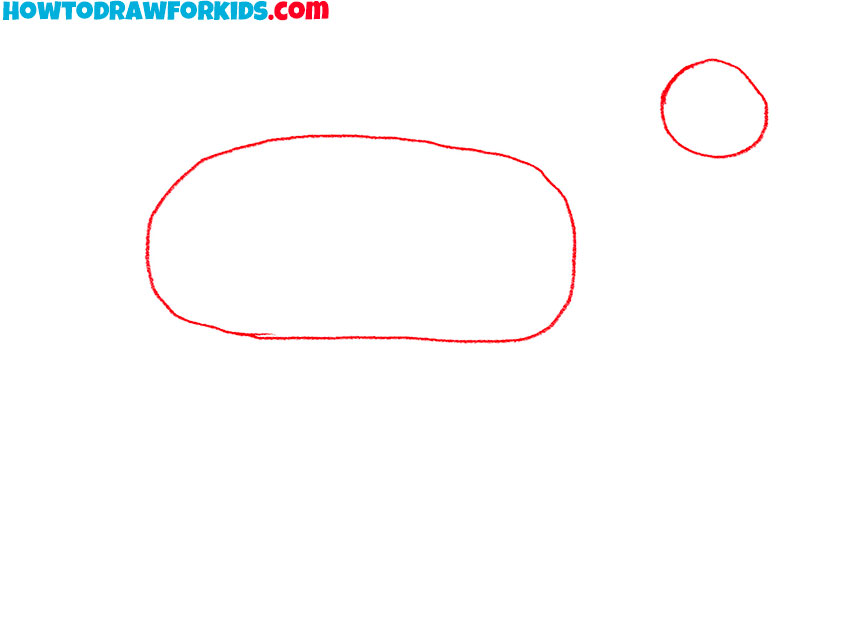
- Depict the neck and the front of the head.
Connect the camel’s body and head with a long, curved line to create the outline of the neck. Also draw the elongated part of the camel’s head as in our example.
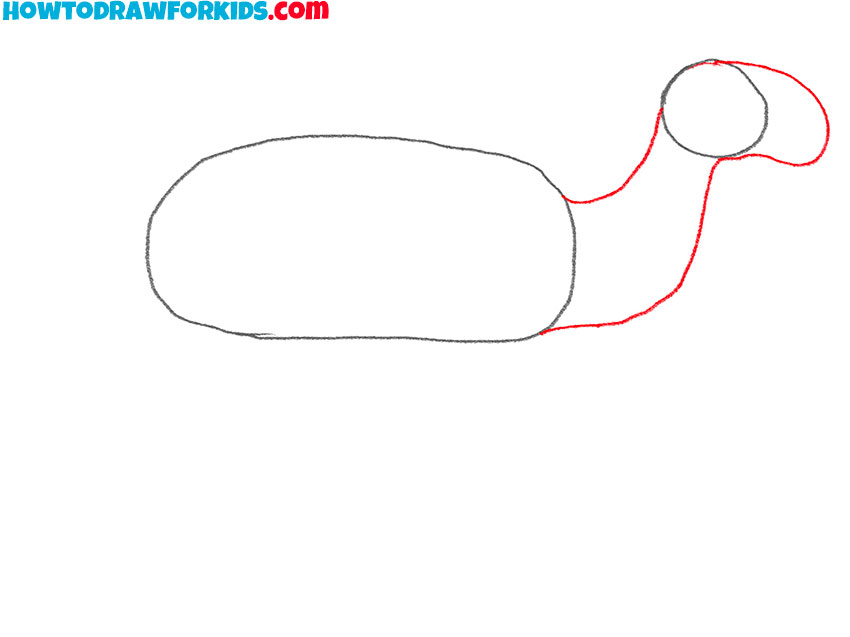
- Picture the ear and facial features.
Now we can add the details of the camel’s head. So, draw a large oval eye, an elongated ear with an inner shell, a nose as a dot and a mouth as a line.
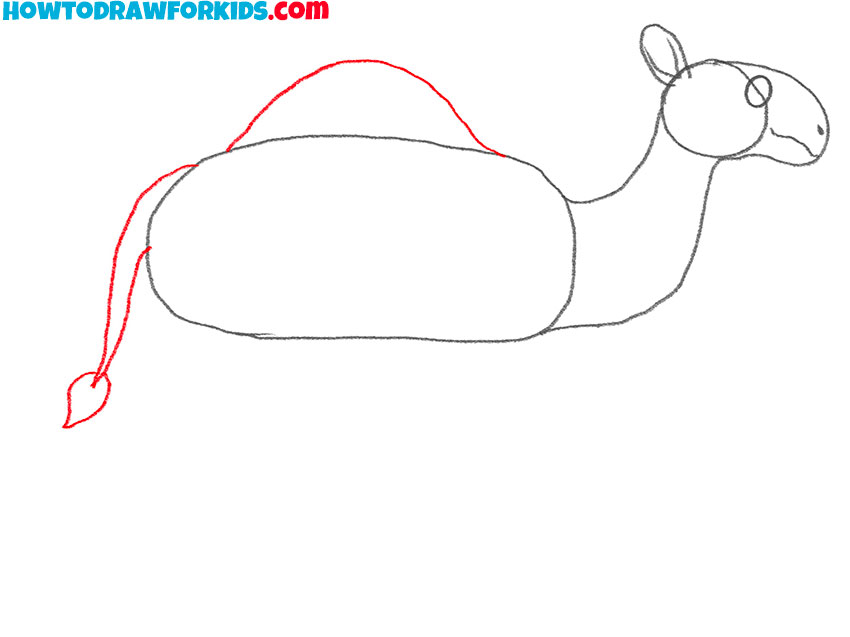
- Add the camel’s hump and tail.
Add the outline of the tail as well. Pay attention to the features of the tail, such as a smooth taper downwards and a large tassel at the end.
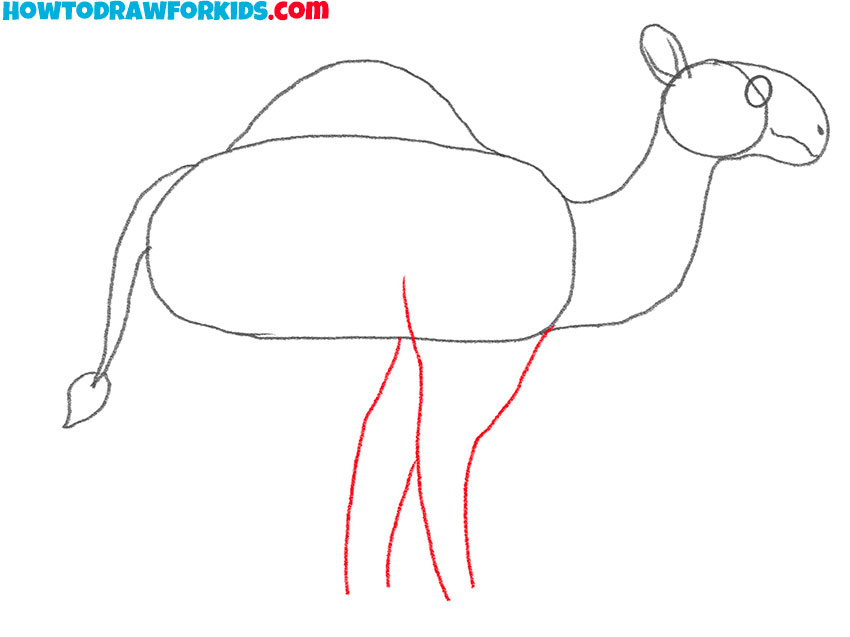
- Picture a pair of camel’s paws.
Depict the legs with some detail, adding the joints and tapering towards the feet. Sketch in the front legs with a slight bend to imply the knee.
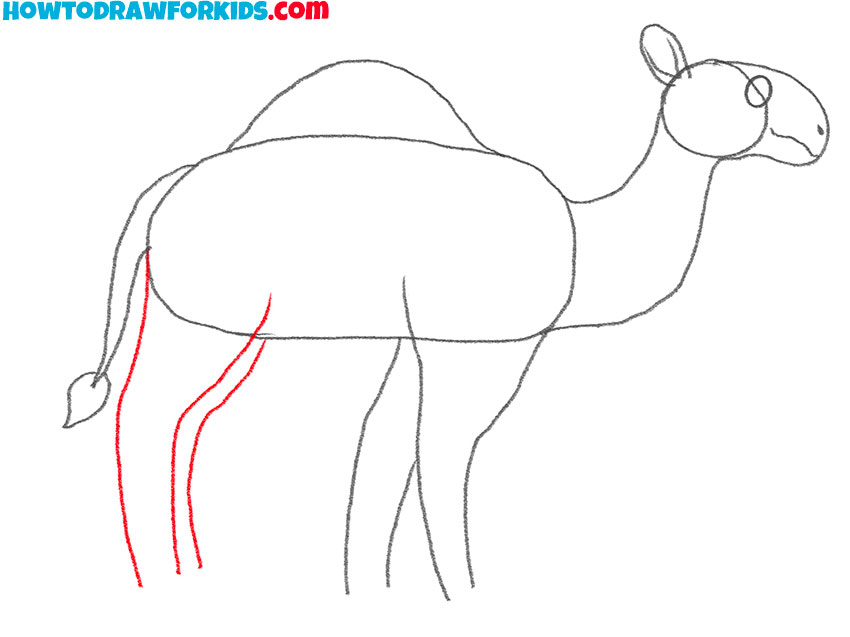
- Add a second pair of paws.
To represent this pair of camel paws, draw three curved lines at the back of the camel’s torso.
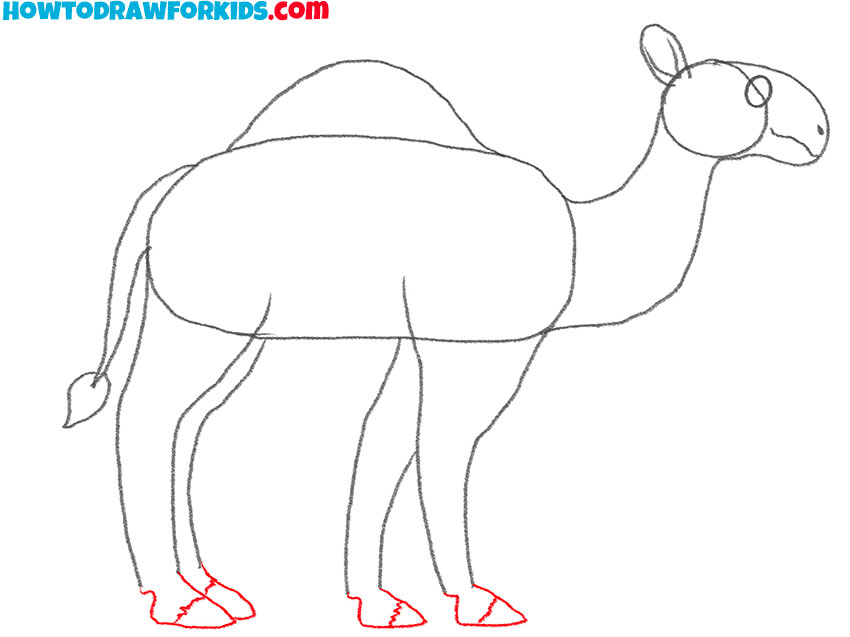
- Depict the hooves on the paws.
Sketch the camel’s distinctive two-toed hooves with slight curves at the bottom for the pads. The feet should be sturdy to support the camel’s weight.
- Erase unnecessary lines.
Remove the extra lines from the camel drawing. Check the contours of individual parts of the body and the entire drawing as a whole.
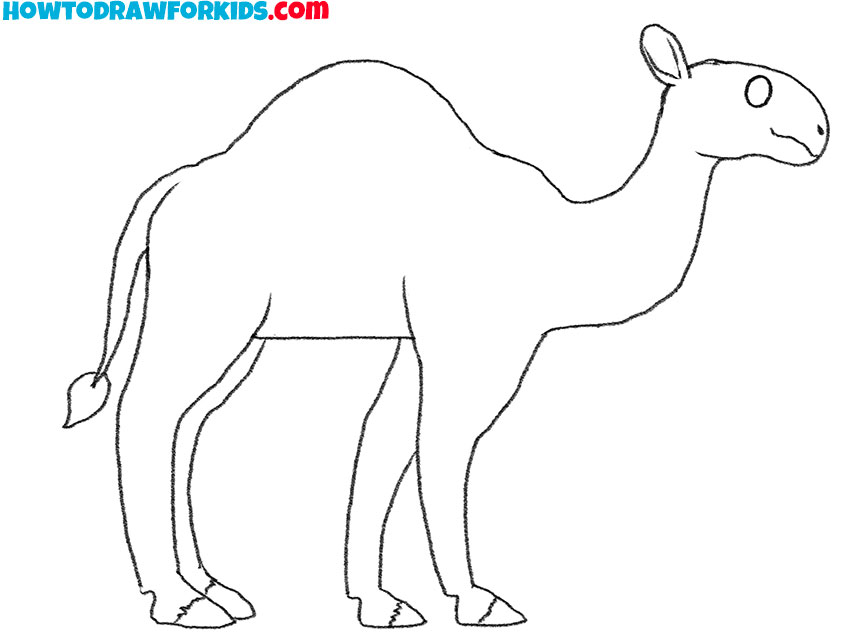
- Color the drawing.
Add a sandy beige color to the camel’s body, deepening the hue around the hump, legs, and underbelly to create a sense of depth and volume. Highlight the facial features with darker shades to complete your drawing.

Additional Content
For your convenience, I have prepared a PDF file in advance that contains a short version of the lesson. You can download this file completely free of charge from the link at the end of the lesson. At the end of the day you will have a quick guide, a coloring page, a tracing worksheet, and a grid drawing worksheet. You can use these materials at any time, regardless of whether you have an Internet connection.
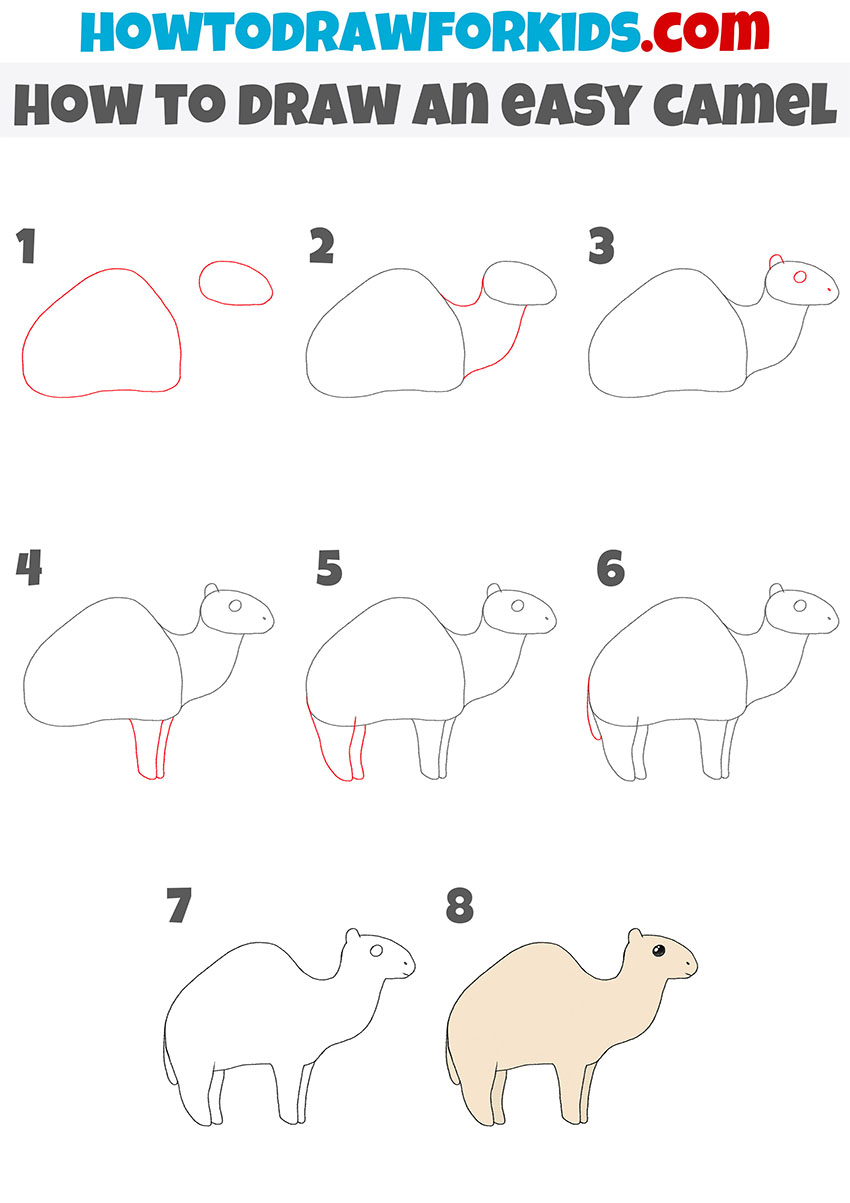
Alternative Way to Draw a Camel
You have now learned how to draw a simplified version of a camel, but if you still have difficulties, then I suggest you a cartoon and super easy camel.
How to Draw an Easy Camel
Here is the easiest way to draw, which even a beginner can easily master. In this tutorial you need to draw a minimal amount of detail in just 8 steps.
Improve Your Camel Drawing
If you wish, you can add an environment for the camel. These animals live in arid regions – deserts and steppes. In the picture you can depict the natural habitat of a camel. For example, draw some hills of yellow sand and small thorny plants around.
This way you will get a wonderful drawing that you can show to your friends.
Conclusion
You have successfully completed the camel drawing lesson step by step and will be able to create new drawings depicting this animal.
Share your impressions and leave a short review about this lesson in the comments.
You can find out information about new drawing lessons from my social networks. Subscribe to us if you haven’t already. We always welcome new subscribers.


I do not like it but try again
Bad,you could improve