How to Draw a Capybara
This tutorial on how to draw a capybara will guide you through sketching this semi-aquatic rodent in a really simple and cute style.

How to Draw a Capybara: Introduction
The capybara is the largest rodent in the world, easily recognizable by its rounded body, short legs, and broad, blunt face. In this tutorial on how to draw a capybara, we’ll create a simplified side view that will illustrate the animal’s appearance and covey it’s features.
While drawing this version, pay attention to the size difference between the head and body – the head is large, and the face is rounded with a small snout. The legs are short and simplified. When drawing a capybara, it’s important to get the body shape and proportions right from the start.
The ear placement is also important. Make sure both ears are positioned at the very top of the head. The toes are small and minimal, so don’t overcomplicate them. Stick to the simple shapes shown in the guide to keep the look simple but natural.
You can leave the drawing as is or add small extras like grass, a puddle, or another animal nearby. Once you’ve learned how to draw a capybara using this version, you’ll be able to modify the pose or combine it with other animal drawings to create a more complete scene.
Capybara Drawing Tutorial
Materials
- Pencil
- Paper
- Eraser
- Coloring supplies
Time needed: 35 minutes
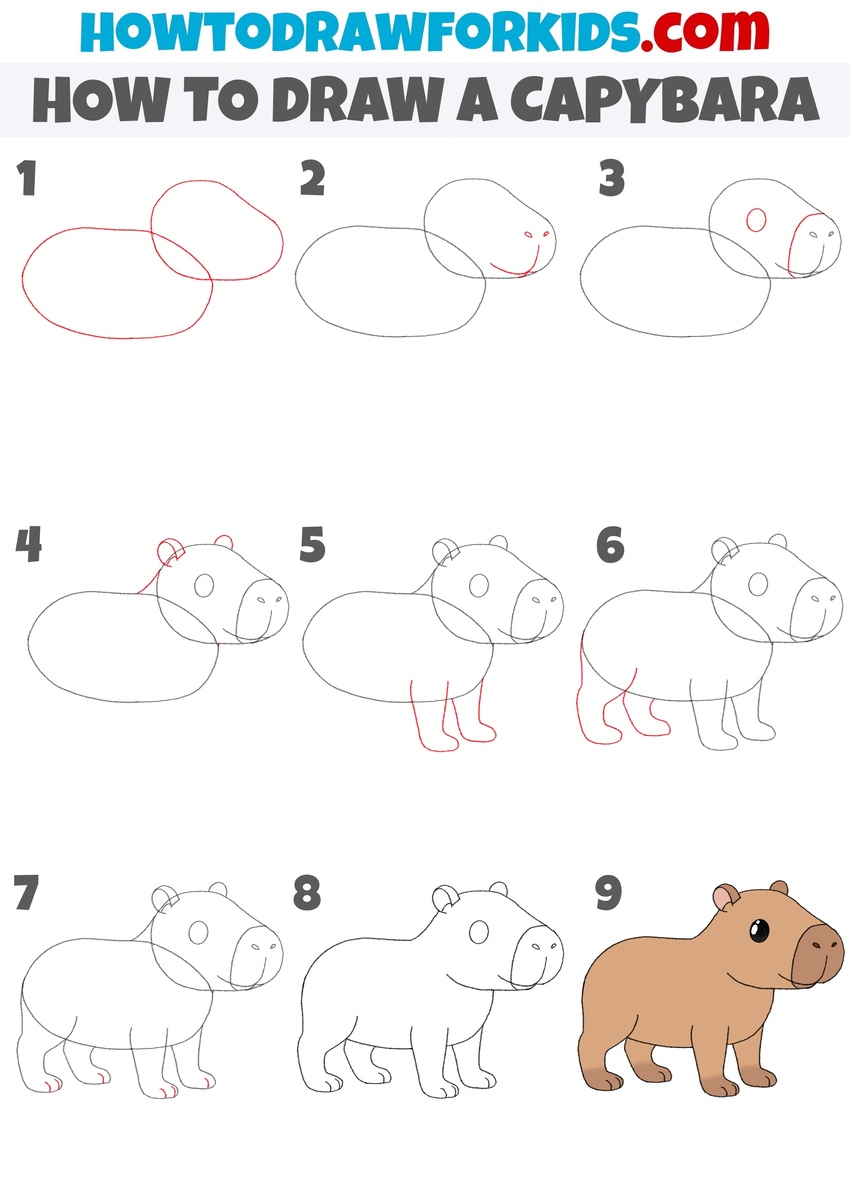
How to Draw a Capybara
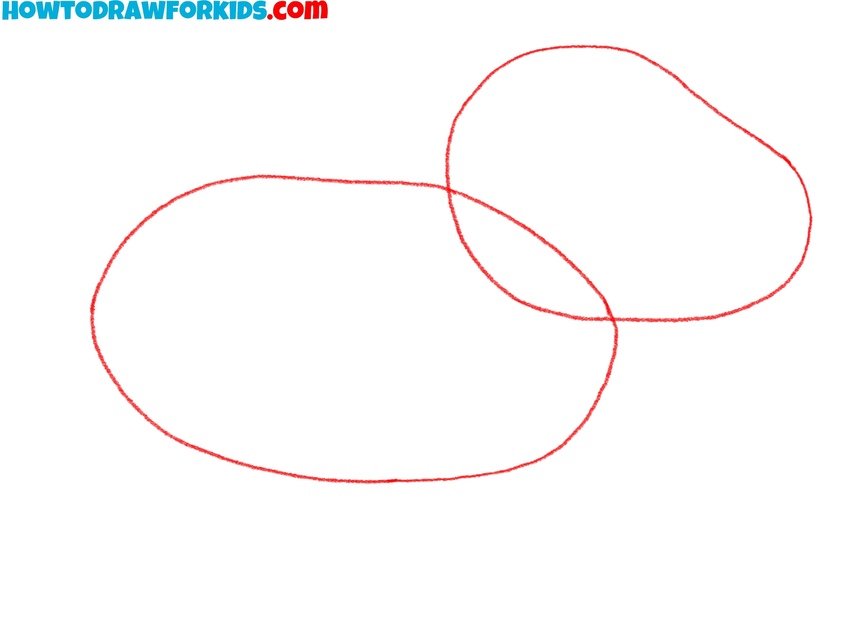
- Sketch capybara’s head and torso.
To start drawing a capybara, sketch two simple shapes to form the base of the body. If you’re going for a more realistic style, you’d make the torso even longer and the head flatter. You can also shift the ovals slightly if you want the animal to face a different direction.
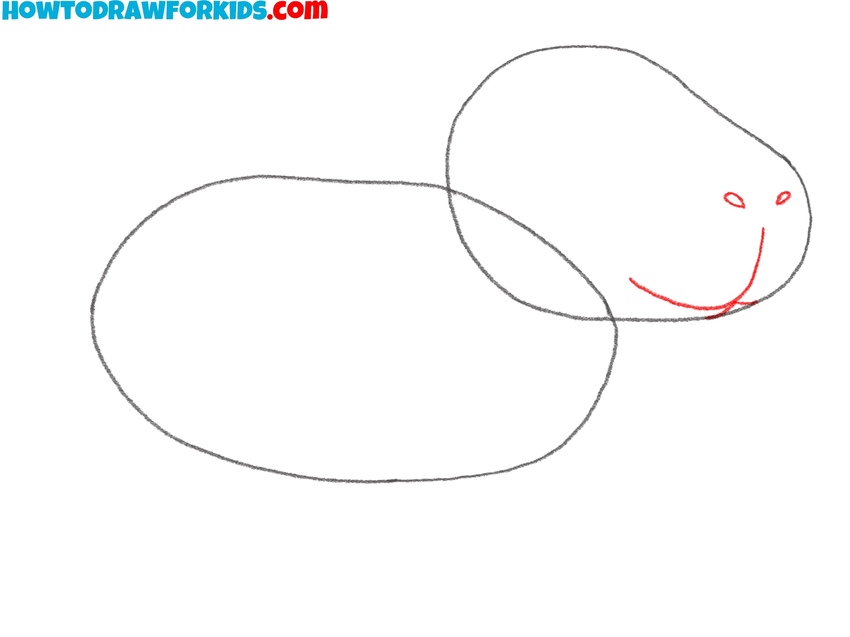
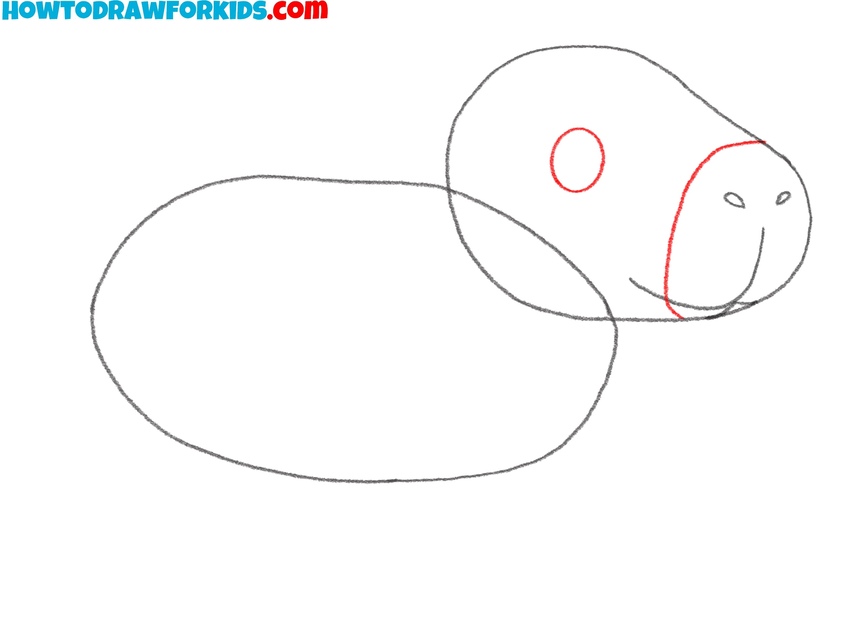
- Start drawing capybara’s snout.
Now, let’s start detailing the head of a capybara by adding some important details to the snout. First, draw the mouth of the animal with a couple of curved lines. Then, draw the nostrils above as two small ovals or drop-like shapes. These features are placed right at the front of the snout.
- Complete the main face elements.
To further detail the face, add a circular eye above the snout line, placing it near the middle of the head oval. This version uses a large cartoon eye, but a more accurate eye would be smaller and positioned a little farther back. Next, draw a curved line to separate the front of the face from the cheek.
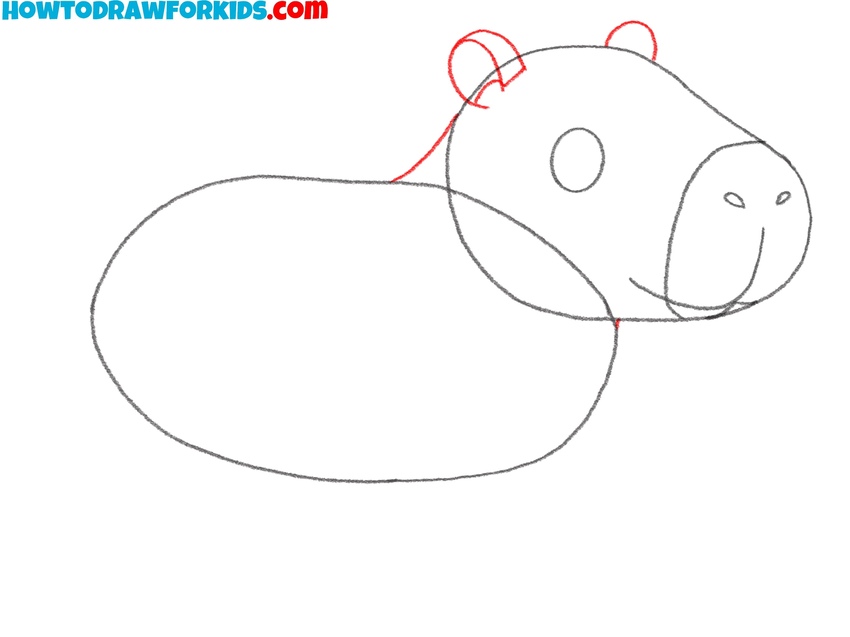
- Draw capybara’s ears and neck line.
Sketch the ears two small, rounded shapes on top of the head. In this cartoon version, the ears are simplified and quite large relative to the head. A more natural approach would make them smaller, almost barely sticking out of the head shape. Then, connect the head and body with a short curved line for the neck.
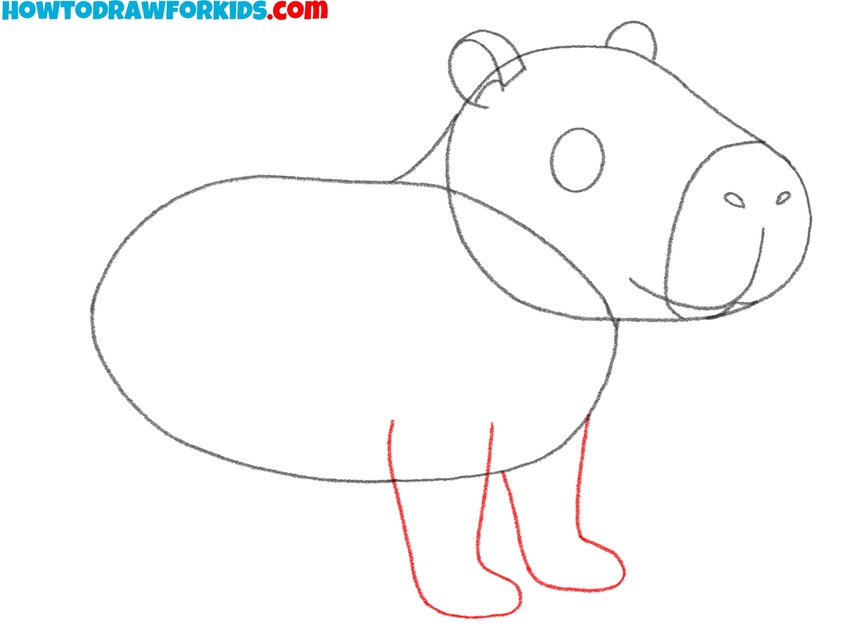
- Sketch the front legs and paws.
Now, draw capybara’s front limbs under the front of the chest. These legs are stubby and rounded. For a realistic look, you’d draw the limbs a little slimmer. You can also tilt the legs forward or backward to suggest walking, sitting, or stepping. The foot shape here is oval and flat.
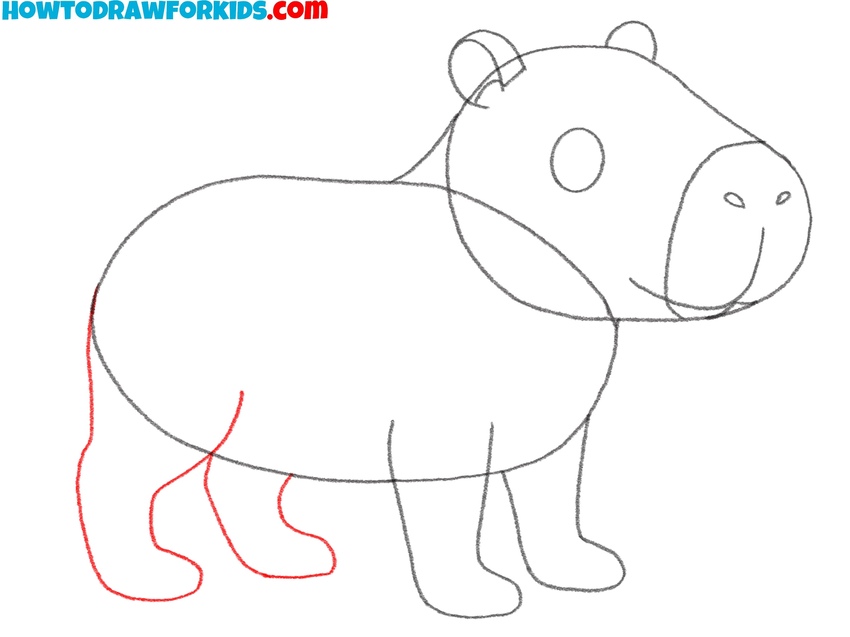
- Form the back legs and feet.
Continue drawing capybara’s limbs and sketch the two back legs behind the front pair. These should curve more noticeably at the top. You can angle the back legs differently if you want the capybara to be mid-step or sitting. You can also adjust the size and curve of the back legs.
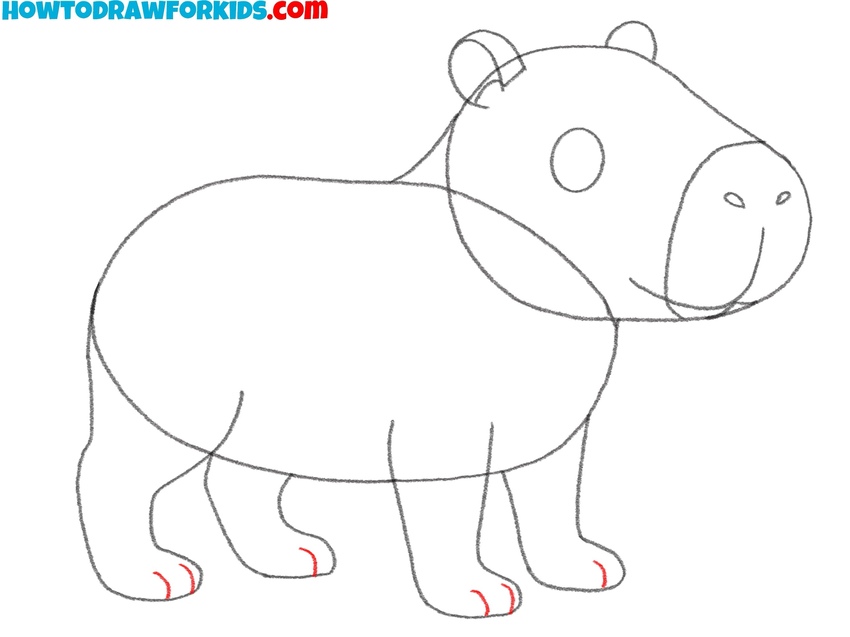
- Mark the toes on all feet.
Draw two or three small curved lines at the end of each foot to create toes of your capybara. Here, you can choose to stay minimal and just suggest the toes or go more detailed if you want accuracy. If you’re experimenting with different styles, this is a good place to do it.
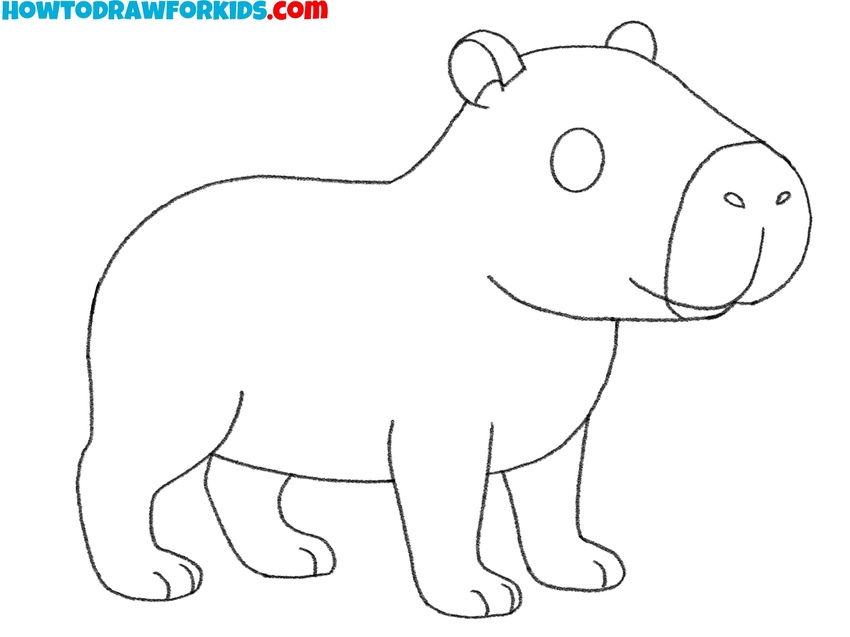
- Clean up the sketch.
Now, erase the initial ovals and overlapping parts. As you do this, refine the contour and adjust any proportions. For example, you can slim the limbs, elongate the torso, or exaggerate the features. Now’s also a good time to shift features like the ears or eyes slightly if they don’t feel quite symmetrical.
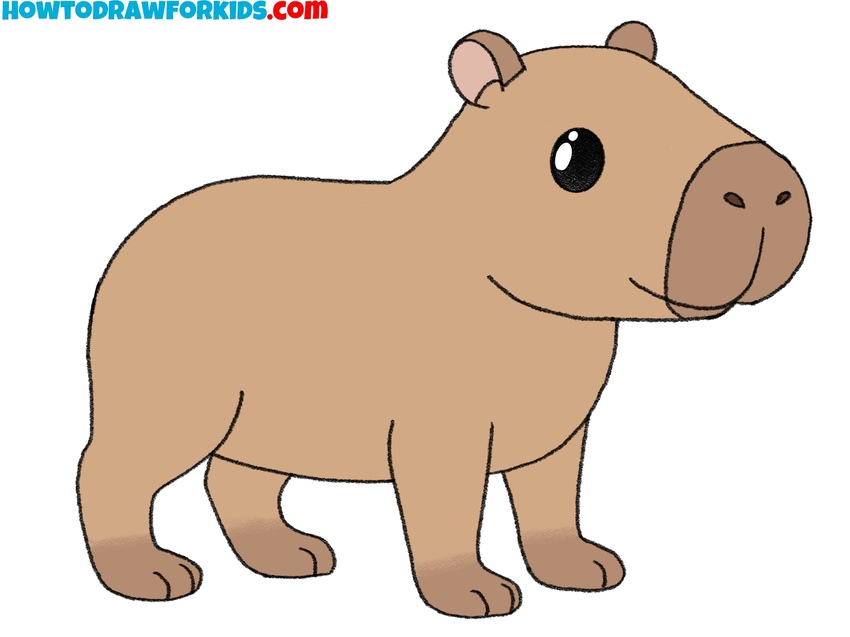
- Color your capybara drawing.
For this version, use a warm light brown for the body and a darker brown for the snout, ears, and feet. Black works well for the eye, and leaving a white highlight will make your capybara look more realistic. You can also experiment with fur texture and shadows, to make your capybara drawing look even more realistic.
Conclusion
Now that you’ve completed this tutorial on how to draw a capybara in a simplified and cute style. This drawing tutorial demonstrates how to create basic proportions and simplified features that work well in a cartoon style. If you want to take it further, try adjusting the body shape and limb size for a more realistic capybara, or experiment with different poses, like sitting or swimming.
Next, continue practicing by drawing other animals with similar body structures. For example, you can try drawing a dog or beaver using the same simplified approach. Drawing these animals, you can train your drawing skills and learn the difference between animal types.
Also, be sure to explore my other animal drawing tutorials if you’d like to boost your skills with more species and styles. And of course, don’t forget to subscribe to my social media for more drawing tutorials and coloring pages.