How to Draw a Chair
This basic tutorial will teach you how to draw a chair step by step and introduce simple rules for creating interior sketching for beginners.
You can use the skills you’ve learned in this lesson if you want to draw the interior of any room. A chair is the most common piece of furniture we see. Chairs come in different types and sizes and are made of different materials.
I promise that this lesson will be simple enough for you because I created it for beginners and children. Use this lesson to improve your artistic skills.
This lesson will be a great addition to the table drawing lesson and helps to create a complete composition. So now is a good time to get your drawing materials ready and start doing this chair drawing lesson.
Materials
- Pencil
- Paper
- Eraser
- Coloring supplies
Time needed: 20 minutes
How to draw a chair step by step
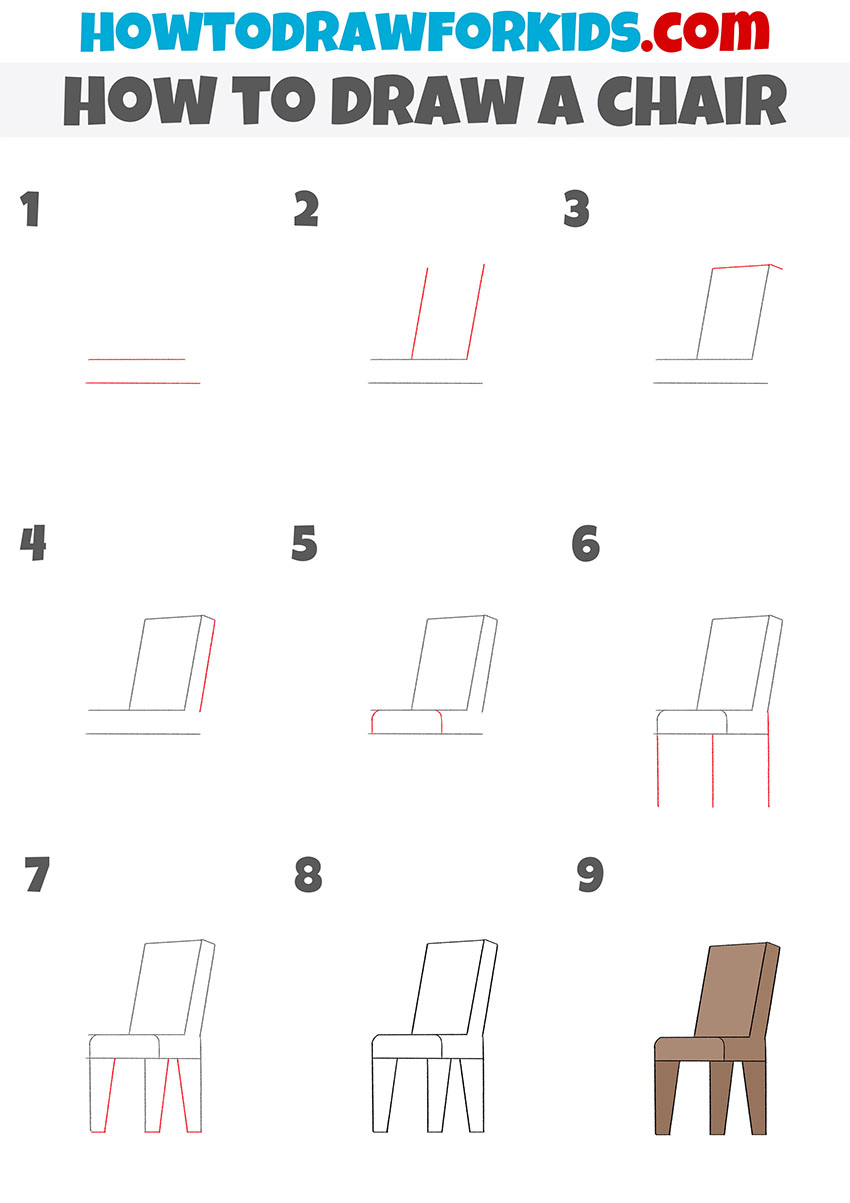
- Sketch the base of the seat.
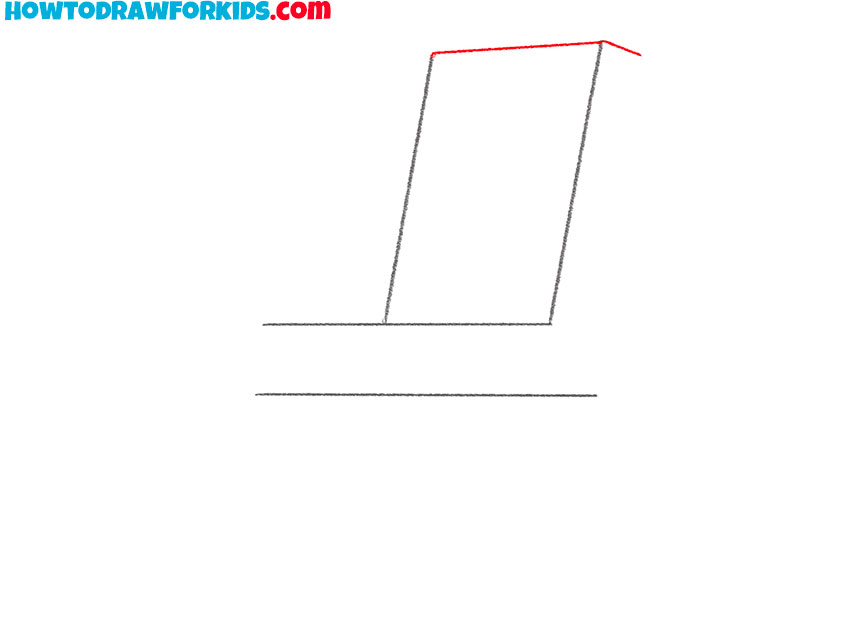
Begin by sketching two straight, parallel horizontal lines. These lines represent the top and bottom edges of the chair seat. This step sets up the overall width of the chair.

- Draw the side lines of the chair backrest.
Add two slightly slanted vertical lines rising from the top horizontal line. These will define the sides of the backrest. The slight backward tilt helps make the chair appear natural and realistic. Check that both lines lean at the same angle.

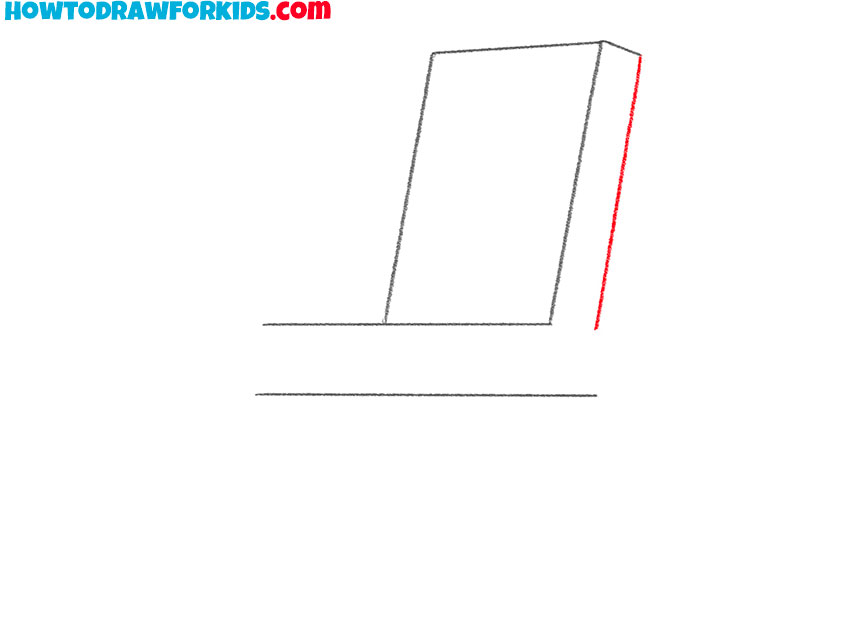
- Connect the top of the backrest.
Connect the upper ends of the slanted lines with a short horizontal stroke. This will complete the outline of the backrest. Together with the seat, these shapes form the core structure of your chair. Visualize how the chair would appear in three dimensions.
- Add the back edge of the seat.
Now, draw an angled line connecting the upper part of the backrest to the rear of the seat. This small addition gives the chair depth and makes this part look more dimensional.
- Add the side edges of the seat.
Add short curved and slightly angled lines at the edges of the seat to close and complete the shape. The curves should follow the perspective of the base. You can also make this part more detailed, for example by adding a pattern to the seat or making this part higher or lower.
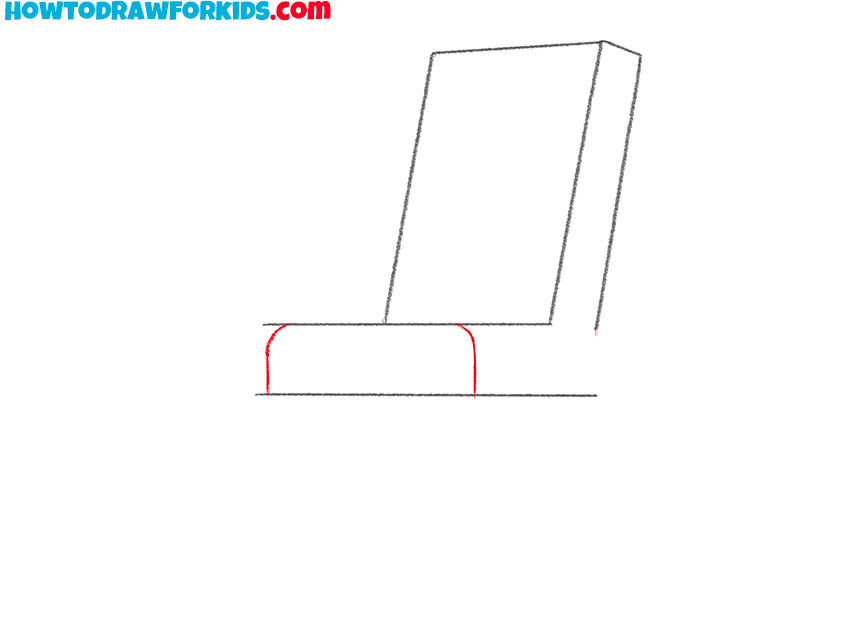
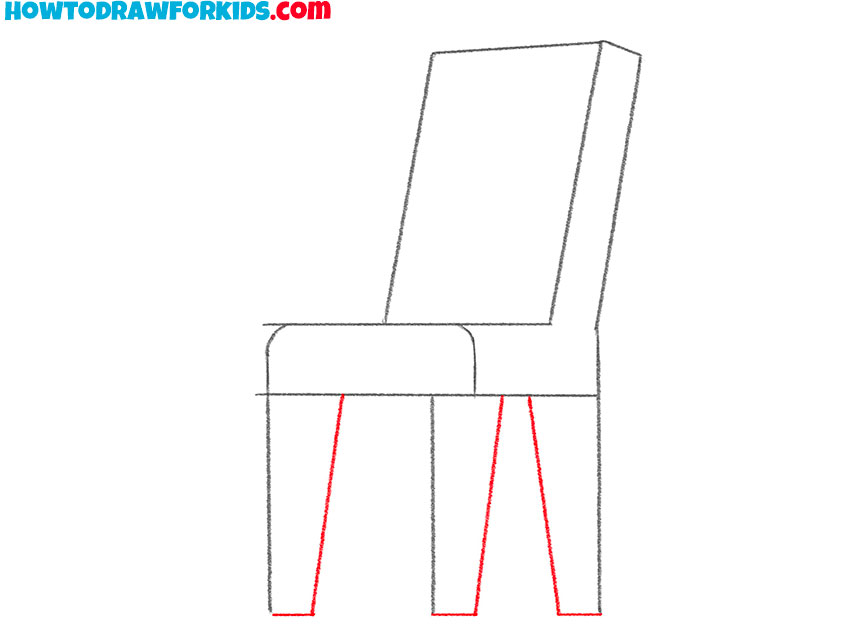
- Start drawing the chair legs.
From the visible corners of the seat, draw three long vertical lines downward to indicate the first edges of the chair legs. These should be straight and parallel. Try to make the legs equal in height. To make the chair drawing look more unique, you can use slightly curved lines of the legs.
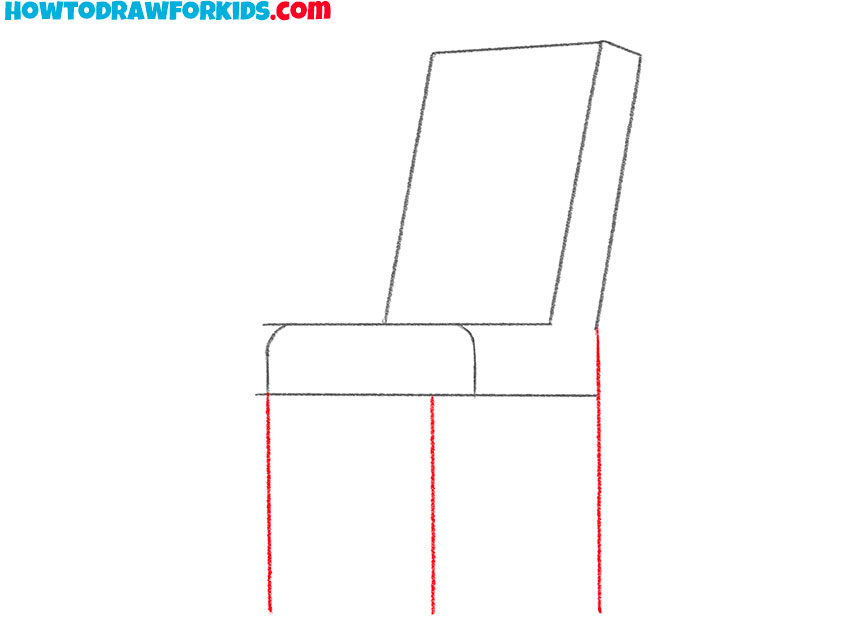
- Finish sketching the legs.
To complete the frame, sketch the remaining edges of the legs beneath the back edge of the previously sketched lines. Be careful to align their angles with the seat and first lines of the legs so the construction looks natural.
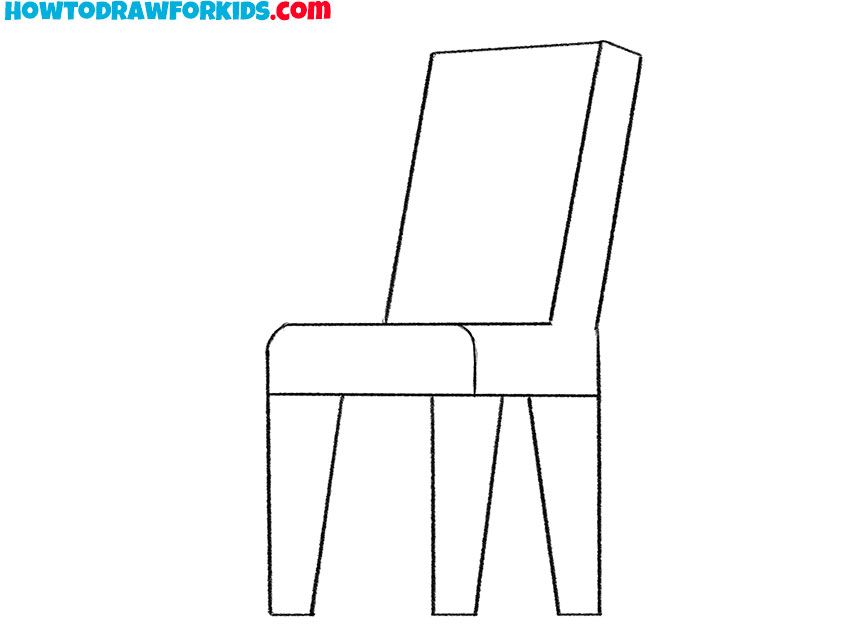
- Remove the guidelines around the seat.
Use an eraser to remove any extra guide lines, overlapping edges, or uneven strokes from earlier steps. Remove all extra lines that emerge from the sides of the finished sketch . Leave only the essential outlines that define the chair’s form. If you notice inconsistent angles or proportions, now is the time to correct them.
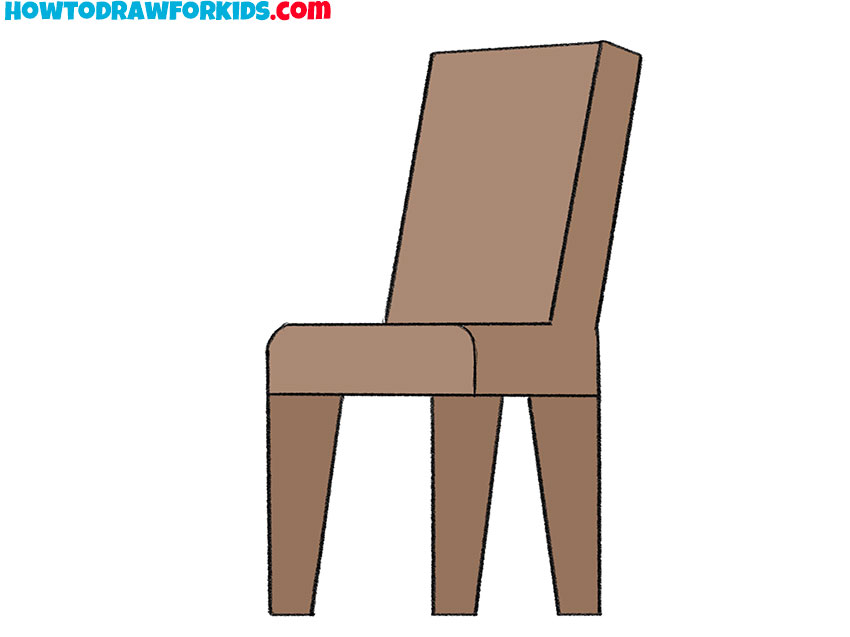
- Color the chair in brown tones.
Use brown tones or any other color you prefer to fill in the chair. A darker shade for the legs and a slightly lighter tone for the seat and backrest can make your chair drawing look more realistic. You can also draw wood texture to make the sketch look even more realistic.

This tutorial on drawing a chair is now complete. Now you know how to draw this furniture item step by step and you can repeat drawing the chair when doing other different drawings. I will be interested to read your feedback in the comments to this lesson. I also suggest you download the PDF file which contains a short version of this guide.
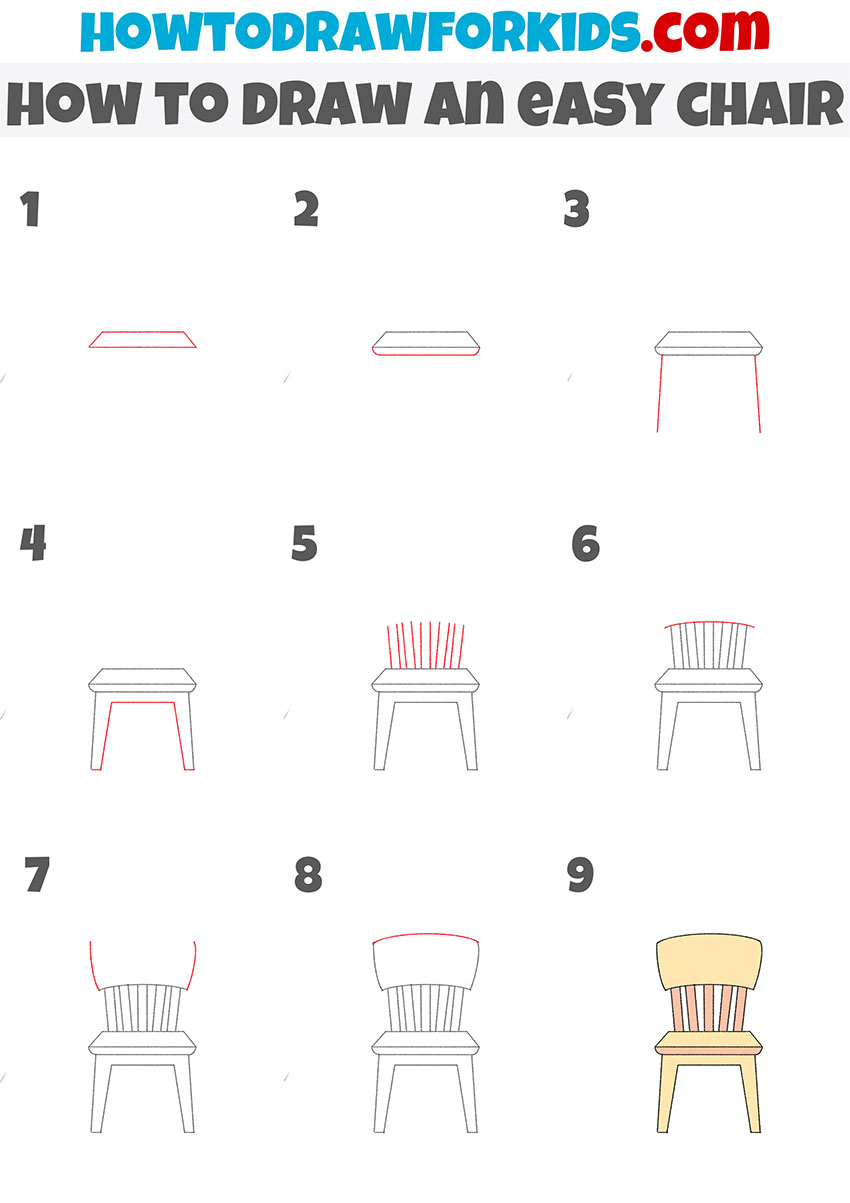
How to Draw a Chair From the Front
This drawing shows the easiest way to quickly draw an easy chair. To successfully complete this lesson, you will need your ability to draw even, straight lines.