How to Draw a Table
Easy, 9-step instructions to teach you how to draw a table. At the end you will be able to download a free PDF file with a short version of the lesson.
This lesson will be very useful for you, as you will once again practice drawing smooth, straight lines and train your spatial imagination.
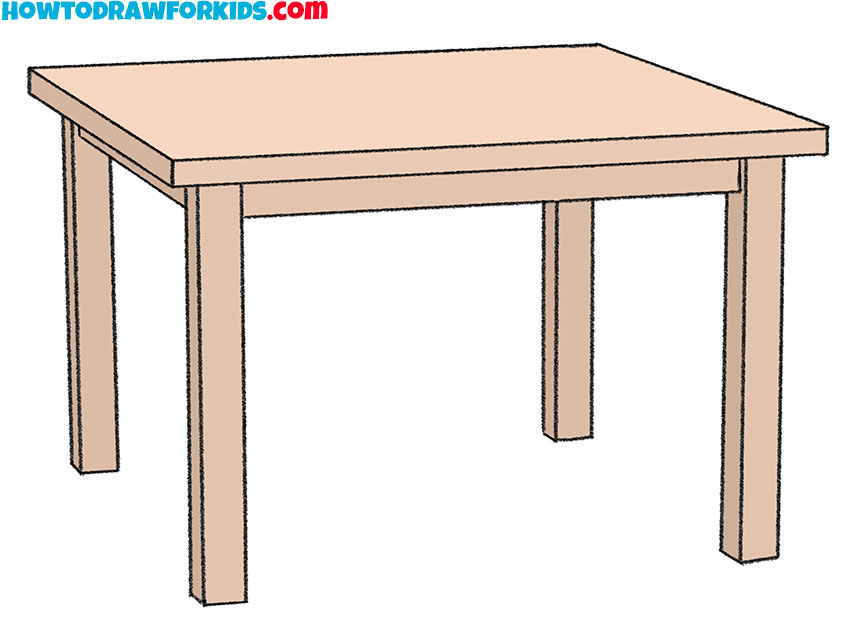
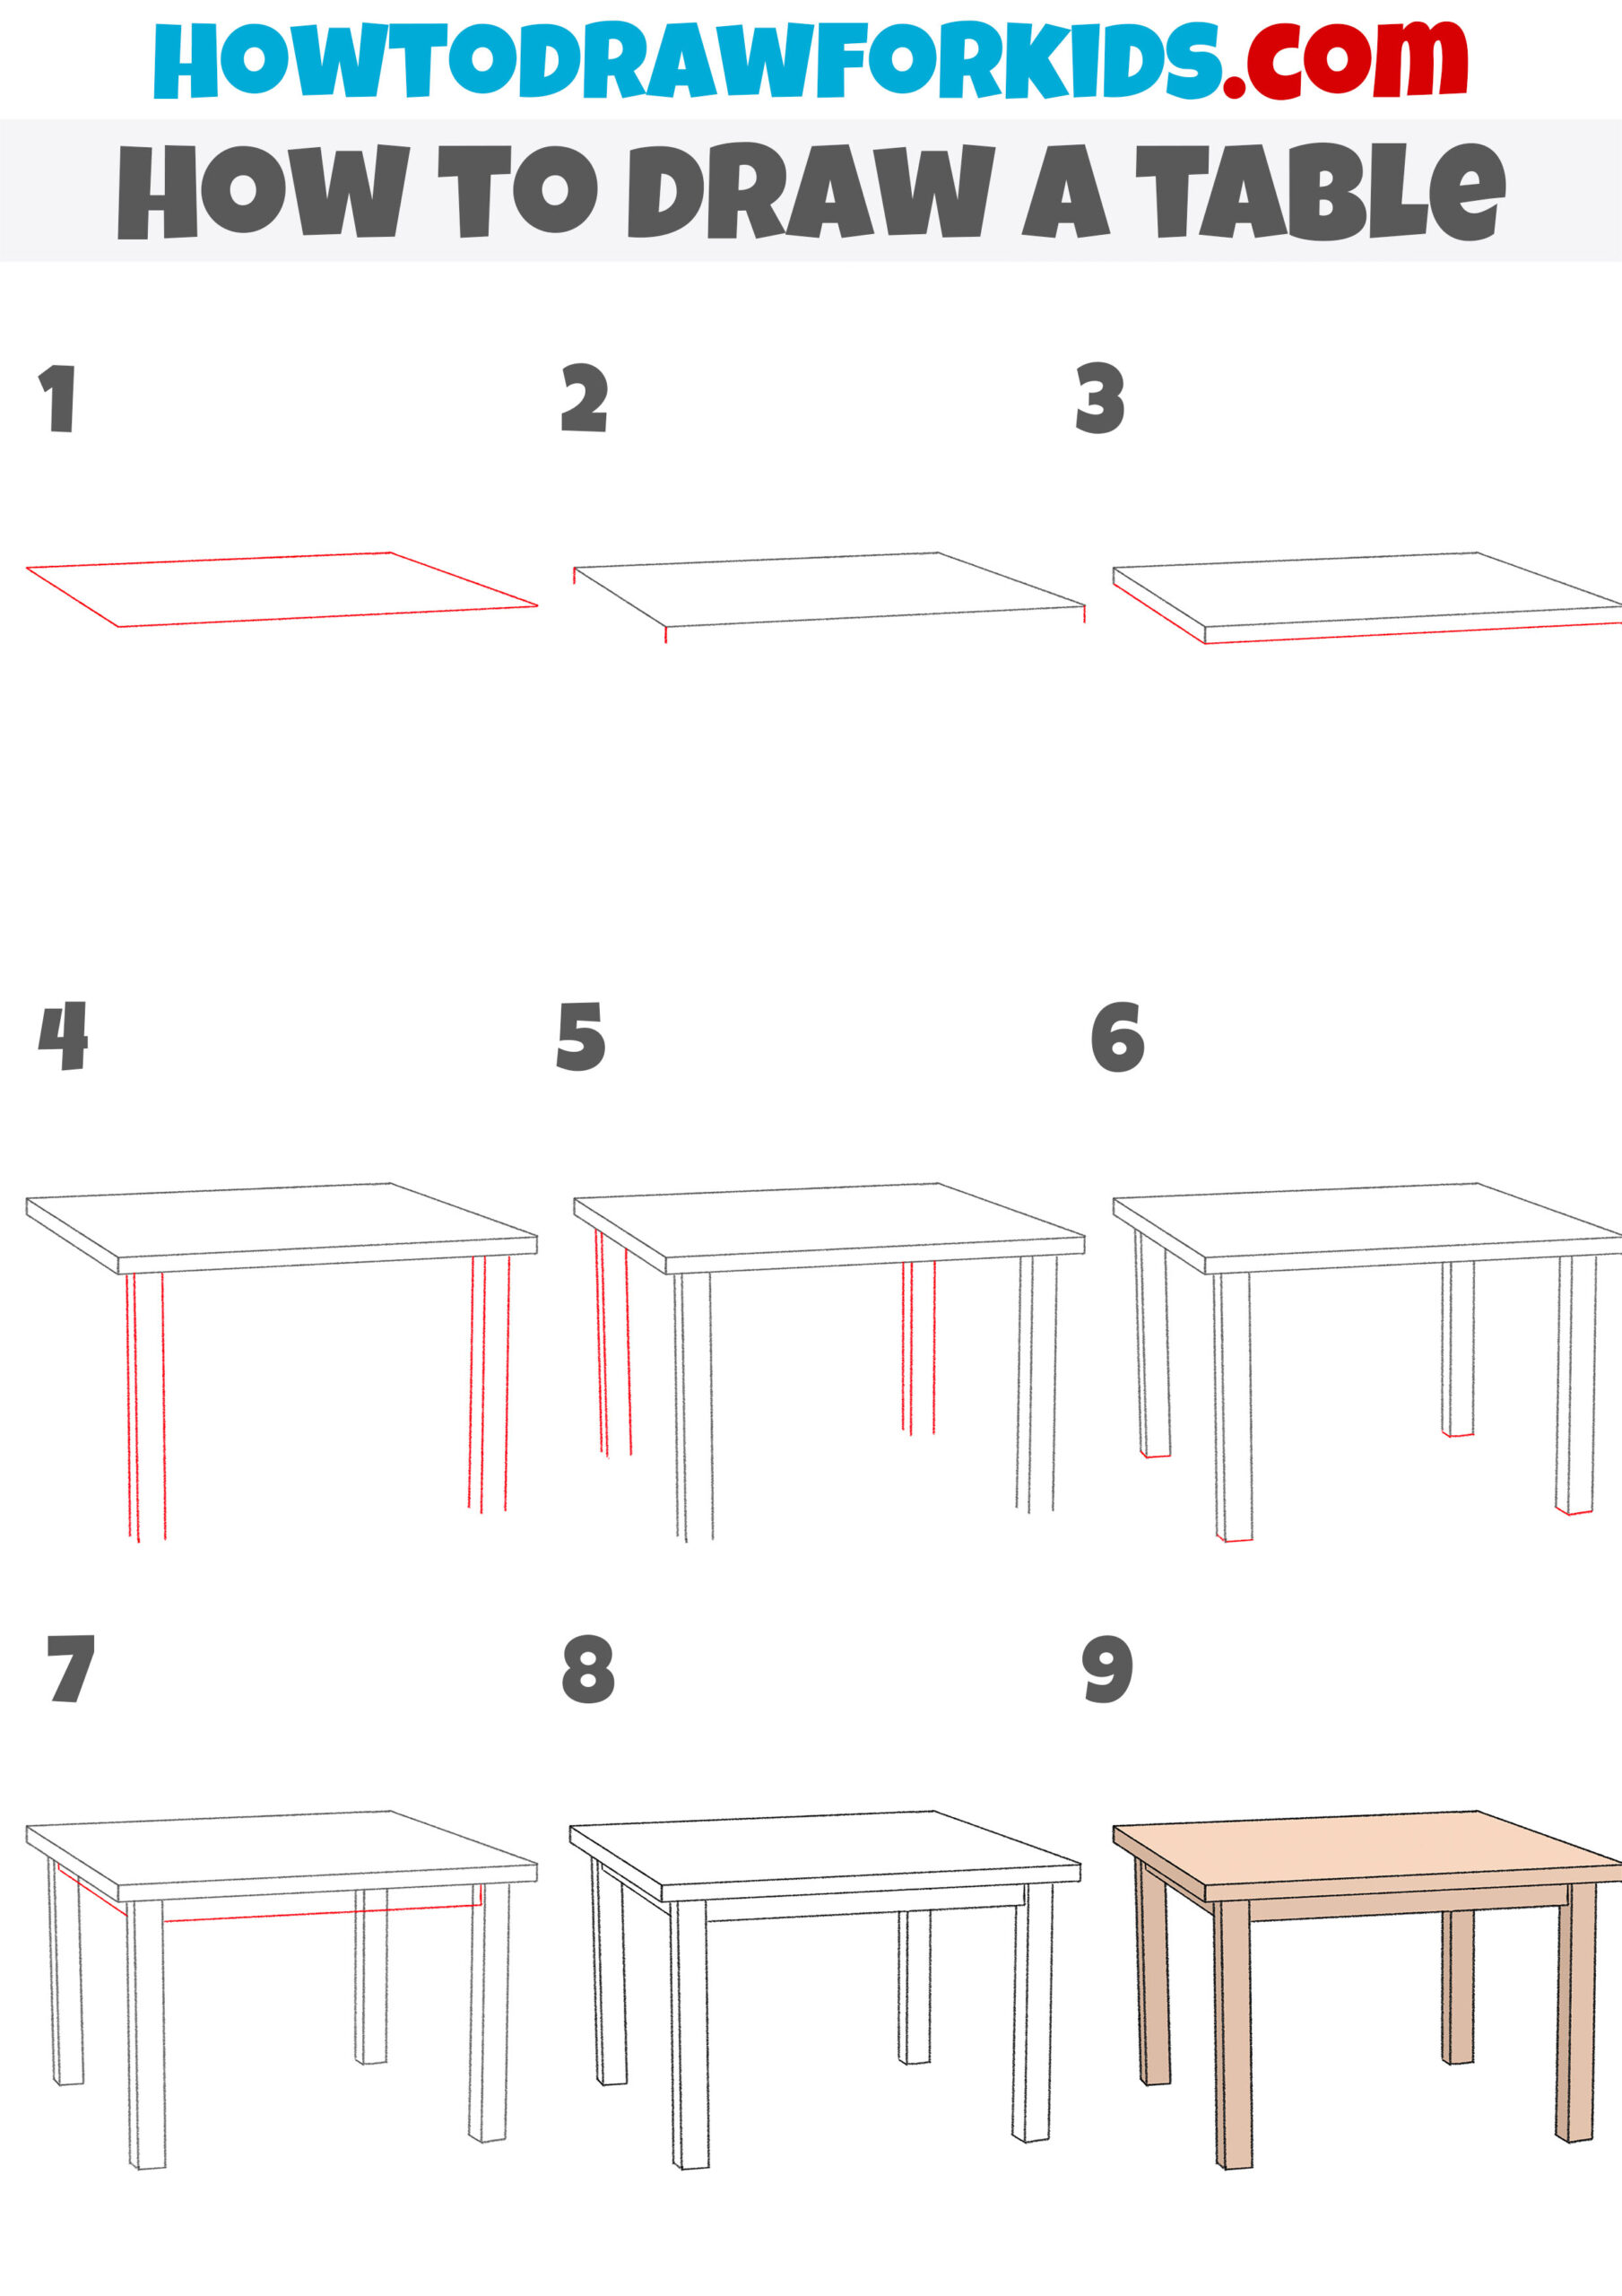
Table of Contents
- Basic information
- Steps on how to draw a table
- Additional content
- Another technique for drawing a table
- Final touches
- Conclusion
Basic Information on How to Draw a Table
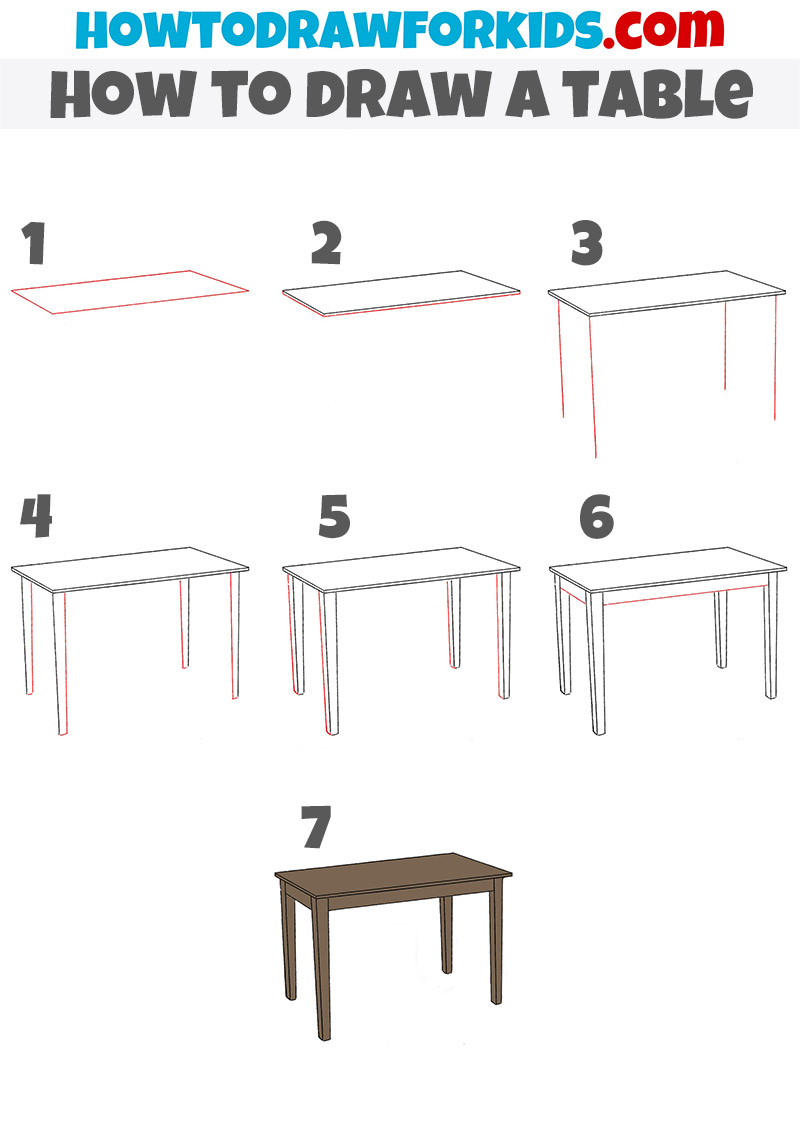
This drawing shows a very simple table model, which is the most common one. Such a small table can be placed in the living room or kitchen. Before you learn how to draw a table, I will ask you to visualize this object in your mind. The table has a rectangular shape and stands on four thin legs.
In the drawing, the table is depicted from such an angle that the top of the table and all four legs are clearly visible. In your work, you can use a ruler to accurately depict all parts of the table, or you can draw all the lines yourself, thereby improving your artistic skills.
Focus on drawing the top of the table, which in my example has the shape of a quadrangle. Here you must maintain perspective so that the table in your drawing looks realistic. Also, be careful when drawing the table legs and try to correctly depict the length of each leg.
Materials
- Pencil
- Paper
- Eraser
- Coloring supplies
Steps on How to Draw a Table
Time needed: 30 minutes
How to Draw a Table
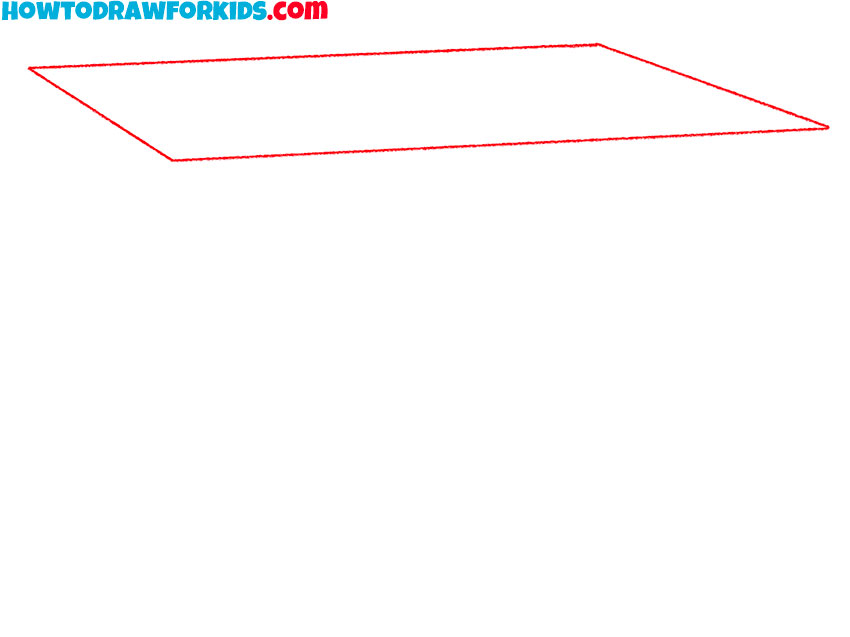
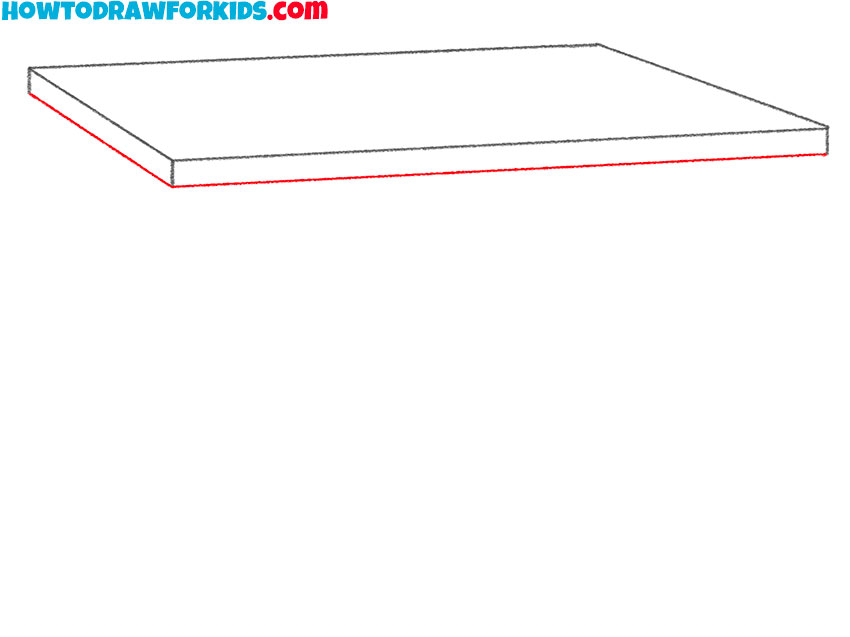
- Start drawing the surface of the table.
Draw a quadrilateral with four straight lines, as shown in the figure.
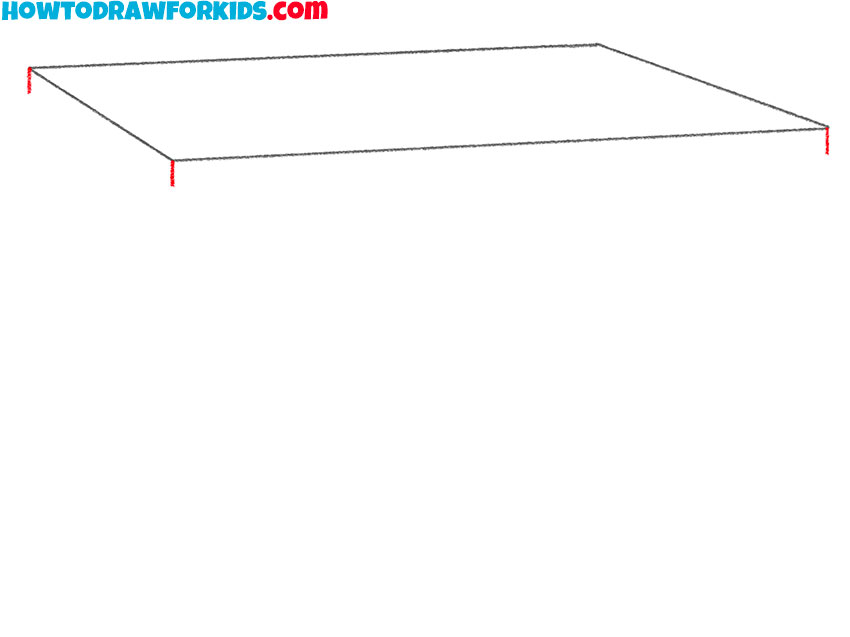
- Add side faces at the top of the table.
From the three ends of the drawn quadrilateral, draw three short straight lines.
- Depict the bottom edges of the top of the table.
Now, you should connect the straight lines with two lines of different lengths.
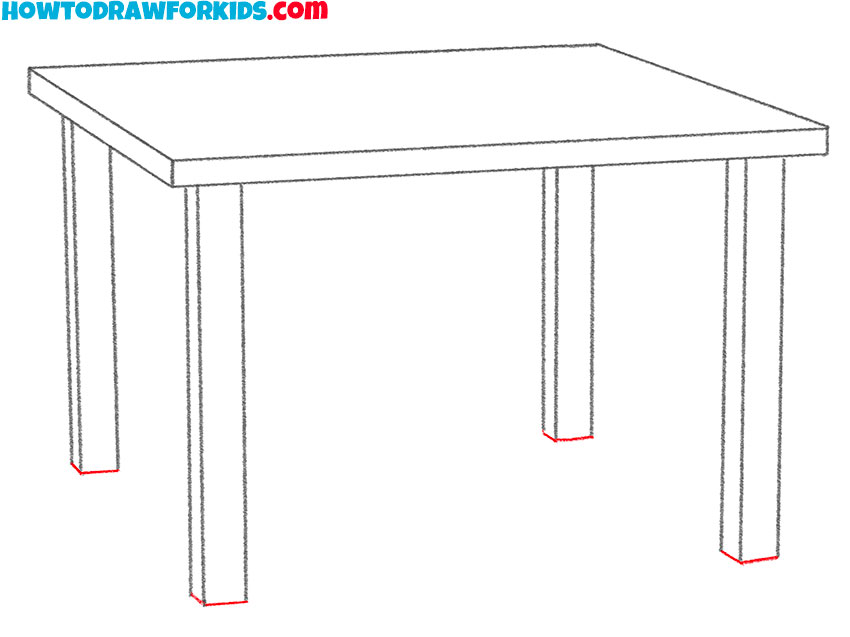
- Start drawing the legs of the table.
Draw two table legs using three straight vertical lines for each of them.

- Sketch out the other two table legs.
Now you need to draw six more straight vertical lines as shown in the picture.

- Finish drawing the legs of the table.
Connect the bottom ends of the straight lines you drew with straight lines of varying lengths.
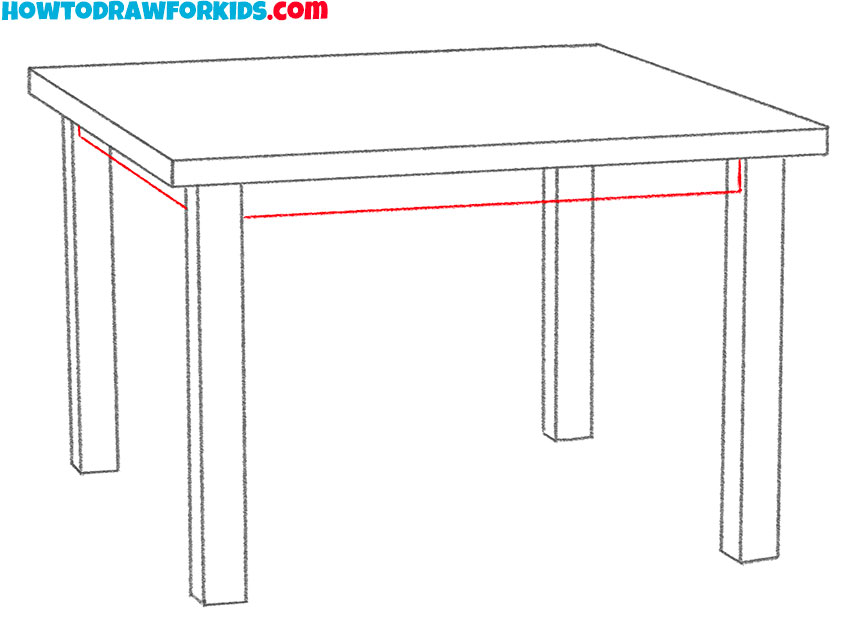
- Add elements at the bottom of the table.
Draw a few straight lines connecting the legs of the table as shown in the picture.
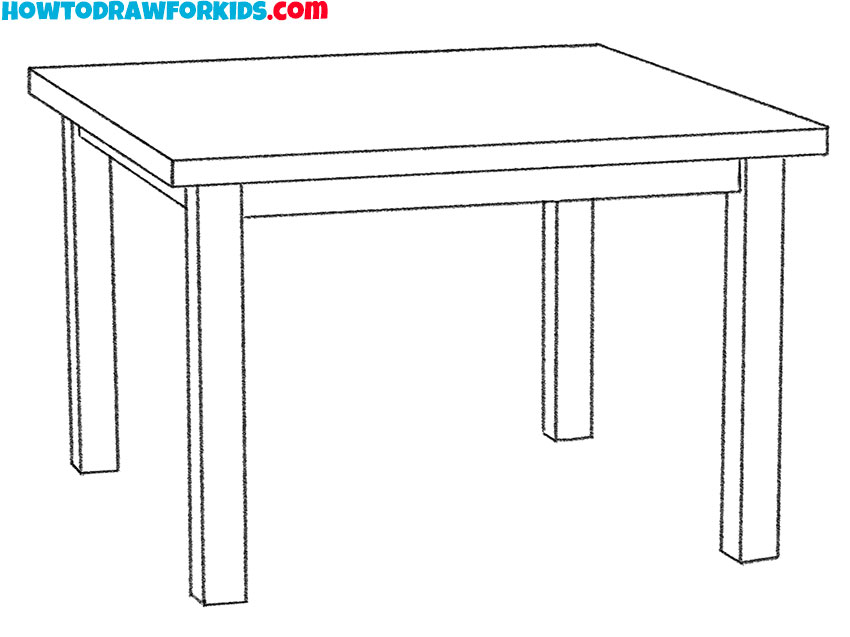
- Correct inaccuracies.
Use the eraser to remove any unnecessary guidelines.
- Color the drawing.
To color the table, I recommend you use different shades of brown.
Additional Content
Especially for your convenience, I have prepared a PDF file that contains quick instructions, a coloring sheet, a tracing worksheet and a grid drawing worksheet. All of these materials are completely free, and you can use them any time you want to get back to drawing. Use the link right now and save the file to your device.
Another Technique for Drawing a Table
For practice, I have prepared for you an alternative way of drawing a table. This is also a simple instruction, consisting of 7 easy steps.
How to Draw a Simple Table
This method is not much different from the basic method of drawing a table. Just notice that in this drawing the top of the legs are wider and taper towards the bottom. For this purpose I chose a dark color. By drawing this table you will improve your skills.
Final Touches
You can practice further and change your drawing. For example:
- If you draw short legs, you will get a small coffee table
- If you give the table legs a curved shape, you will get an antique table
- You can draw a vase, cup, plate or other objects on the table
- Try working with color. The color of the table can be monochromatic or contain uneven lines that imitate the texture of wood.
During the drawing process, you can return to the description and again revise those points that cause you difficulty. This way you will avoid mistakes and develop your attentiveness.
Conclusion
On this site you will find other useful tutorials that show you how to draw various pieces of furniture. I recommend taking these lessons so that in the future you can quickly and easily draw the interior of a room.
Do you know that we have social networks? If you haven’t subscribed to us yet, do so right now to stay up to date with new drawing lessons for kids!


My child got her drawing out of 10% she got 9%
So thanks so much
I am very happy