How to Draw a Croissant
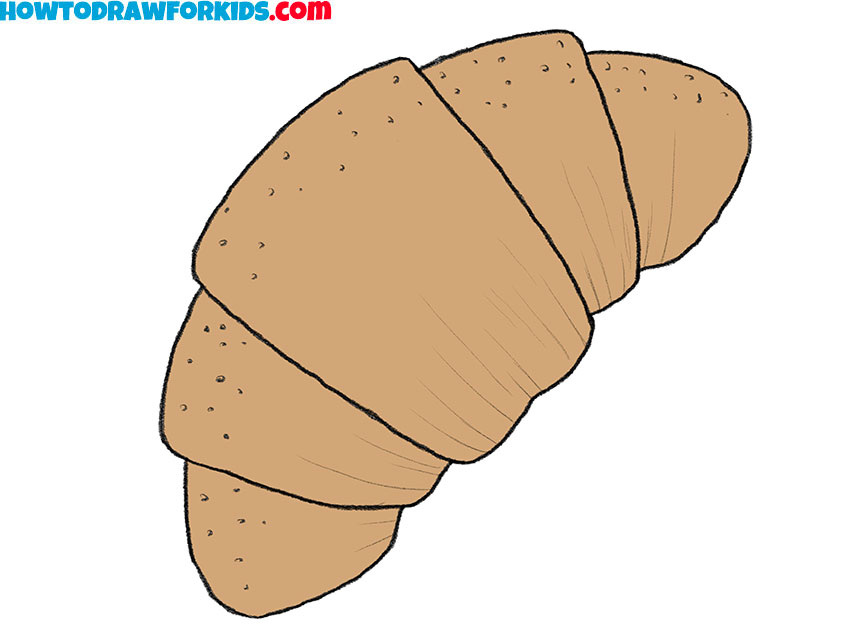
There is probably no pastry more European than the subject of today’s lesson, because in it we will learn how to draw a croissant.
How to Draw a Croissant: Introduction
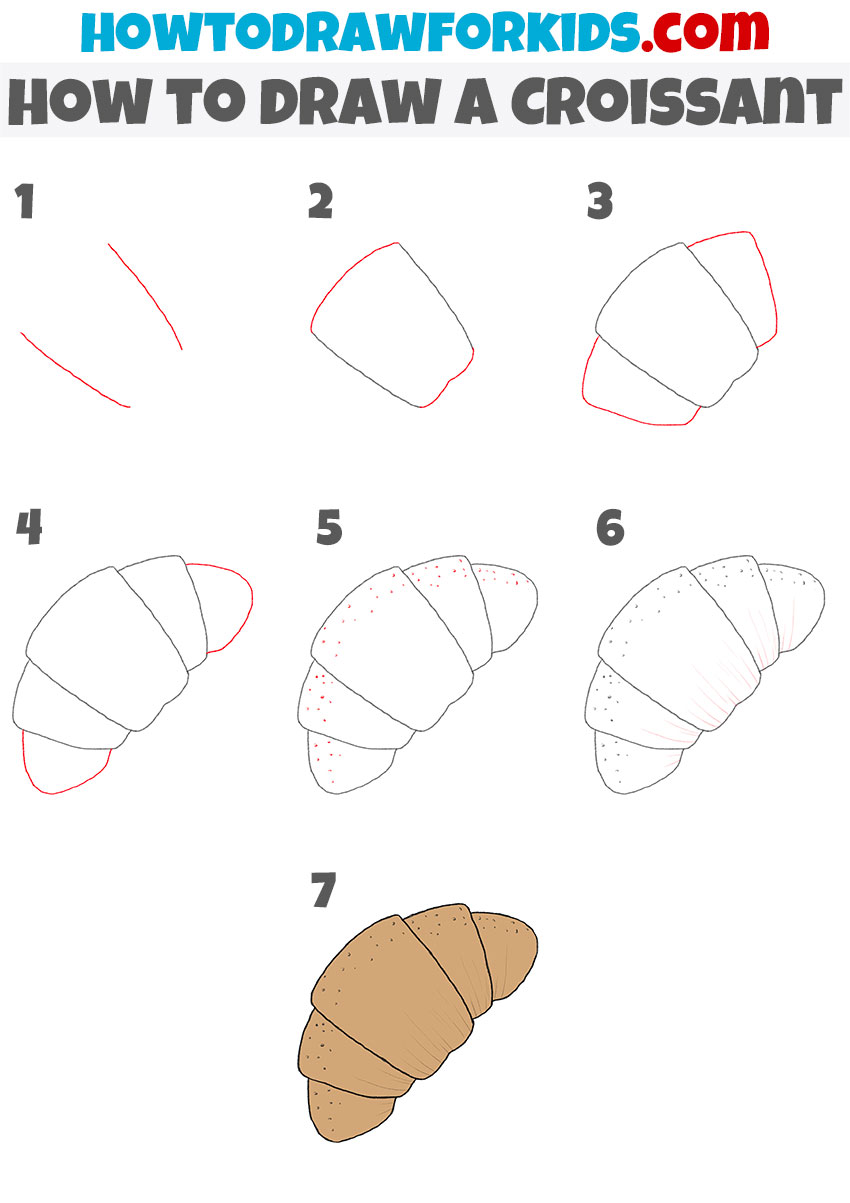
In this tutorial, I would like to tell you how to draw a croissant step by step. To draw a croissant with these instructions, you only need to follow seven very simple steps.
A croissant is a buttery, crescent-shaped French pastry. The croissant gets its name from its shape: in French, the word means “crescent” or “crescent of the moon”. Today, the croissant is both a symbol of French culture and tradition, shared throughout the world. I think you have ever tasted this delicious pastry.
Before you start drawing a croissant, I will note that it is a pastry, which means it has very organic and natural lines and shapes. This means that you need to watch the symmetry, but do not try to make perfectly straight lines, just like in the bread drawing tutorial.
Croissant Drawing Tutorial
Materials
- Pencil
- Paper
- Eraser
- Coloring supplies
Time needed: 20 minutes
How to Draw a Croissant
- Start sketching the pastry’s central part.
To draw a croissant, it’s always best to think about the general arc of the pastry, so begin by sketching two long, slightly curved lines that run parallel. Croissant is a pastry, so it should have irregular shapes, so don’t try to make the outlines too smooth.

- Finish the central pastry block.
Now let’s complete the central part of the croissants. Using two smooth and slightly irregular lines, close the shape you’ve started in the step 1. This will become the central folded part of your croissant drawing. When you draw a croissant section like this, don’t make it too square, make is slightly curved.

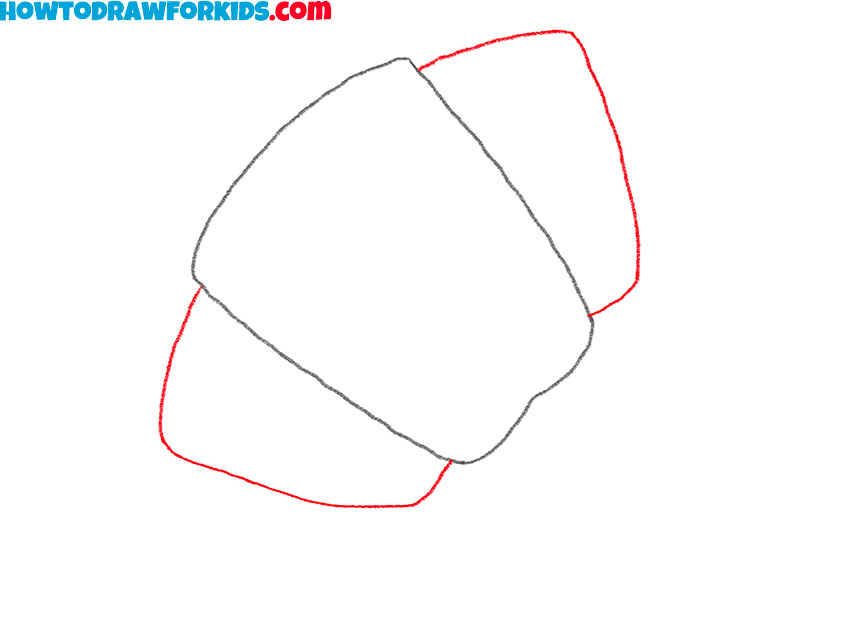
- Add more pastry segments.
It’s time to add more body to the croissant. Draw two additional rounded sections on the sides of the shape from the previous steps. These should also follow the natural arc of the guide lines, creating a segmented pastry look. Each section should overlap slightly with the one next to it. Try to make each piece a bit unique.
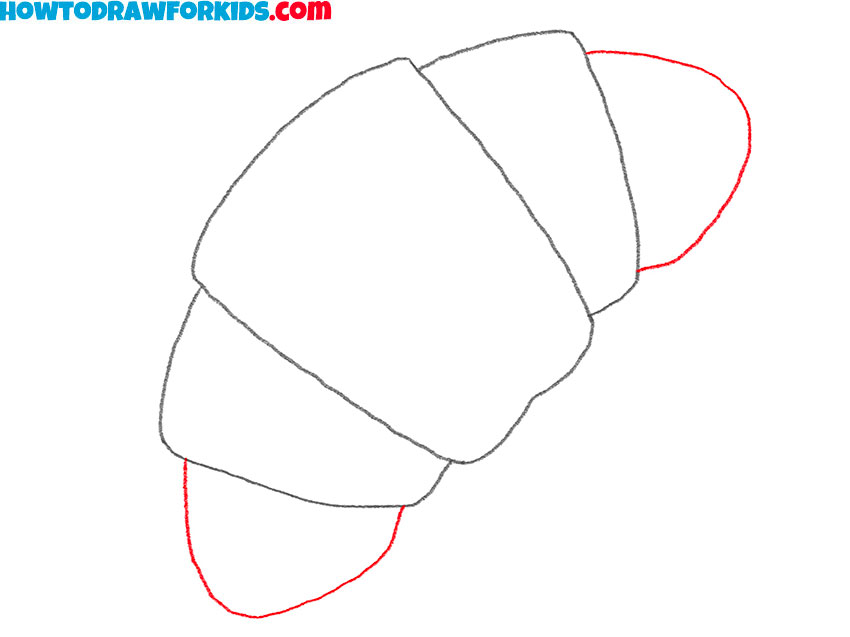
- Draw the croissant’s ends.
Next, add the two end sections to close off the croissant. These shapes are smaller, more rounded, and taper, showing where the dough would curl in real life. By sketching these ends carefully, you finish creating the recognizable croissant shape.
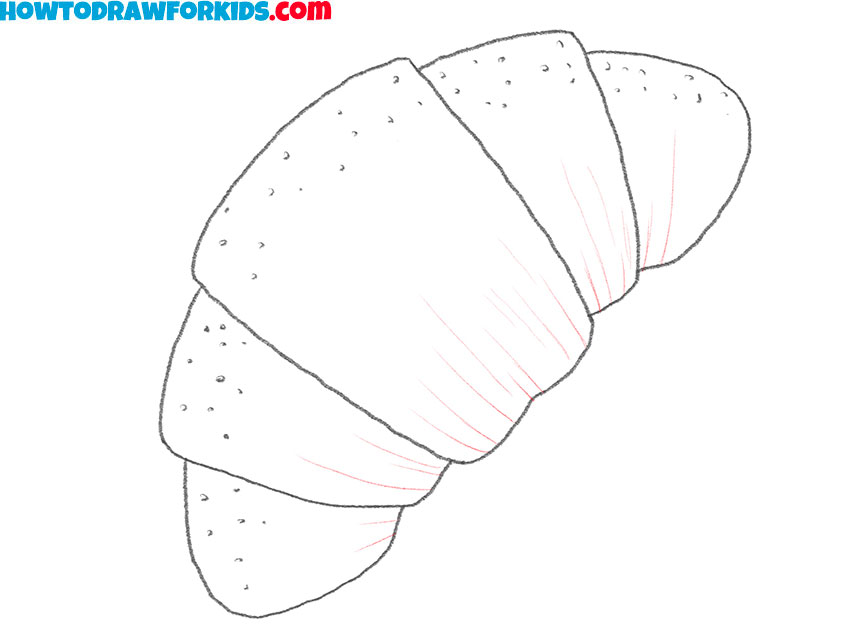
- Illustrate baked surface spots.
As I’ve said before, croissants aren’t just smooth shapes; their baked surface often has tiny speckles or pores from air bubbles. Lightly sketch small dots across the surface of the sections, making sure they’re not all identical or evenly spaced. This creates a more realistic food drawing.

- Draw the croissant’s curved fold lines.
Sketch light curved lines across the sections. These lines convey folds in the dough and the baked ridges of the pastry. Place them gently, following the shape of the croissant’s arc. Don’t draw straight lines here, instead, let your hand relax, as if tracing the soft puff of baked dough.
- Add golden tones to the pastry.
Finally, give your croissant drawing the baked look it deserves. Fill in the sections with warm, golden brown shades. When coloring a croissant, think about how heat affects dough: some parts can appear darker, while other areas stay slightly lighter. This creates a more natural look.

Additional Content
So you have drawn this picture! I hope you got a great drawing of a yummy croissant. Leave feedback in the comments on whether you enjoyed this tutorial. Don’t forget to follow us on social media. I have prepared for you a short version of this tutorial as a PDF file, which you can download and use at any time convenient for you.


thanks, it was kinda helpful
Glad it helped, Lain. If you’d like, you can check out the related tutorials.