How to Draw a Brachiosaurus
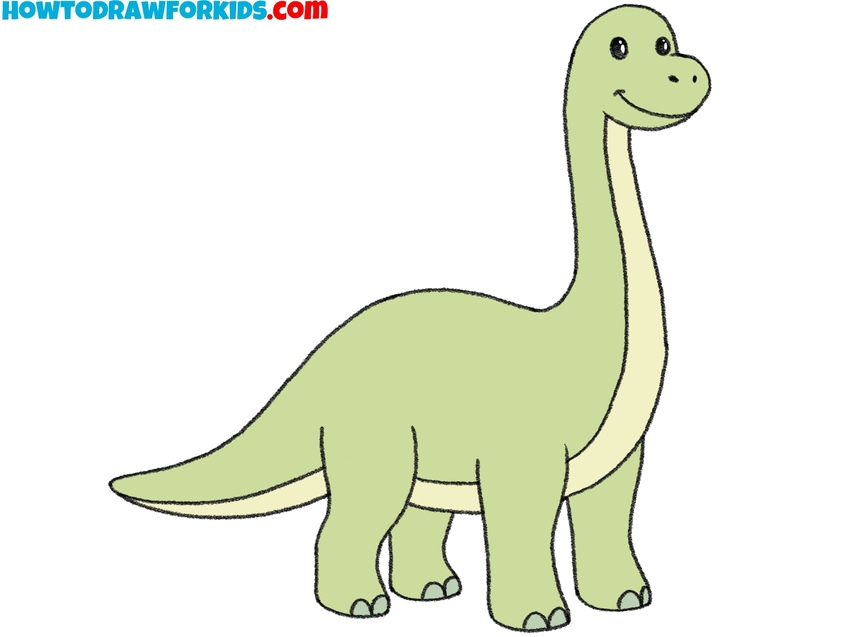
Many of us picture this creature first when we hear the word dinosaur, so let’s recreate it and learn how to draw a Brachiosaurus.
How to Draw a Brachiosaurus: Introduction
As I already said, drawing a brachiosaurus is a very unusual and interesting task. It was a large and very slow herbivorous dinosaur that fed on the foliage of high-altitude trees. All this is reflected in the unusual appearance of the brachiosaurus.
Firstly, a long, incredibly long neck. It’s hard not to notice, isn’t it? We will have to try very hard to draw this correctly. The neck should not be too thick or asymmetrical. You can notice that the length of the neck exceeds the length of the rest of the body, including the limbs. This allowed the brachiosaurus to feast on the leaves of the tallest trees.
Secondly, it has a small body and short, wide legs. This body type is clearly not for running, is it? This is very different from Tyrannosaurus rex, for example. Here we will have to draw four wide limbs that look like they are almost motionless.
However, I use a cartoon style of drawing, which gives the whole drawing a more cute appearance. With guys like Brachiosaurus it’s pretty easy, to be honest.
Brachiosaurus Drawing Tutorial
Materials
- Pencil
- Paper
- Eraser
- Coloring supplies
Time needed: 30 minutes
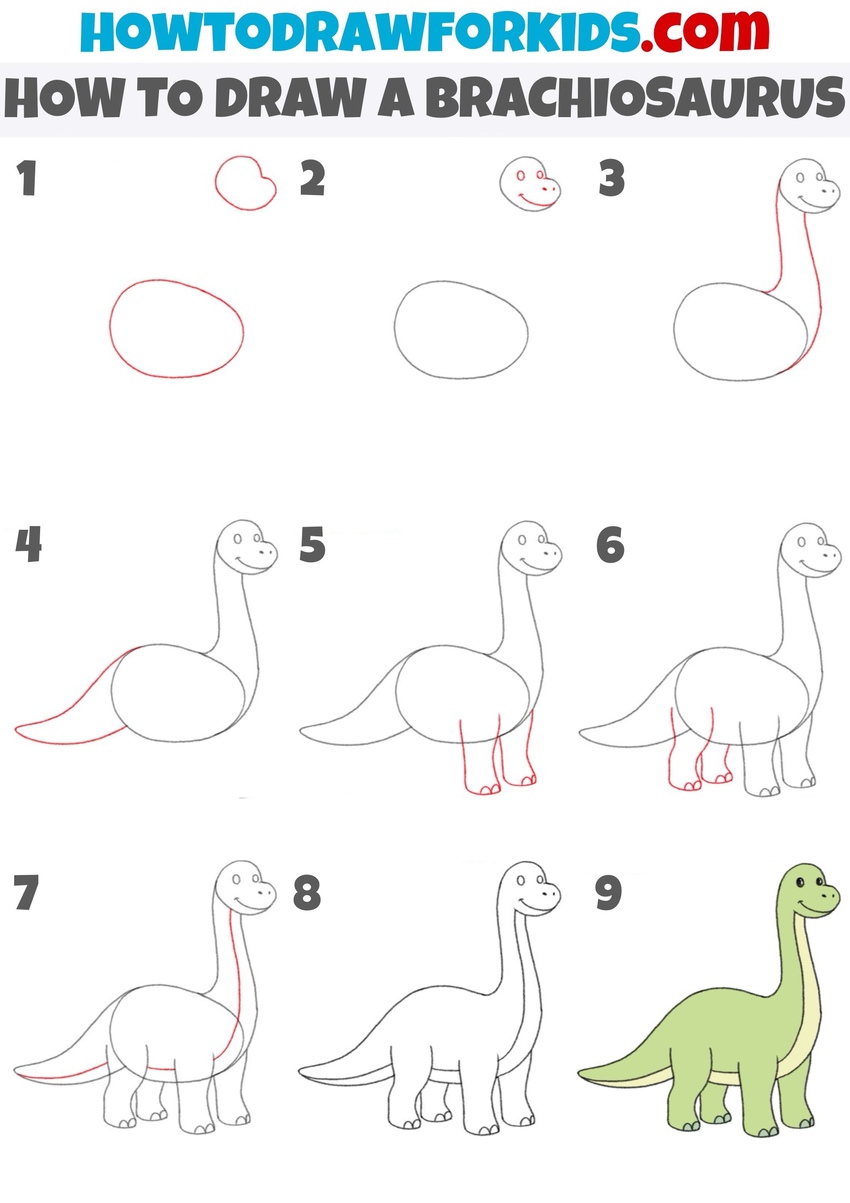
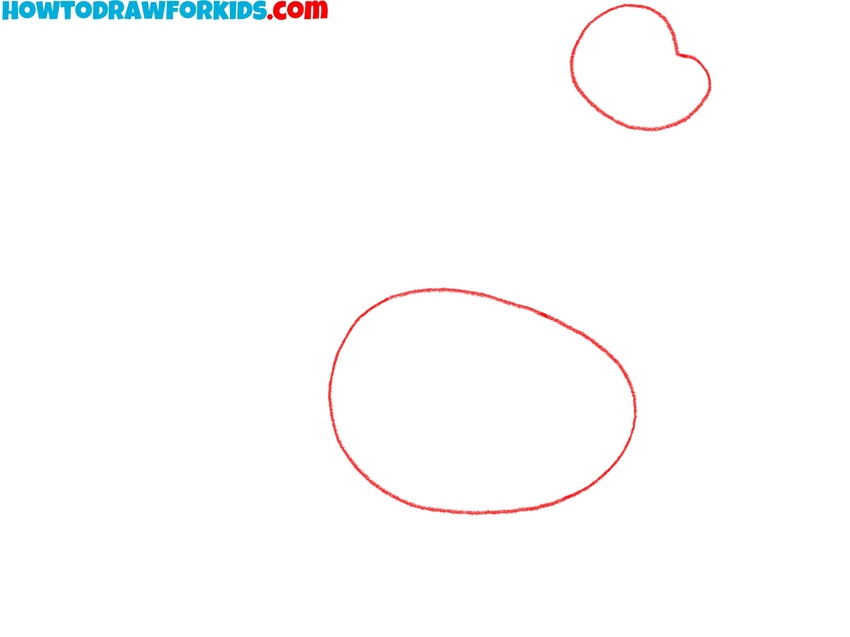
- Sketch the dinosaur’s head and torso.
To create a brachiosaurus in this simple style, sketch a small rounded shape that will serve as the head of the dinosaur. The head of this dinosaur is fairly simple, more like an oval with a slight bump for the snout. After that, draw the dinosaur’s torso in the form of a simple oval or an egg-shaped form. This oval should be much bigger than the head
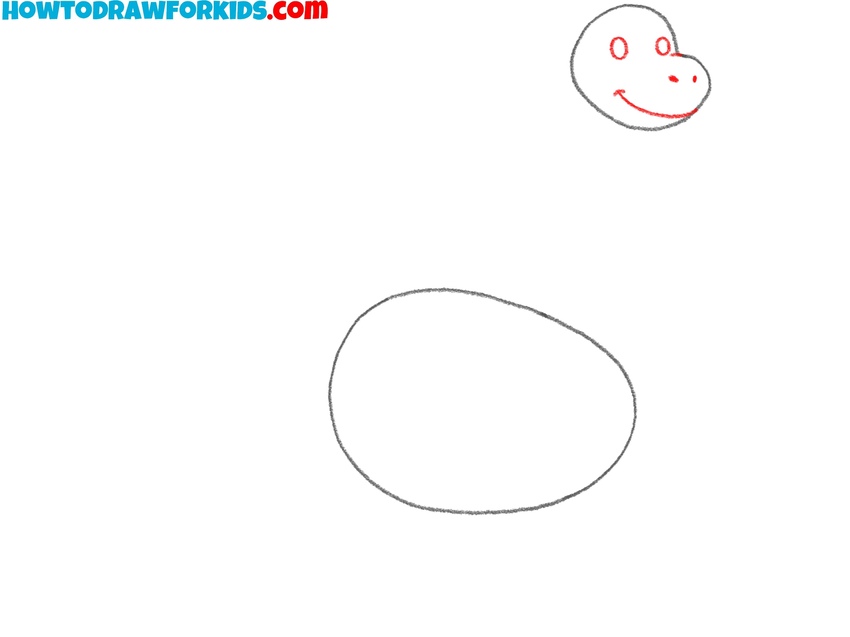
- Draw the eyes and nostrils of the dinosaur.
With the basic head shape is finished, it’s time to set the face. Draw two round eyes near the upper portion of the head. Make them slightly large if you want a cartoon-like brachiosaurus. Below the eyes, add a couple of small curved lines or dots for the nostrils and a long and smooth line for the mouth.
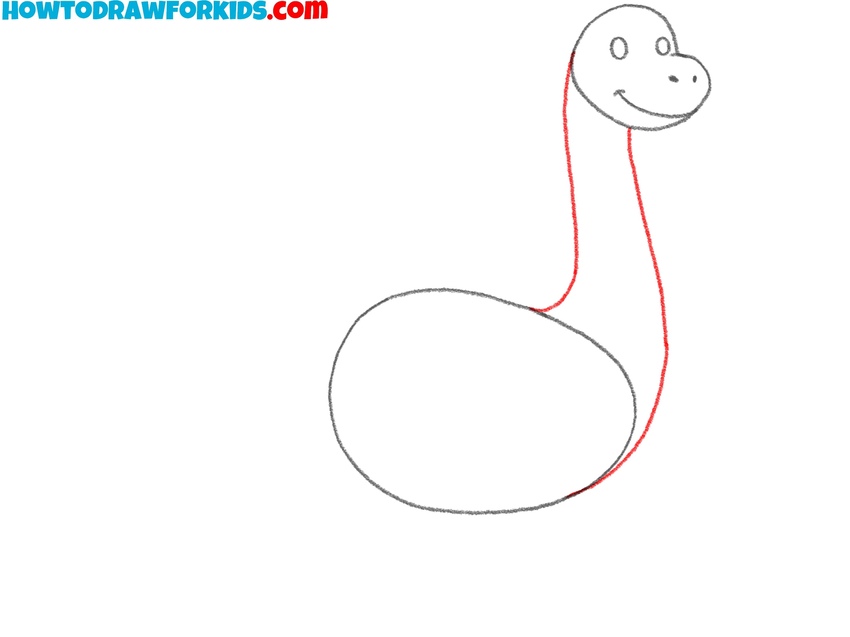
- Connect the head and torso with a neck.
The neck is one of the most iconic features of a brachiosaurus, so this step is very important. Draw two long, smooth lines extending downward from the head to create the neck. Curve these lines to keep the figure looking natural. For variation, you can curve the neck forward or backward to convey a different posture, like grazing or looking around.
- Draw the brachiosaurus’ tail.
With the main body parts in place, you can now add the tail, drawing a long, tapering shape that starts at the back of the oval body and stretches before narrowing into a point. The length of the tail should be equal to the length of the neck. You can adjust the tail’s direction.

- Sketch the two front legs.
From the underside of the body, draw two long, vertical shapes that taper at the bottom to form the legs. Add small, rounded toes at the bottom of each leg. An important detail to note is that the front legs of a brachiosaurus were actually longer than the back ones.

- Add the back legs of the dino.
Now draw the back pair of legs, connecting them to the other side of the body oval. These legs should be slightly shorter than the front ones, which will give your dinosaur its characteristic posture. Again, sketch them as pillar-like shapes, and include rounded toes at the bottom.

-
With the outline of your brachiosaurus in place, you can add smaller details that make the drawing more complete. For example, you can draw a long line thought the bottom of body, starting below the head of the brachiosaurus and ending on the tip of the tail. This simple line will define the lower part of the body.
- Add some final details to the dinosaur.
At this stage, begin polishing the full outline of the brachiosaurus. Trace the main lines to give them a finished look. This is also the time to erase unnecessary guidelines, like parts of the oval body that overlap with the legs or the extra lines from earlier stages.

- Paint the dinosaur’s body green.
The final stage turns your simple outline into a finished drawing. Paint your brachiosaurus drawing with a solid green tone to convey the familiar dinosaur look, but don’t hesitate to experiment. You might try soft browns, muted blues, or even patterned markings if you want to give the creature more unique look.

Alternative Techniques
So, I made two more Brachiosaurus drawing guides that look even more cartoonish. Drawing dinosaurs in different ways and in different poses will help you gain confidence in drawing many other animals.
Easy Drawing Technique
Draw the small head with an oval shape, and then create a long curved line for the neck. Attach a larger oval for the body at the bottom. Add a tail by stretching a curved line out from the back.
Sketch four legs as tall rectangles, with the front legs a little longer than the back legs. Add an eye on the head and a short curve for the mouth. After that, color the brachiosaurus in shades of green.

How to Draw a Cute Brachiosaurus
Despite the fact that everything is really simpler here, I used a slightly different drawing method. This tutorial is based on drawing simple geometric shapes. If you draw the first four steps correctly, you will get a great result. A little interesting thing is the reversal of the dinosaur’s head.

Conclusion
I hope you really enjoyed this drawing guide. So, write on our social networks or in the comments here about how useful this was to you. This really helps me work and create new lessons for you.

this is amazing you can draw exceptionally good enjoy your day
Thank you, Louisa! I’m glad you liked it.
thank you
You’re very welcome!