How to Draw a Grill
This simple lesson will guide you on how to draw a grill and reinforce your knowledge with an additional step-by-step tutorial.
How to Draw a Grill: Introduction
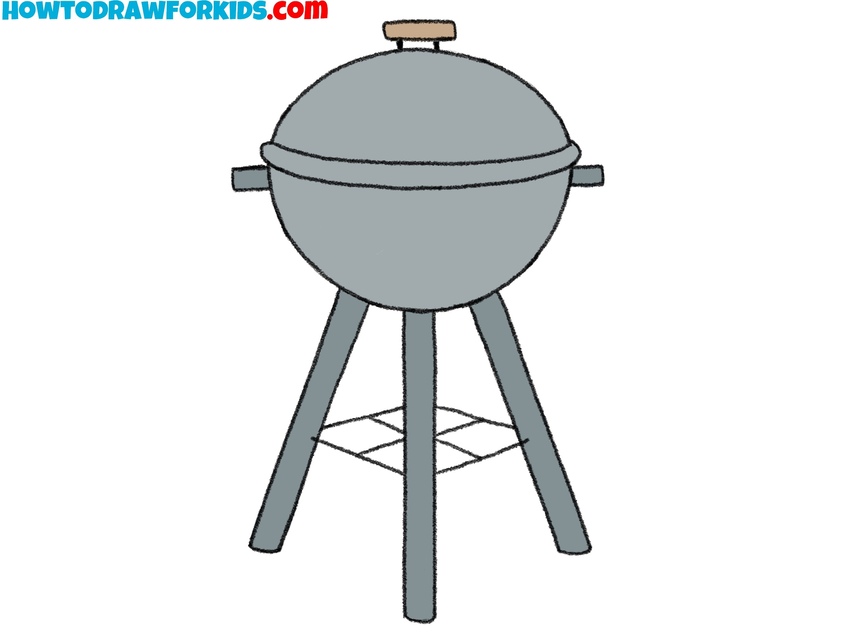
In this tutorial, you will learn how to draw grill in really simple way. In the picture, you can see a wide metal bowl with handles and legs. In the guide, I’ll demonstrate how to illustrate all three parts and make the drawing believable and realistic.
To draw a grill, we will use simple lines and details. The lesson will consist of two simple methods. In the first, main lesson, I will show you a slightly more detailed way of drawing a grill, and at the end of the page I will show you an easier way, created for the most inexperienced artists.
Since a grill typically has symmetrical parts, such as the lid, base, and legs, this tutorial provides a focused way to practice achieving symmetry. Young artists can improve their skills in mirroring shapes and placements on both sides of the grill, which is an important skill when drawing any symmetrical objects, like faces or balanced designs.
The grill drawing doesn’t require excessive detail but still includes essential elements like handles and legs. This exercise teaches artists how to add just enough detail to convey the object clearly without overcrowding the image.
Grill Drawing Tutorial
Materials
- Pencil
- Paper
- Eraser
- Coloring supplies
Time needed: 25 minutes
How to Draw a Grill
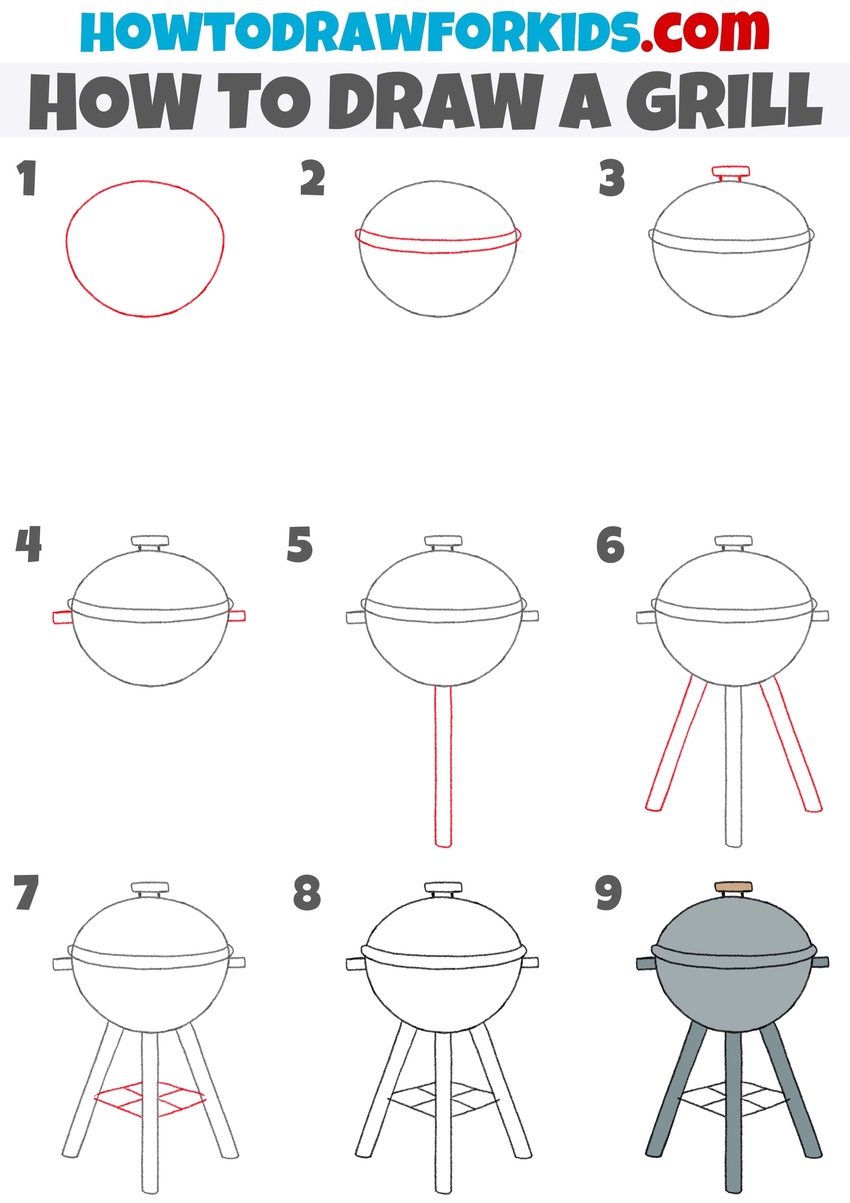
- Start sketching the bowl of the grill.
To start your grill drawing, create a large oval in the center of your page. This oval will serve as the bowl of the grill. Keep it slightly rounded, as it will form the shape of the grill. Try to make the oval smooth and symmetrical. Don’t forget to check the symmetry when drawing this part of the grill.

- Add the lid separation line.
Next, draw a long and slightly curved line across the middle of the oval. This line represents the separation between the lid and the base of the grill. To add volume to this part of the grill, extend the separation line slightly beyond the edges of the bowl.

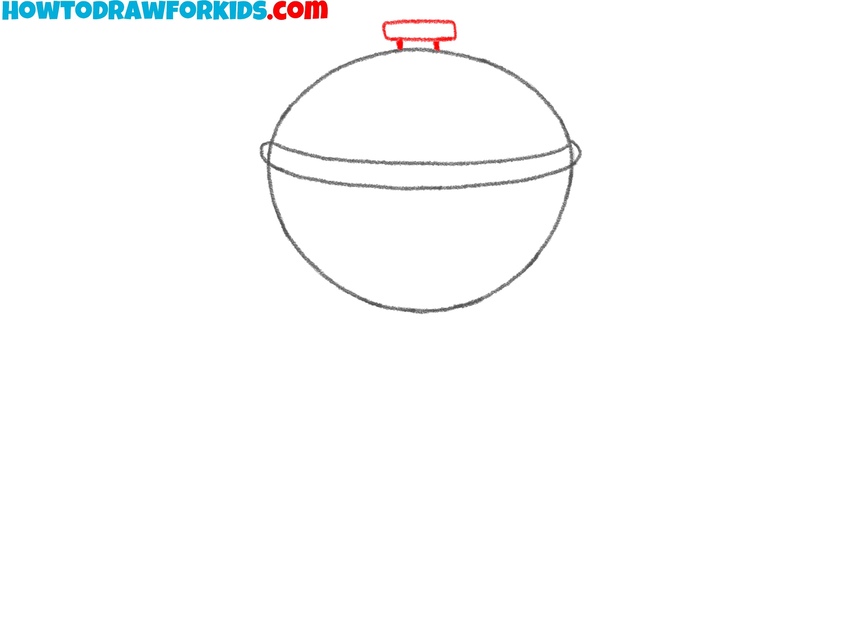
- Draw the grill lid handle.
On top of the oval, add a small, narrow rectangle. From this small rectangle, draw two short lines, thereby connecting the handle and the top edge of the lid. This will be the handle for the grill lid. Center it on the top of the oval, as this position will make it look like it’s attached to the lid.
- Add the side handles.
Now, draw two small horizontal rectangles on each side of the oval shape. These rectangles will act as the side handles of the grill. Symmetry is very important at this stage, and to check it, you can hold your drawing up to a mirror to see if both sides align evenly.

- Start drawing the legs of the grill.
Begin drawing the legs of the grill by adding a long, straight line extending downwards from the bottom center of the oval. This line represents the first leg, which will support the grill. Attempt to draw this leg by hand; however, if that proves challenging, a ruler can be used for accuracy.

- Add two more legs.
To complete the grill’s base, draw two additional legs on either side of the central leg you just created. These legs should angle slightly outward to give the grill a tripod-like base. Ensure the legs are of similar length and look proportional.

- Sketch the bottom shelf.
Now, draw a simple diamond shape that connects each of the legs near their lower ends. This structure serves as a support platform and sometimes used for storage. As in the previous steps, maintaining correct proportions is important here, so remember to periodically check the proportions of your grill drawing.

- Finalize the sketch.
Before adding color, go over your grill drawing to finalize the outline of the sketch. Ensure all lines are clean and smooth, and erase any unnecessary marks or guidelines that are left from previous steps. This step helps create finished look before coloring.

- Color the drawing of the grill.
Use gray or dark shades of blue for the bowl of the grill and a brown color for the top handle. To prevent the drawing from looking too monochromatic, paint the legs and side handles of the grill a slightly darker tone than the bowl.

How to Draw a Grill for Preschoolers
The main difference between the first tutorial and this additional one is the simplicity and number of steps. The first tutorial has more details, including multiple legs and a handle, making it a bit more realistic. This additional tutorial is simplified with fewer steps, ideal for beginners or a quicker drawing.
To draw a grill in this simplified style, start by drawing a long, horizontal rectangle at the top of your page. This will form the upper section of the grill. Below this rectangle, draw a half-circle, connecting it to the bottom of the rectangle. This rounded shape will serve as the grill bowl.
Next, add two straight, angled lines extending from the bottom of the half-circle to form the legs. Connect these legs near the bottom with a horizontal line. Finally, add color to your simple grill drawing by shading the rectangle in a dark shade and the half-circle in a slightly lighter shade to differentiate the parts of the grill.

Conclusion
I hope this easy grill drawing tutorial was helpful to you. If you enjoyed this guide, feel free to check other drawing lessons available on my website. I focus on creating the simplest techniques and steps to make learning to draw really easy for kids and beginners.
For example, you can learn to draw a book or try your skills in drawing fire. Alternatively, you can enter the desired title in the search field to locate the lesson you are interested in. With thousands of lessons available, you will most likely find what you are looking for.
Also, If this tutorial was helpful, then consider sharing it, subscribing for updates, and leaving a comment with any feedback or questions.

