How to Draw a Heart
Is it easy to learn how to draw a heart? Of course it is very easy, and in this step-by-step drawing lesson I will show you it.

How to Draw a Heart: Introduction
I am pleased to suggest a new drawing lesson for beginners and children on how to draw a heart step-by-step. The heart you will draw in this lesson differs greatly from the anatomical shape of the real heart in the human body. This picture is more a symbol of the heart than a real representation of it.
You have probably seen this heart symbol many times in various cartoons, films, comics, books, postcards, and so on. The heart is often depicted on Valentine’s Day cards that lovers use to congratulate each other on Valentine’s Day.
The process of drawing a heart using this method will be very simple, but despite all its simplicity, you will get an excellent result.
What are the basic rules you need to know before you start drawing a heart?
The main difficulty here is to depict the proportions correctly. And in order not to make a mistake with this, you will need to first draw auxiliary lines.
The main reason why many beginning artists don’t get their heart drawings right is the asymmetry between the left and right sides. It will also help us with this that we will start the whole process by sketching auxiliary lines.
Now is the time for you to start drawing this symbol of love!
Heart Drawing Tutorial
Materials
- Pencil
- Paper
- Eraser
- Coloring supplies
Time needed: 15 minutes
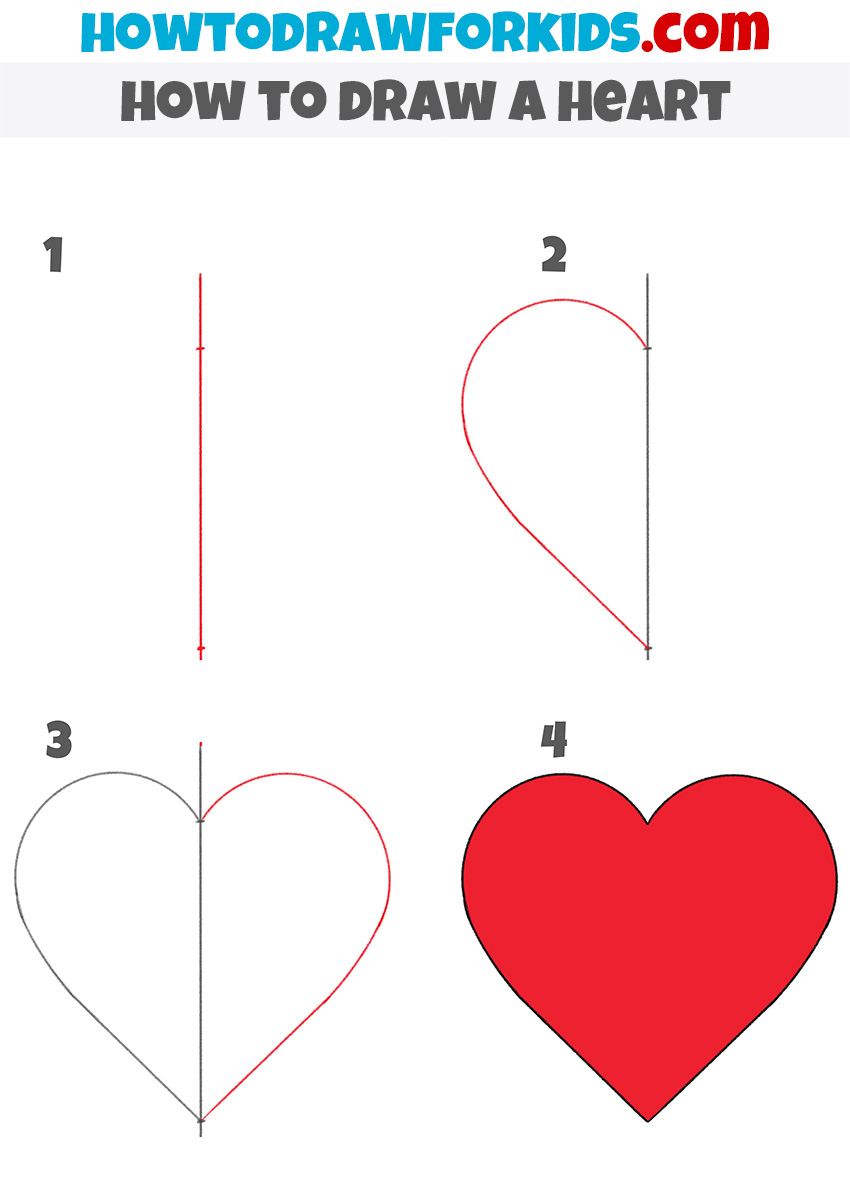
How to Draw a Heart
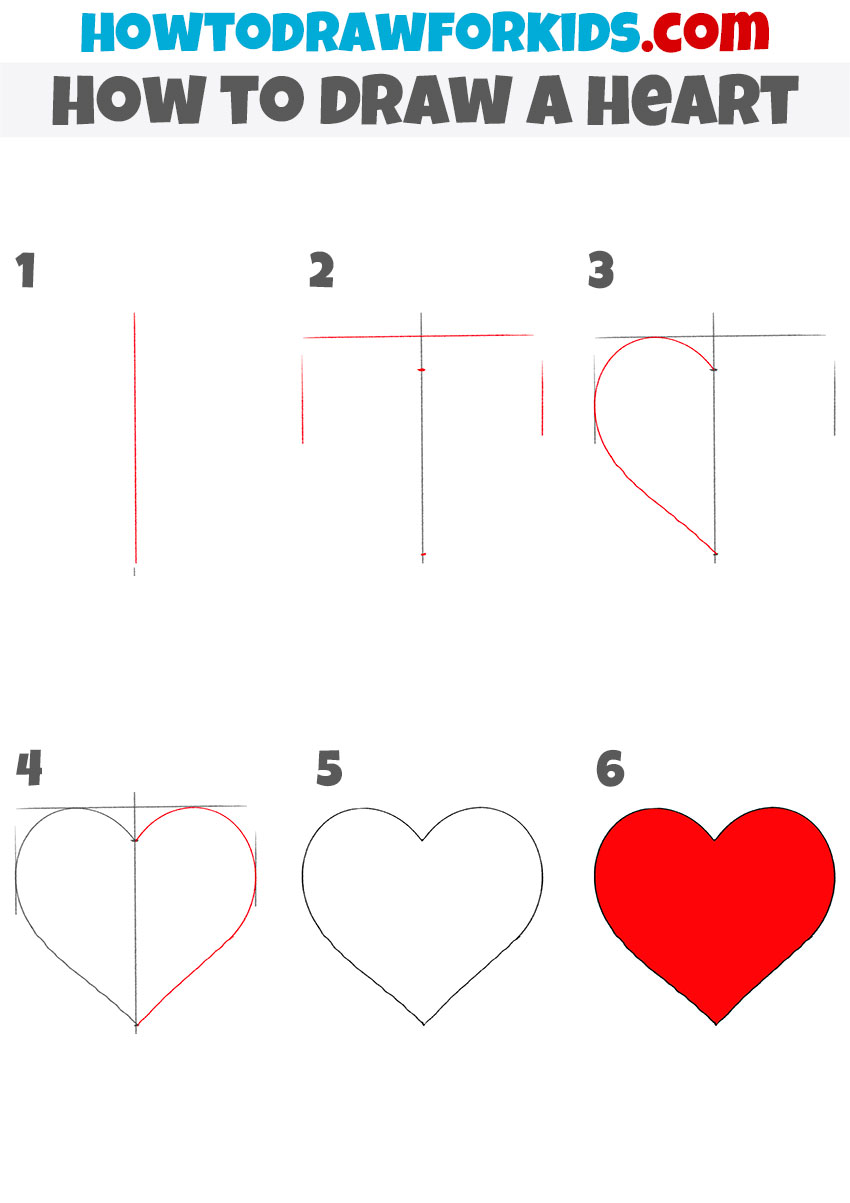
- Place the vertical guiding line.
Sketch a straight vertical line down the center of your paper. This will be the central guideline of your drawing and will help you keep both sides symmetrical. When you draw a heart, symmetry is one of the most important aspects to consider.
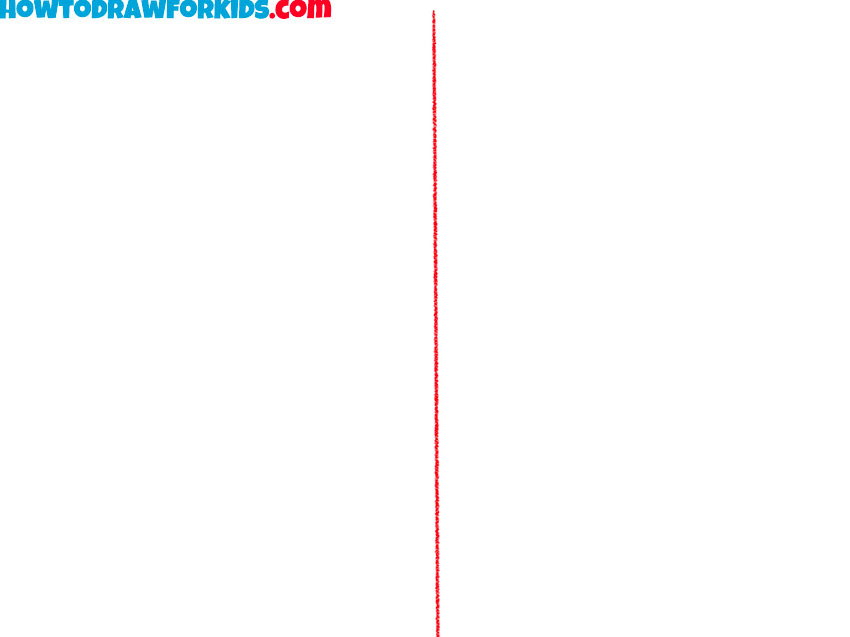
- Mark the top and side edges.
Next, draw a horizontal line that crosses the vertical one. This line will show us where the top edge of the heart will be. Add a small line just below this edge to define the central part of the heart at the top. Next, mark the side edges at an equal distance from the central line.
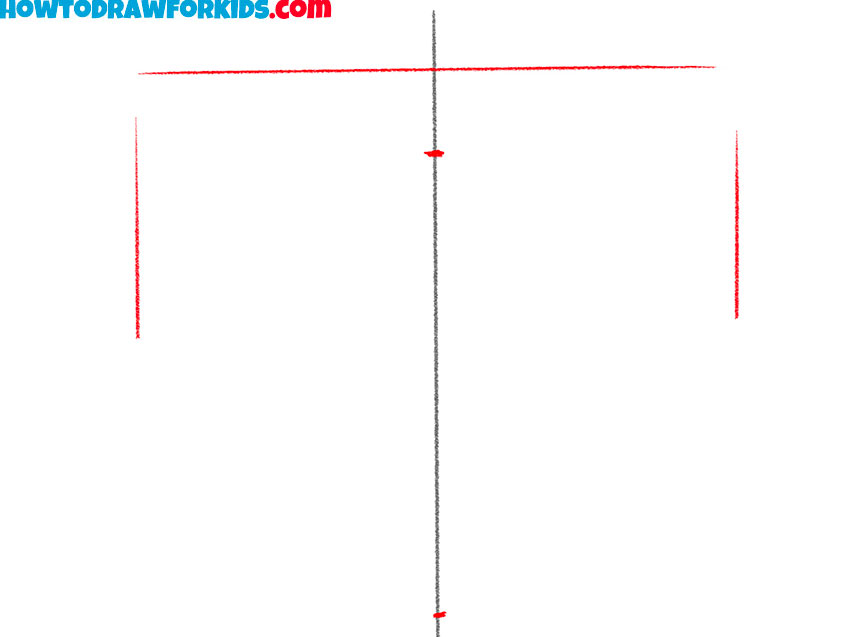
- Draw the left half of the heart.
Now you can begin drawing the actual shape. On the left side of the guidelines, sketch a curved line that starts at the top horizontal line and sweeps down to the bottom point of the vertical line. This forms one half of the heart.

- Add the right half of the heart.
On the opposite side, draw a mirror image of the curve you just made. Start from the same point on the top guideline and sweep the line down to meet at the bottom tip. This gives you a full heart outline. When sketching both halves, pay close attention to symmetry.
- Remove the construction lines.
Now carefully erase the vertical and horizontal guidelines you drew earlier, leaving only the clean heart outline. Take a moment to refine the curves and make sure both sides flow smoothly into each other. Before coloring, check the symmetry and proportions of your heart drawing.

- Fill the shape with color.
Traditionally, you can fill your drawing of a heart with a bold red tone, but you can also experiment with pink, purple, or even blue depending on the style you want. If you want to give it more dimension, try adding shadows and highlights. Of course, you can also decorate it with patterns or textures.

Addition Content
This concludes the main step-by-step instructions for drawing the heart. So now you can use the skills you have learned in this lesson for many other drawings as well. I would also like to remind you that for your convenience I have created a short version of this drawing lesson, which you can download as a PDF file. So that you can use this file even without an internet connection.
Alternative Methods on How to Draw a Heart
A heart, at least a cartoon one like in my example, is a very easy subject to draw. But even such a simple object can be drawn in several different ways. Below I will show you a few of these heart drawing techniques.
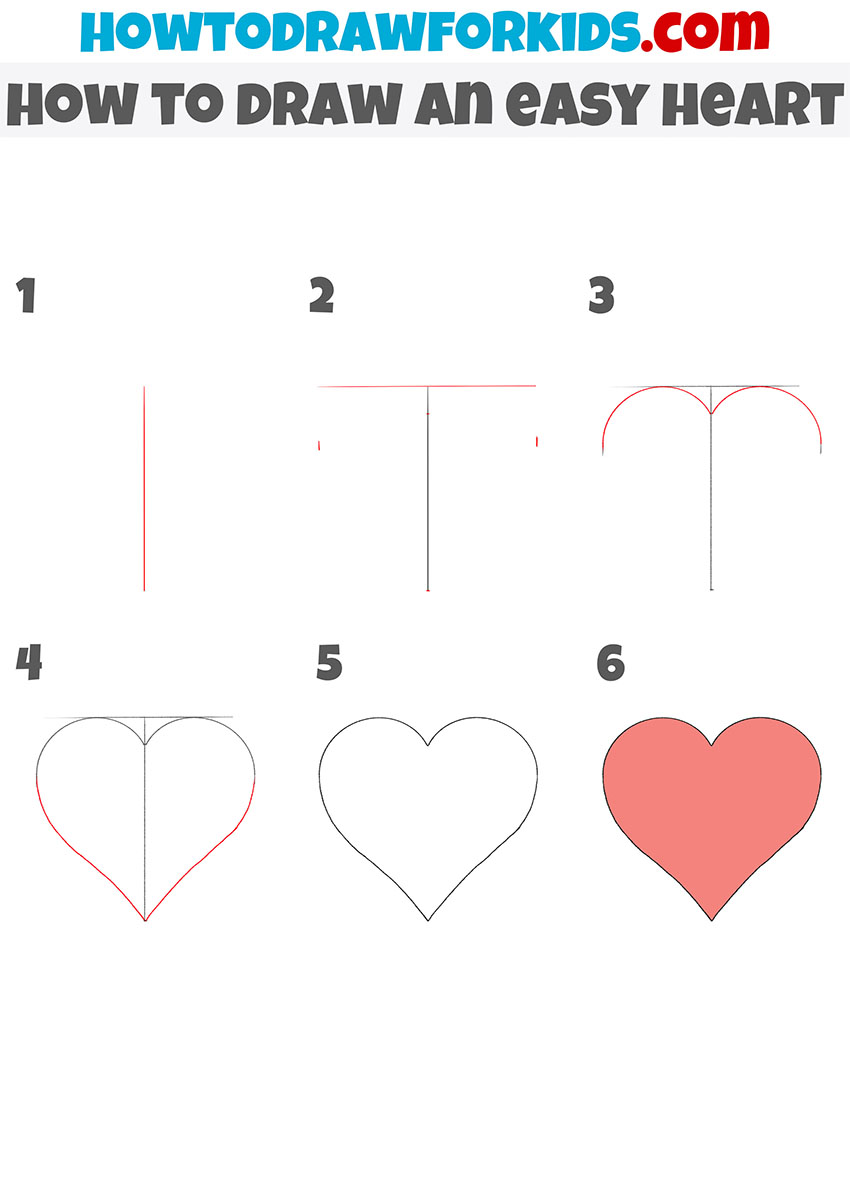
Easy Heart Drawing Tutorial
Unlike the first instruction for drawing a heart, here you can see a slightly different approach. If there you first drew auxiliary lines, then drew the left half, and then added the right one to it, then here you will draw both halves at the same time.
Heart Drawing Tutorial for Preschoolers
Here you will see instructions that are simplified as much as possible. Here we won’t draw too many auxiliary lines. On the one hand, this can speed up the process, but on the other hand, you will have to try to observe proportionality by eye.
If you draw a heart with irregular contours or irregularities in symmetry, you don’t need to worry. Just keep using my lessons and practice as often as possible. As a result, you will see significant progress.
Conclusion
So, let’s summarize. To correctly draw such a simple object as a heart, first of all you need to outline an auxiliary line. Based on them, you need to carefully draw all the outlines, trying to maintain symmetry between the left and right parts.
That is, the main thing is not only to depict the correct shape, but also not to make the heart drawing asymmetrical.
So, don’t forget that I have social media. Subscribe to them to stay updated with all the updates.


It really works
Glad to hear you like this guide, Amelia.